Network policies are a great way to restrict access across a Kubernetes cluster. They allow you to define exactly which services are allowed to communicate with one another. This not only helps strengthen your governance; it’s also a fundamental way to increase security within your cluster.
Using network policies, you decrease the possible attack surfaces available to hackers. And with properly implemented policies, there are fewer services that can be used to pivot into your critical infrastructure, such as databases.
This post provides a deeper explanation of why network policies are useful, a high-level overview of how they work, and a concrete example of implementing one.
Why do you need network policies?
By default, all pods in Kubernetes are non-isolated, meaning that all pods are able to talk to one another. This is true for pods in the same namespace and pods in different namespaces. While this is fine for most organizations, there are many good reasons to consider implementing network policies.
As mentioned earlier in this article, network policies allow engineers to restrict communication access between services. The most important reason to implement network policies has to do with the principle of zero trust: the concept that no service or network can be trusted, including your own services and networks. As an example, on a day-to-day basis, there would probably be no problem with your frontend being able to access your database. Most engineers would agree that the frontend should never access the database — but if the ability exists, it’s not too big of an issue as long as you don’t implement any access functionality. However, even a scenario like this leaves a door open for hackers.
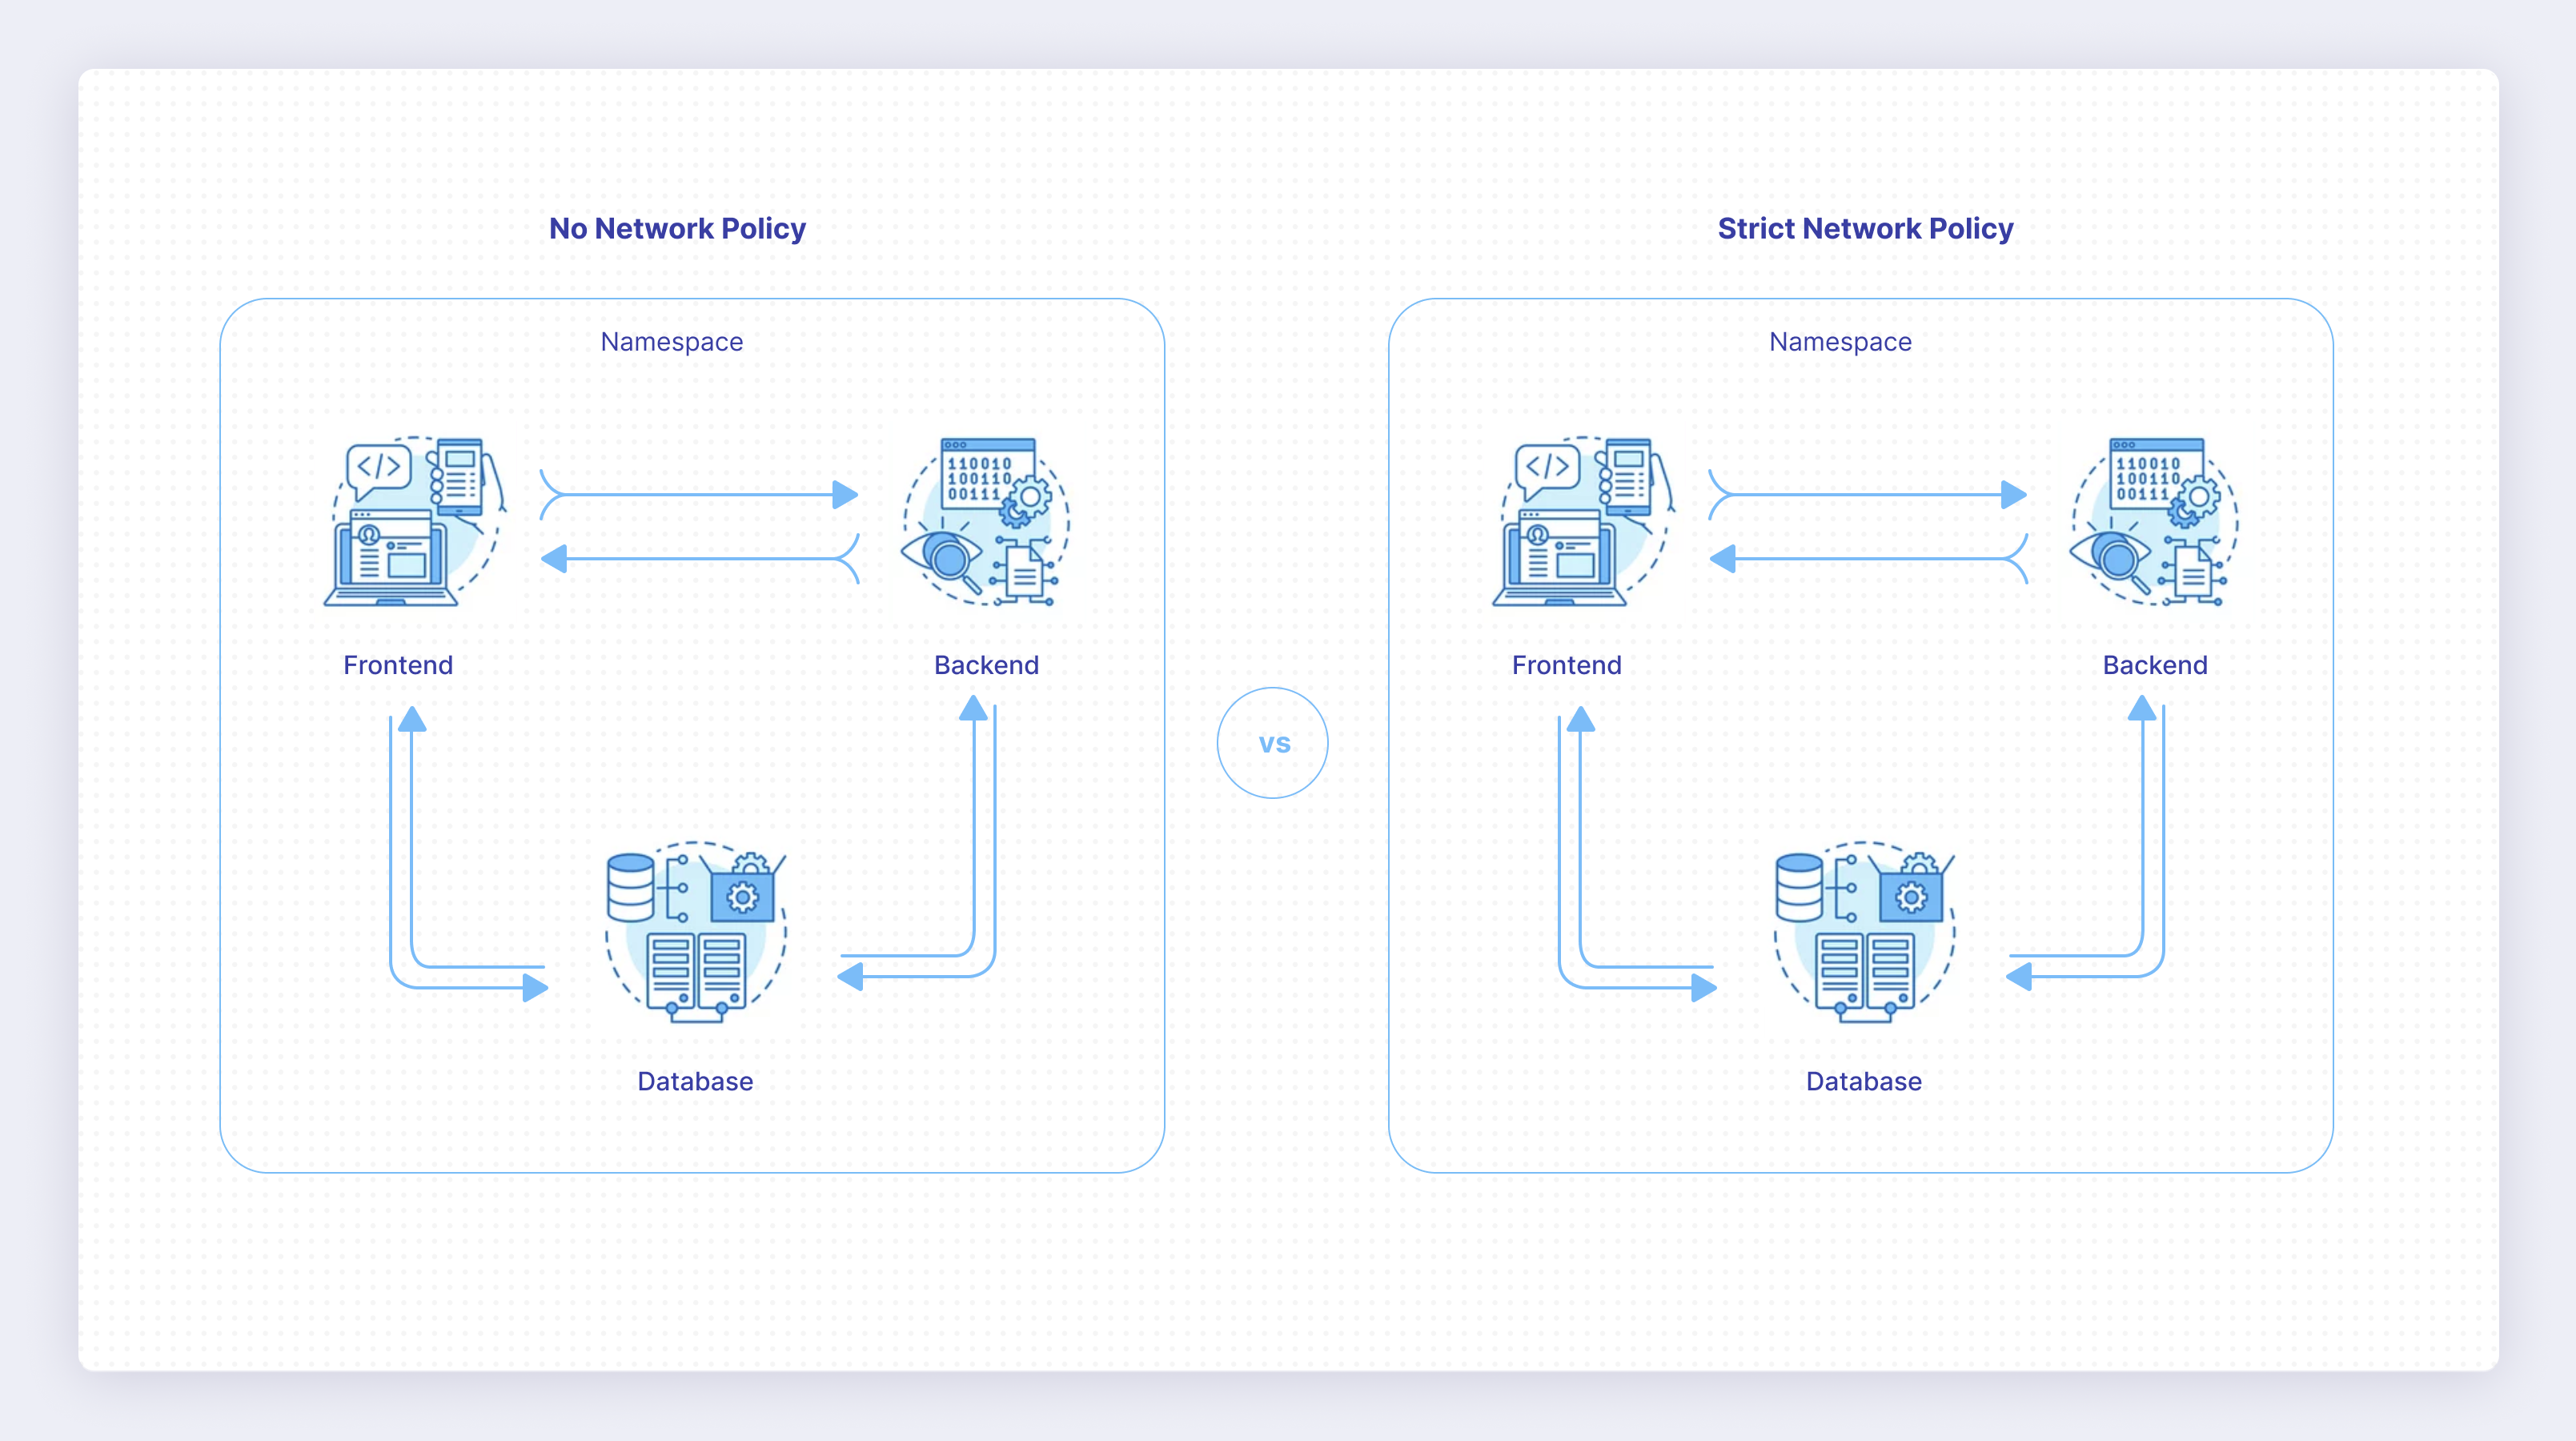
Envision an infrastructure with three services: a frontend, a backend, and a database. With an open network, a hacker needs only to get access to any service, from which they can then access the database. If you lock down network access so that only the backend can access the database, it’s no longer enough for the hacker to get access to the frontend service — they need to get access to the backend if they want access to the database. This is one of the most important reasons for implementing strict network policies.
How do network policies work?
The first thing to know about network policies is that they require a network plug-in. There are two types of network plug-ins in Kubernetes: CNI and kubenet. One of the many available CNI plug-ins will work with a network policy. If you’re using a managed service from a cloud provider, it’s also worth determining whether they provide specific ways of enabling network plug-ins. For example, this is how you enable them in Google Kubernetes Engine.
Once you’ve got the network plug-in set up, you can define your network policies. They’re defined just like any other resource you work with in Kubernetes, and they require standard fields such as apiVersion, kind, metadata, and spec. Next, you either define one of the two forms of isolation possible in Kubernetes or specify both, as ingress and egress can be defined together or separately. It’s worth noting that even though they may be specified in the same file, they’re still referred to as separate forms of isolation.
Once you’ve defined your manifest file, it’s a simple matter of using kubectl apply to apply it. When creating your network policy, you can choose your ingress selectors in three different ways: CIDR (selection of IPs), podSelector, and namespaceSelector. This gives you very granular control over where traffic is allowed to come from.
It’s important to note that network policies are additive, not sequential — all of them will be applied, and newer ones don’t supersede older ones. So you don’t need to worry about the order you create your network policies in, but you do need to be sure that you don’t have conflicting network policies, as that can lead to confusing troubleshooting.
One last thing to know about network policies is that they have to be mutual. If one service allows communication but the service on the other end doesn’t, the connection will be dropped.
Implementing network policies in Kubernetes
To get a solid idea of how network policies can be implemented, it’s best to see an example. You can use the diagram below to implement the example shown on the right.
First, you need to determine how to enable the network plug-in in your cluster and enable it. Once it’s enabled, you need to create the services used in this example: a frontend, a backend, and a database. To make this easier, all three services will be represented by an Nginx server, as that allows you to easily test the connection.
If you’d like to see all the code for this tutorial in one place, you can do so in its GitHub repository.
Start by creating a file called frontend.yaml and paste the following into it:
This is a simple YAML manifest file specifying two distinct resources. The first is a deployment that spins up three instances of an Nginx service. Next, a service is defined, allowing the pods to easily communicate with one another. In the spec field of the deployment, you’ll notice the field lifecycle.postStart.exec.command, which installs curl. This is because you’ll be using curl to test the connection between services and verify that the network policies are working.
Save this file in an empty directory, and create two copies of it. Name one of them backend.yaml, and change all occurrences of “frontend” to “backend”. Name the other database.yaml, and change all occurrences of “frontend” to “database”. Now all the manifest files are ready, and you deploy them by executing kubectl apply -f . in your terminal. Within a few seconds, you’ll have all the services spun up; you can verify this by running kubectl get pods.
Once they’re all running, get a shell inside the frontend service by running kubectl exec -it svc/frontend bash. With the shell open, run curl backend. You should see that the pod is able to communicate with the backend, and it can also communicate with the database by running curl database. This is the expected behavior, but now you want to lock down the frontend’s access to the database.
To do this, save the following to a file called access-backend-database.yaml:
This policy will be deployed in the default namespace, and the rule will match any pods with the label app: database. The rule specifies that any ingress from pods with the label app: backend will be allowed. You might notice that the frontend isn’t mentioned anywhere here — this is because network policies are all about specifying the traffic that is allowed. Any traffic not specified will be dropped. This is also why this rule is being applied to the database rather than the frontend.
Applying a rule to the frontend specifying that it’s not allowed to access the database will work, and the frontend won’t be able to access the database. But what happens when you spin up another service that shouldn’t be allowed to access the database? Then you need to create a new policy. Therefore, it’s better to tell the database what services are allowed to access it, as any other service will automatically be denied.
Now test this by executing kubectl apply -f access-backend-database.yaml. This will apply the network policy. Enter the frontend shell again by running kubectl exec -it svc/frontend bash, and run curl database. After a while, the curl request will time out, demonstrating that the access is now being denied.
This is a simple example of how a network policy that restricts traffic between services can be implemented. You can make more-advanced policies by utilizing namespaceSelectors and IP ranges. Policies can be used to lock down your entire cluster, ensuring that only approved paths can be used between services.
Further options
What you’ve seen in the previous section is an example of a simple network policy. As already mentioned, you can get more specific by utilizing selectors such as namespaceSelector and ipBlock. Beyond this, network policies don’t offer a lot of advanced use cases. While getting network policies to work can be a complicated task, there aren’t a lot of options to use when you’re configuring them.
The only missing option you need to learn about at this point is how you can target a range of ports. This is done by adding a field endPort to your port specification. For example:
Final thoughts
As you can see, network policies are incredibly useful when you want to restrict access inside your cluster. With effective network policies in place, the security of your cluster is considerably heightened. What’s more, you’re increasing your ability to implement governance controls, making sure that services that shouldn’t be interacting don’t communicate.
If you’re wondering how your applications are communicating with each other, it’s important to have the right tool to track them.
If you're looking for a solution that makes tracking your applications easy, check out Airplane. With Airplane, you can transform your scripts, queries, APIs, and more into powerful workflows and UIs. The basic building blocks of Airplane are Tasks, which are single or multi-step functions that anyone can use. Airplane also offers Views, a React-based platform for building custom UIs quickly. You can use Views to quickly build a custom dashboard to manage your applications in an easy-to-use interface.
To build your first internal dashboard within minutes, sign up for a free account or book a demo.