


Kubernetes is an open-source orchestration system aimed at automating deployment, scaling, and managing operations of application containers across clusters of hosts. Ingress resources and controllers in Kubernetes allow you to manage HTTP access to your cluster.
When deploying applications to Kubernetes, an important consideration is how your application will be accessed by external users. The standard solution to this problem is an Ingress. In this article, you’ll learn to use, secure, and manage Ingress resources and controllers in Kubernetes.
What is an Ingress?
An Ingress is a Kubernetes resource that allows traffic to come into your Kubernetes cluster. The external traffic could be via HTTP or HTTPS to a service running within your Kubernetes cluster. The service is exposed by your Ingress to allow inbound traffic.

Ingress provides externally available URLs, performs load balancing, terminates SSL/TLS, and offers name-based virtual hosting.
Here’s an example of an Ingress configuration file:
From the example Ingress, there are a few things to note:
- Host is specified as localhost, so the rule applies to the host.
If a host is not specified, then all inbound HTTP traffic goes through the IP address. - Path can consist of multiple rules; in the example above, the path rule points to a Service within the Backend definition.
- Backend is a combination of Service and port, as seen above.
An Ingress controller is needed to satisfy the Ingress you created, as it handles all routing logic.
Ingress controllers
Ingress controllers in Kubernetes are resources that accept traffic from the internet and load balance it to applications (usually in the form of running pods). Ingress controllers abstract away the complexity of routing traffic to applications running within a Kubernetes cluster.
An Ingress controller is a daemon running in a Pod that watches the /ingresses endpoint on the API server. When a new endpoint is created, the daemon uses the configured set of rules to allow traffic into a service.

A controller uses Ingress Rules to handle traffic to and from outside the cluster.
There are many Ingress controllers (and I’ll cover some of them later in this post). Any tool capable of reverse proxying traffic should work, so you can even build your own if you’re so inclined.
As seen in the diagram above, this article focuses on NGINX Ingress controllers as NGINX-based controllers seem to be the most common. NGINX is a general-purpose implementation compatible with most Kubernetes deployments, but I’ll add more details about alternative Ingress controllers at the end of this article.
How to set up an NGINX Ingress controller
To run your own NGINX Ingress controller, you can use the process documented in this GitHub repository. This deploys your pods and related resources to serve the Ingress resource. The Nginx Ingress Getting Started page also provides Kubernetes manifests for installing Kubernetes locally or via one of the big cloud providers (AWS, GCP, Azure, etc.).
Setting up an NGINX Ingress controller
Assuming you’ve enabled Ingress on your cluster, deploying an NGINX Ingress controller is just a matter of running the following command:

This deploys a pod for your Ingress controller, and you can run the following to see this pod:

This shows that your Ingress controller is running, and you can proceed to use it for a sample application.
Deploying a sample application
To test your Ingress controller, you need some kind of small sample application. Here I’ll deploy an NGINX web server with the following command:
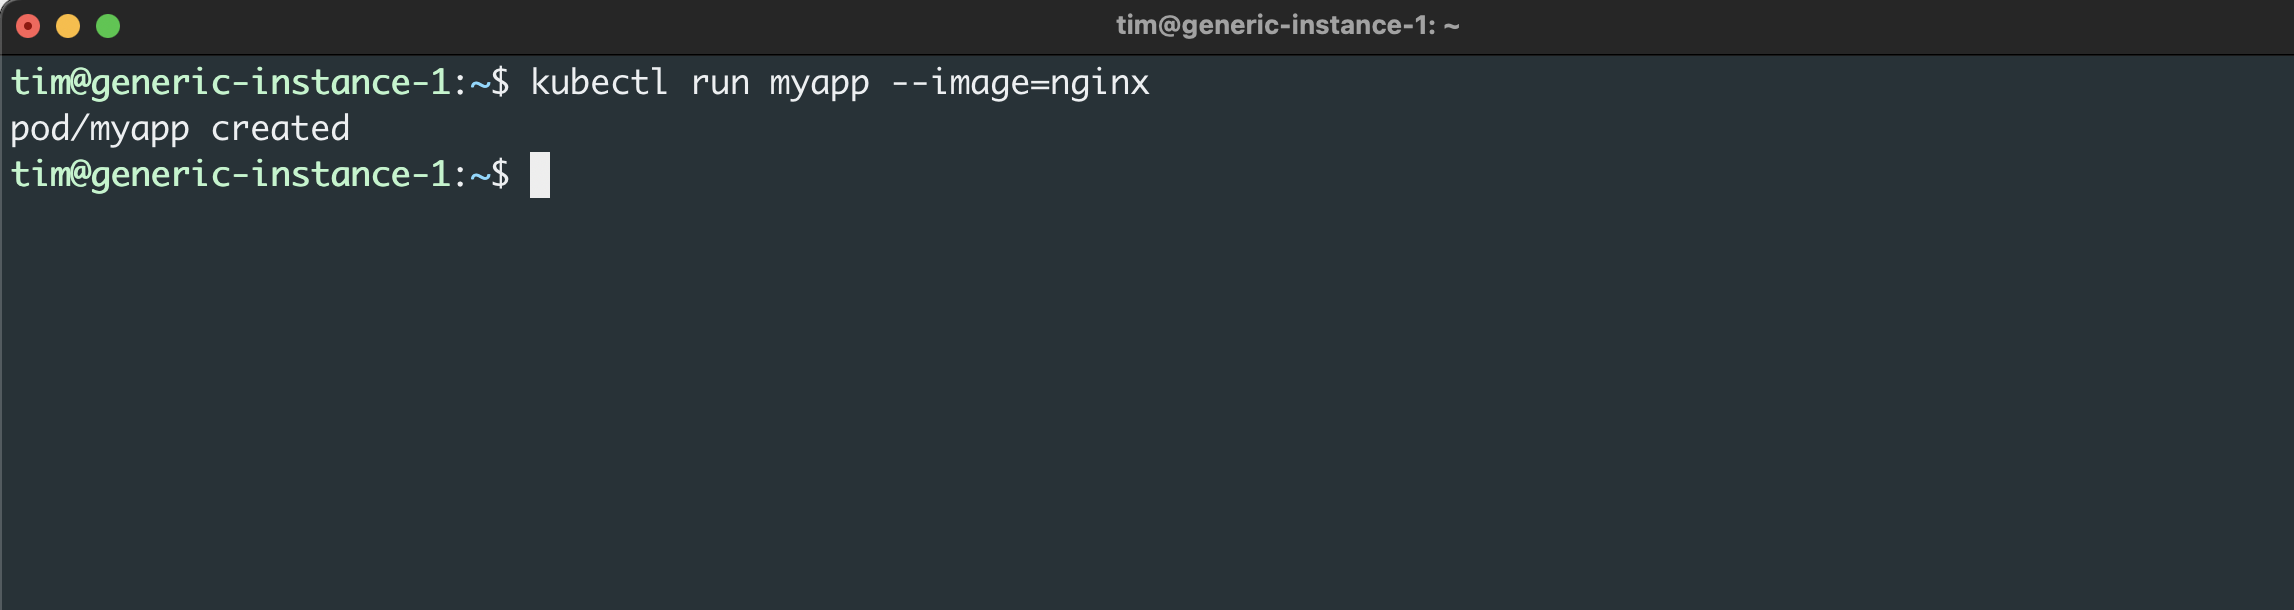
This creates a pod called myapp with nginx as the container image. Next, you need to connect your demo application to your Ingress controller so that traffic is properly routed to the pod.
Accessing the application
In order to allow users to access your new sample application, you need a NodePort Service that exposes a port on your app.
To create a NodePort Service for your application, run the following command:
Then you can view the Service’s details by running the following:
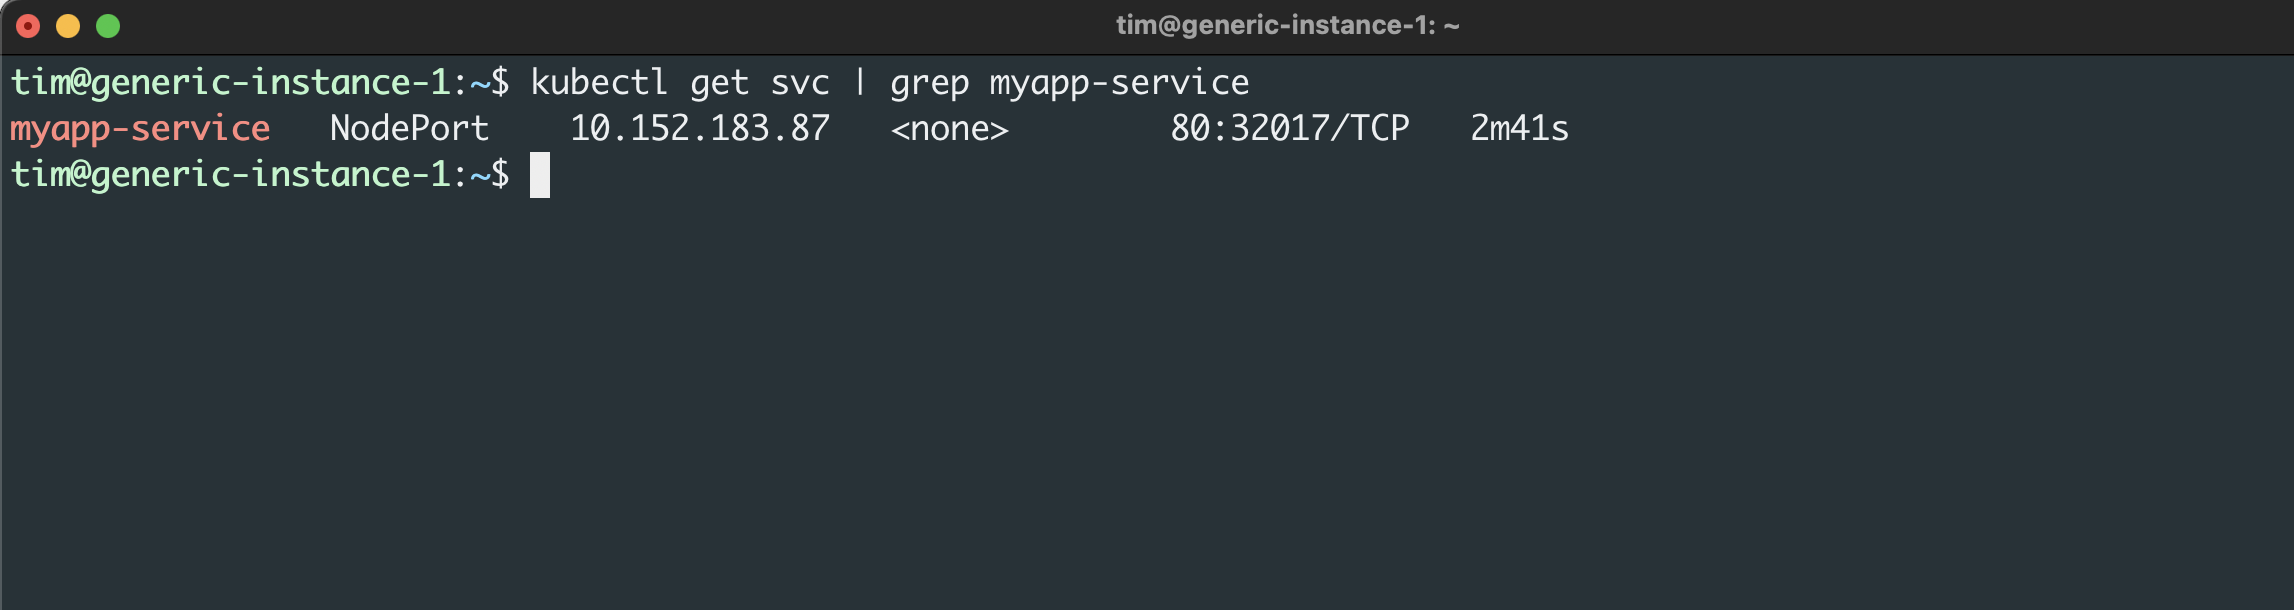
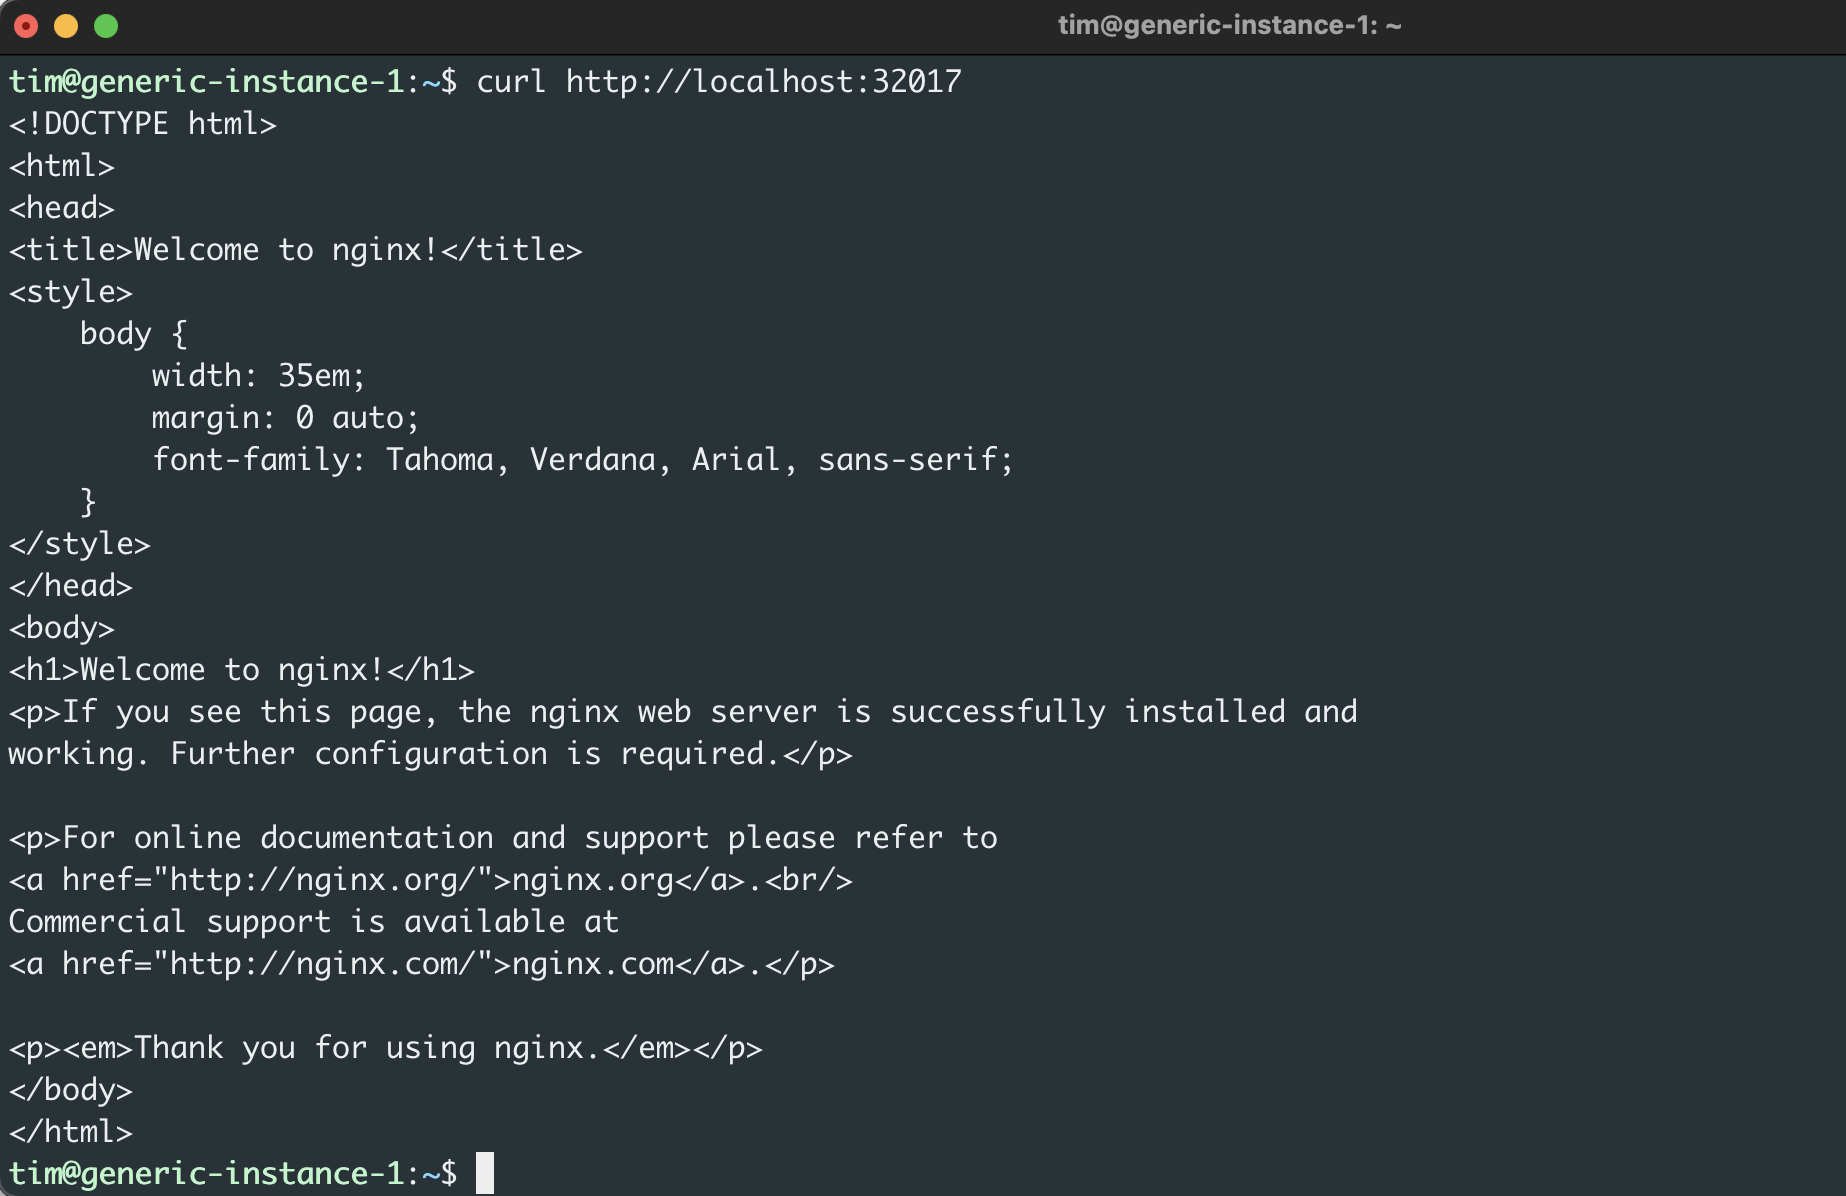
This summary tells you that your new demo application is routing port 80 (NGINX’s default port) to your host machine’s port 32017. To confirm that the application is accessible, visit or use curl to view http://localhost:32017.
At this point, you have an application running and an Ingress controller running, but the two aren’t connected. This allows you to access the application locally, but in a production environment, you don’t want users accessing endpoints using the cluster’s IP address. To provide secure access to external users, you’ll need to set up a custom domain and connect your Ingress controller to your Service.
Adding a custom domain
Giving your application a custom domain will make the address easier to remember and ensure that even if you redeploy your Kubernetes cluster to a different set of IP addresses, the application will be available.
To avoid purchasing and configuring a real domain for this demonstration, you can add your desired domain (my-app.com in this case) to your local /etc/hosts file. To do this from the terminal, run the following command using your ClusterIP and domain of choice:

If you don’t remember your ClusterIP from above, you can get it by running the following:
Be sure to replace [ClusterIP] with your Cluster IP from the service.
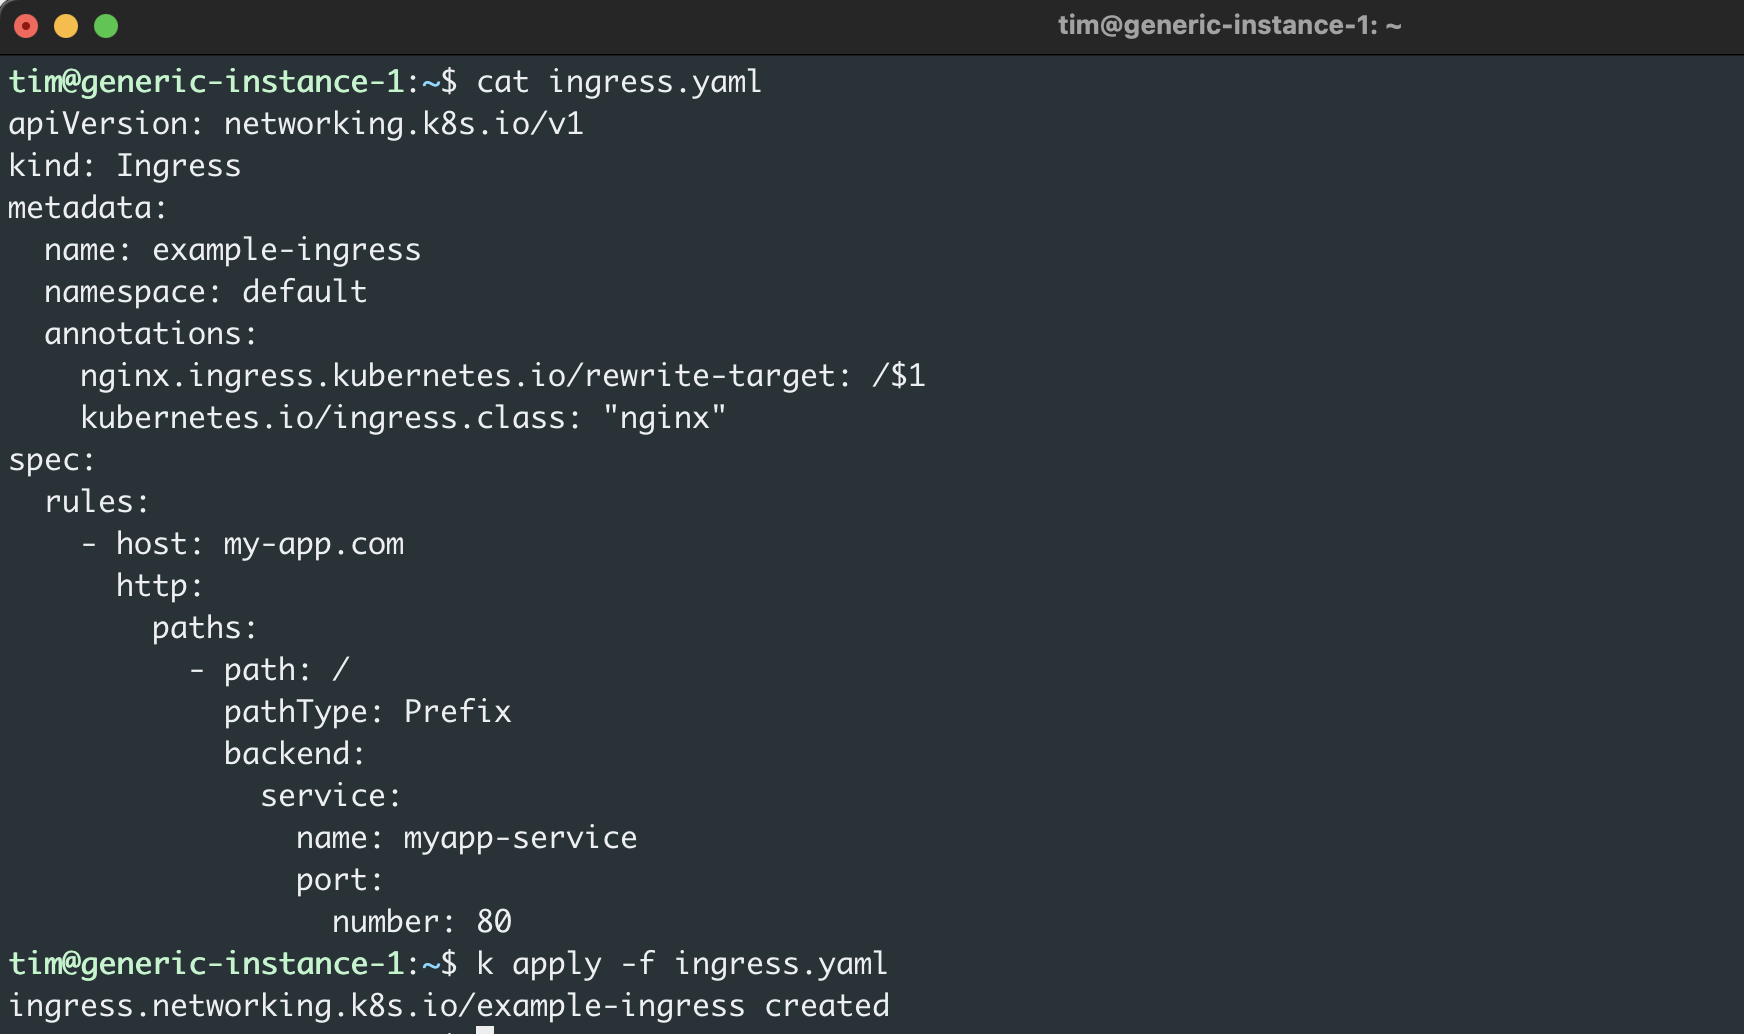
Next, update your Ingress file (ingress.yaml) with a host (my-app.com) and annotation as shown here:
This configuration proxies all requests from my-app.com to the service, which is serving the NGINX application.
Next, apply the configuration using the following command:
To verify that the Ingress was created and now points to your custom domain, run the following:
Visit the domain in your browser or using curl to verify it works:

Now you have an Ingress controller routing traffic from the domain to your application, but there is more you can do to prepare your application for production use. You can add an SSL certificate, whitelist access to specific external IPs, and try different Ingress controllers besides NGINX.
Additional Ingress controllers
There are a number of viable Ingress controllers available depending on your application’s needs and your development teams’ preferences. Some popular ones include:
- Kong Ingress is built on NGINX but adds extra modules like gRPC support, authentication, and plugins that broaden its capabilities.
- Traefik is easy to integrate with any Kubernetes environment, and it allows you to dynamically swap out or upgrade services without complete reconfiguration.
- HAProxy, which stands for High Availability Proxy, is another open-source Ingress controller, but unlike others on this list, it’s exclusively focused on load balancing.
- Contour is based on Envoy and developed jointly with its authors. Contour has created a special Custom Resource Definition called an IngressRoute which can help you support multi-team clusters and delegation of routes to external Namespaces.
Conclusion
In this article, I’ve covered the basics of Kubernetes Ingress resources and controllers. I’ve shown you how you can use Ingress to route external traffic to applications through Services and some options in case you’re deciding on an Ingress tool today.
If you're looking for a powerful internal tooling platform that makes it easy to manage your Kubernetes applications, then try out Airplane. With Airplane, you can transform scripts, queries, APIs, and more into powerful workflows and UIs. Build custom admin panels, deployment pipelines, incident command centers, and more.
Sign up for a free account or book a demo to build your first internal tools quickly and effectively.


