

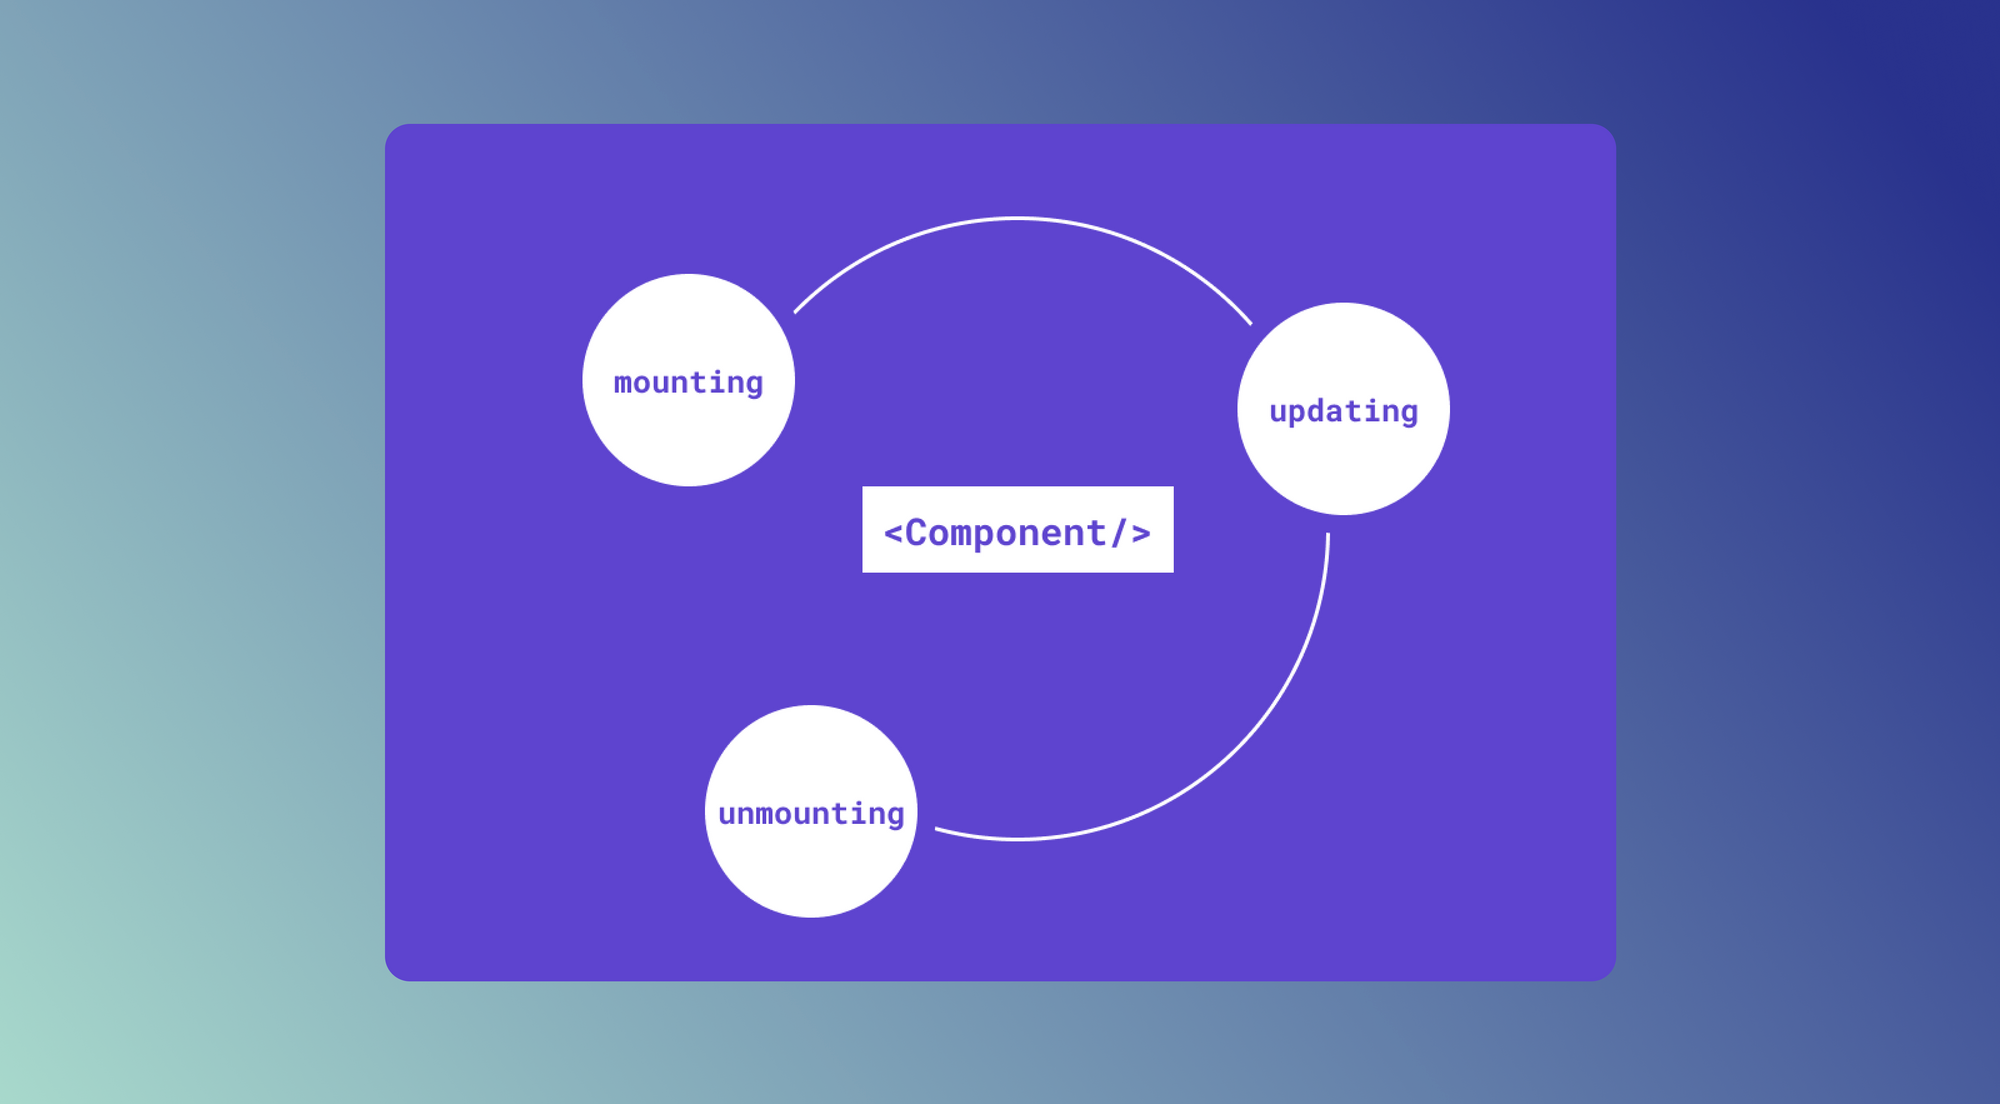
React components are reusable bits of code that divide UIs into smaller pieces. Each React component has its own lifecycle that users can manage during its three different phases: mounting, updating, and unmounting. Mounting is when a React component mounts a document object model (DOM). Updating is when there is a change to a React component's state or props. Unmounting is when a React component is removed from the DOM.
Users can trigger many behaviors and effects between the mounting and unmounting stages. Knowing what is happening to the React components during their stages is essential in understanding how these components work. This understanding helps users build practical applications and enables them to debug more effectively if their components encounter issues.
This article will walk through the fundamentals of the React component lifecycle by building a sample app.
Project setup
There are two ways to create React components: with classes or functions. For this article, we'll use classes to see how their methods allow running statements at different points in the component’s lifecycle. For each lifecycle, we’ll use code samples to see the class methods at work.
To follow along, create a sample application called lifecycle-app with create-react-app:
Start your development server, and the website should be live on localhost:3000.
Next, replace src/App.js with the following code, which has a class App component:
localhost:3000 should now output the word Lifecycle.
How the React component lifecycle works
A component’s lifecycle has three phases: mounting, updating, and unmounting.
Let's now walk through what each phase does and how it impacts our example.
Mounting phase
The mounting phase is the point at which a component mounts a DOM. This phase of the process represents the “birth” of the component.
We’ll now mount two components to see this phase in action.
Use the code below to define a component in a new file, src/Button.js:
Now, localhost:3000 displays the image below:
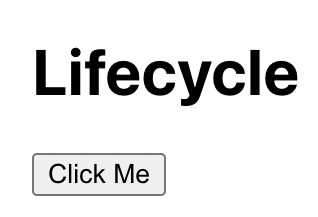
This updated display confirms that we’ve mounted the App and Button components on the DOM. The React class components expose some methods we can call in the mounting phase.
constructor
The constructor method is the first step in the mounting phase. It lets us declare a component’s props and state. Let's call it before the component mounts.
In src/Button.js, the constructor method looks like this:
Think of this class method as the place to define the internal data (characteristics) of a component before it’s born. For that reason, we shouldn’t include any other processes (for example, an API request) until after mounting the component.
getDerivedStateFromProps
The getDerivedStateFromProps method is static. It should be called after the constructor method. According to the React documentation, this method exists for rare occasions when the state of a component depends on the props passed to it. As the name implies, we derive the component’s state from the props it receives.
Suppose the disabled state of the Button component depends on an isLoading prop that's passed to it. Let's use getDerivedStateFromProps like this:
This method receives two arguments when called: the updated props and the previous state of the component. Then, it checks whether isLoading is true. If so, it returns a derived state when the disabled state is true, which becomes the updated state of the component. If isLoading is false, it returns null, which means “Do not update the state.”
There are many ways to achieve this state without getDerivedStateFromProps. That’s why the React docs mention that it exists only for sporadic cases.
render
In the previous methods, we defined some of a component’s internal data (props and state). The render method triggers the rendering of a component on a DOM. Implementing this method is essential because the component will not mount the DOM without it. The React element returned from this method is mounted on the DOM, as seen in the previous examples.
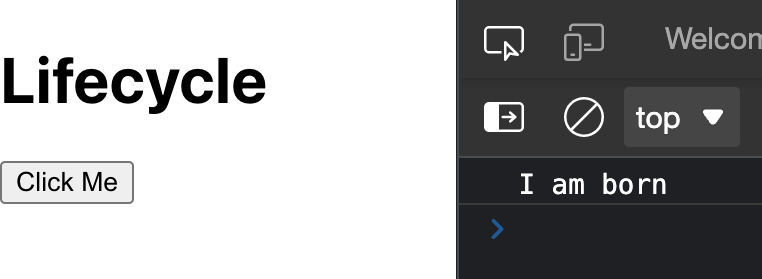
componentDidMount
Let's call the componentDidMount method when rendering a component. We can aadd the following code to this method to execute when the component mounts:
When we run the development server and this component renders on the screen, we should see the following in the browser console: “I am born.”
This method is an excellent place to include additional effects, such as making API requests. Also, we can use this method to update the component’s state, causing re-rendering to occur.
Updating phase
The updating phase involves several changes to props and state. When a component is born, it grows. Growth refers to the changes that occur in the component. They could be state changes (for example, in src/Button.js, the loaded state changes from false to true). Or, it could be prop changes (for example, the isLoading prop changing from false to true).
Here are some class methods called during this phase.
getDerivedStateFromProps
As in the mounting phase, getDerivedStateFromProps is a method that allows us to get an updated derived state from the props. We also call this method in this phase when the props of a component change.
shouldComponentUpdate
We call the shouldComponentUpdate method after getDerivedStateFromProps. It allows us to specify a component to update or not (after a prop or state change). By default, this method returns true, but we can write logic that returns false.
For example, in src/Button.js:
The shouldComponentUpdate method receives the updated props and the updated state. The logic compares the isLoading property of the updated props and the disabled property of the updated state. If they are equal, it returns false, which means the component is not re-rendered. Otherwise, it updates the component.
getSnapshotBeforeUpdate
We can call the getSnapshotBeforeUpdate method just before a component is re-rendered. As the name implies, this method allows us to take a “snapshot” before updating a component.
In src/Button.js, this method looks like this:
Usually, this method is rarely used. Still, it helps to take a snapshot of a DOM before a component is re-rendered. A possible use case is to take a snapshot of scroll positions or the width of an element before re-rendering a component. This is because re-rendering could cause the scroll position or an element’s width to change.
The snapshot object returns passes to the componentDidUpdate method.
render
The first render method we walked through in the mounting phase also renders the component when it is updated if shouldComponentUpdate returns true.
componentDidUpdate
Just like the mounting phase, the componentDidMount method is in the updating phase. We can call it when the component is updated and rendered on the DOM. Any code we write in this method executes when calling the method.
For example:
We do not call this method when the component is rendered the first time. We only call it on subsequent updates and re-renders. It receives three arguments: the previous props object, the previous state object, and the snapshot object returned from getSnapshotBeforeUpdate.
This is a great place to make another API request based on a changed prop, for example.
Unmounting phase
The last lifecycle phase of a component is the unmounting phase. In this phase, a component dismounts from a DOM. There are different ways to do this.
For example, we can render the Button component conditionally based on a showButton boolean state in src/App.js like this:
When the App component mounts, showButton is false. Clicking div calls toggleShowDown, which updates the showButton state to true, rendering Button on a DOM. This component may go through several updates until showButton becomes false. Then, the Button component unmounts the DOM.
There is only one method currently called in the unmounting phase: componentWillUnmount.
componentWillUnmount
We can call the componentWillUnmount method to unmount a component.
For example, let's add the componentWillUnmount method to src/Button.js to unmount the Button component:
We can try this with our browser. Clicking div updates the showButton state to true, causing Button to render. In the browser console, we should see “I am born.”
Click the div again to update the showButton state to false, causing Button to be unmounted. When we check the browser console, we should see “I'm leaving the DOM 😭”:
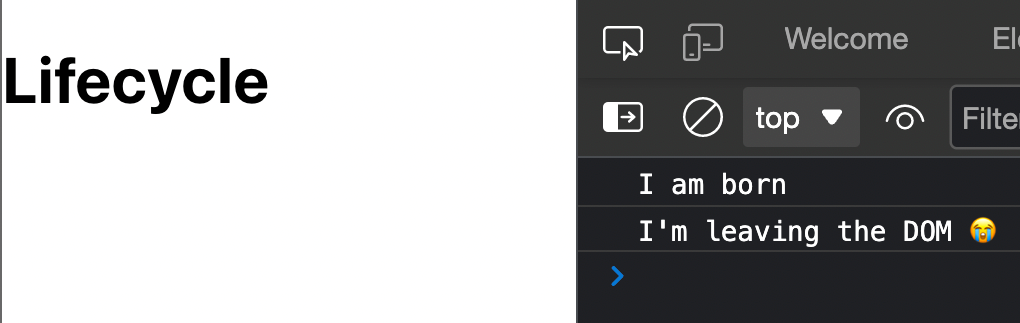
The componentWillUnmount method is beneficial for cleaning up side effects in React applications, such as a component that makes an API request when mounted and updates the state with the data from the API. If such a component unmounts before the API request completes, we can cancel the API request with this method.
And we have now walked through a React Component Lifecycle. Components have a lifecycle that consists of three phases: mounting, updating, and unmounting, Understanding how the different phases work can give you an in-depth understanding of your component's lifecycle.
To learn more about React components, check out our blog for content such as React vs. Vue: which to use for building admin panels, how to build a React component library, how to force React components to re-render, and more.
Introducing Airplane Views: Build React-based UIs quickly
Airplane is the developer platform for building custom internal tools. You can transform scripts, queries, APIs, and more into powerful workflows and UIs. Airplane Views is a React-based platform that allows users to quickly build custom UIs for their organizations.
Airplane Views offers an extensive React-based component library and a template library, making it very easy to get started. Since building Views in Airplane is React-based, you can implement your own custom components or use third-party component libraries easily.
Airplane also offers powerful built-ins, such as permissions setting, audit logs, job scheduling, and more.
To try it out yourself and build your first UI in minutes, sign up for a free account or book a demo 👋. If you are at a startup that is series A or earlier with under 100 employees, check out our Airplane Startup Program for $10,000 in Airplane credits for a year.


