


In today's fast-paced business world, companies need to streamline their operations and enhance their workflows. Building internal tools that automate tasks is one of the best ways to ensure that workflows are as efficient and effective as possible. Automating tasks means less manual labor, which also leads to increased productivity and fewer human errors.
While internal tools can contribute to a streamlined workflow, building them from scratch is a complex undertaking. Luckily, there are tools on the market that can help streamline the internal tooling process. Airplane is the developer infrastructure platform for building custom internal tools. Teams can use Airplane to transform scripts, queries, APIs, and more into powerful workflows and UIs to fit their specific business needs.
The basic building blocks of Airplane are Tasks, which are single or multistep functions that anyone on your team can use. Airplane Views is a React-based platform that allows users to quickly build custom UIs. Airplane offers an extensive template library and pre-built component library for users to get started easily. Airplane Views are intuitive and highly customizable, making it easy to create rich GUIs.
In this article, we'll walk through how to build a Snowflake GUI using Airplane Views.
Why use Airplane Views to create a Snowflake GUI?
Building your own custom Snowflake GUI has significant advantages over using a pre-built tool. Prebuilt tools may not offer all the features and functionalities required. Using a custom-built Snowflake GUI also ensures that users can integrate it with other tools and systems. Airplane Views offer a way to seamlessly create a custom, user-friendly Snowflake GUI for working with Snowflake data.
Using Airplane Views is one of the best options for building your Snowflake GUI, because Airplane offers all of the features of a custom GUI while also providing the following advantages:
- Ease of use: Airplane provides a simple interface and a CLI tool for managing, quickly spinning up, and deploying tasks and Views. Users can build a UI within minutes.
- Centralized GUI management: Instead of managing multiple GUIs individually, Airplane provides a centralized location where users can manage them all at once.
- Powerful customization capabilities: Airplane allows users to create highly customized internal UIs. Users can choose from a range of chart types and visualization options to create a visually appealing representation of their data that is easy to understand. They can also easily create custom components using code.
- Enterprise-grade security: Airplane ensures the security of data through secure features such as audit logs and role-based access controls.
- Highly collaborative experience: Airplane's collaborative features allow multiple users to work on the same dashboards simultaneously, making it easy for teams to share insights and collaborate on data analysis.
Implementing a Snowflake GUI using Airplane Views
In this section, we'll walk through how to build a Snowflake dashboard using Airplane Views. The dashboard will be used to manage client data that comes from Snowflake.
Before we get started, ensure you have the following:
- An Airplane account
- The Airplane CLI for interacting with Airplane
Setting up Snowflake
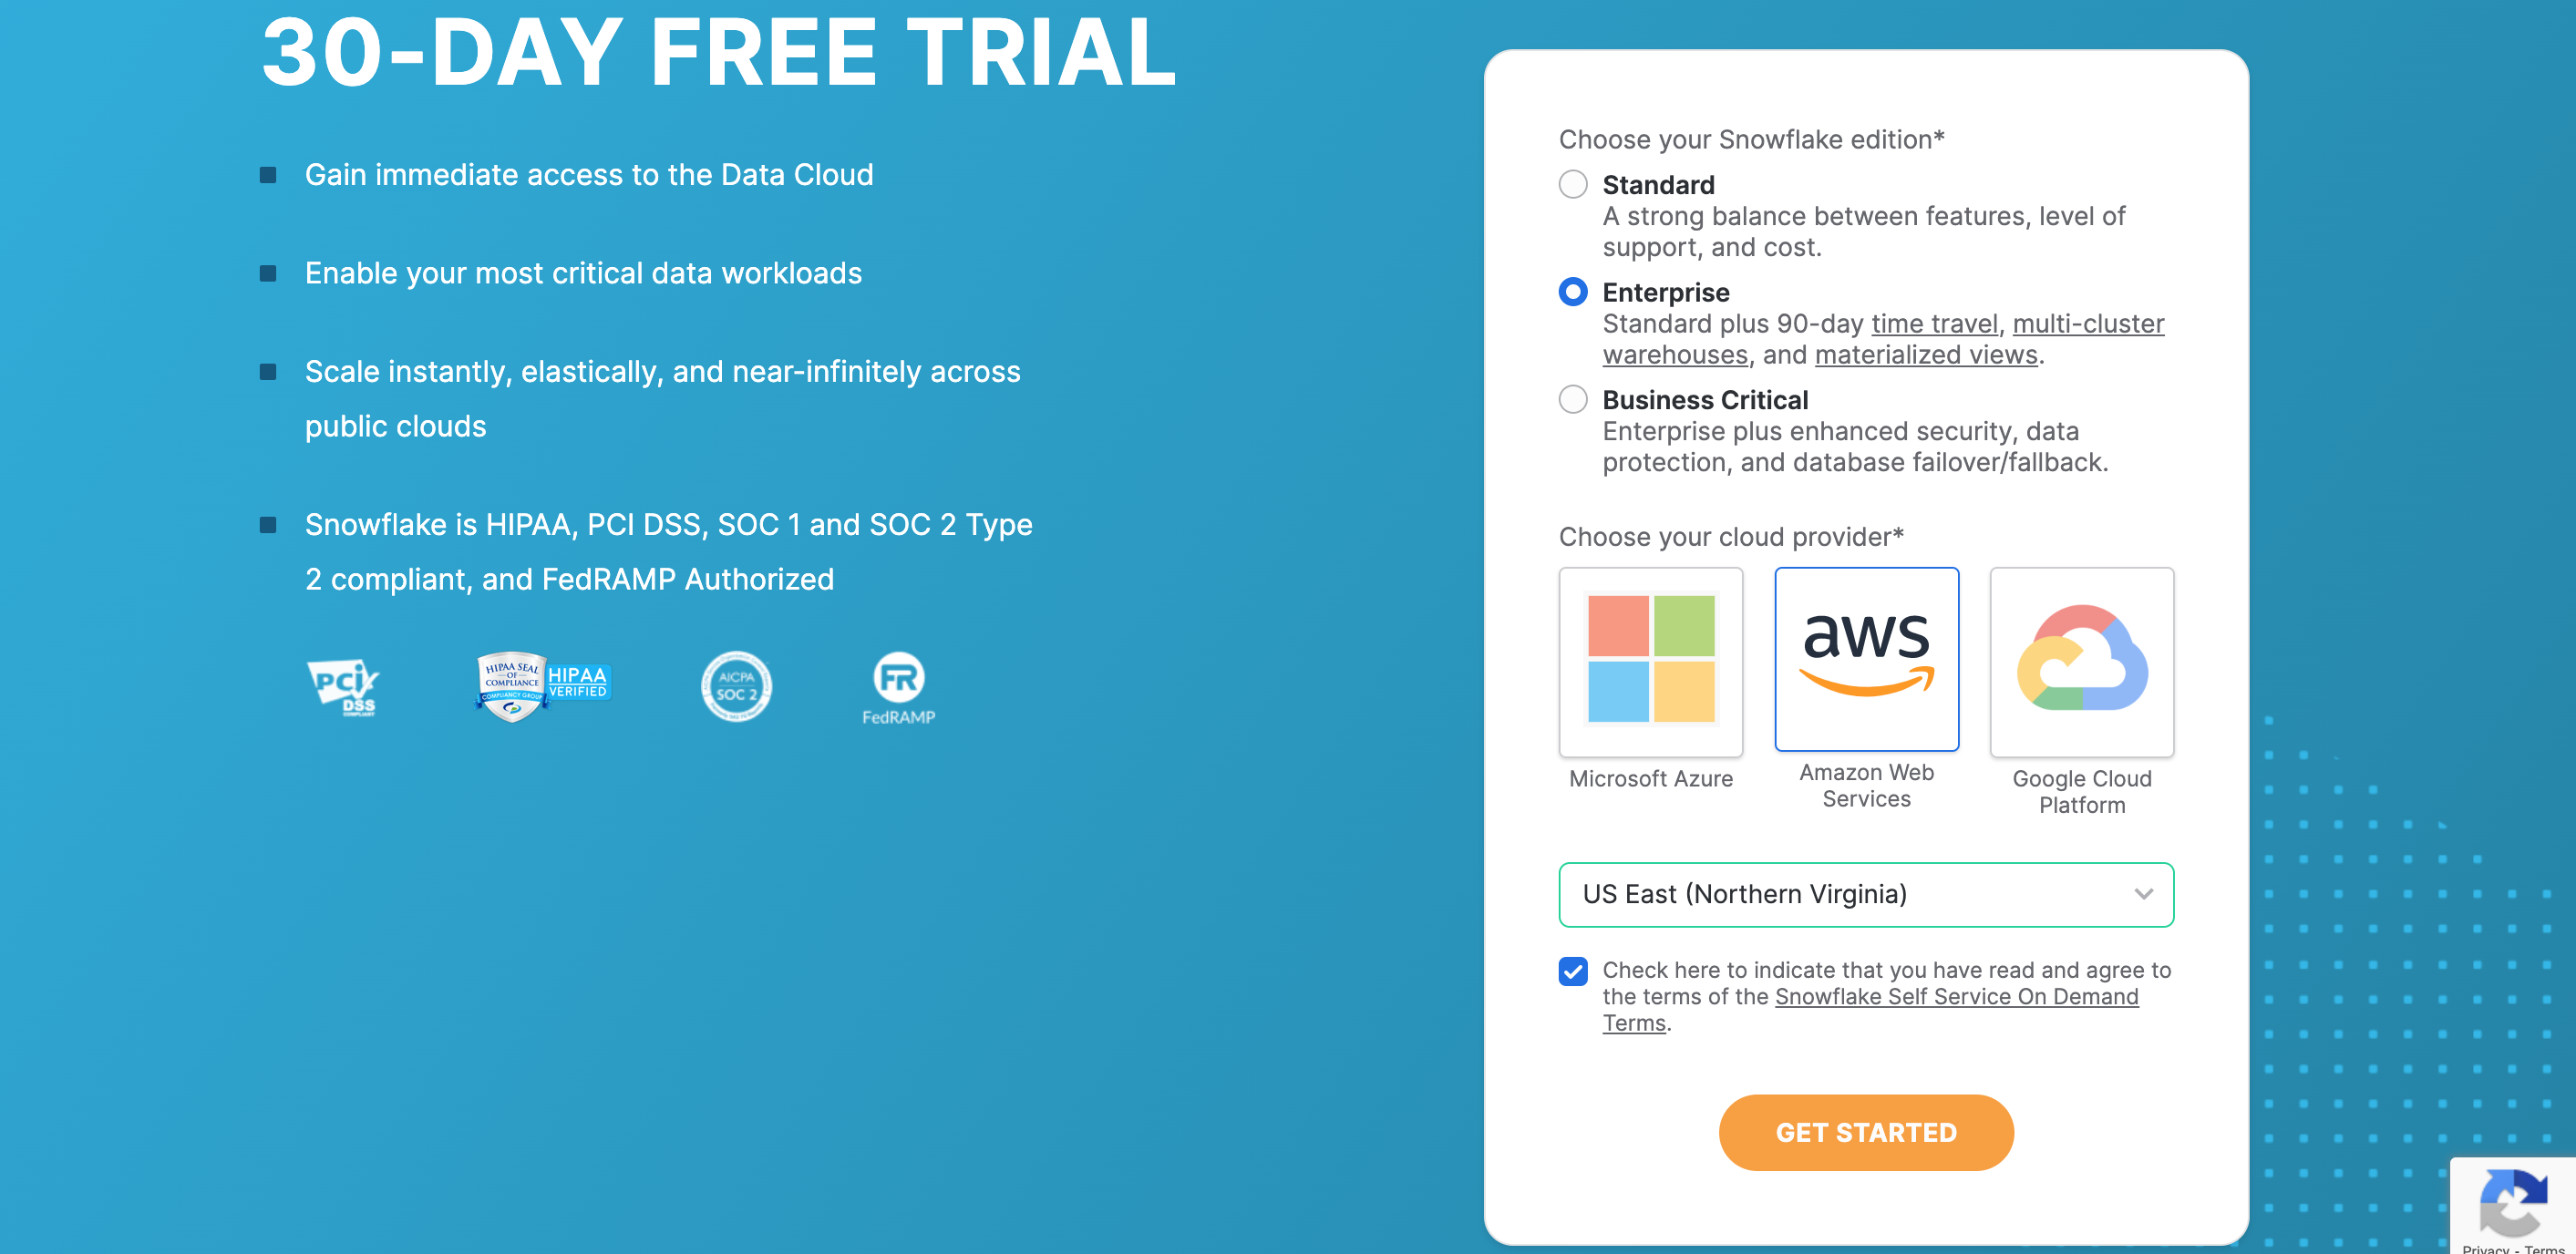
Start by creating a new Snowflake account if you've not done so yet. We'll be asked to select the Snowflake edition and cloud provider that we want in the process of creating the account. We'll be using the enterprise edition and AWS for this tutorial:
After we've verified it, we'll be granted access to the account. The interface seen upon logging in is Snowsight, Snowflake's default GUI. After creating the account, a default admin role, warehouse, and database are created.
Now, navigate to the terminal to complete the setup. Download and install the SnowSQL CLI for the type of machine you're using. We'll use SnowSQL to run queries for creating a data warehouse, database, schema, and clients table. We'll also execute queries to load data into the clients table from a CSV file.
To complete the setup of the Snowflake account, first log in to the account using SnowSQL in the terminal:
The -a flag takes in the account identifier as its value, which consists of the organization name, a dash, and the account name. The -u flag takes in the username as its value.
The following details need to be replaced as specified:
<organization_name>with the organization name<account_name>with the account name<_user>with the username
We can find these details in the bottom-left corner of the Snowsight interface:

Next, we'll be prompted to enter the password. If our credentials are correct, we should be logged in to SnowSQL's terminal:

Create a new Snowflake warehouse, such as COMPUTE_WH:
Create a new database, such as AIRPLANE_VIEWS_DB:
Create a new schema, such as AIRPLANE_VIEWS_SCHEMA:
Create a new clients table to store clients' information:
We can download a curated client data set (with data from Datablist) here. This clients.csv file contains a dummy data set of clients that subscribed to a fictional plan in the year 2022.
Next, let's load the client data set into the clients table.
Create a file format for the CSV file to be loaded. In this case, the file format is named client_data_csv:
Create a stage called client_data_stage:
A stage is a location where files are stored, or "staged," before being loaded.
Upload the clients.csv file we downloaded earlier to the stage that was just created, replacing <full_path_to_file> with the full path to the clients.csv file:
Finally, load the client data from the stage to the clients table:
The Snowflake account is now setup and ready to use. Next, let's build the client's Snowflake dashboard using Airplane Views.
Setting up Airplane
Snowflake must be added as a resource to the Airplane account. Resources assist users in configuring connections to third-party platforms such as Snowflake.
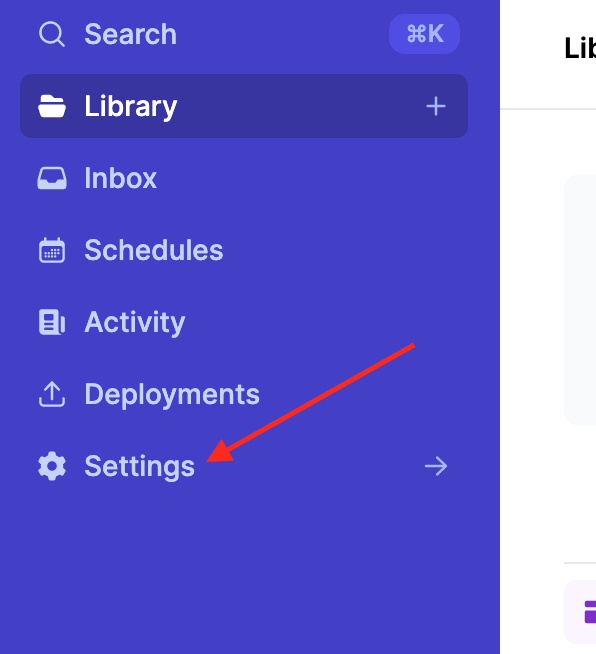
To add a Snowflake account as a resource, click Settings in the left sidebar of the Airplane account:
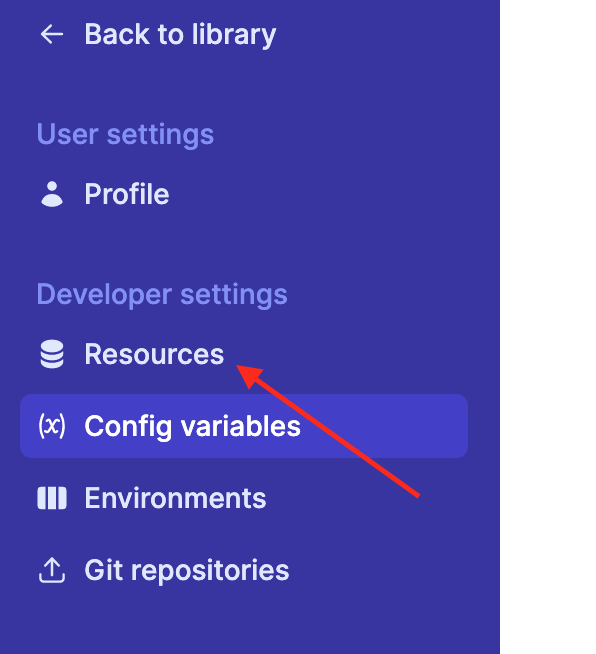
Then click Resources:
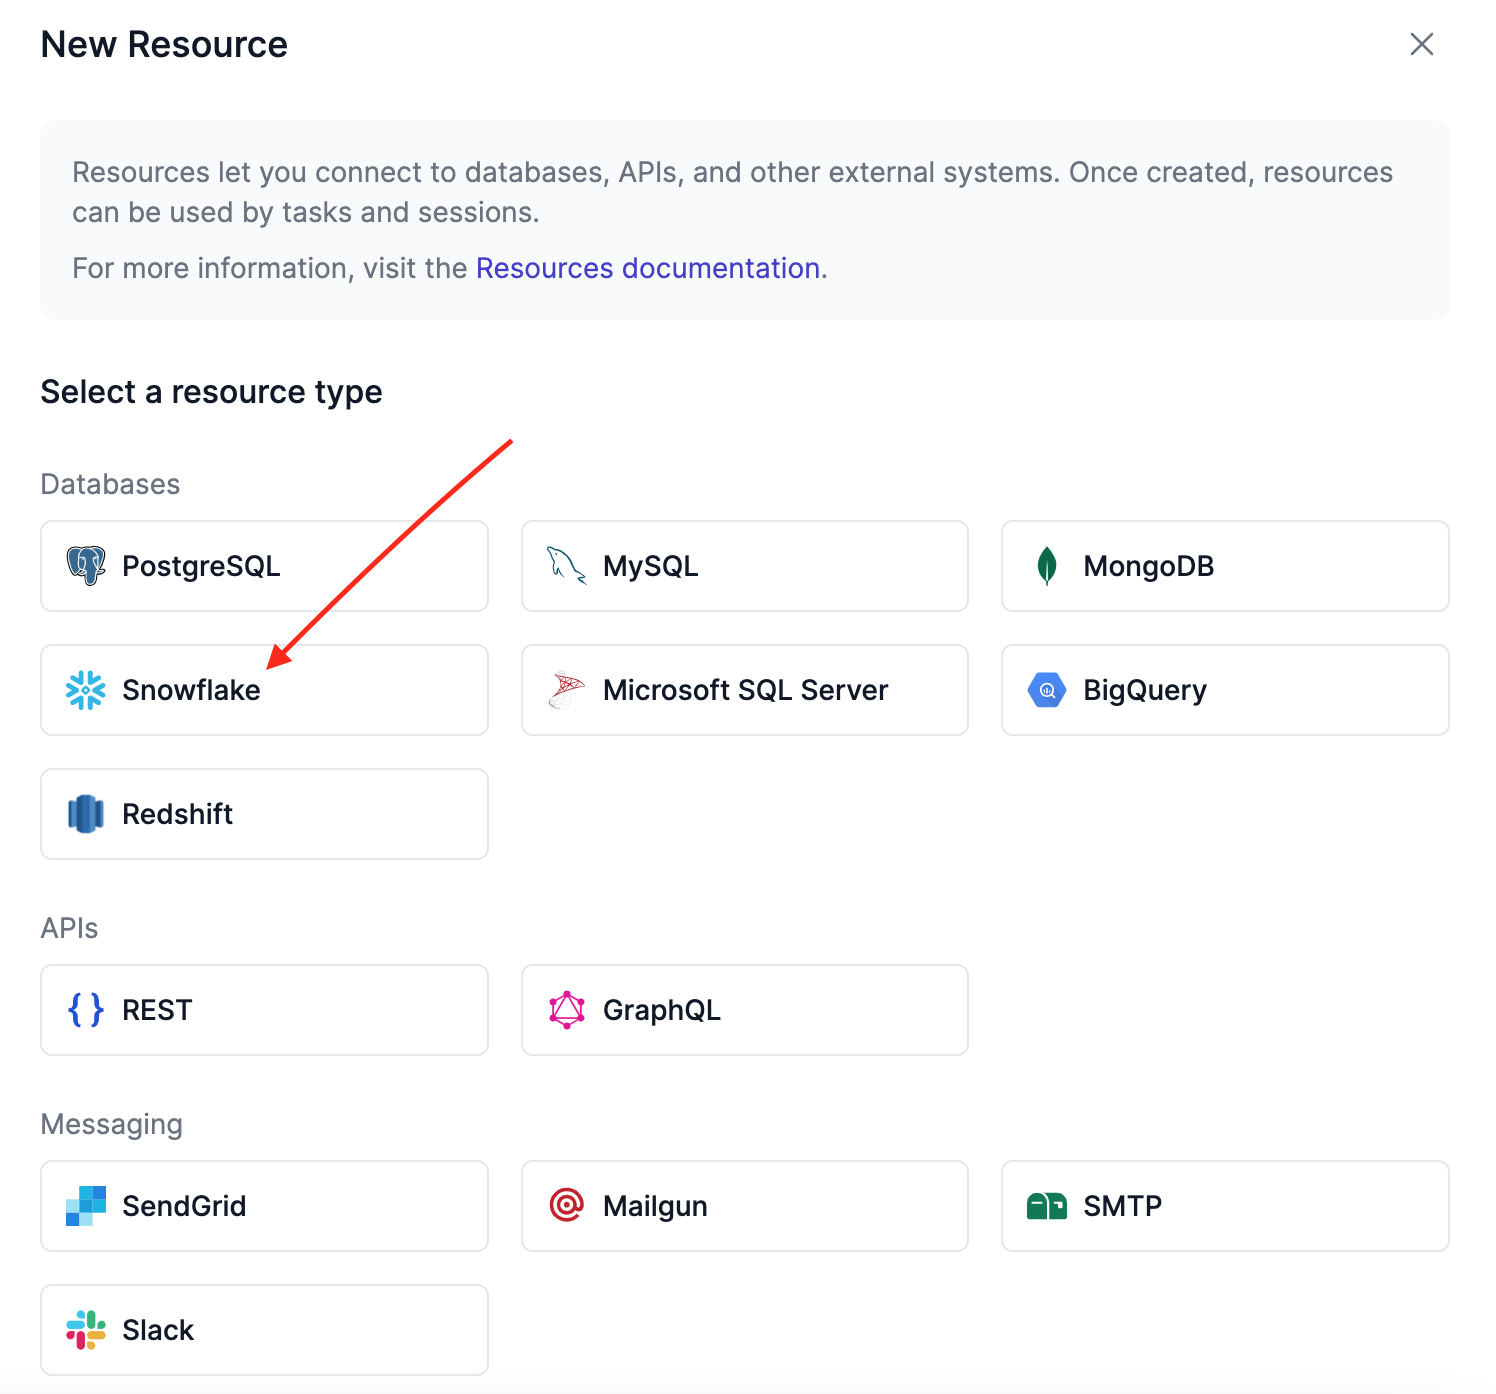
Next, click the New resource button:

Select Snowflake as the type of resource to add:
We'll be presented with a form to enter the following details:
- Name
- Account
- Warehouse
- Database
- Schema
- Role
- Username
- Password
The name is what we want to call the Snowflake resource. For this tutorial, let's call it snowflake_demo_db.
The account is the combination of the locator and region, eg, yes31912.us-east-1. We can find the locator in the bottom-left corner of the Snowsight interface, in the same place we found our organization and account name.
After filling in the necessary details, click the Test connection button. Airplane will run a test query to confirm the connection. The test will return a success message if the Snowflake account credentials that were entered are correct:
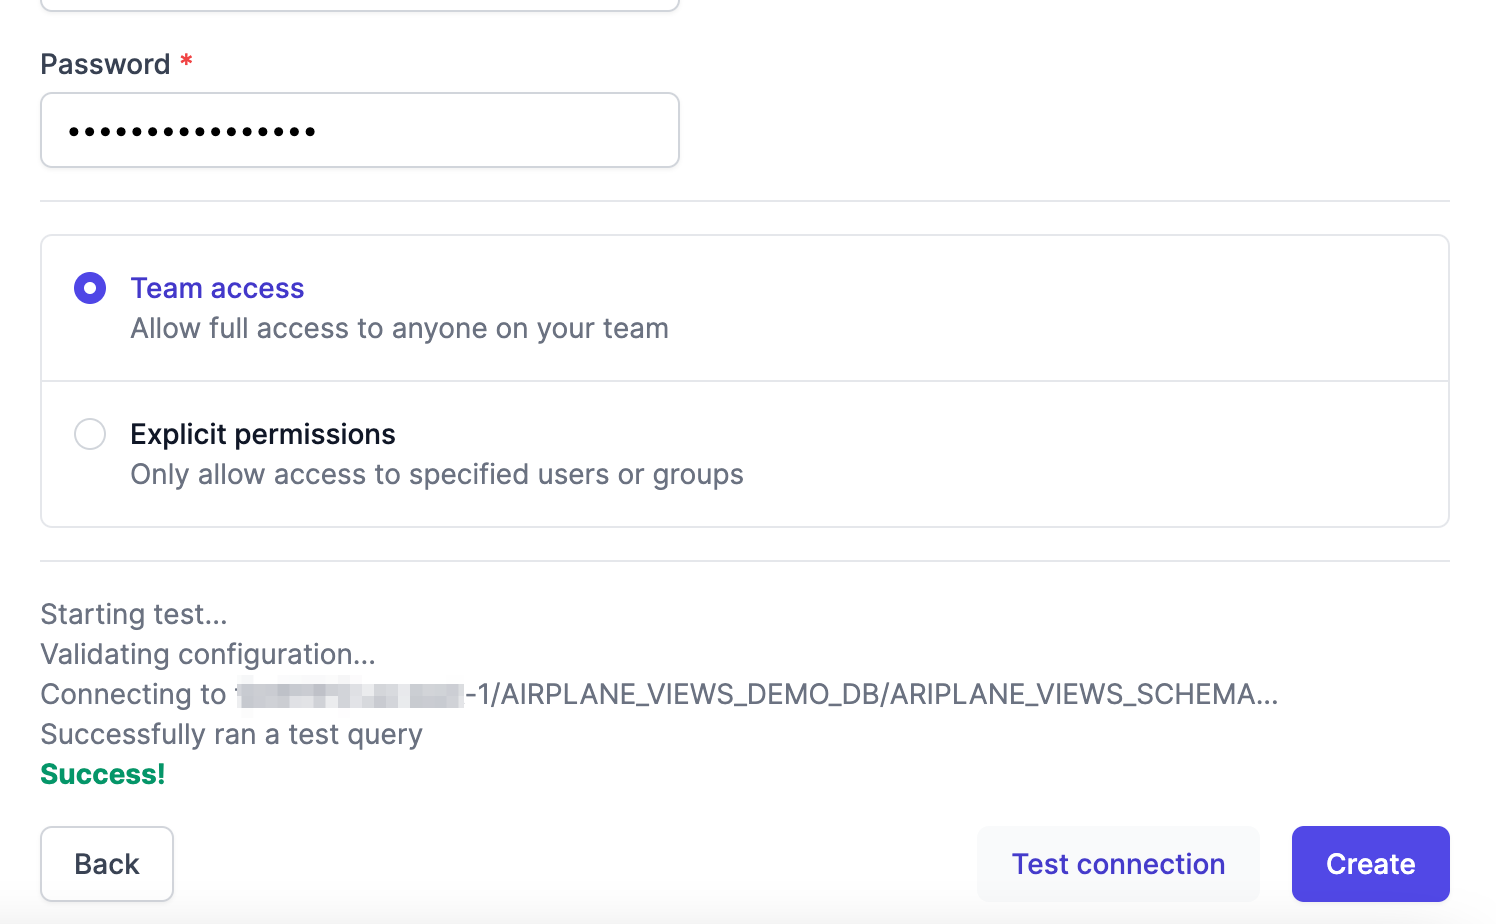
Finally, click Create to add the Snowflake resource.
Next, let's construct the dashboard. For this section, ensure the Airplane CLI has been installed.
Building the client dashboard
In this section, we'll construct the client dashboard by creating SQL tasks and a View that connects those tasks and can execute them.
The dashboard consists of two major components: a table and a line chart. The table lists all clients and also gives users the ability to update a client's name on demand. The line chart displays the number of client subscriptions per month in the year 2022.
The two components consume two separate SQL tasks: one to list clients and the other to get the number of client subscriptions for each month in a year. The table component then runs another SQL task to update a client's name.
Logging into Airplane using the Airplane CLI
Run the following command to log in to Airplane from its CLI:
We'll be asked to enter a token. Click the link shown in the prompt:

Copy the token from the web page that opens after clicking the link. Paste the token in the terminal and press Enter to log in.
Creating tasks for the Snowflake Dashboard
To create the necessary tasks for the Snowflake dashboard, first make a new directory to house the dashboard:
Run the below command to spin up Airplane's dev environment:
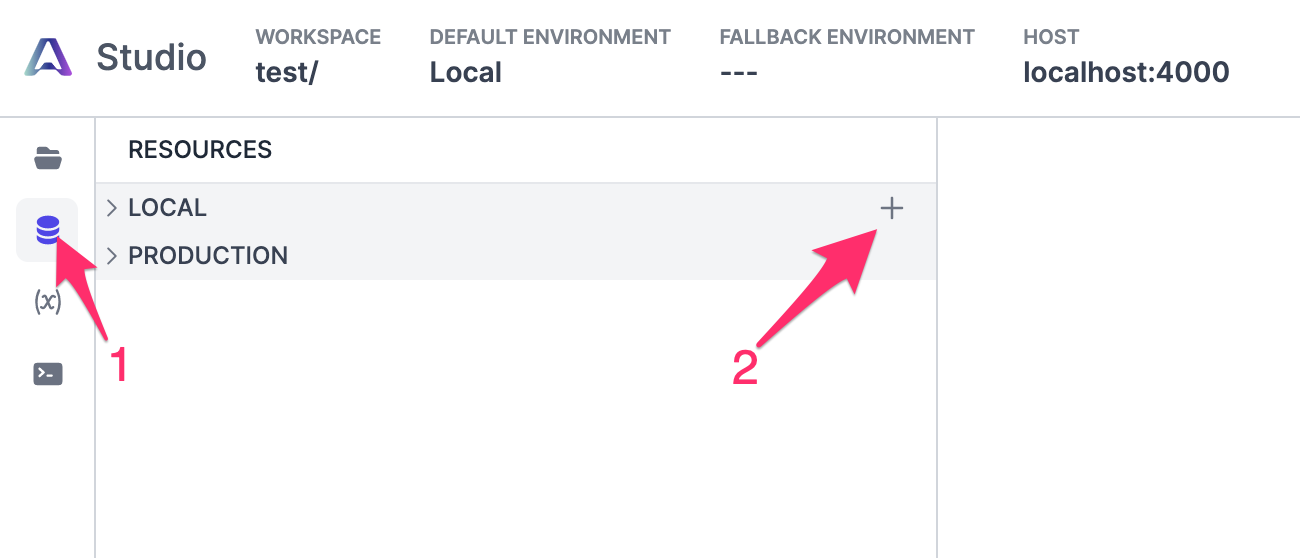
After the dev environment is opened up in the browser, click the Resources button in the left sidebar of the dev environment. Click the + button and then add Snowflake as a local resource using the same credentials as before:
Navigate back to the terminal and create a new SQL task to list all clients available in the clients table:
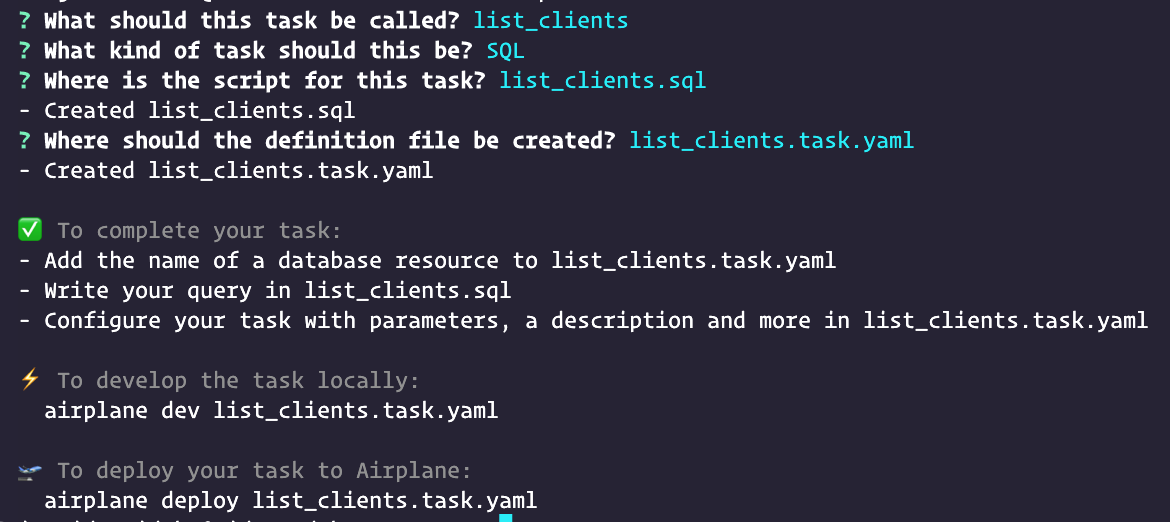
We'll be prompted to enter the name of the task; call it list_clients. Select SQL when prompted to choose the type of task, then keep pressing Enter until the prompts are complete. The command creates two files when it's done: a list_clients.sql task file and a list_clients.task.yaml configuration file.
Replace the contents of the list_clients.sql file with the below SQL query that gets all clients:
This queries our Snowflake resource for all the clients in the clients table.
Replace the contents of list_clients.task.yaml with the below config:
This sets the snowflake_demo_db resource as the resource to use when executing the task and list_clients.sql as the task execution entry point.
Next, let's create a new SQL task called count_subs_by_month to calculate the number of subscriptions by clients each month since inception. The data in the SUBSCRIPTION_DATE column of the clients table represents the subscription date for each client.
Replace the contents of the resulting SQL file with the following query that fetches the number of clients that subscribed each month in the year 2022:
Then, replace the contents of the resulting YAML file with the config below:
Create yet another SQL task called update_client to update a client's name. Replace the contents of the corresponding SQL file with the following code:
Replace the contents of the corresponding YAML file with the code below:
With some tasks set up, we can now create the dashboard view.
Creating a View for the Snowflake Dashboard
Run the following command in the terminal to initialize a new View:
Just like the tasks we created, we'll be prompted to enter the name for the new View; let's call it client_dashboard. A client_dashboard.airplane.tsx file will be created once the command is done running. Airplane will also install the dependencies we need and set up the necessary configurations.
Update the code in the client_dashboard.airplane.tsx file with the following to add the dashboard components and Table and Chart components:
The main components in the above code are Table and Chart, and they are task-dependent. The values passed to the task prop show the task that is being run by each component.
The hiddenColumns={['ID', 'CLIENT_ID']} prop passed to Table prevents the component from showing the ID and CLIENT_ID columns that originally exist in the clients table in the Snowflake resource.
The value passed to the column prop of the Table component makes changes to the label of some of the existing columns and also makes the name columns editable. The value of the rowActions prop of the Table component adds an "Update" button that updates a specific client name using the update_client task.
The value of the outTransform prop of the Chart component transforms the data from the count_subs_by_month task. The line data for the chart is passed as an array of twelve numbers (January to December) to the Client_Subscription property.
Lets return to the Airplane development environment, which should now look like this:
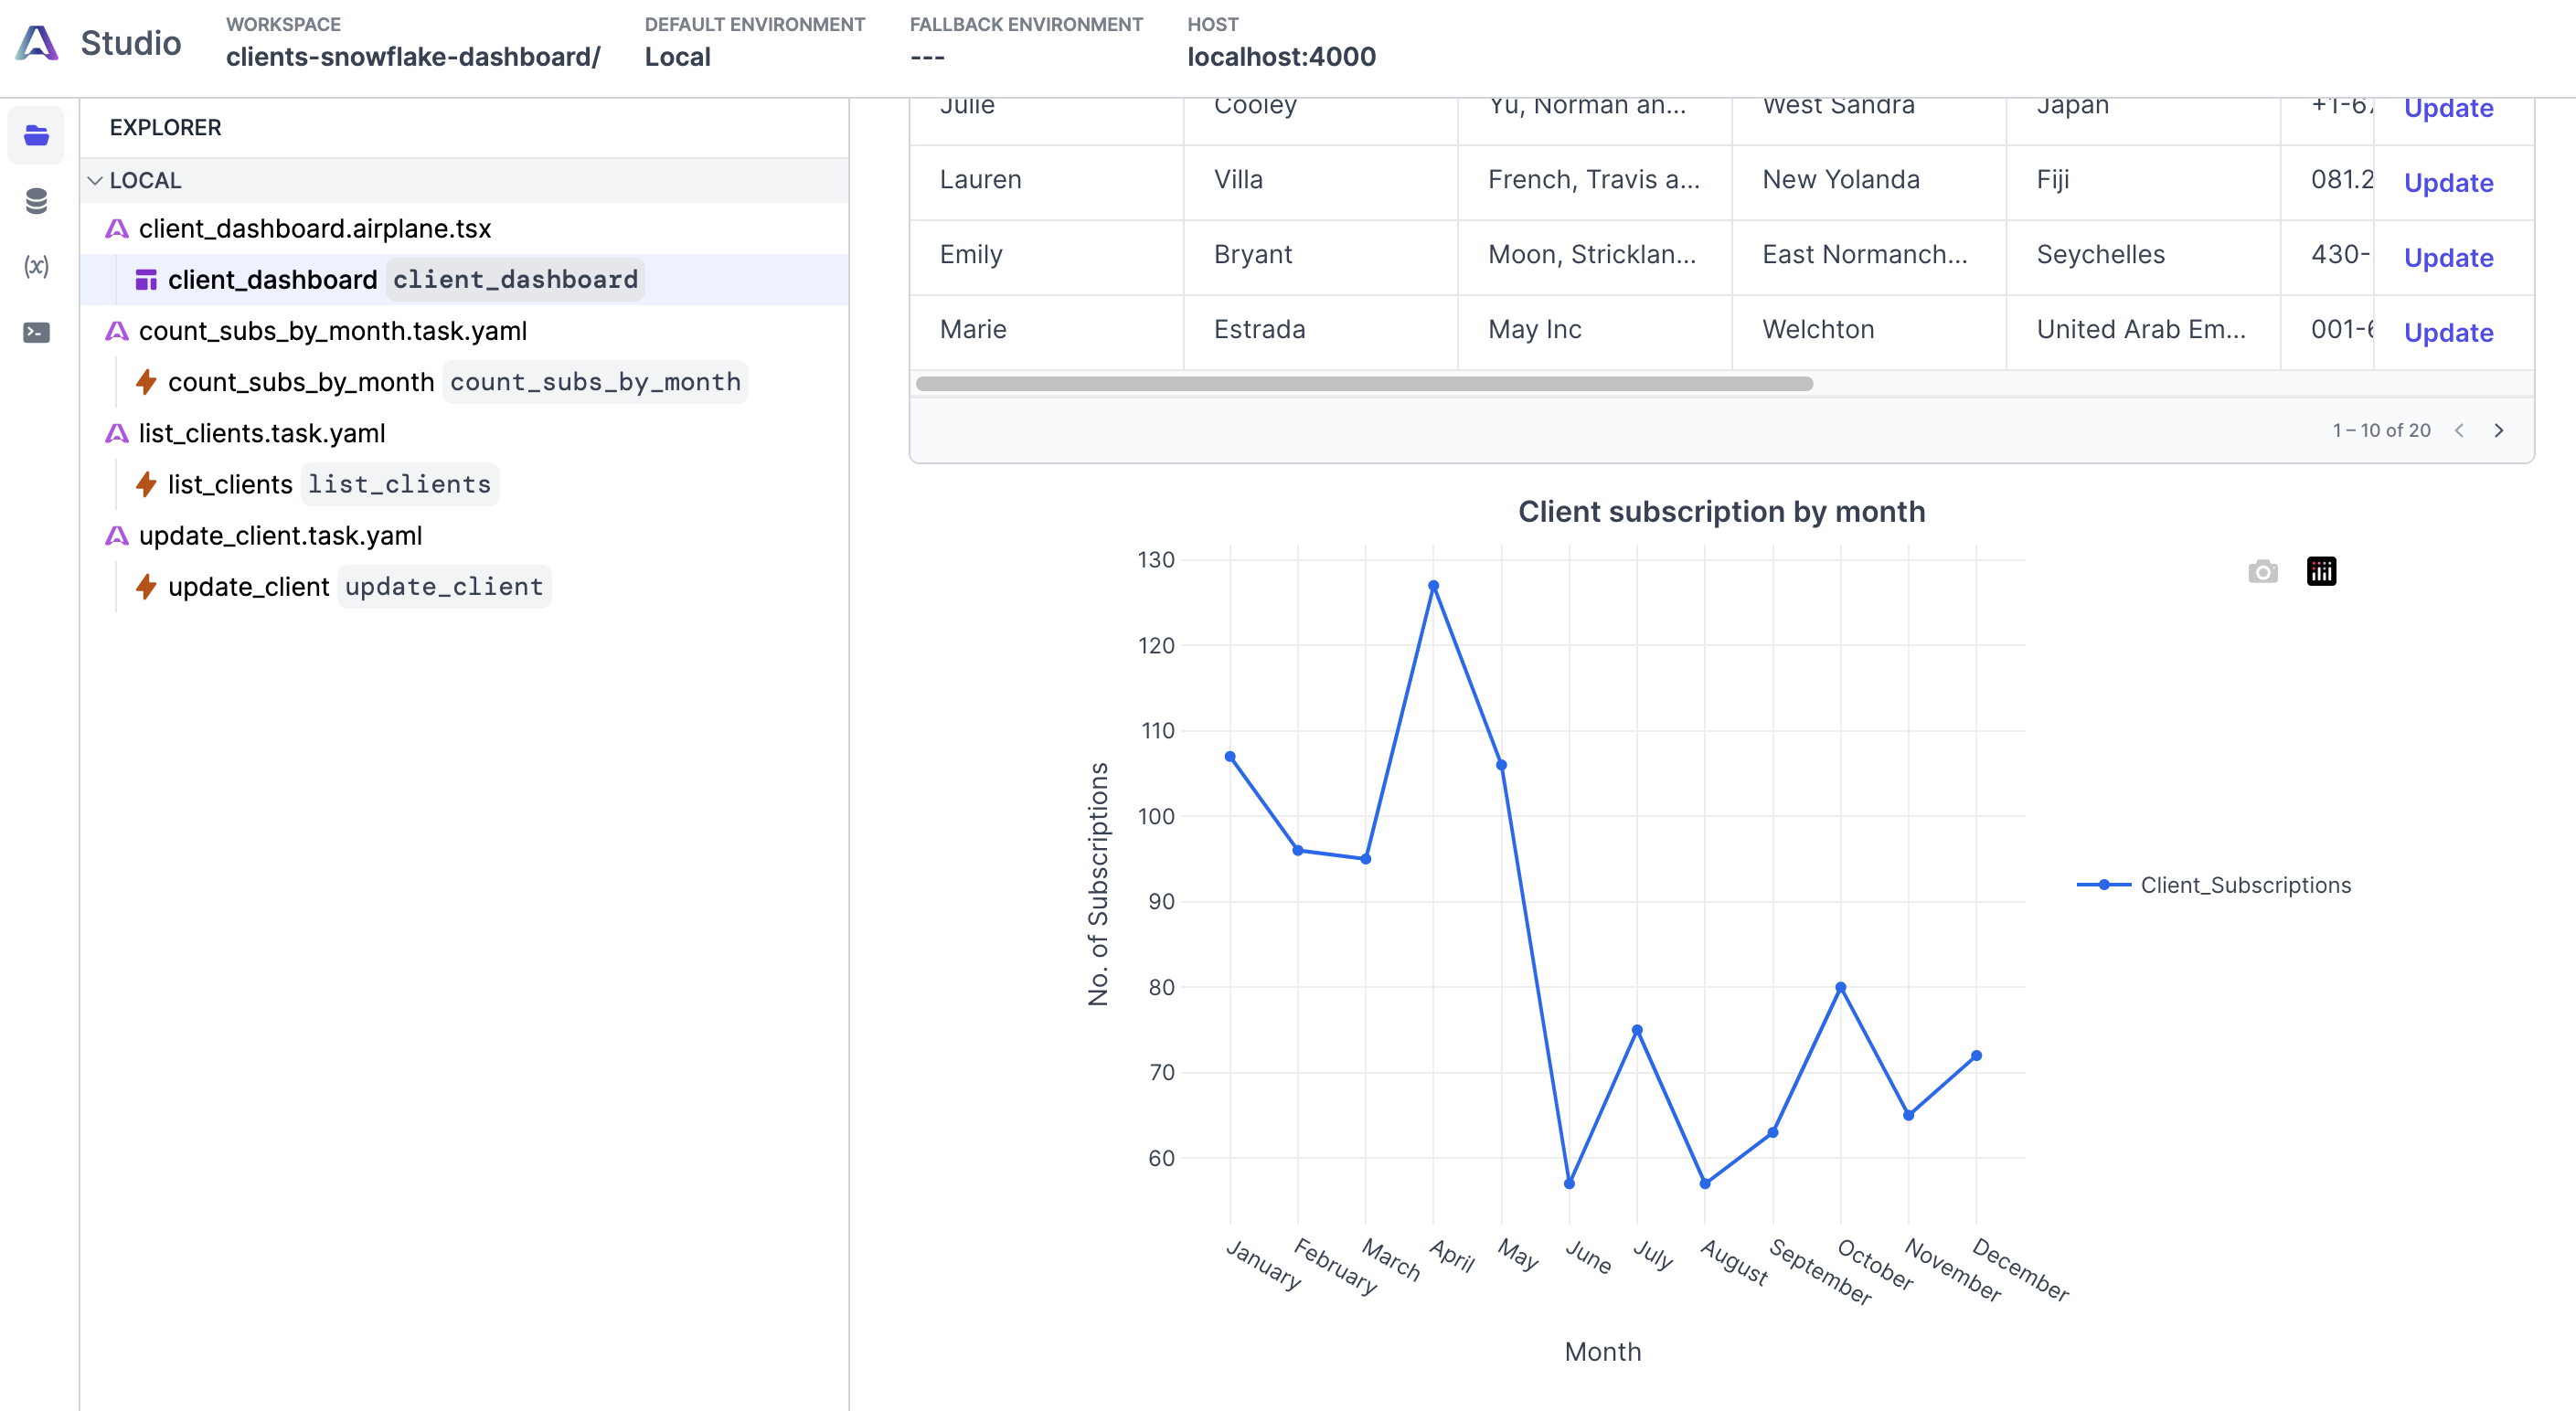
We can see from the chart that the month of April has the highest number of client subscriptions, while the month of August has the lowest.
Deploying the Snowflake Dashboard
Let's now deploy the Snowflake Dashboard. Run the command below to deploy the client dashboard:
This deploys the tasks and View we've created, which we can then access in our Airplane account once the deployment is complete.
And that's how to build a Snowflake dashboard using Airplane Views! Along with Tasks and Views, Airplane offers powerful built-ins, such as permissions setting, audit logs, job scheduling, and more.
If you're interested in learning more about building internal UIs, check out our blog for content such as how to create a Google Analytics KPI dashboard, how to build an admin panel using React, how to build a Python admin dashboard using Plotly dash, and more.
Conclusion
In this article, we walked through how to build a Snowflake Dashboard using Airplane Views.
Airplane is the developer platform for building custom internal tools. Instead of using a pre-built tool with limited customizability, engineers can use Airplane Views to create a fully customized GUI tailored to their specific needs. Airplane's easy-to-use interface and powerful features let you build custom, rich, and dynamic internal applications without the hassle of managing complex infrastructure.
To try it out and build your first UI within minutes, sign up for a free account or book a demo. If you are a startup, check out Airplane for Startups, where you may be eligible to earn $10,000 in free credits.


