

AWS job scheduler allows users to schedule workloads easily. It is a part of AWS Batch, a computing service where users can run batch-processing workloads efficiently. AWS job scheduler is a fully managed service, which means that users do not have to worry about maintaining and updating the compute software or server clusters required to run it. This frees up developer time and allows users to focus on customer-facing activities.
Many users utilize AWS job scheduler to simplify batch processing. AWS job scheduler also dynamically provisions the optimal type and quantity of compute resources required based on the requirements of the batch job (e.g., volume and specific resources). AWS job scheduler can be used to process workloads in various industries, such as finance, digital media, and more, and can be used for high-performance computing, post-trade analysis, fraud surveillance, and more.
This article will discuss how to use AWS job scheduler to process batch workloads. We'll also cover an easy-to-use and secure job scheduling alternative called Airplane.
AWS job scheduler overview
The AWS job scheduler uses four components to execute a workload: jobs, job definitions, job queues, and compute environments. This method of executing workloads comes with several benefits:
- Efficient and well-managed - AWS job scheduling is efficient and well-managed, providing default queues and compute environments to make it easy to get started. It dynamically provisions and scales the compute resources to match the volume and resource requirements of your submitted jobs.
- Easy integration with other AWS services - AWS job scheduling works well with other AWS services such as AWS EC2 and Lambda. To access the other services in AWS from the AWS job scheduler, users need to provide an IAM role with the necessary access in their job definition.
- Effective pricing - Users only pay for the AWS resources used. Users can further reduce the costs of running their batch jobs by opting for EC2 Spot Instances, Savings Plans, and Reserved Instances when specifying their compute-type requirements and setting up their compute environment.
- Fine-grained access control - Users can utilize IAM roles to obtain access to other AWS services. Through IAM, users can define access policies for different team members in their organization.
Prerequisites for the AWS Job Scheduler
In the following sections, we'll walk through a demo to see how the AWS job scheduler works. We'll create a simple Python script that runs an HTTP GET request to obtain a random fact about cats. We'll then create a compute environment, job queue, job definition, and job.
Before we start, ensure you have Docker and the AWS CLI installed and working on your system.
Python code
To start, we'll need Python code to run with the scheduler. In this example, we'll use a simple Python script that makes an HTTP GET request and prints out a random cat fact. The following code is from a file named random_cat_fact.py:
requirements.txt file
Next, we'll use requests and JSON packages, so let's declare them in the requirements.txt file. The requirements.txt file for this tutorial is the following:
Dockerfile
We'll also need a Dockerfile with a command to run the Python script. This file should be named Dockerfile. Here are the contents of the Dockerfile:
Creating a Docker image
Now that we have a Python script, the requirements.txt file, and a Dockerfile, we must create a Docker image. A Docker image packs the application and the environment required to run the application. To create the image, navigate to the folder that contains the Python script, requirements.txt file, and Dockerfile:

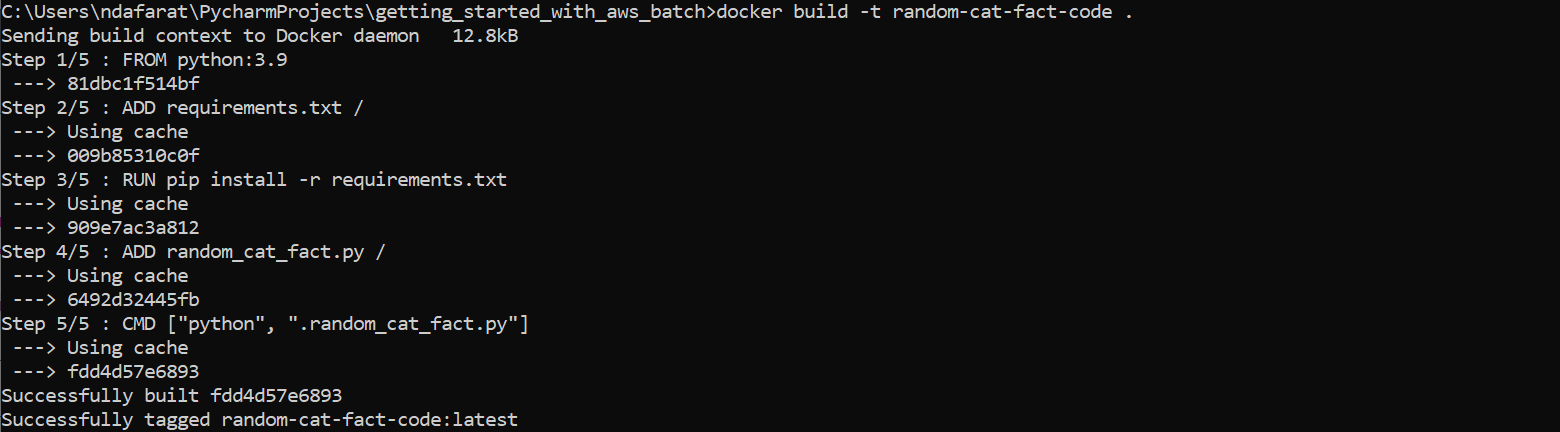
Then run the following Docker command to create the image: docker build -t random-cat-fact-code.
It will build the image, and the message "Successfully tagged random-cat-fact-code:latest" should confirm that the image was built successfully:
Now let's test if the image is working well. Run the command docker run -t random-cat-fact-code.
If this returns a random cat fact, it means that the image is working properly.

Creating an Amazon Elastic Container Registry (ECR) repository
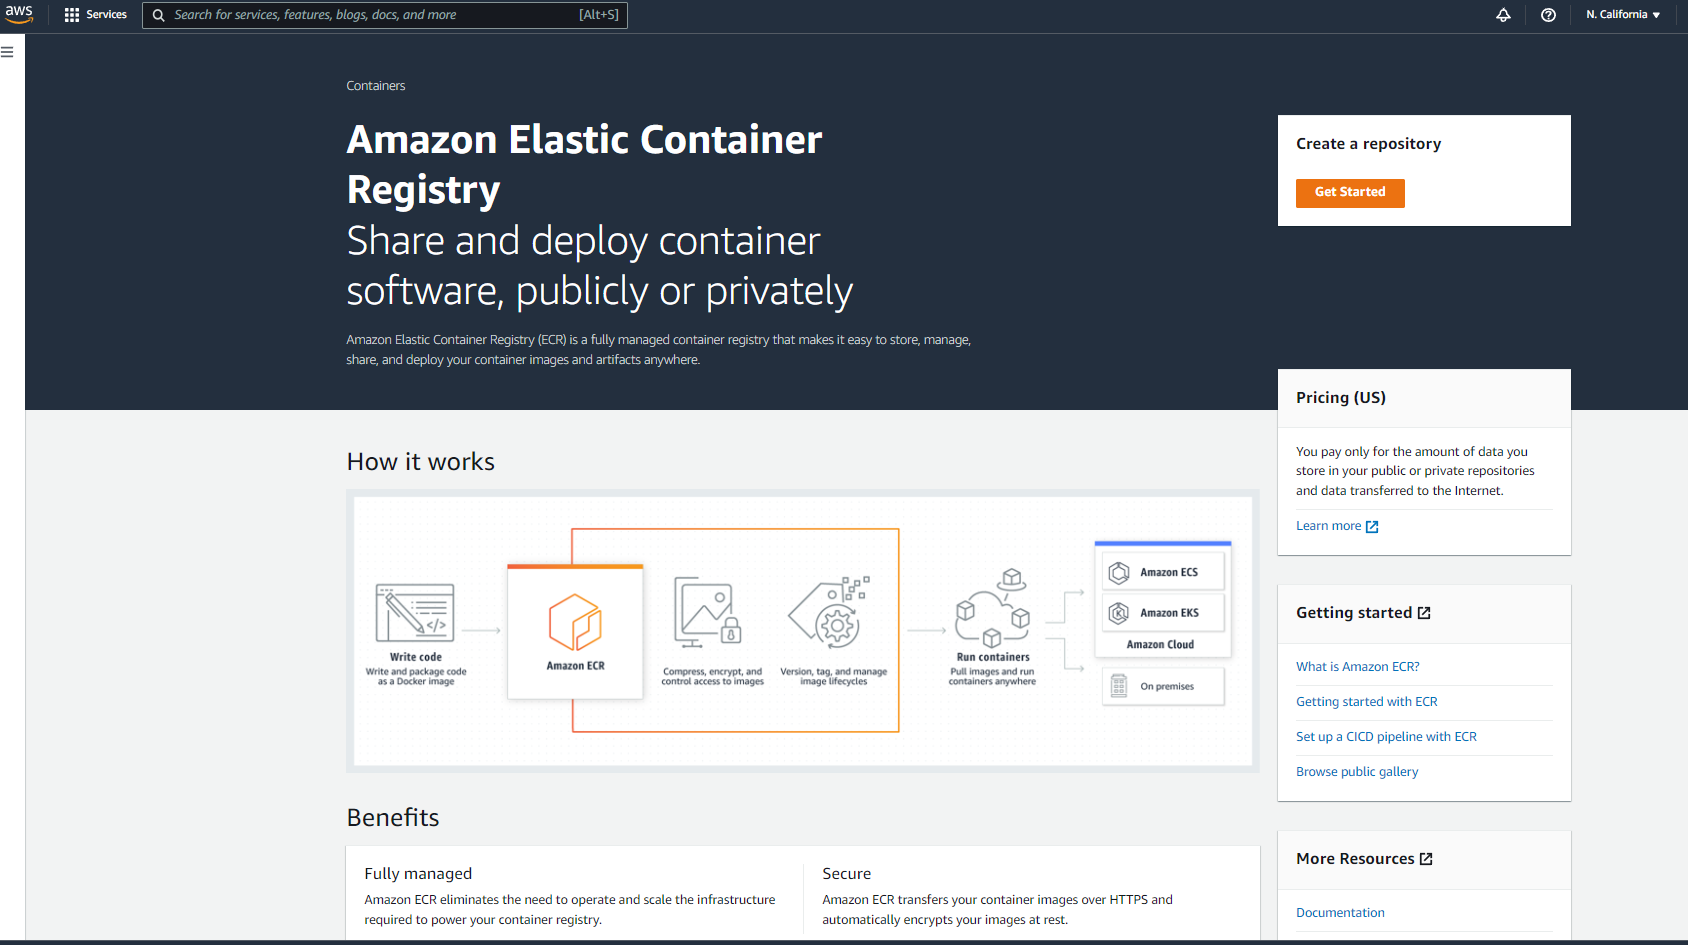
Now let's get the image into either Docker Hub or ECR. This tutorial uses ECR, so log into the AWS Console, go to Amazon ECR, and click Get Started:
Now, enter the repository details. As this is a demo, the repository here has been made public, but for production, we can make it private.
Then input a name for the repository. This tutorial uses job-scheduler-demo.
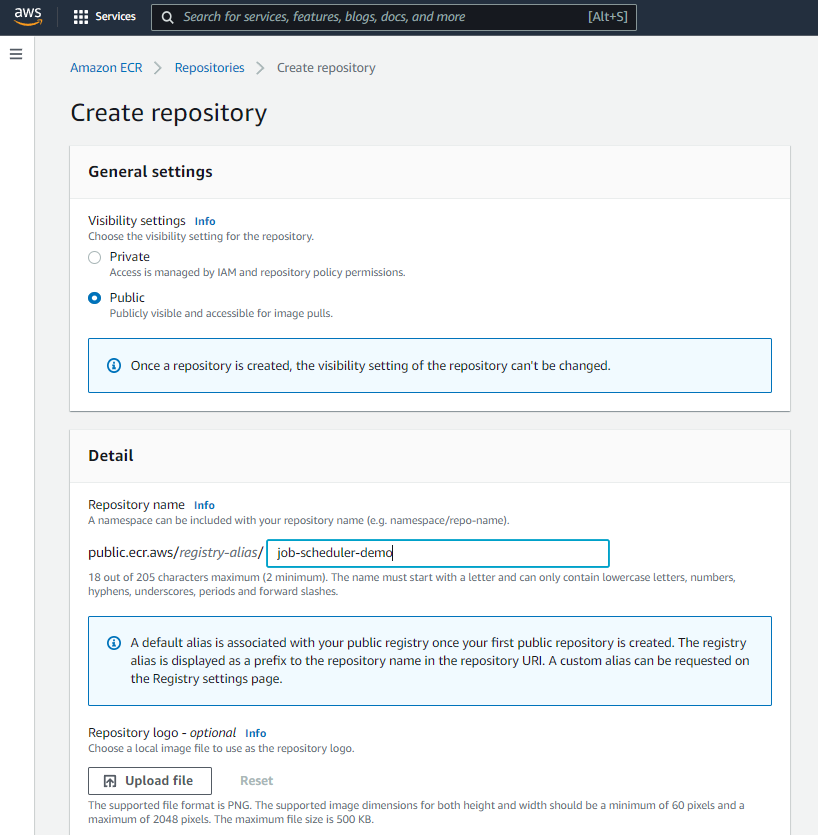
Leave all the other settings as default, and then click Create repository.
This should create the repository, and we should receive a message saying it was successfully created:

Now, click View push commands to see the commands that must be followed to push the image we created above to this repository.
The following image shows the push commands we'll be following:
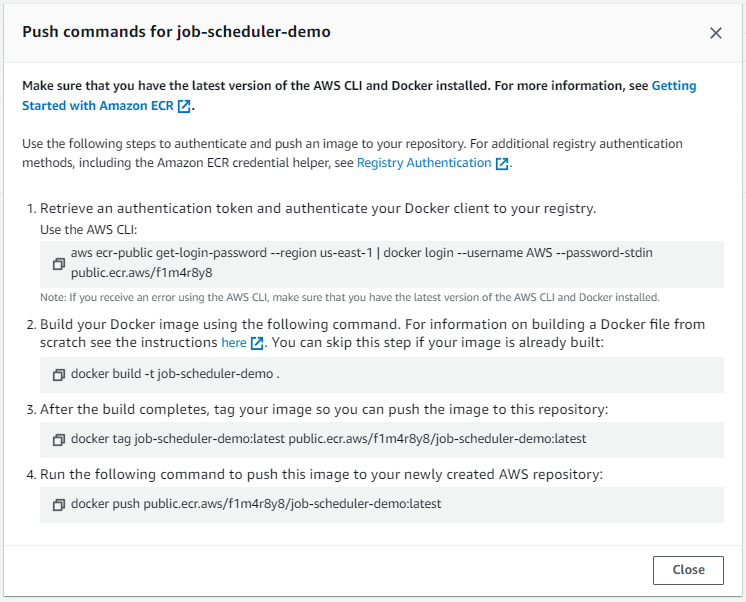
We must make sure that we are in the folder that contains the Python script and Dockerfile.
Start off by running the first command: aws ecr-public get-login-password --region us-east-1 | docker login --username AWS --password-stdin public.ecr.aws/f1m4r8y8. Once ran, we should get a "Login Succeeded" message:

Since we already built the Docker image, we can skip the second step shown in the push commands, but remember to replace job-scheduler-demo with the name of the image we built earlier.
The third step is to tag the image. We can do so by running the following command: docker tag random-cat-fact-code:latest public.ecr.aws/f1m4r8y8/job-scheduler-demo:latest. Replace random-cat-fact-code with the name of the image. This command does not return any output.
Finally, run the following command to push the image to the newly created AWS repository: docker push public.ecr.aws/f1m4r8y8/job-scheduler-demo:latest:
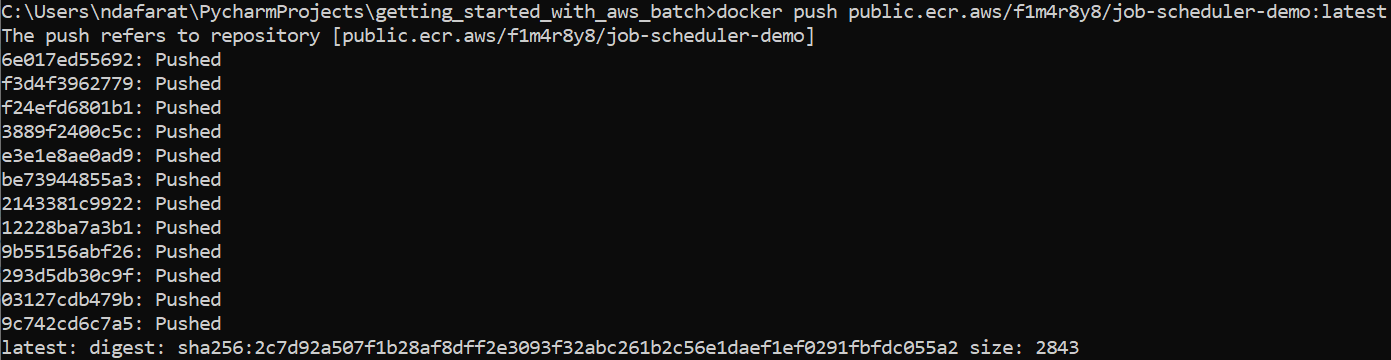
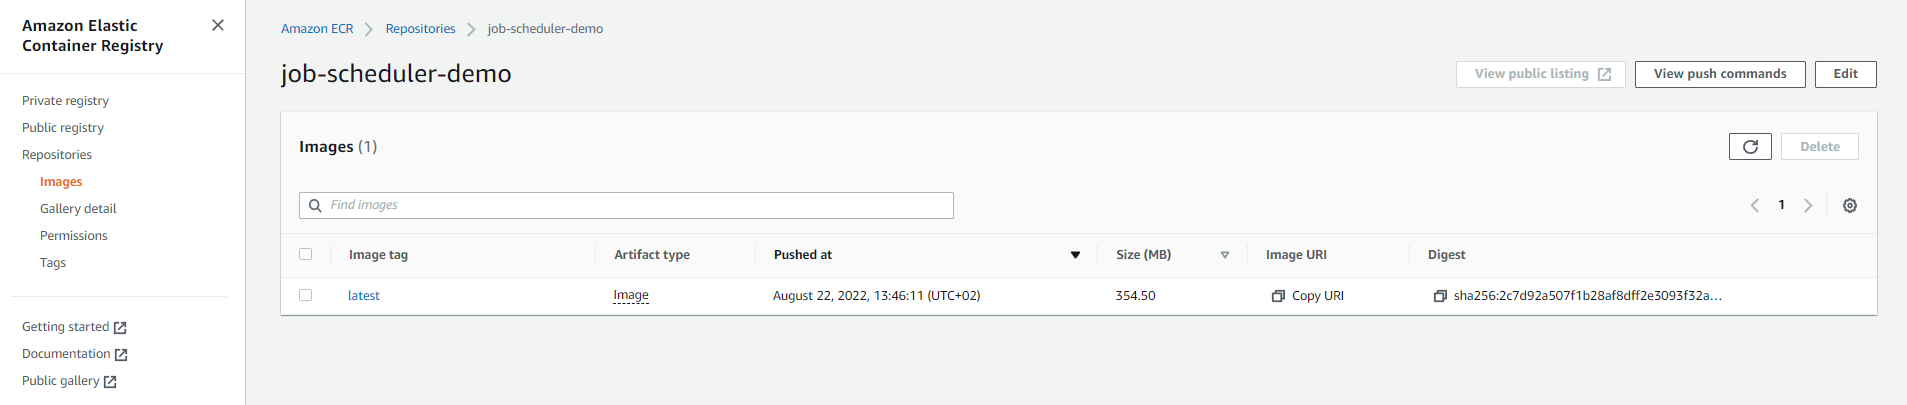
To confirm if our image was successfully pushed, let's open the Amazon ECR repository and we should see it there:
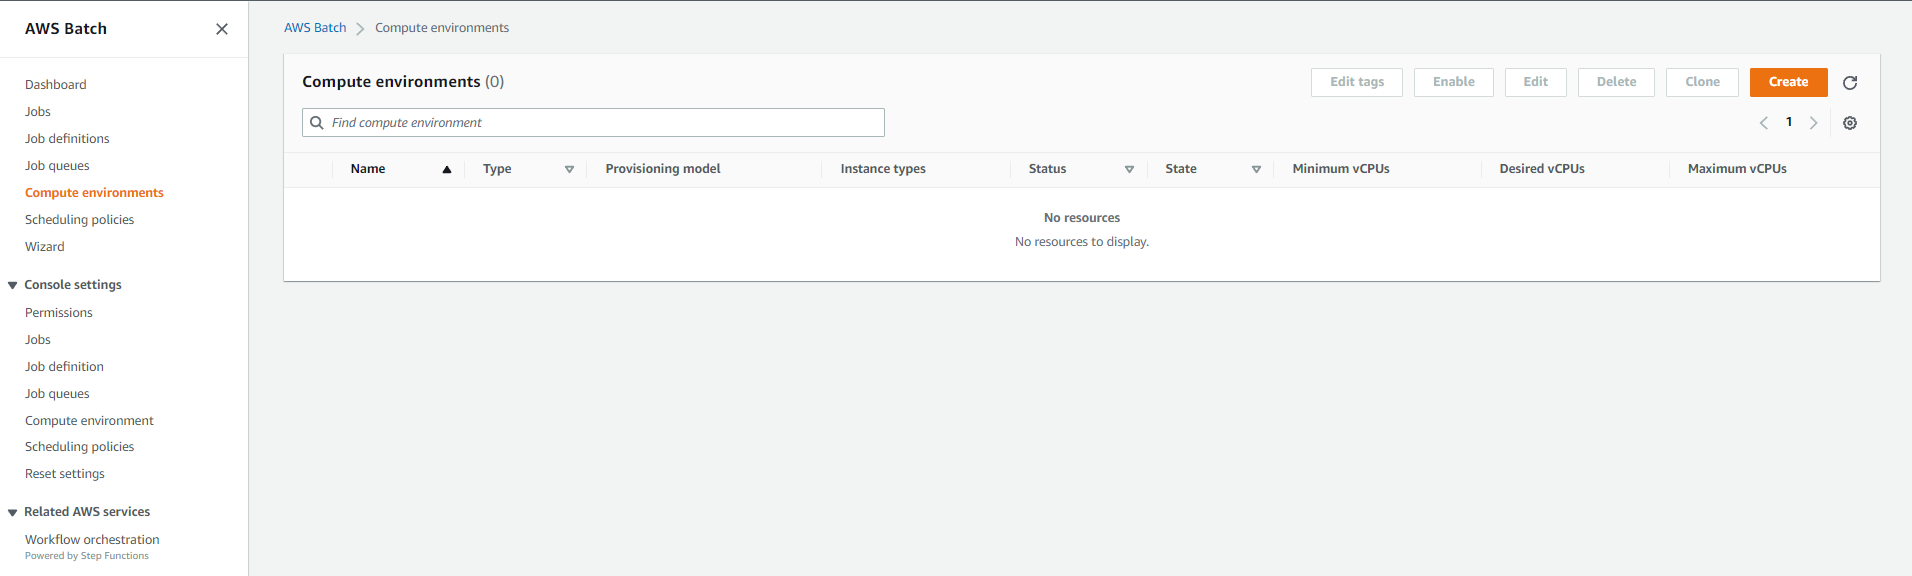
Building a compute environment
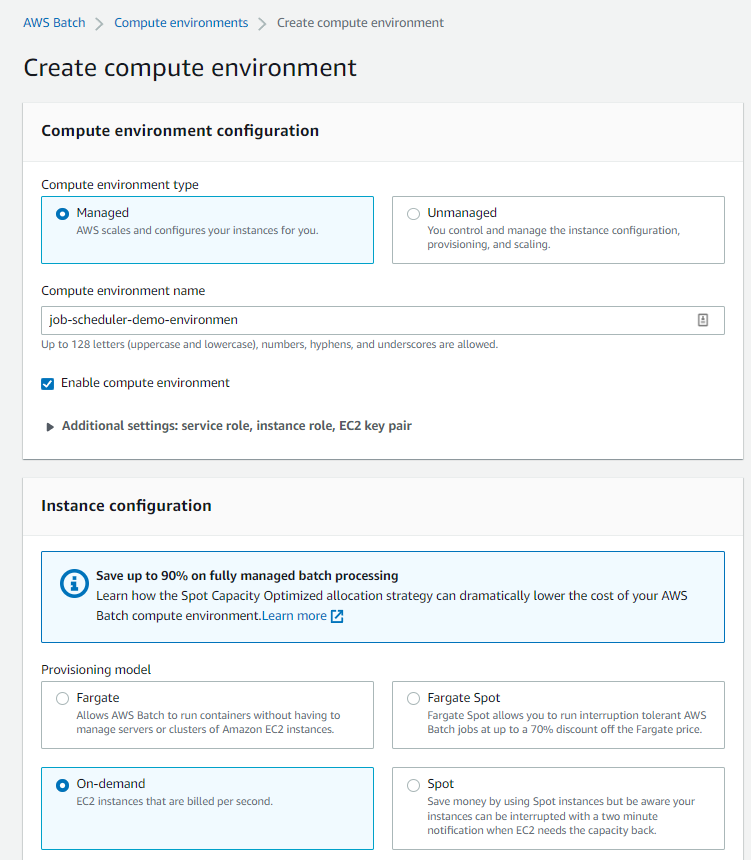
Now that the image is in AWS, it's time to build the compute environment. Go to AWS Batch, select Compute environments on the navigation pane, and then click Create:
Select Managed, and input the environment name: job-scheduler-demo-environment. On the instance configuration, select On-demand since this is a demo and we don't want to wait to execute.
Keep everything else as default, but under Additional settings: Security groups, placement group, be sure to add a security group with HTTP and SSH inbound rules:
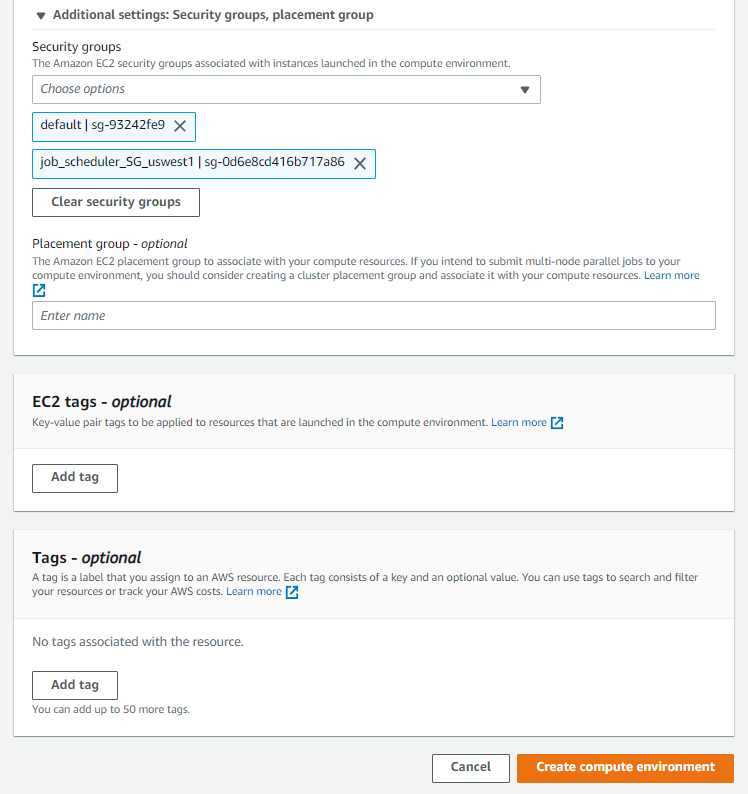
Then click Create compute environment. If the creation is successful, we should get the following message:

Make sure the status becomes Valid before moving to the next step.
Creating the job queue, job definition, and job
With our image and compute environment ready to go, let's create the job queue, job definition, and jobs and then run them.
Creating the job queue
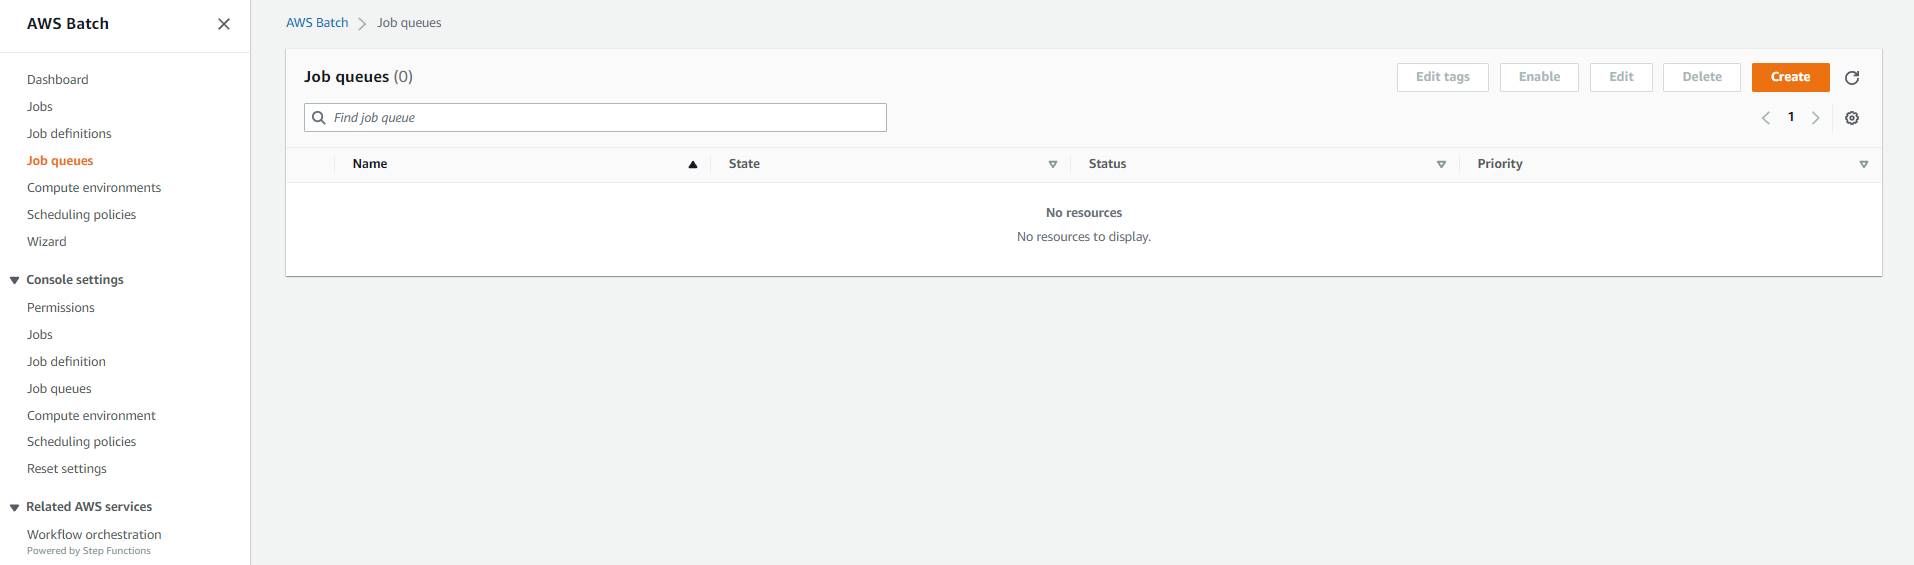
In the AWS Batch console navigation pane, select Job queues and then click Create:
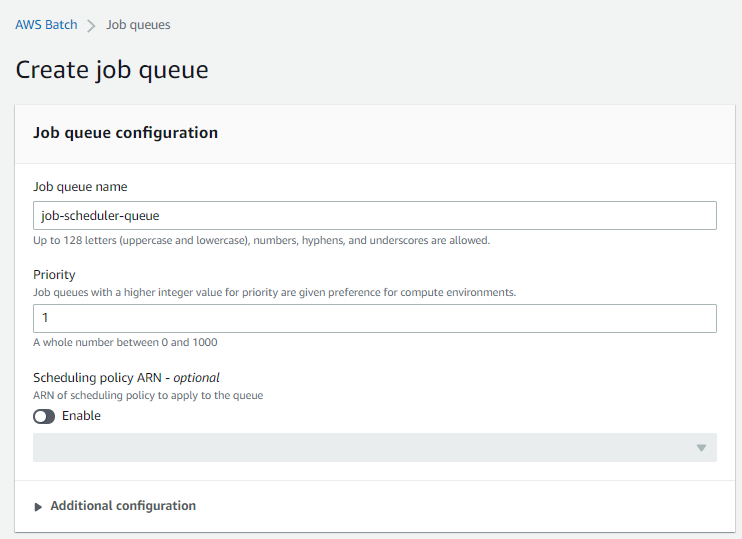
Name the job queue job-scheduler-queue. Since there is only one queue in this example, a priority value of 1 has been assigned. However, we should note that queues with higher integer values for priority are given preference for computing environments.
To select a compute environment option, select the compute environment we created:
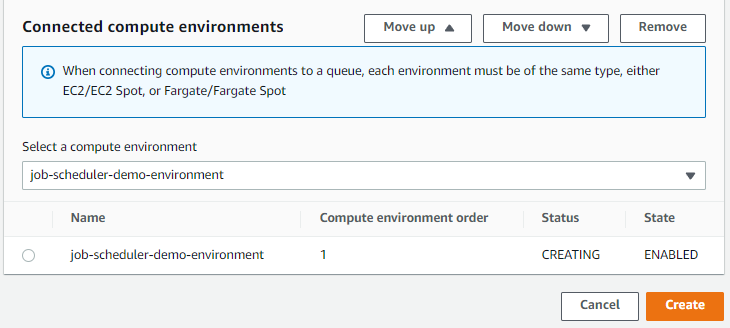
Then, click Create. We should now see the queue being created as per the status field.

Wait until the status is VALID before creating the job definitions. Since we didn't specify a scheduling policy, this queue will operate in a first in first out (FIFO) model.
Creating the job definition
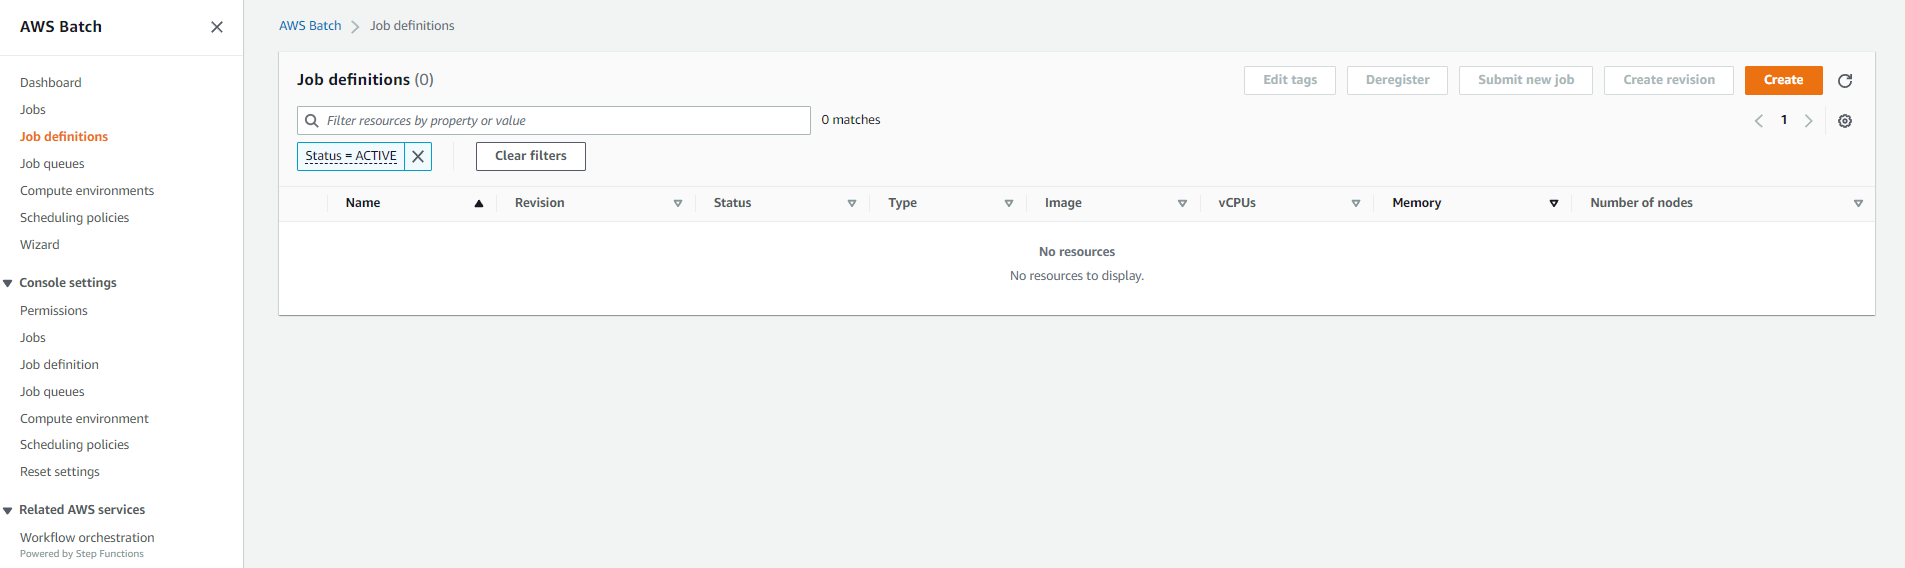
Go back to the navigation bar, select Job definitions, and then click the Create button similar to what we did for the job queues.
Then, select the job type, which in this instance will be Single-node. The name of the job is random-cat-fact, and the execution timeout is 600 seconds (i.e., ten minutes).
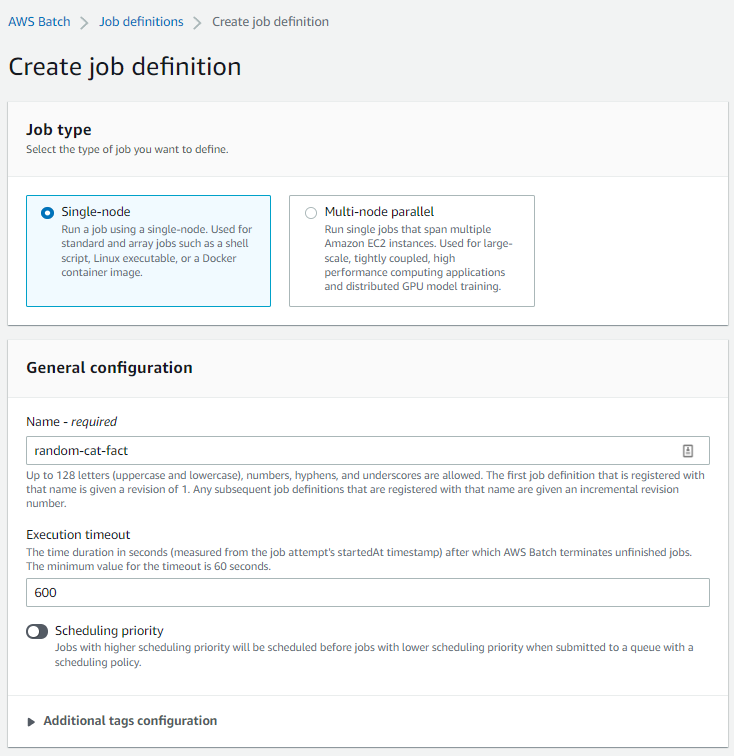
We can specify a scheduling priority, but since we didn't set up a scheduling policy on the queue, there is no need to set a priority here.
Then under the platform compatibility, select EC2. This is because we chose EC2 when creating the compute environment earlier on.
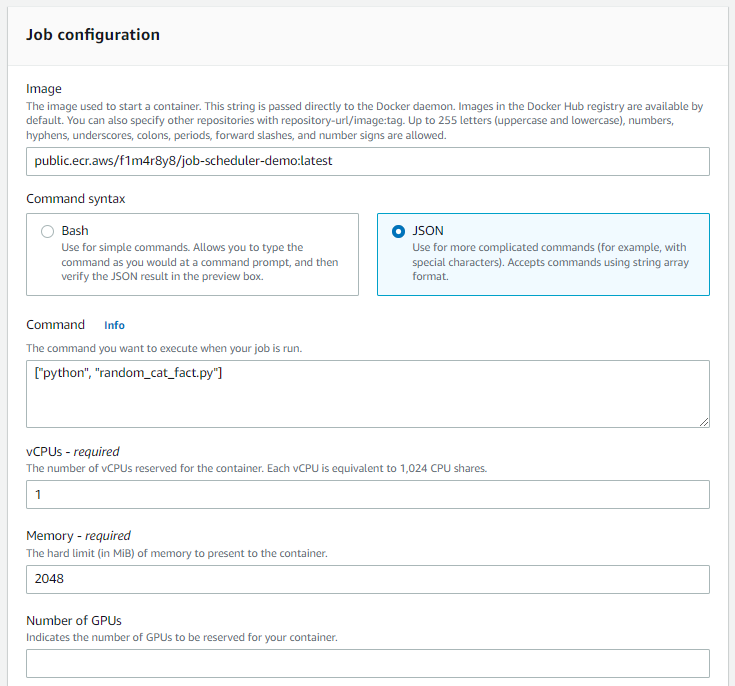
Under job configuration, input the path of the image in ECR. For this example, it's public.ecr.aws/f1m4r8y8/job-scheduler-demo:latest.
Select JSON for the command syntax and input the command from the Dockerfile, which is ["python", "random_cat_fact.py"]. The job configuration should look like the following:
Keep everything else as default and then click the Create button. The job definition should be created successfully:

Creating the job
With the job configuration set up, it's time to create a job that uses this job definition. Select Jobs on the navigation pane, and then click Submit new job.
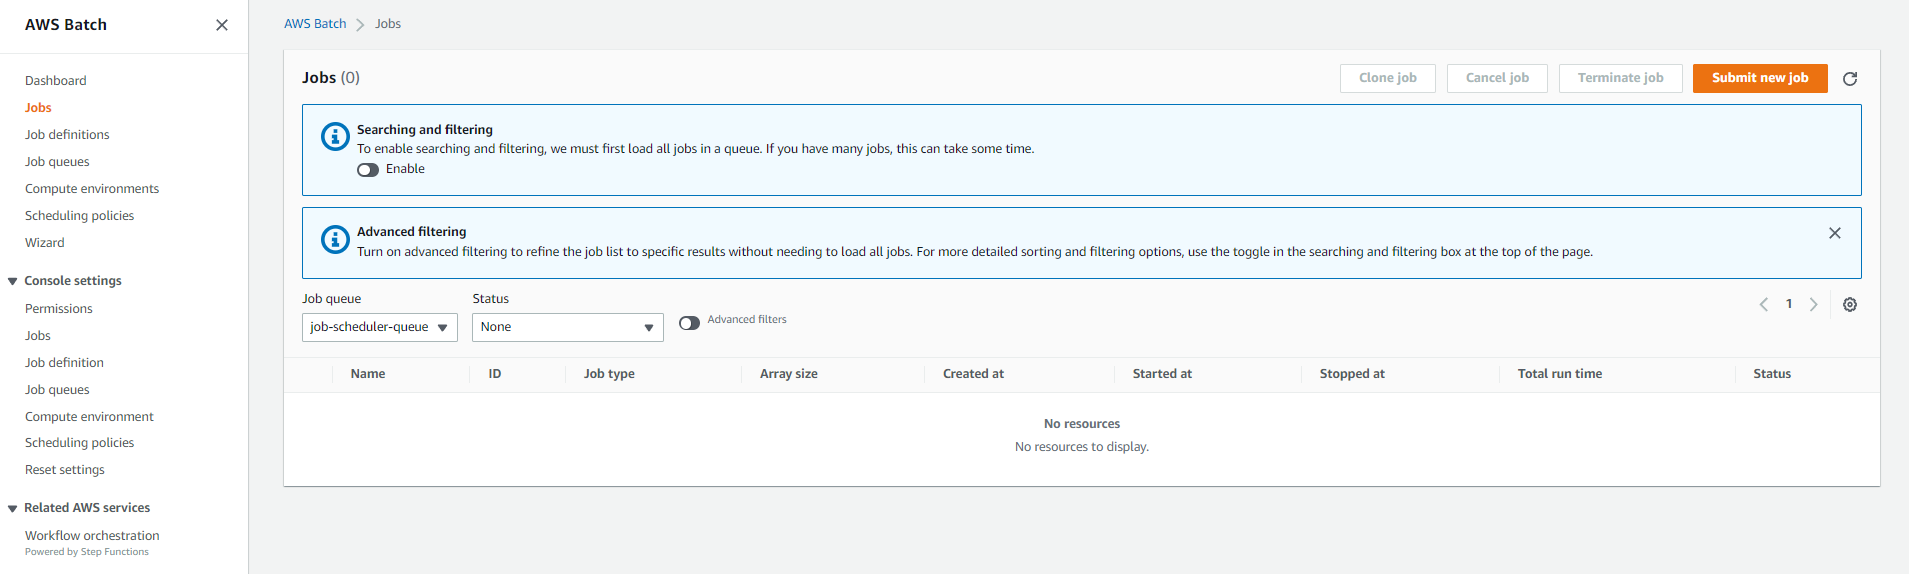
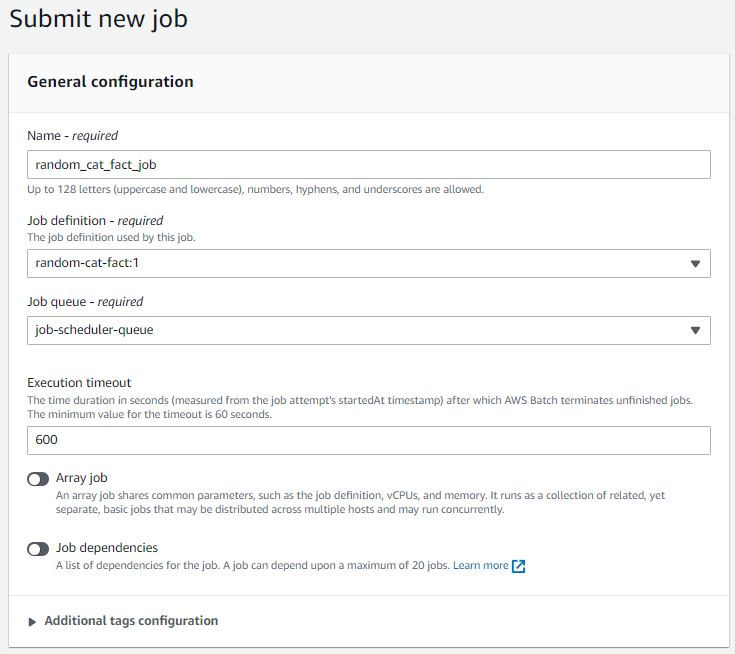
The Submit page will open with some details we must provide. Then, name the job random_cat_fact_job. Choose the job definition we created previously, as we did for the job queue. Then click Submit to submit the job.
We should then see that the job was successfully submitted:
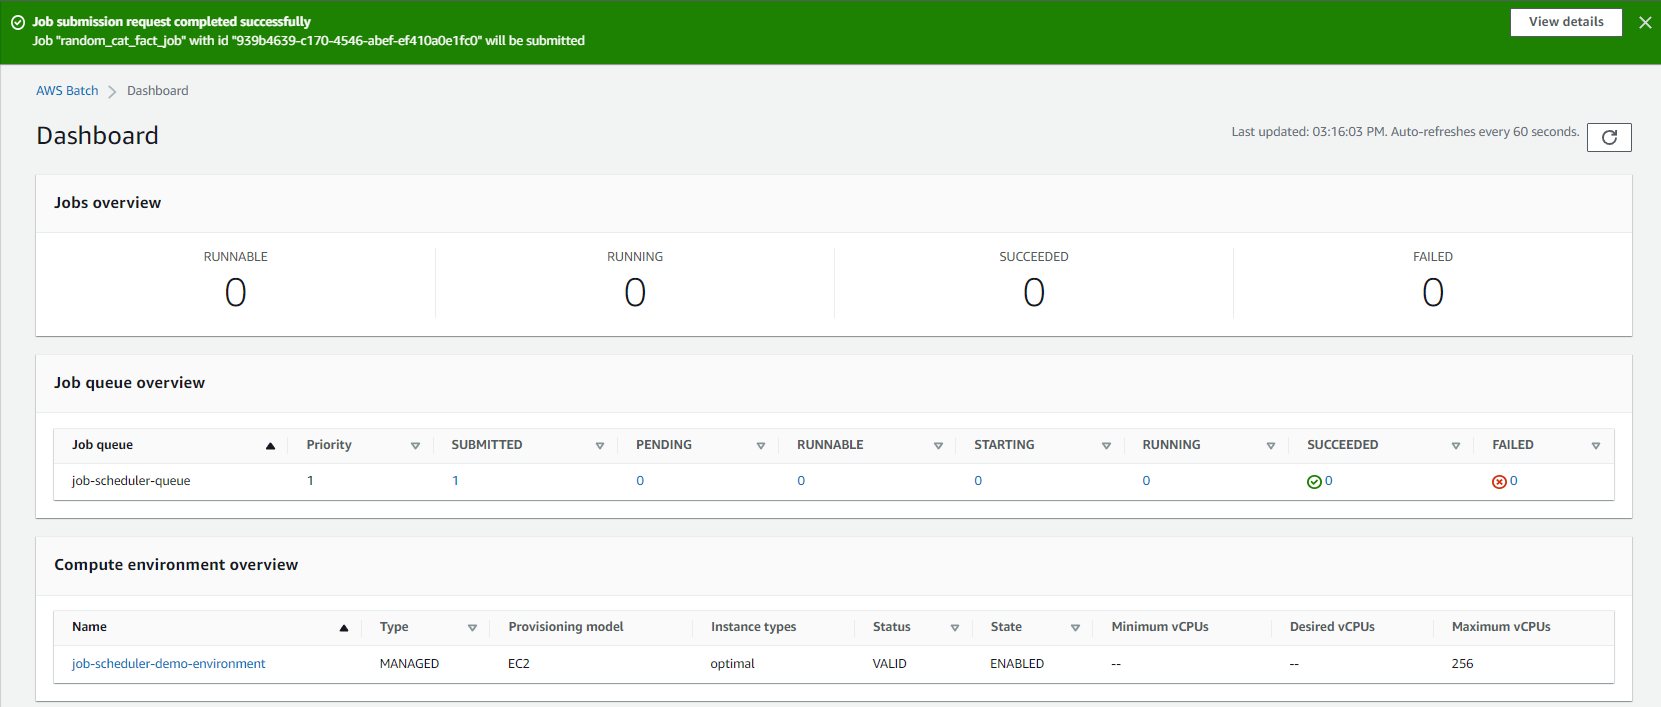
The job will move through the various stages of the job queue. These stages include submitted → pending runnable → starting → running → succeeded or failed. In this case, the job should have succeeded so we should see 1 under succeeded.

If it had failed, we would see 1 under failed. If we click 1, we can see more details about the job.
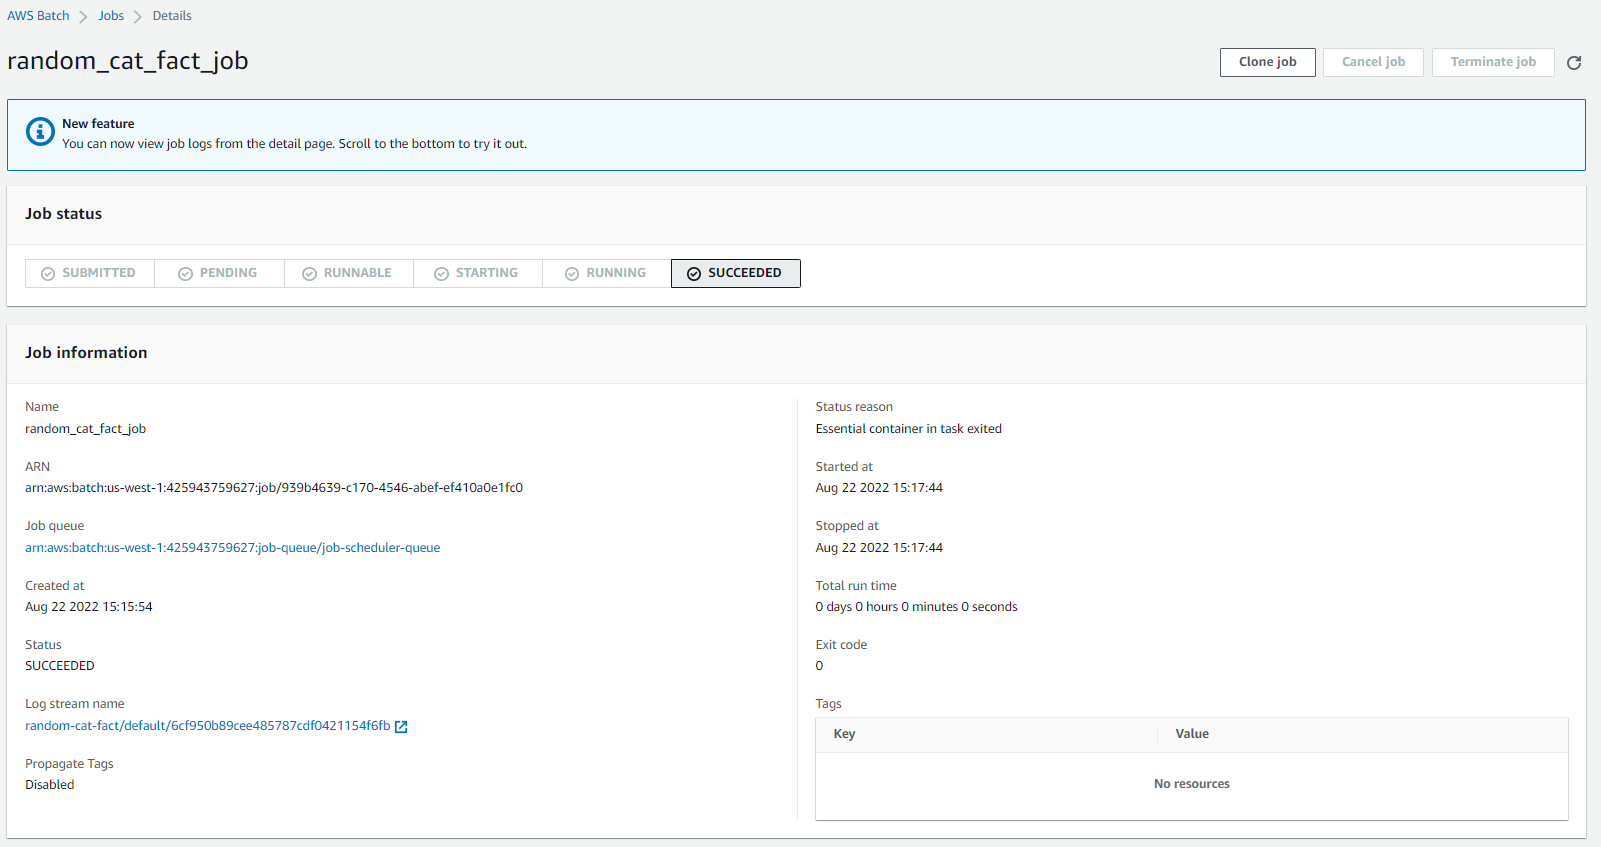
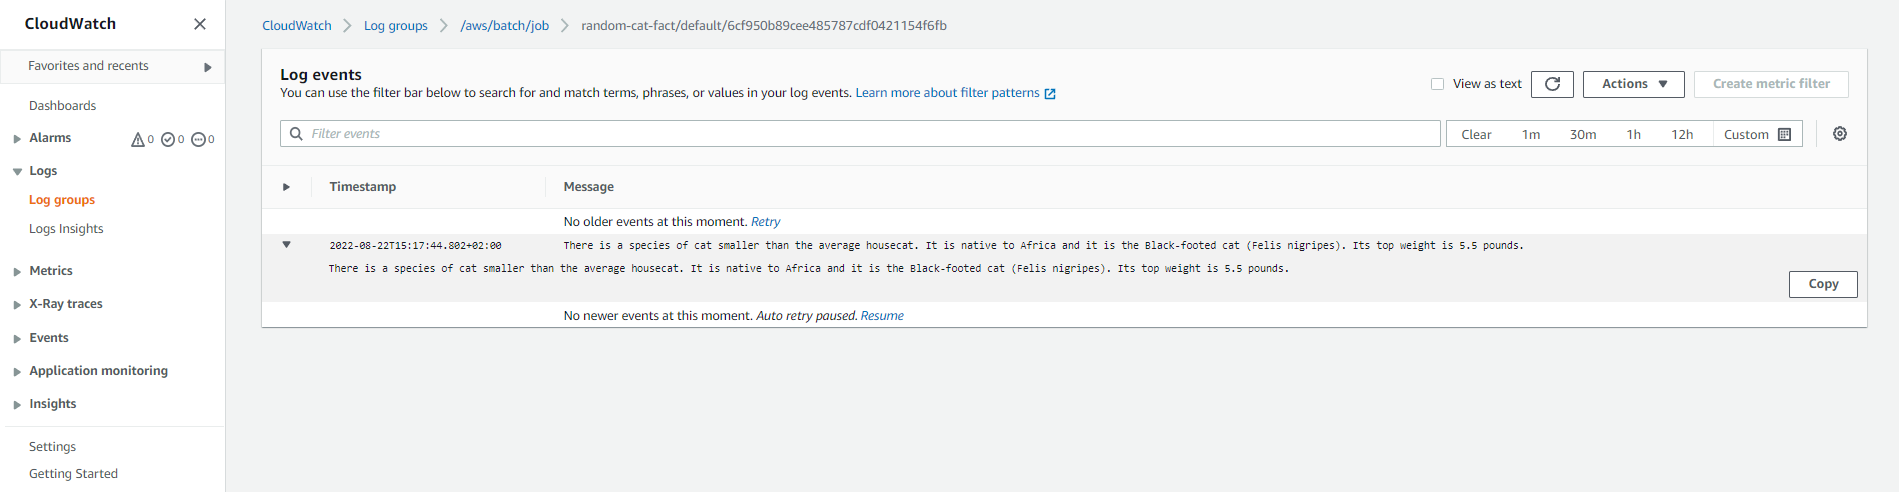
If we click the log stream name, we can see the execution logs in AWS CloudWatch. We should see a random cat fact in these logs:
And that's how to use AWS job scheduler to create a job and execute it. Although using AWS has several benefits, it involves many steps and complex configurations that make it more difficult to use. Users who want to do something simple like prioritize a job must have an existing queue that supports that priority before creating the job. Users who want to run a job more than once must submit a new job and set it up.
Luckily, there is an alternative solution that is easy to use, secure, and efficient.
Schedule jobs easily using Airplane
Airplane is the developer platform for building custom internal tools. The basic building blocks of Airplane are tasks, which are single-step or multi-step functions that anyone on your team can use. Airplane also offers Airplane Views, which allow users to build custom UIs within minutes.
Airplane also offers robust job scheduling for users. Airplane schedules are serverless and maintenance-free, making it easy to get started and create new schedules. Airplane also offers run failure notifications and historical run logs for users to monitor their job executions.
It takes minimum effort to run the same job we ran using the AWS job scheduler in Airplane. We can also easily rerun the job or create a schedule using Airplane.
The following Airplane tutorial demonstrates just how easy it is. To follow along with the demonstration, ensure you have the following:
The following image is the Airplane version used for this tutorial:

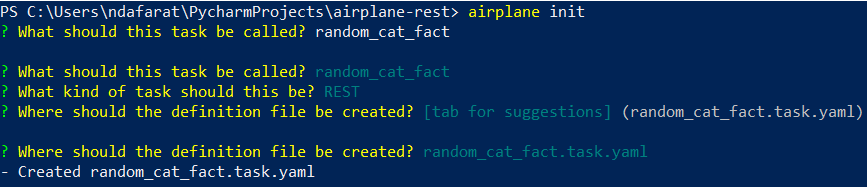
Once the Airplane CLI has been installed, navigate to the folder where you want to create a task. Then run airplane init. This will prompt us for the task name. Enter random_cat_fact as the name. For the kind of task option, select REST. Then enter random_cat_fact again as the name of the task definition file:
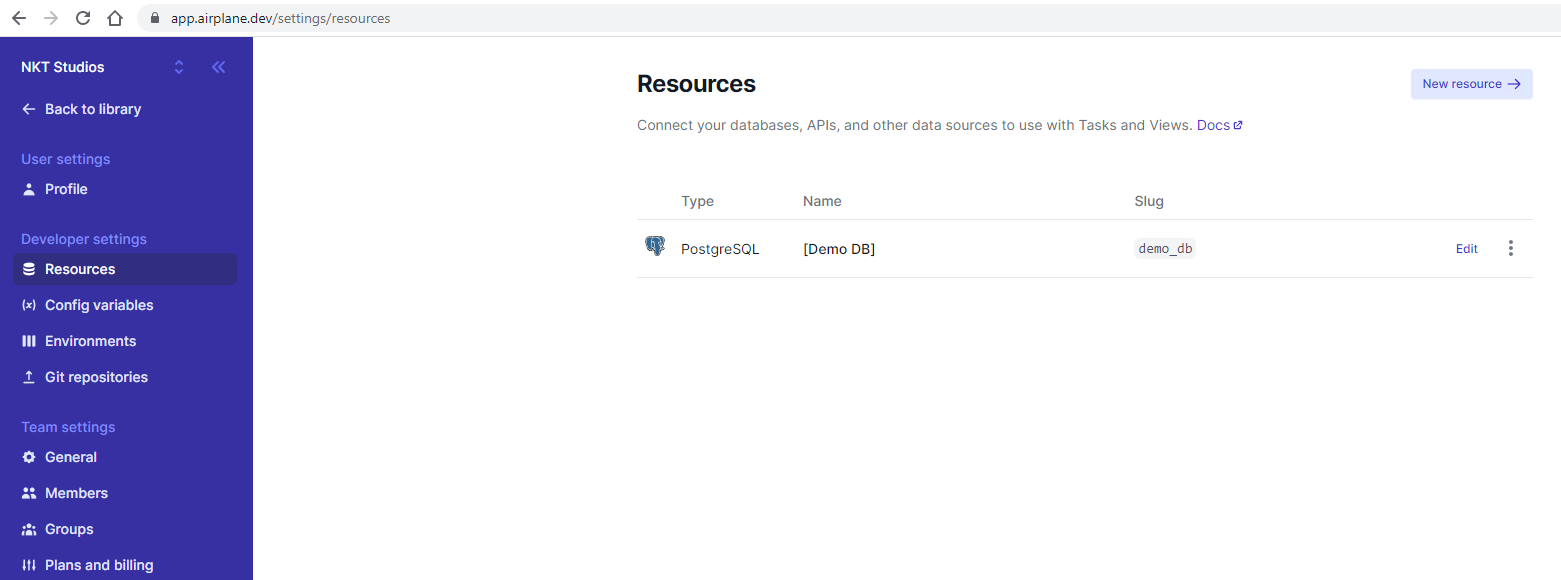
Now, let's create the REST API resource needed. Log into www.airplane.dev and then go to Settings then Resources:
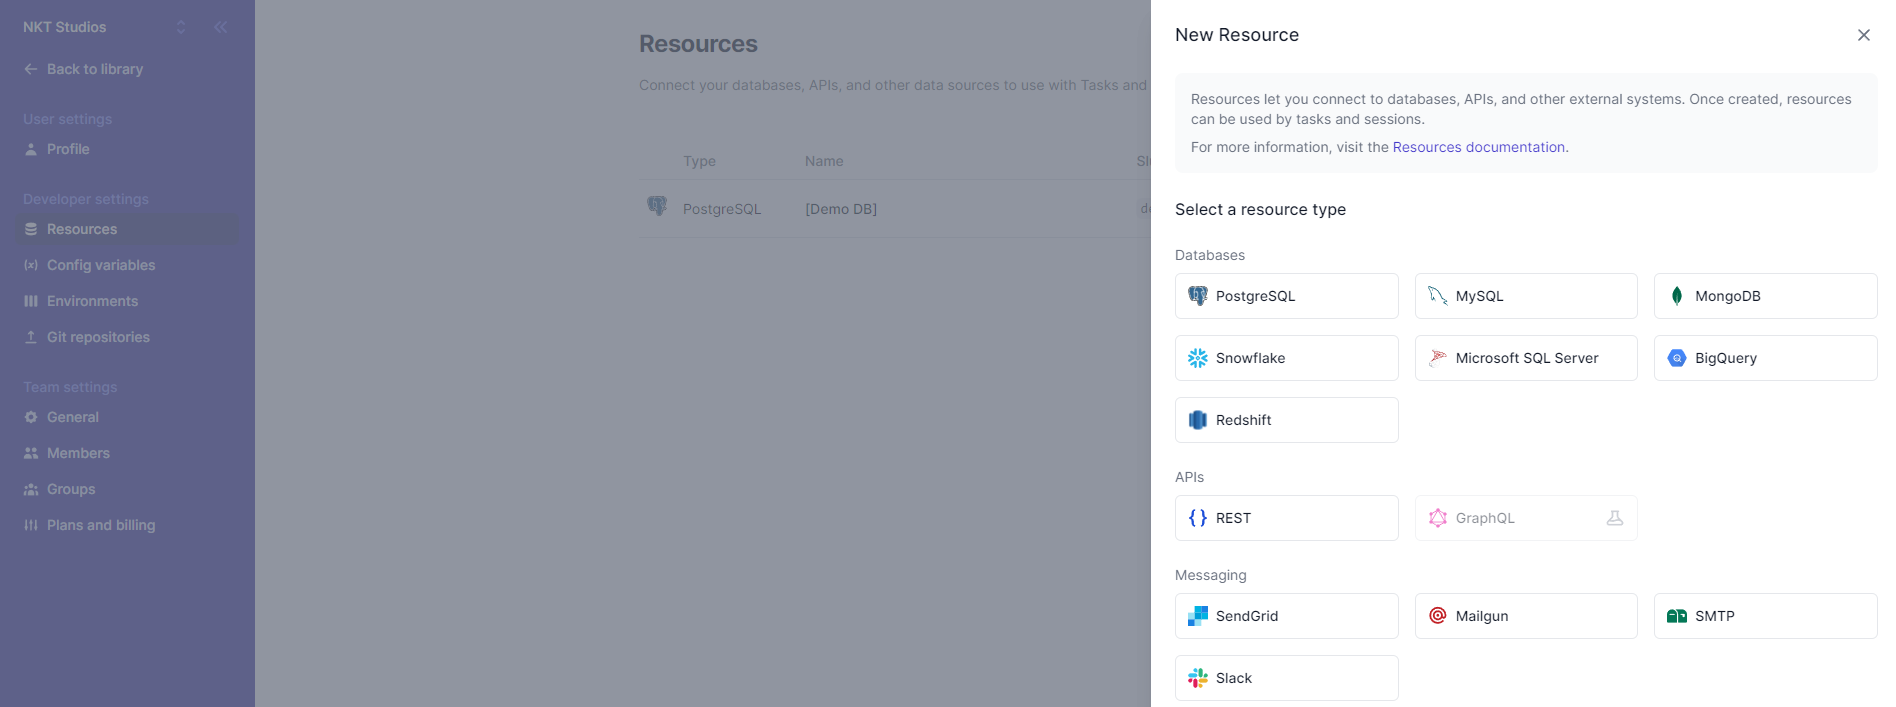
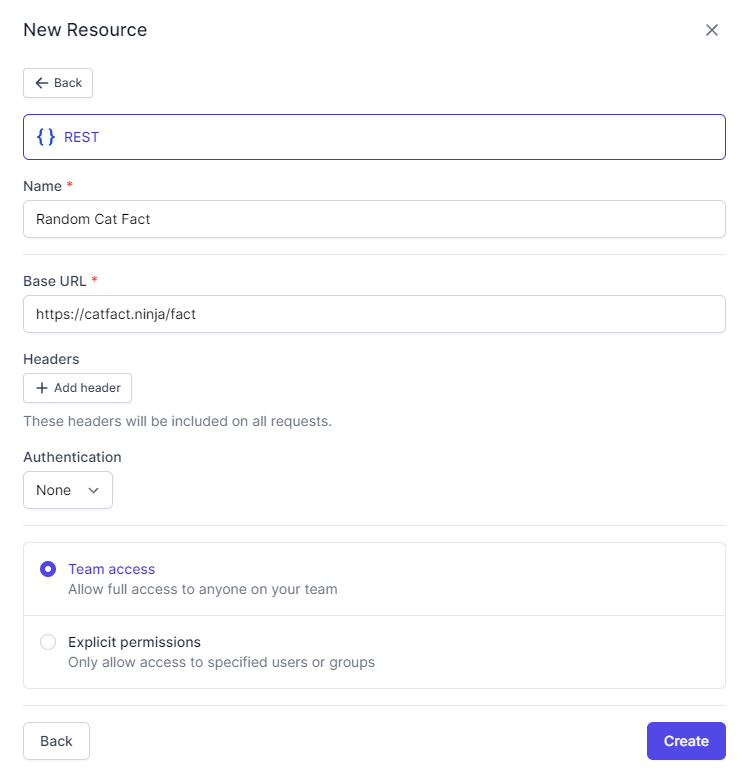
Once there, click New resource and select REST under APIs:
Use the following configuration for the resource: For the name, use Random Cat Fact and use https://catfact.ninja/fact as the base URL. Keep all the other defaults the same. Then, click Create to create the resource:
Under Resources, Random Cat Fact should now be listed:

With the REST resource ready, let's open the task definition file and configure it. The definition file should now be as follows:
Finally, let's deploy the task to Airplane with airplane deploy random_cat_fact.task.yaml. If this is the first time you're deploying, you'll receive a confirmation to create a task:

After it's been confirmed, the task will be created and deployed:

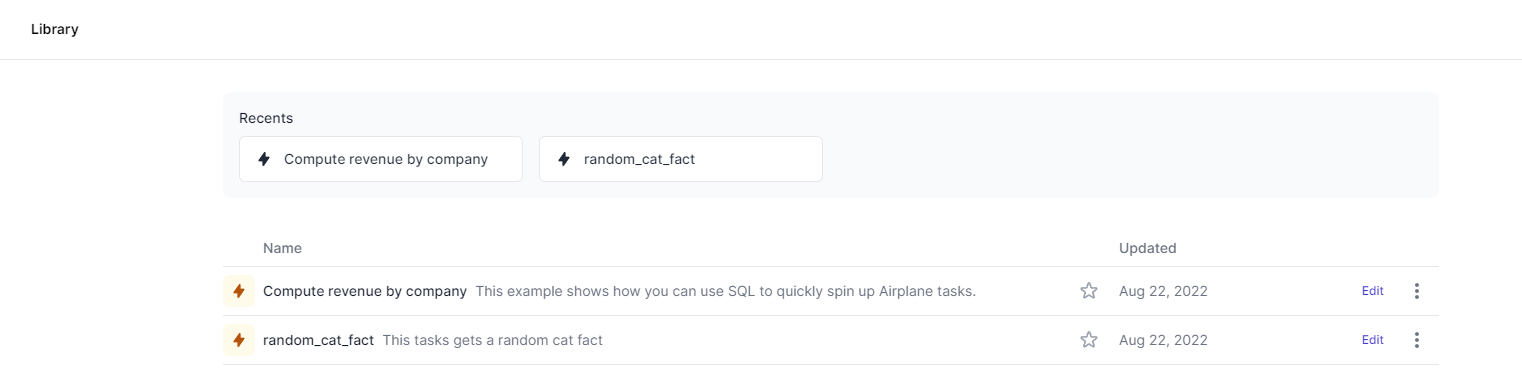
Now navigate to the Airplane library. We should see the task deployed:
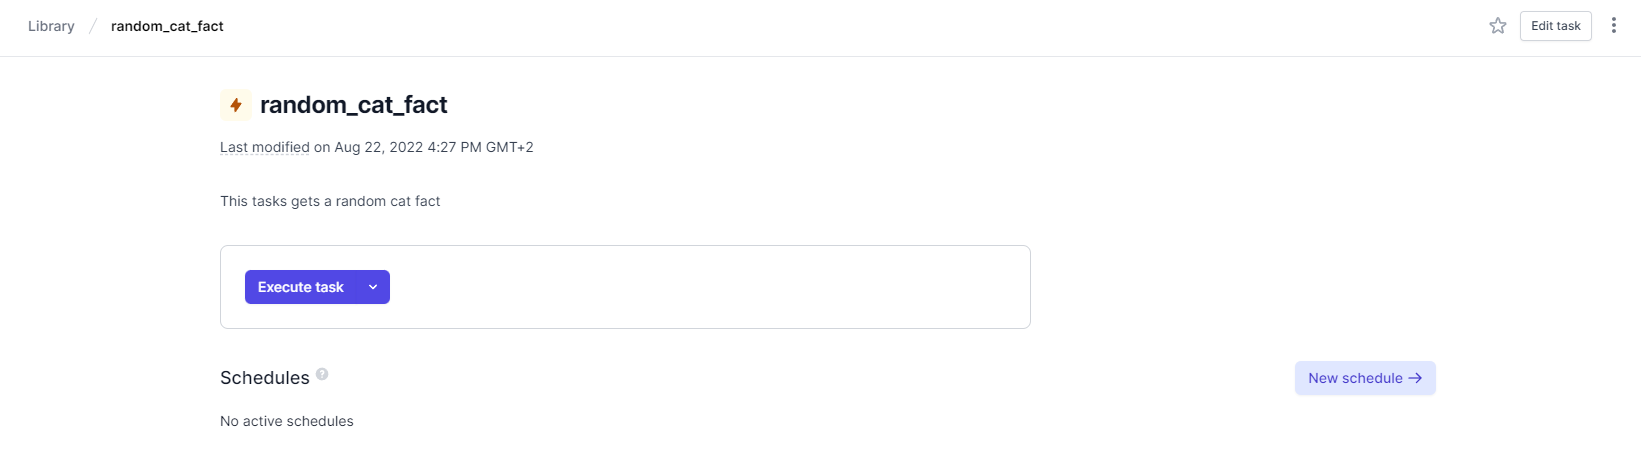
We can then select the task to open its details page. Click Execute task to run the task:
Execution is fast, and we get instant feedback on whether the task succeeded or failed.
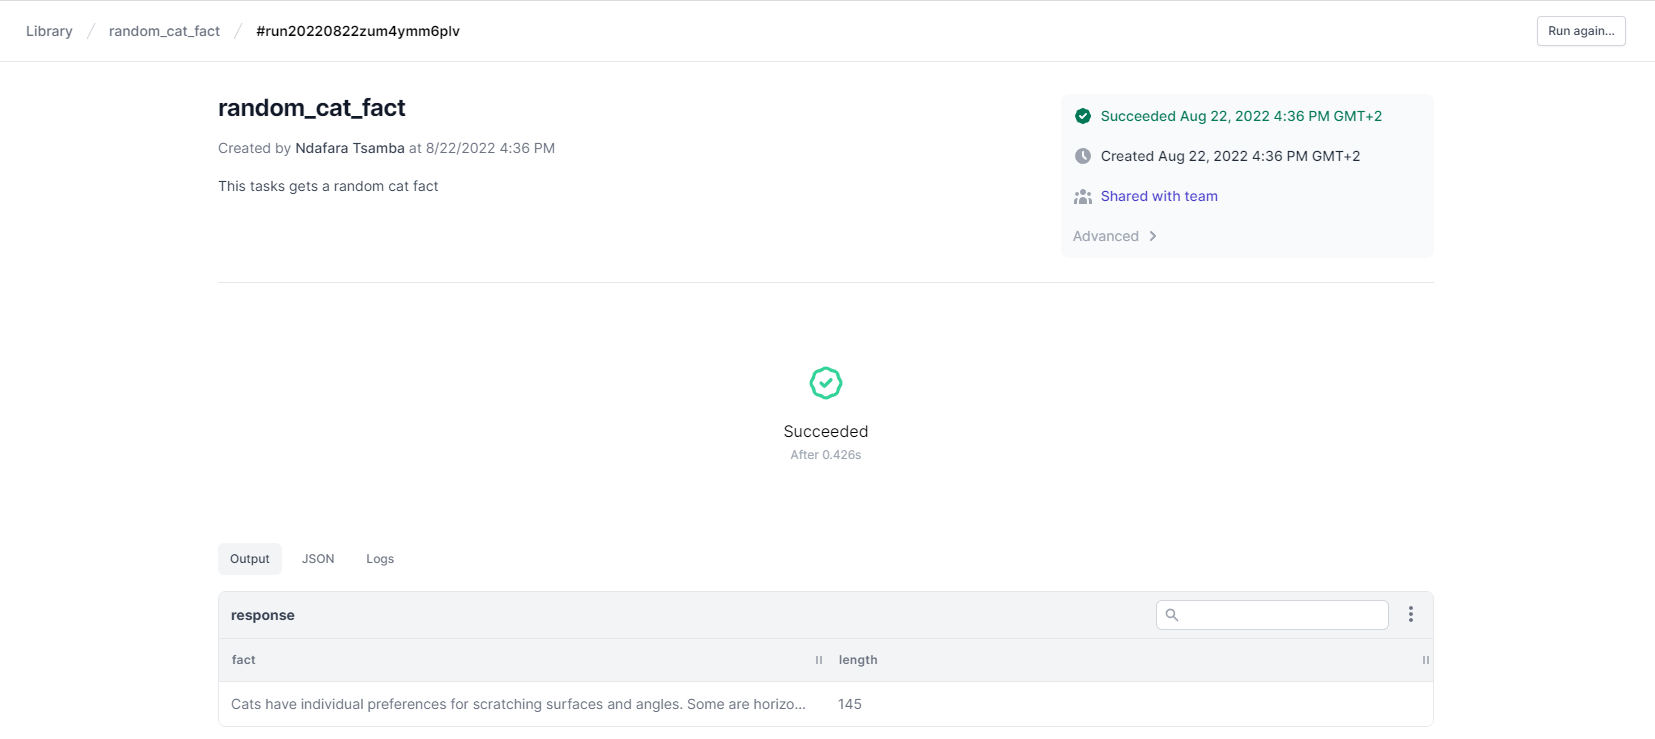
In this case, the task succeeded. The task also has a button to execute it again, so we can easily run the task multiple times.
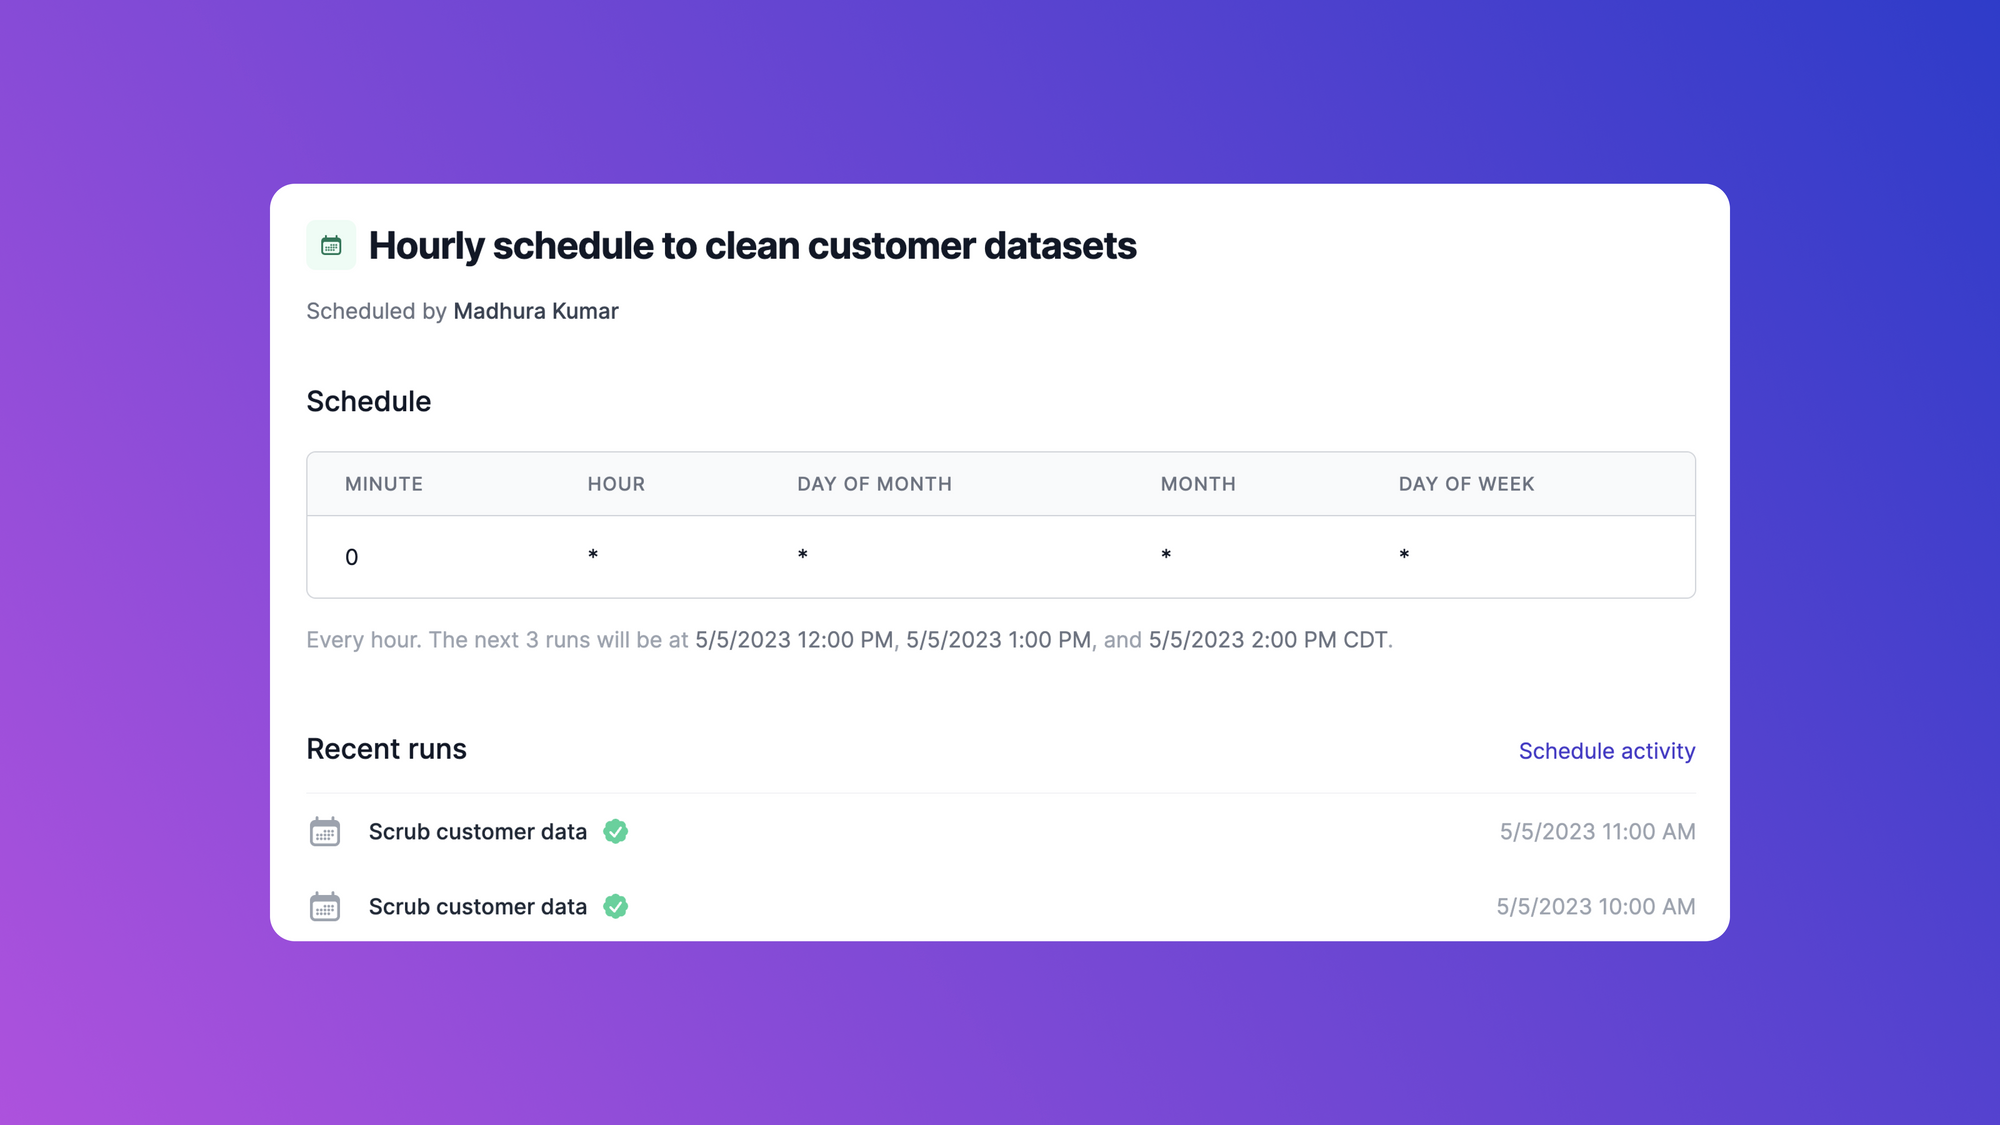
If we want the task to run at specified time intervals instead, we can easily create a schedule in Airplane. The schedule can be created using simple syntax or cron syntax:
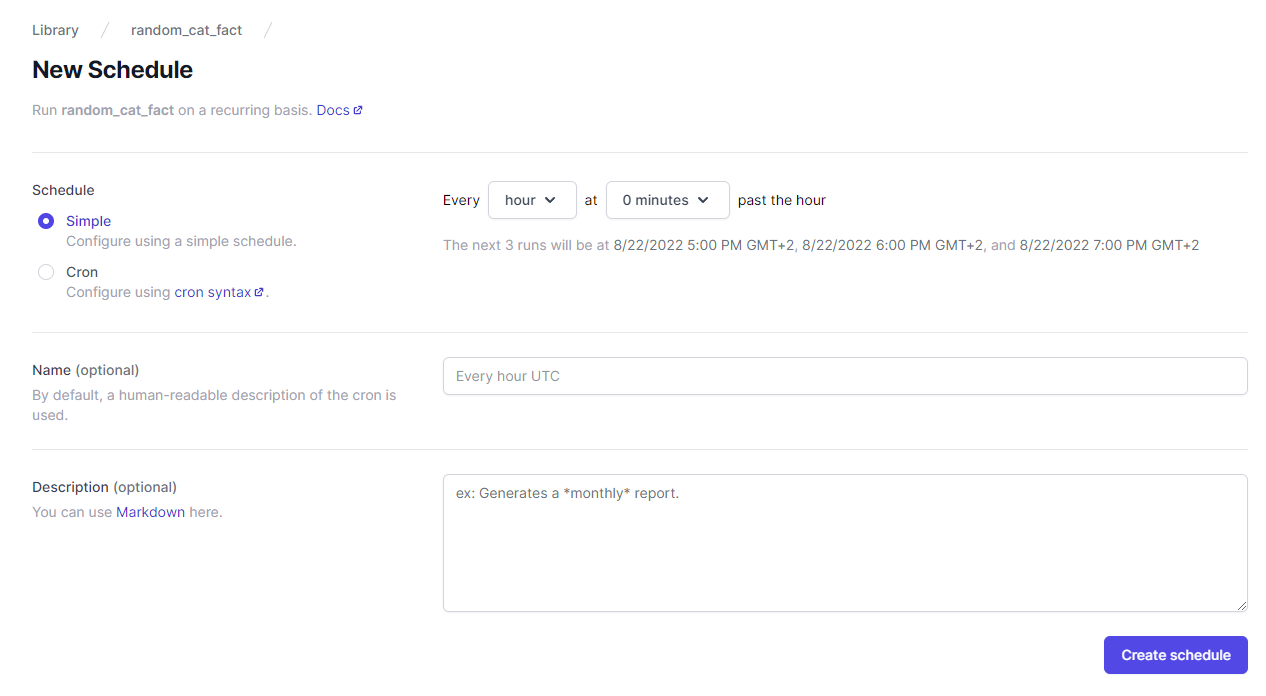
We can set the job schedule for when we would like it to run (e.g., Every hour at 15 minutes past the hour). Once that's been set, we can hit Create schedule and the task will then run at the specified time based on what we set.
And that's how to create a schedule using Airplane. To learn more about scheduling, check out our blog for content such as how to run scheduled tasks with node-cron, top batch schedulers, and how to start, stop, and restart cron jobs. You can also check out our schedule docs for more information.
To test out Airplane and schedule your first job in minutes, sign up for a free account or book a demo 👋. If you are at a startup that is series A or earlier with under 100 employees, check out our Airplane Startup Program for $10,000 in Airplane credits for a year.
Author: Ndafara Tsamba
Ndafara Tsamba is a software engineer turned self-taught data engineer and technical content creator. When he is not working or creating technical tutorials, Ndafara plays chess and Call of Duty mobile.


