

Cron is a job scheduling function that allows users to trigger specific tasks at designated times. It is a background process executing non-interactive jobs. A cron file contains commands to run periodically at specified times and these files are used to automate system backups, clear folders, send Slack notifications, and more.
Node-cron is a cron-like task scheduler for Node.js. It applies the same syntax rules as crontab for macOS and Linux, allowing users who are familiar with traditional cron jobs to start using it quickly without a large learning curve.
In this article, we'll explore using node-cron for scheduling jobs. We'll also walk through scheduling a job that sends user signup notifications to a Slack channel. We'll also introduce Airplane where you can schedule tasks securely for free.
Prerequisites
For this tutorial, ensure you have the following:
- A local Windows, Linux, or macOS environment
- Node.js version 16 or above
- Git Bash for Windows users to use Bash commands
- A Slack account that belongs to a workspace
To understand how node-cron works, let’s start by installing the node-cron library into a new Node.js application.
Creating a new Node.js application
From the terminal (open Git Bash if using Windows), run the following command to create a new directory named node-cron-demonstration:
Next, initiate a Node.js environment:
Now install the node-cron library using the following command:
Then, check the content of the package.json file:
The content of the package.json file should match what’s shown below. Note the added dependency for node-cron inside the dependencies block:
Now, create a new file named index.js to use as an entry point to the Node.js application:
Copy the following script to the index.js file and save it:
We are currently importing node-cron using import syntax, which is only allowed in an ES6 module. To run the index.js file as an ES module, we'll need to add "type": "module" inside the package.json file. The package.json file now should look like the following:
Scheduling tasks using node-cron
Next, let's schedule tasks using node-cron. The mandatory syntax for cron jobs has five values: minute, hour, day of month, month, and day of week. The syntax for the second value is optional:
To better understand how node-cron works, let’s explore its scheduling syntax in a simple example. Be sure to also check out our intro to cron content to learn more about scheduling syntax.
Let's say we want to print text at seconds 10, 12, and 14. To do so, we would write the following code in the index.js file:
We can run the above code by executing the following command:
Now, we should see the following result in the terminal output:

We can also run a task using a specific time zone:
The output should look like this:

We can use the validate function to confirm that the input for a cron job is valid:
If the input is valid, the value of validateCronJob variable will be true:

In the example below, the input is invalid:
In such cases, the value of validateCronJob will be false:

Notifying a Slack channel
Next, let's use node-cron to send daily notifications to a Slack channel. These notifications will inform our team members of the number of new users who have signed up for our hypothetical app.
Building a user management service
To build a user management service, we'll need a web server and a database. Let’s use lowdb as a simple JSON database and express as a web server.
To install lowdb and express dependencies, run the following commands:
Next, create an empty file named db.json in the project root folder that will act as a JSON database and populate it with the following:
This database stores a list of user fields, each containing information such as firstName, lastName, age, eyeColor, and createdTime.
To build the user management service, replace the existing content inside the index.js file with the following:
Here we create two APIs for signing up new user accounts and retrieving users:
With APIs to retrieve users, we provide the option to retrieve only users who have signed up today using the parameter date with the value today. We can also retrieve all existing users if no parameter is provided.
To bring up the service, run the following command:
Then, open another terminal (using Git Bash on Windows) and create a new user account using the sign-up API. In the example value, we are using createdTime as "2023-02-07".
Replace createdTime with today’s date value so that when the users who have signed up today are retrieved, we will get this created user.
Run the following curl command to get users that have been created today:
We should see the following:
Sending notifications to Slack
To send a notification message to Slack programmatically, we'll need to create a Slack application. Then we'll need a Slack token belonging to the Slack application, specifically one with permission to write messages to the Slack channel.
After successfully signing into Slack, click on Create New App on the Slack application page.

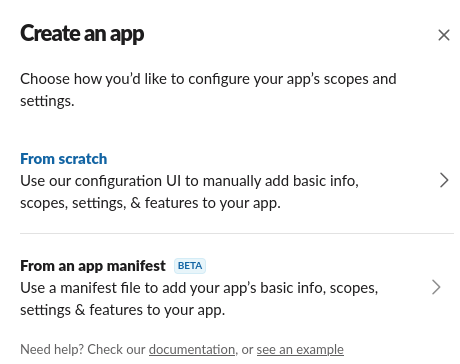
Once you’ve clicked Create New App, choose From scratch.
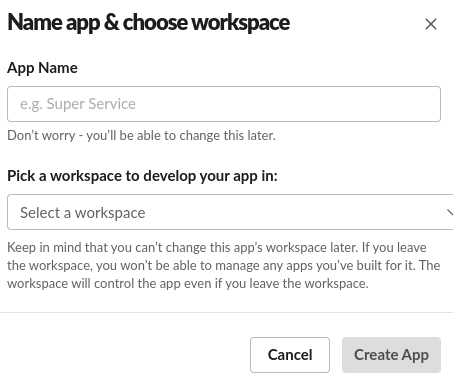
Set the application name to “Demo App.” Then, choose the workspace from the dropdown menu labeled Pick a workspace to develop your app in and click Create app.
Choose OAuth & Permissions on the sidebar. Scroll down the page to the Scopes section for the Bot token of the “Demo App”:
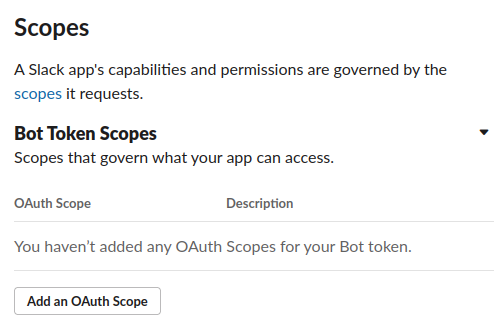
Click Add an OAuth Scope under Bot Token Scopes. Search for “chat:write” and “chat:write.public”, then add these two scopes to the Bot token scopes. These scopes will allow the app to send messages to channels in which the app is a member, or send messages to public channels in which the app is not a member.
We need to then install the OAuth Tokens for the Workspace to apply the scope changes of the Bot token to the workspace. To do that, scroll up to the top of the page, and click on Install to Workspace. We should see a notification page that provides changes that will be applied to the workspace.
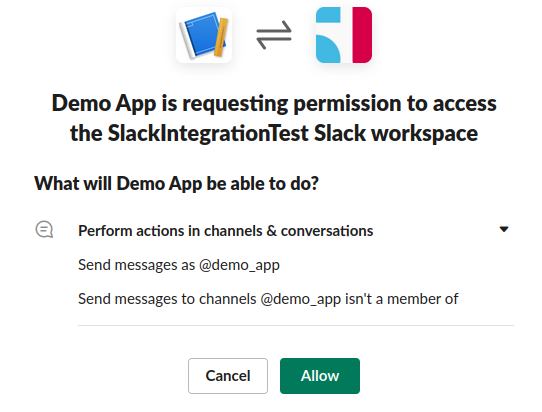
Click Allow to apply the changes.
The changes are now applied. Copy the Bot User OAuth Token to use later for sending messages to the Slack channel.
To send notifications to a Slack channel, we must have the Slack channel ID. Visit the new public channel on Slack to view the channel details. Copy the channel ID from the bottom of the page.
Now, return to the project code folder. Let's now install the @slack/web-api dependency to interact with the Slack API. Let's also install node-fetch, an HTTP client dependency, to make HTTP requests that retrieve the number of users that signed up today.
Run the following commands to install these dependencies:
Next, add the following code to import these two dependencies into the index.js page:
Then, copy the following code to the bottom of the index.js page:
Define a function named notifySlack to send a message to a Slack channel and a function named getNewUsersRegisteredToday to retrieve signed-up users from today. The cron job is set to send notifications to the Slack channel every minute using '*****' cron syntax.
To send notifications to Slack, we must add environment variables for SLACK_BOT_TOKEN and SLACK_CHANNEL_ID. To do that, run the following commands and replace the values of these variables with the actual ones:
Then run the following command to run the index.js file again:
After completing the above, we should now see a notification sent to the Slack channel every minute with the following message: “There are X users registered today.”
And that's how to use node-cron to schedule jobs to run at certain intervals. Node-cron is a convenient way to schedule basic and straightforward tasks, whether it's setting up Slack notifications, backing up application databases, or cleaning up test reports. But it becomes limiting if there are a large number of tasks that need to be scheduled - implementing code using node-cron can be tedious and difficult to manage.
Airplane: A better way to schedule tasks reliably
A better alternative to scheduling tasks exists using Airplane. Airplane is a developer platform that allows users to transform scripts, queries, and more into powerful tasks and UIs within minutes using code. The basic building blocks of Airplane are tasks, which are single or multi-step functions that anyone on your team can use. Airplane also offers Views, which allow users to build custom UIs within minutes.
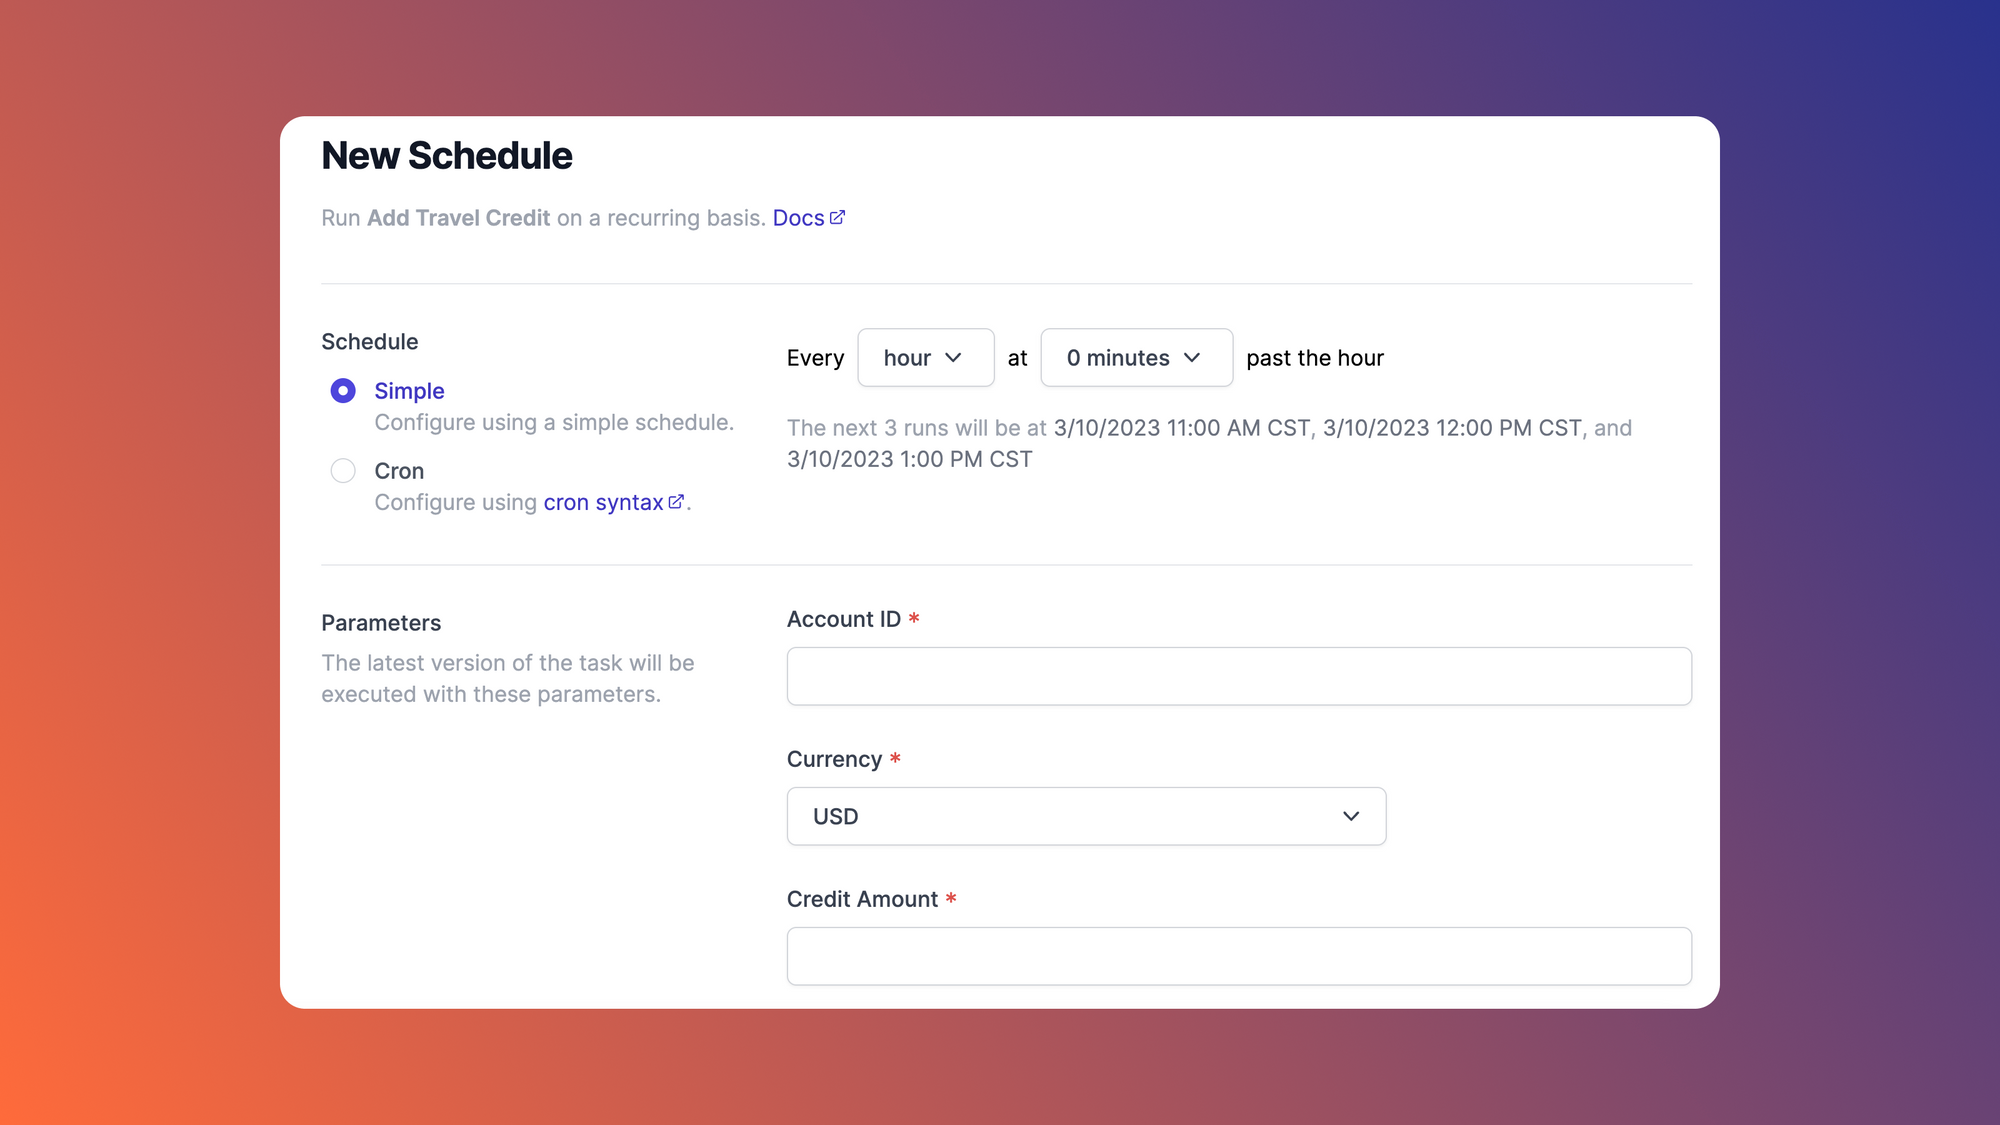
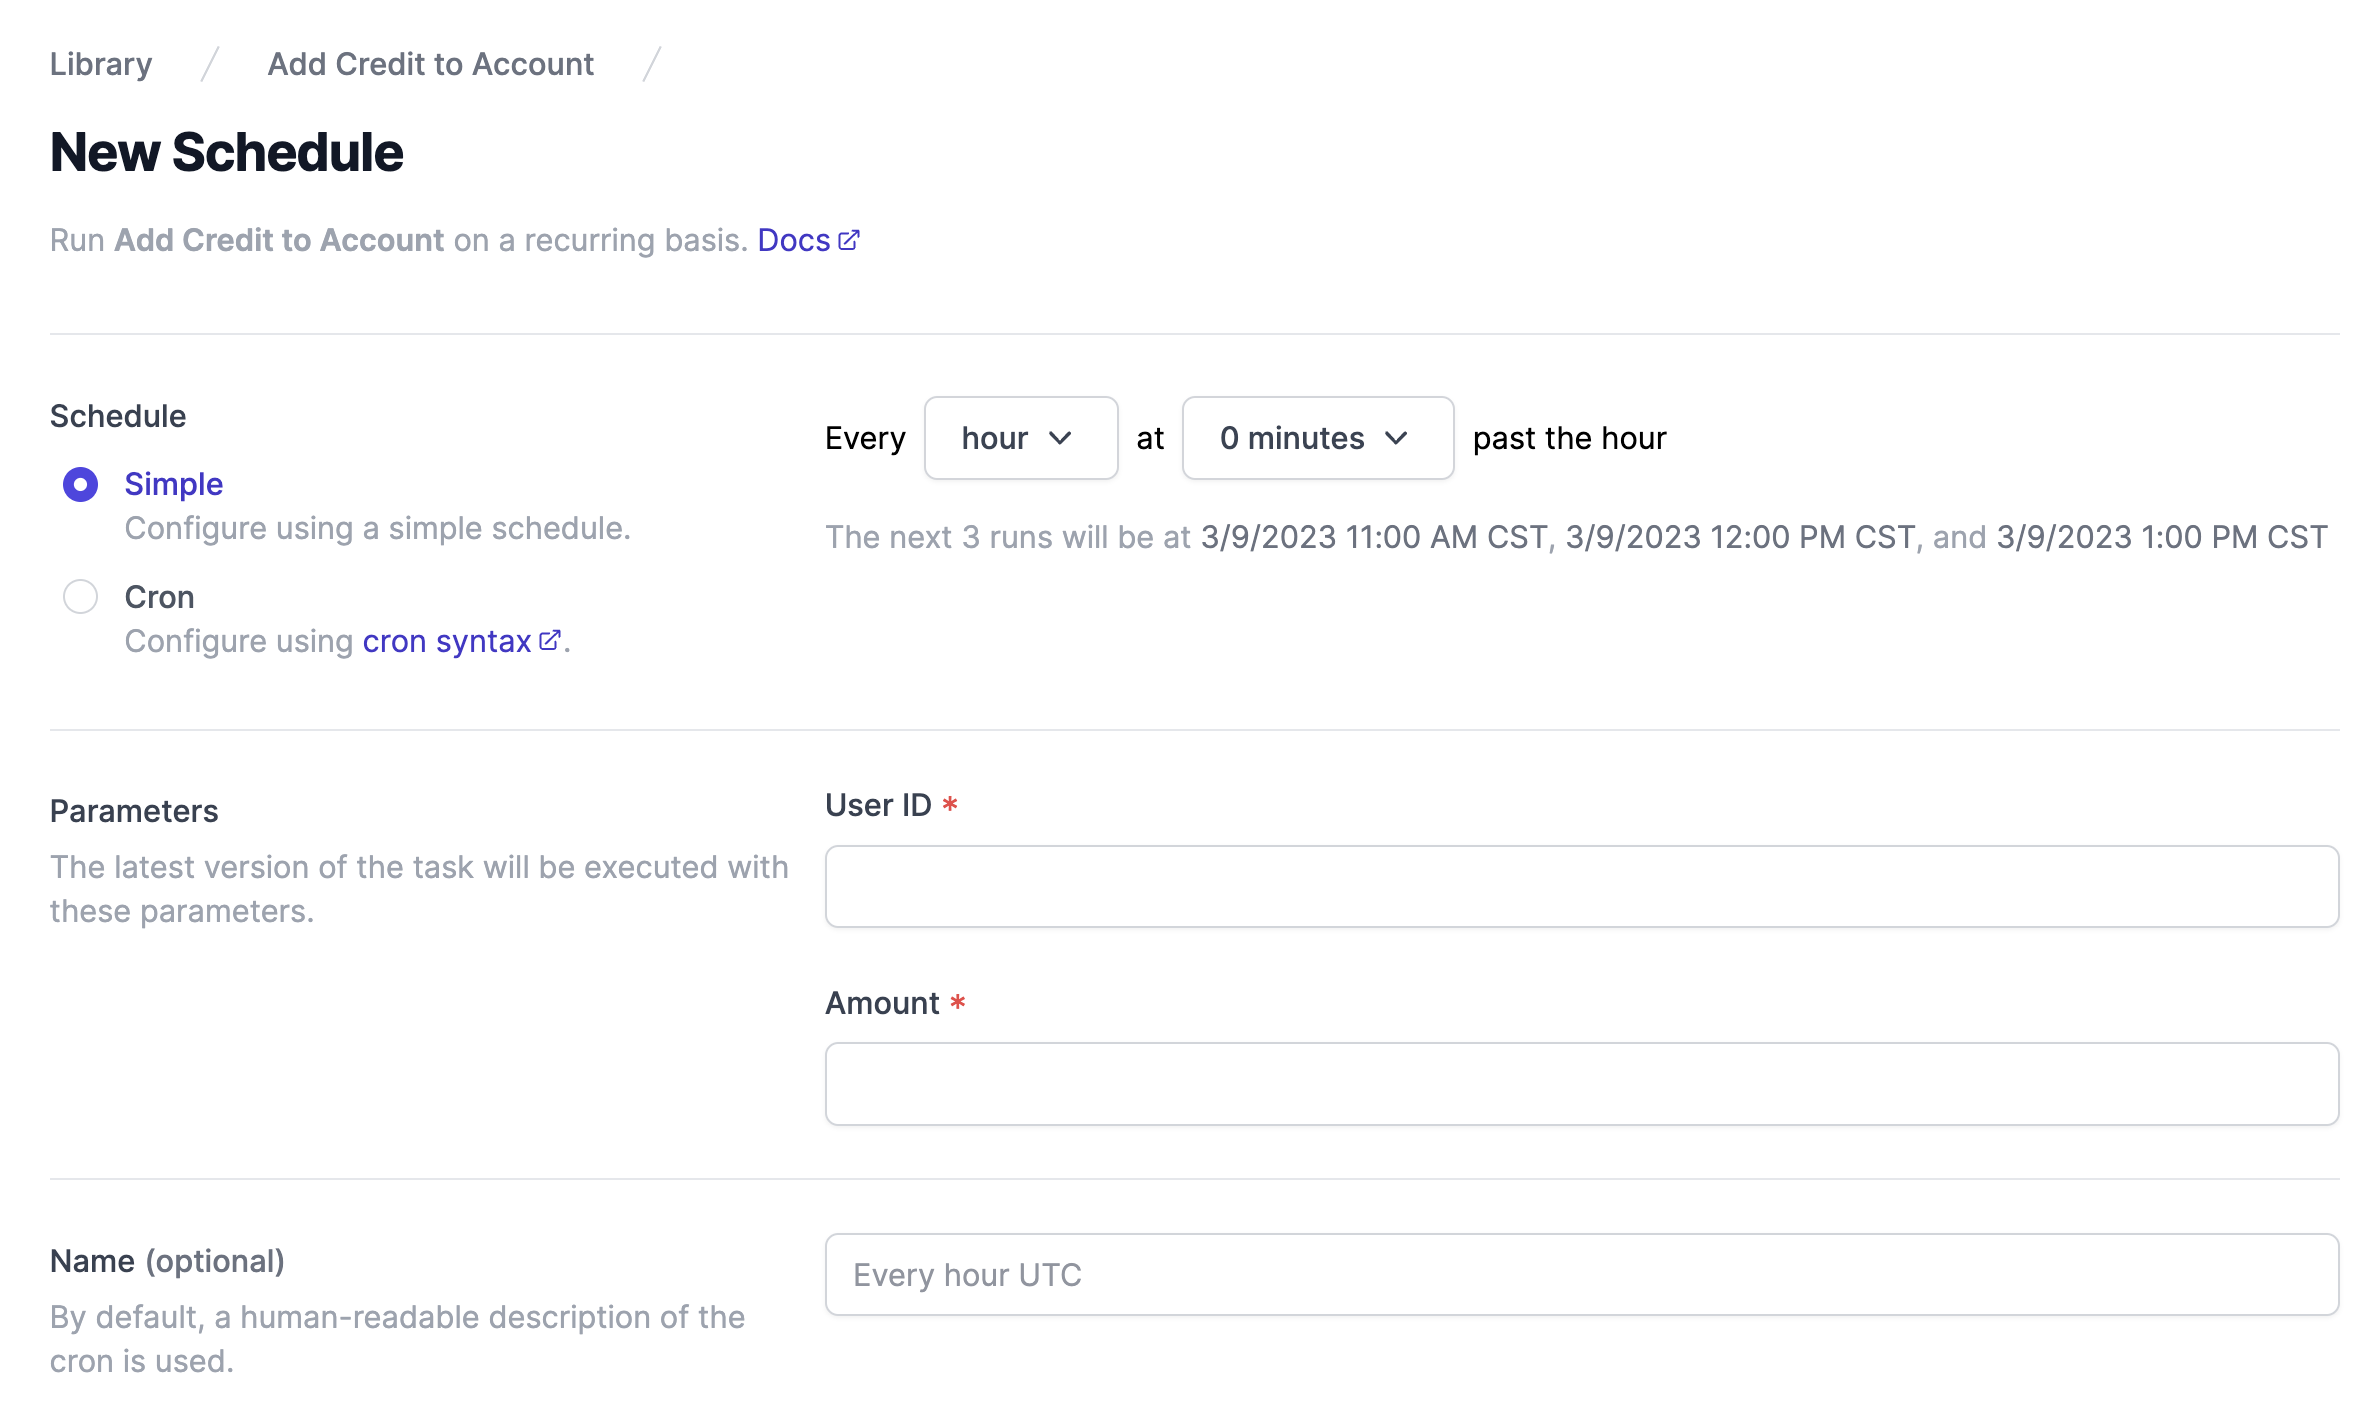
Airplane Schedules provides users with serverless, maintenance-free job scheduling capabilities, making it easy to schedule and manage tasks reliably. Airplane also provides powerful built-ins, such as audit logs and automatic error notifications. These built-ins make it simple for users to track their schedules and ensure they are being executed correctly.
To learn more about job scheduling, check out the Airplane blog for more content such as mastering Kubernetes CronJobs, 6+ cron alternatives, how to start, stop and restart cron jobs, and more.
To try out Airplane yourself and schedule tasks reliably within minutes, sign up for a free account or book a demo. If you are at a startup that is series A or earlier with under 100 employees, check out our Airplane Startup Program for $10,000 in Airplane credits for a year.


