When you’re starting to build your next API project, you’ll inevitably need to make some decisions about infrastructure and where you’re going to deploy the API once it’s completed. Traditionally, this meant spinning up an always-running server, deploying your code to it, having to make sure it didn’t get overloaded with API requests and being willing to accept that it might be running even when it’s not needed.
Because usage can come in bursts, a server with a fixed amount of capacity isn’t always the best choice for hosting an API. In this article we’ll take a look at how a serverless architecture can make your next API project more performant and specifically how to utilize AWS Lambda to build your next API.
Understanding serverless architecture
Despite the name, a serverless architecture doesn’t mean that there are no servers involved. Rather, it just means that servers are utilized differently and that the end user isn’t responsible for the provision, maintenance or upkeep of the servers at work in their infrastructure. There are three core concepts that distinguish a serverless architecture from a more traditional server-based approach:
- Functions: At the core of any serverless architecture are functions. Functions are small, self-contained blocks of code that perform specific tasks or operations. They can be written in most any language (especially with the advent of AWS Lambda layers) but it’s important that they are stateless and event-driven. Because each request is invoked separately, functions don’t have the benefit of sharing state from previous runs (unless a database or some other storage mechanism is involved). This means each serverless function you create should be stateless and able to be evoked in response to an event.
- Events: Actions or changes within the system or external environment that cause functions to run are known as events. Events can be many different things such as HTTP requests, database modifications, messages from queues, or scheduled tasks. Ultimately, deciding which events are important to your system will dictate how you build your various serverless functions. In our specific case of creating an API, HTTP requests will be the types of events that are important.
- Triggers: Triggers act as bridges between events and functions. They listen for specific events and invoke the corresponding functions when an event occurs. Triggers are responsible for mapping events to the appropriate functions. In our example, we’ll largely be concerned with triggers that listen for API requests and trigger our function as a result.
By combining functions, events, and triggers, serverless architecture enables building applications that automatically scale, require less development time to operate, and only incur costs when functions are executed. This event-driven, function-as-a-service paradigm promotes rapid development, flexibility, and resource efficiency, making it a great choice for building your next API.
Building an API endpoint in AWS Lambda
Now that we have discussed some of the advantages of a serverless architecture, we can take a look at how to put these principles into place by building an AWS Lambda function that returns data in response to an HTTP request.
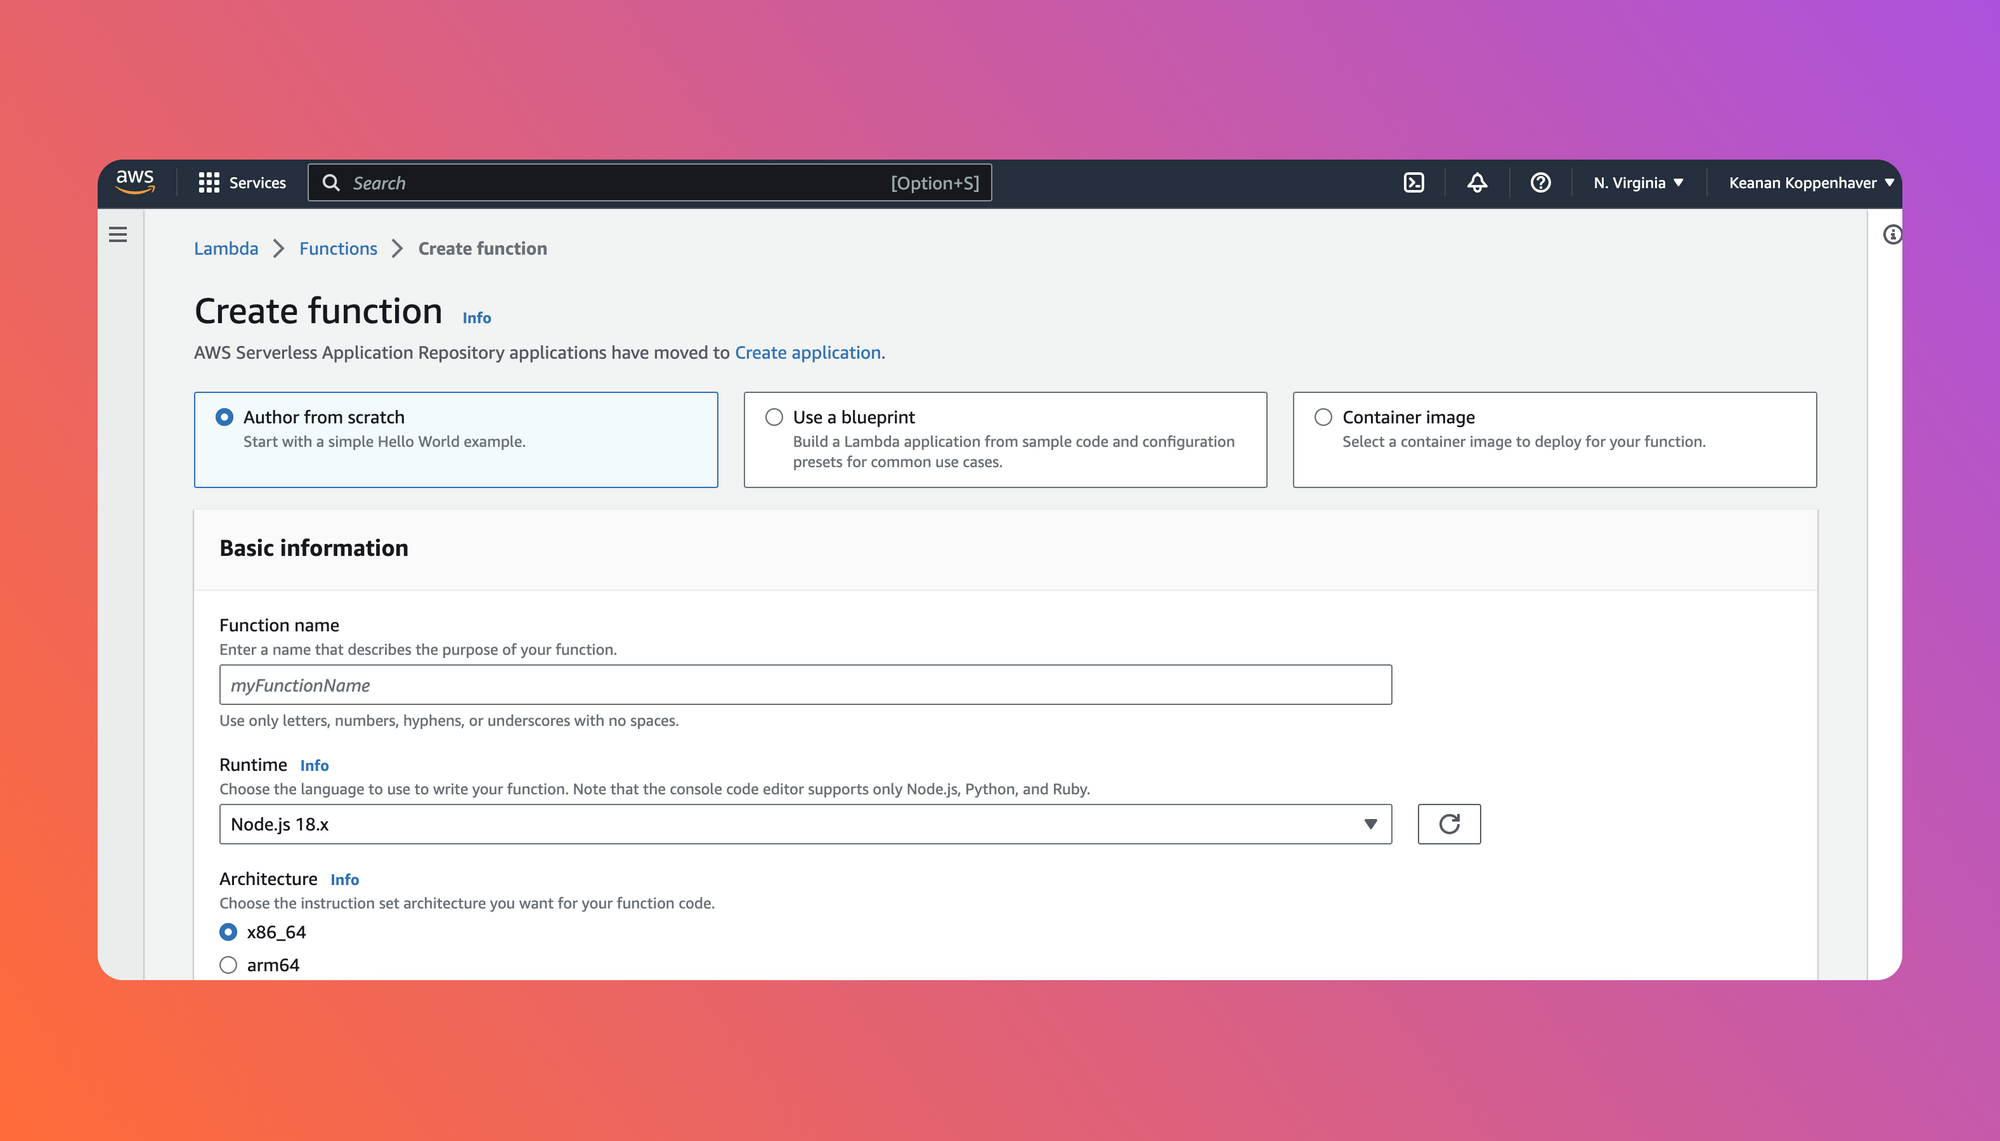
To get started, you’ll need to sign up for an Amazon account if you don’t already have one. Next, log into the AWS Console and navigate to the Lambda section. Once there, click on Create function in the top right.
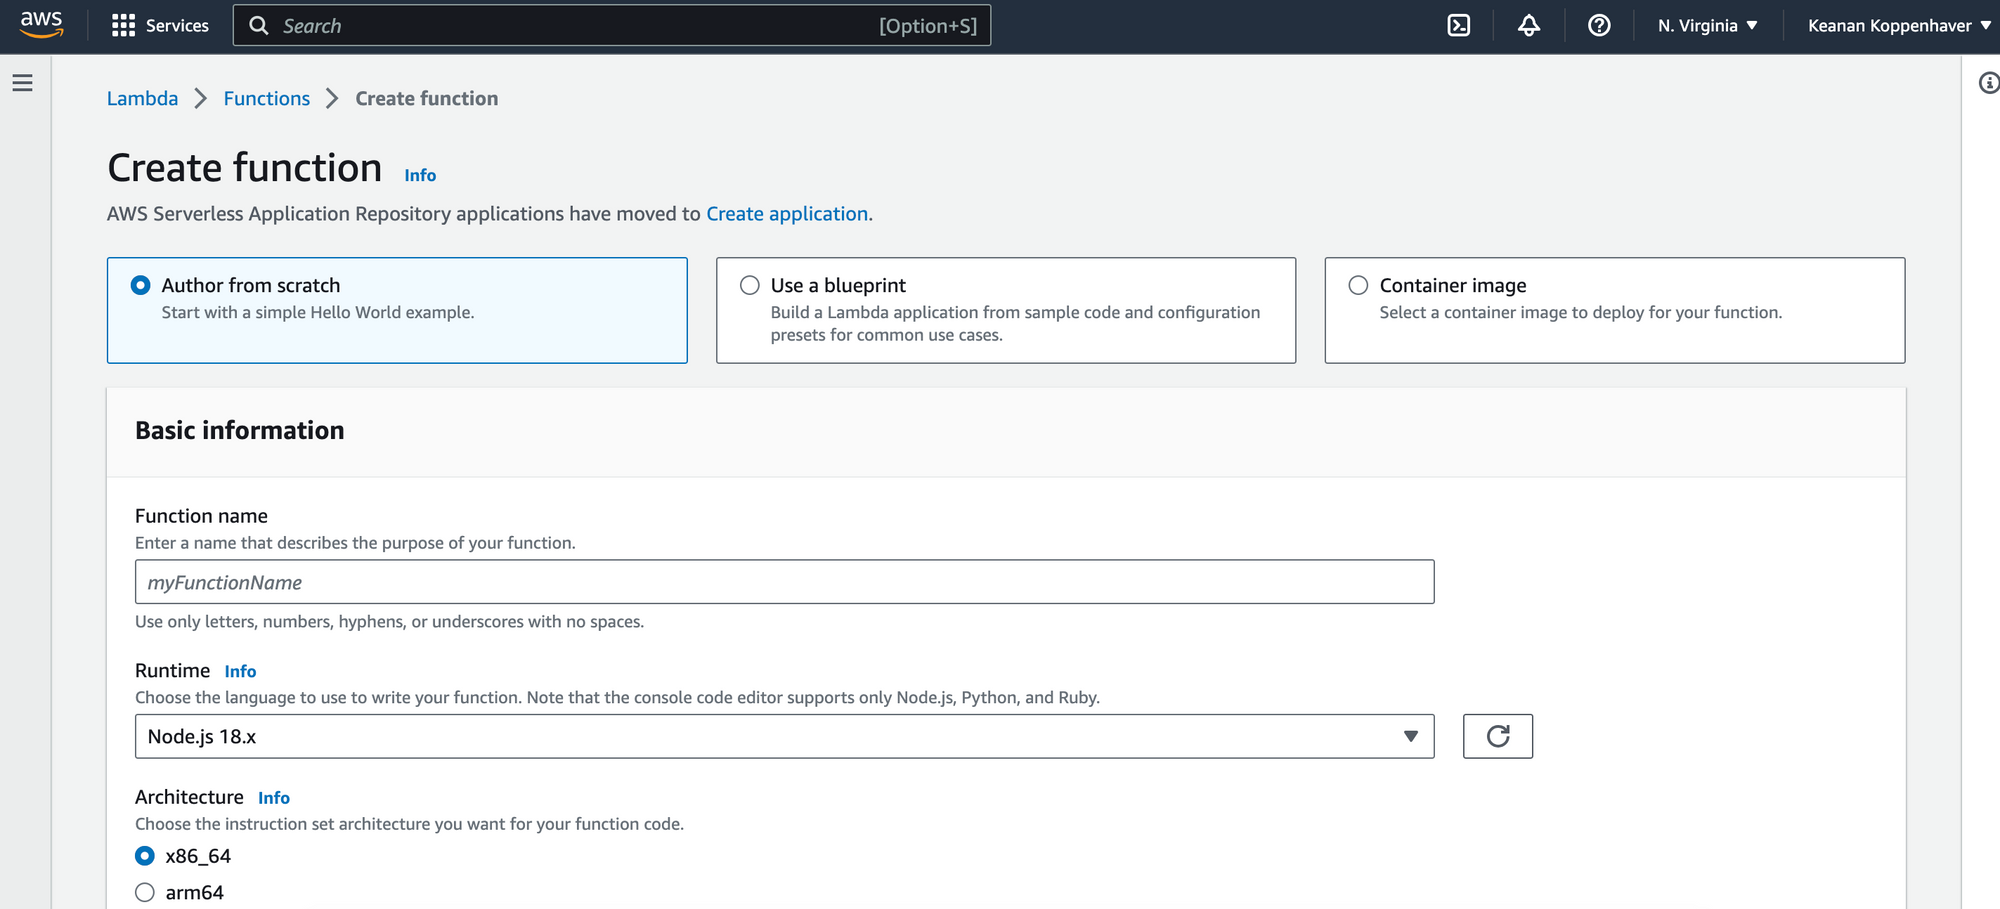
You’ll be presented with a few options, most of which you can leave as default. Make sure to give your function a name that describes what it’s going to do and then pick a runtime depending on which language you want to use to write the code for your function. In our example, we’ll be using Node.js version 18.x.
Configuring a function URL
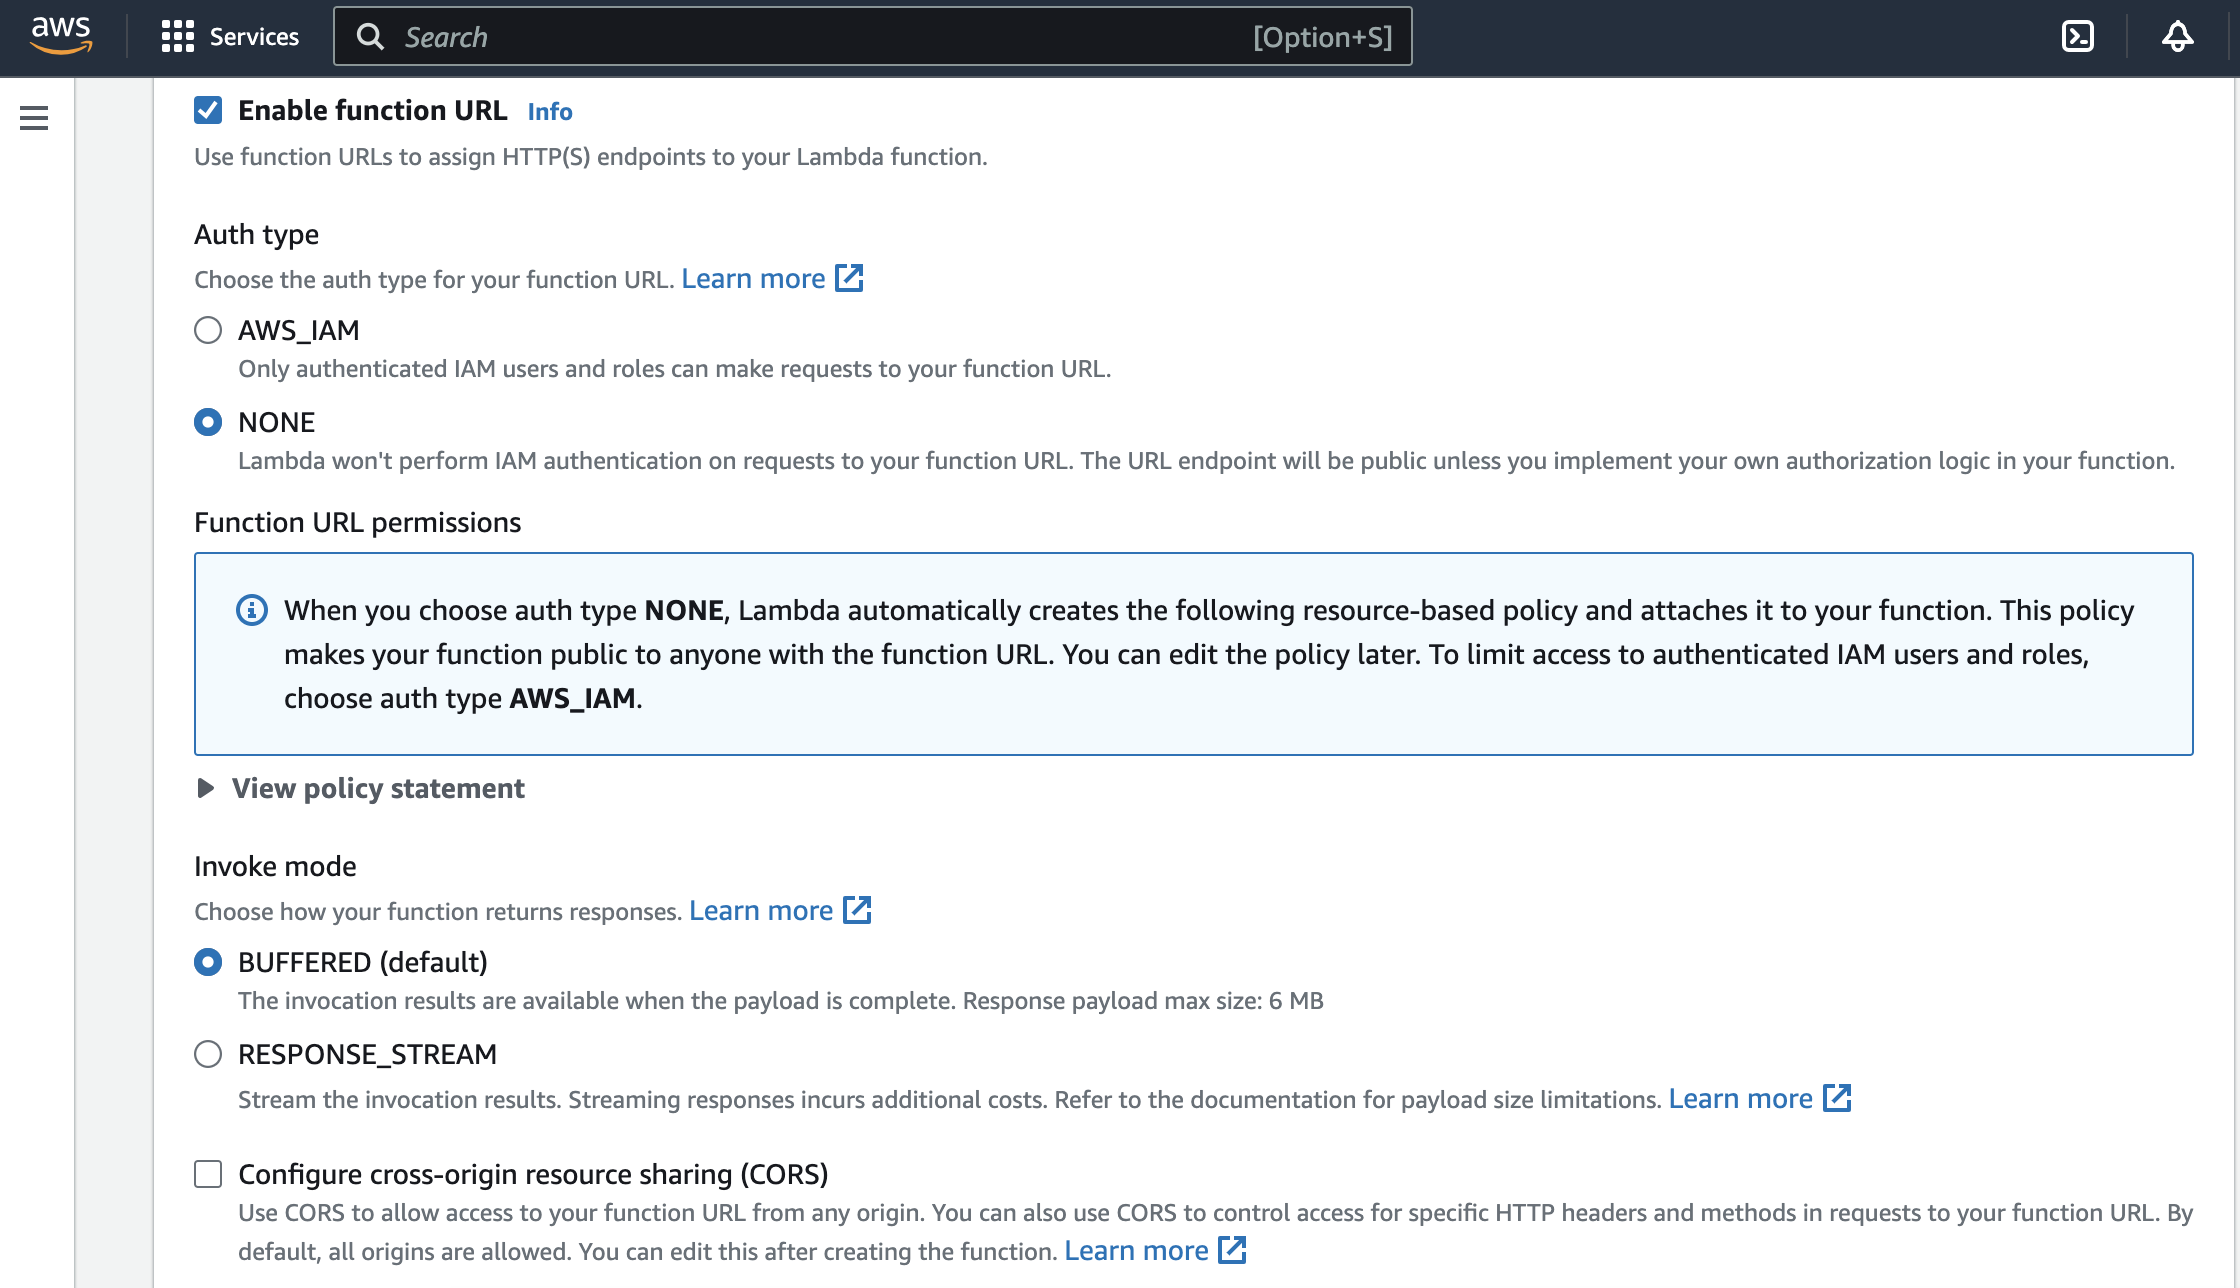
This is where using AWS Lambda to create our API really simplifies things. Under Advanced settings, choose the option to Enable function URL. Making sure this option is checked means that we’ll get an API endpoint assigned to our new function out of the box with very little additional configuration necessary.
Once you check this option, we’ll need to make a couple more configuration choices. We can leave Auth type as None for now (but if you’re building a production API endpoint that you don’t want exposed publicly, you’ll want to set up some additional authentication here). And if you need CORS support, make sure to check that box as well.
Once you have configured all these settings, click Create function at the very bottom of the screen to finish setting up your function.
Building our API endpoint
For a very basic example, we’ll create a Lambda function that returns the current date and time when anyone accesses our newly-created API endpoint. On the main screen for our new Lambda function, you’ll see a section titled Function URL. This is the URL we’ll use to invoke our function later, so it’s important to note. If we scroll down a bit further, we can see the boilerplate code that currently exists for our Lambda function:
We can double check this by loading up our Function URL in a browser and seeing that we get the same message.

Now, to make this a bit more useful and finish out our example, let’s modify our Lambda function’s code to show the current date and time.
Make sure to click the Deploy button to actually save your changes. Once you do that, refresh your Function URL in your browser and you should see the current date and time displayed!
Monitoring and logging
Now that we’ve successfully created our first API endpoint, we should also find a way to make sure it’s performing as expected and not returning any errors. On the same page where we edited the code for our function, there’s also a tab called Monitor which is very useful for keeping an eye on our Lambda function. Within this tab, there are two important sections:
- Metrics: The Metrics view lets us see a few different graphs that show the number of times your function was invoked, how long it ran for and if there were any errors. It is a very useful view for getting a high-level overview of how our function is performing.
- Logs: The other important section of the
Monitorview is Logs. This section allows us to drill down into a specific function invocation and see more detailed information about a particular run of our function. If you start seeing errors on the Metrics screen and want to see the exact error message that resulted from a function run, use this view.
Using Airplane as a serverless platform for your next API project
A serverless architecture, and AWS Lambda’s implementation of serverless in general, can be a great fit for your next API project. However, if you’re looking for a serverless platform with a bit more out of the box functionality that’s also simpler to use than AWS Lambda, consider Airplane.
Out of the box, Airplane supports NodeJS and Python functions (just like AWS Lambda), but it’s also more than just functions. With Airplane, you can execute your functions on a schedule, turn database queries and scripts into powerful internal tools and even create custom React-based UIs on top of the tools you build. And with the release of Airplane’s webhooks feature, you can now invoke your tasks any time you need them, from any of your other tools or applications.
If you’re ready for a simpler way to build serverless functions, sign up for a free account or book a demo.