When developing and deploying code on AWS’ serverless Lambda platform, you might find that you need to include additional code, input files or training data, configuration files and more. However, because each instance of an AWS Lambda function is just that, a function, there’s no way to do this without an additional solution. That’s where Lambda layers come in.
A Lambda Layer is a .zip file that allows you to deploy additional code or data to be used with your Lambda function. Each layer can be specific to one function or shared across functions.
In this article, we’ll take a look at when Lambda layers can be useful and how to build and deploy one yourself.
What are Lambda layers?
At their core, Lambda layers are a zip file containing anything and everything your Lambda functions need to run outside of the environment already configured by AWS. This means you can:
- Configure a runtime not supported out of the box, like PHP
- Include dependencies that you can share across Lambda functions, like Pandas and Numpy in Python
- Share a single helper function that you created across multiple Lambda functions instead of having to rewrite it every time
- Reduce the file size of your main Lambda deployment to stay under the maximum size limit imposed by AWS
In its final form, a layer in Lambda is just a .zip file containing all of the files necessary to accomplish your goal, whether that’s npm libraries, a completely custom runtime or a single function that you’ve created.
If you’re encountering one of the situations described above and are ready to create your first Lambda layer, let’s take a look at how you can do that.
How to build a simple Lambda function
For this example, let’s assume you want to build a Node.js Lambda function that checks whether a particular email is valid. To do this, we’ll use the Validator npm package. This is the npm package we’ll eventually build into a layer, but we need to create our Lambda function first.
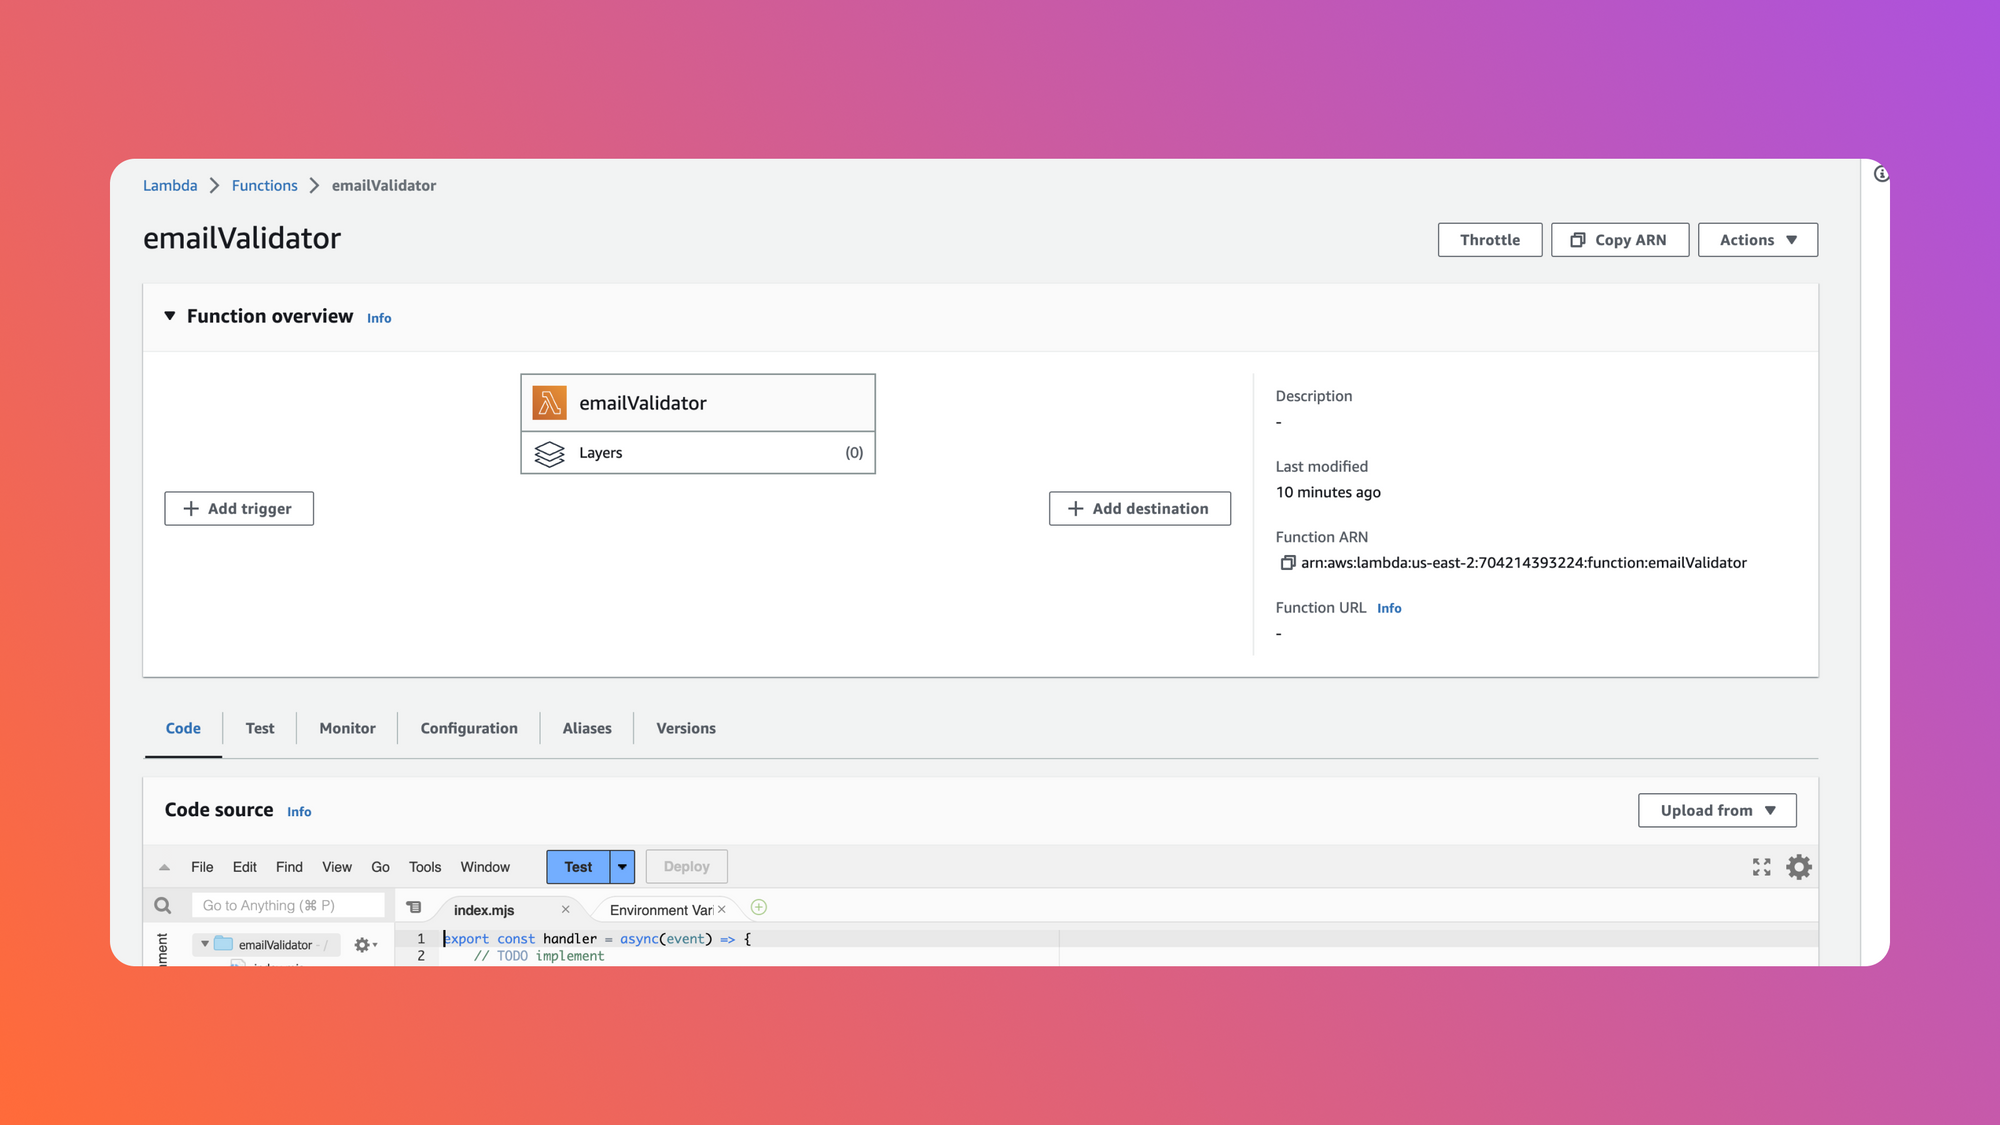
To get started, log in to your AWS Console and navigate to the Lambda section. Click on Create function in the top right and choose Node.js as your runtime. After AWS creates this function for you, you should have a function that looks like this:
To test this function, click the blue Test button and configure your test data as follows:
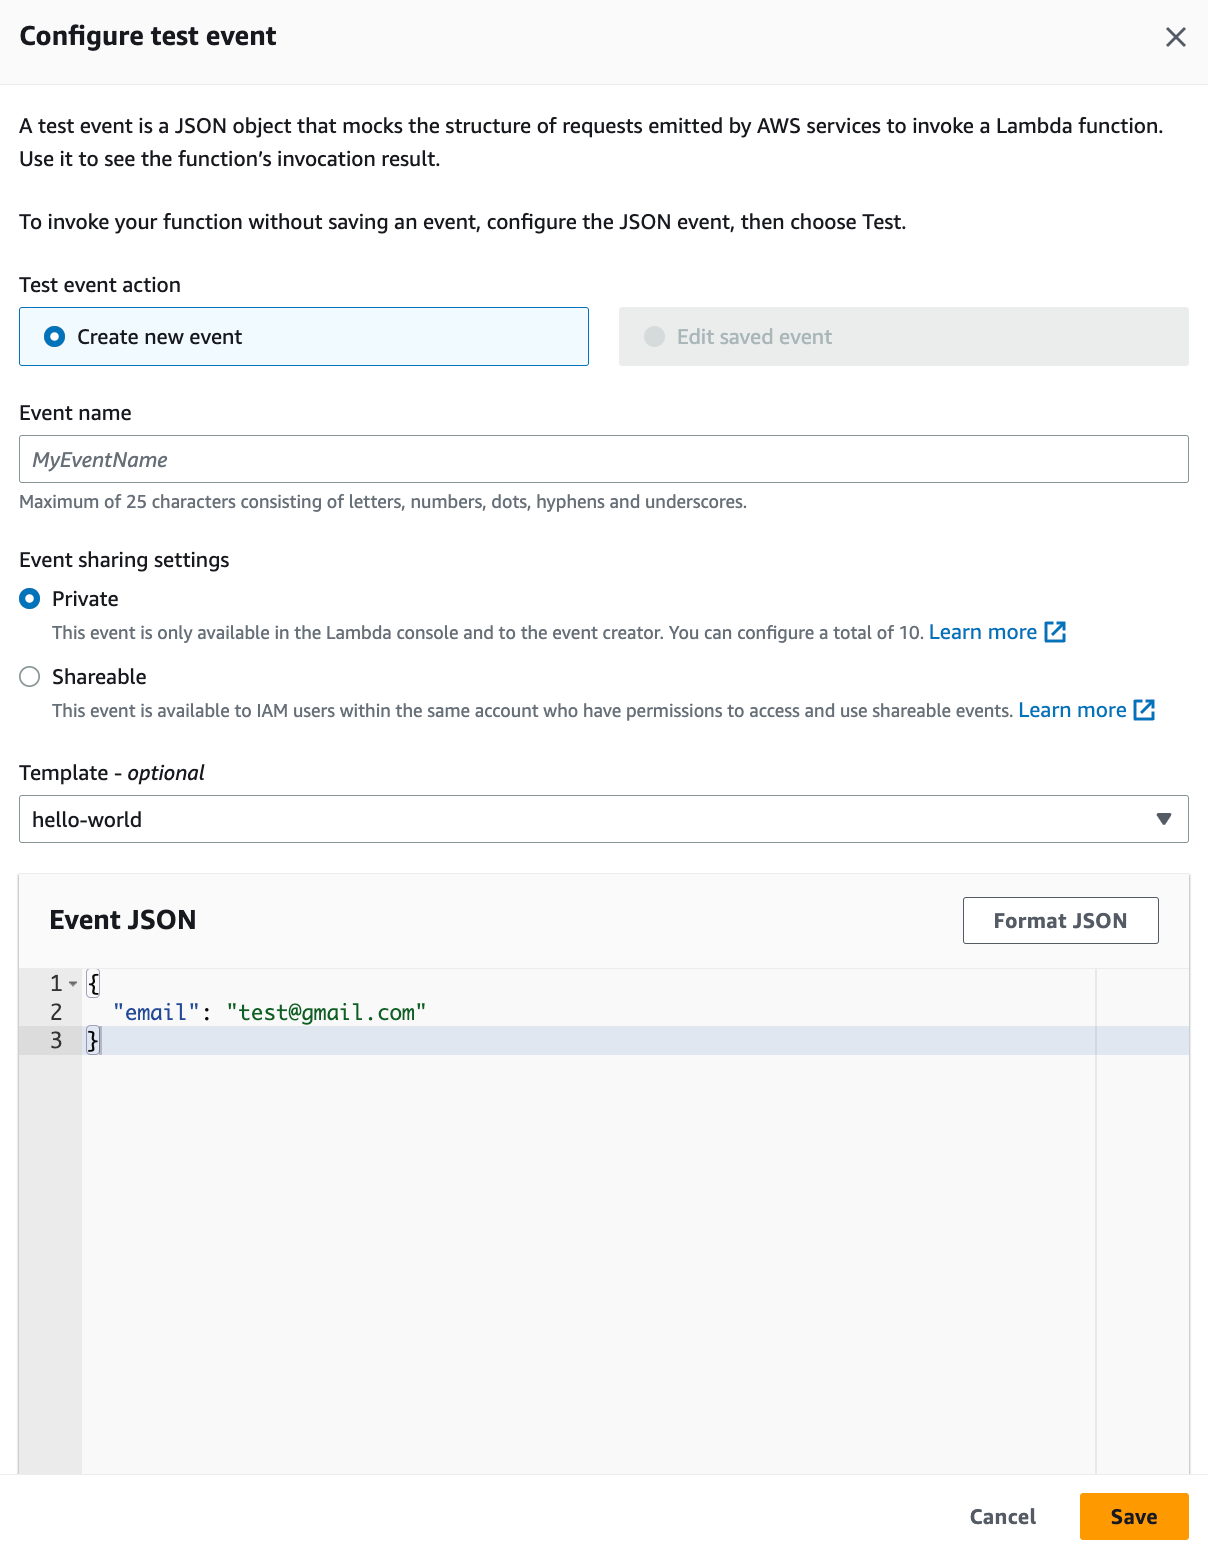
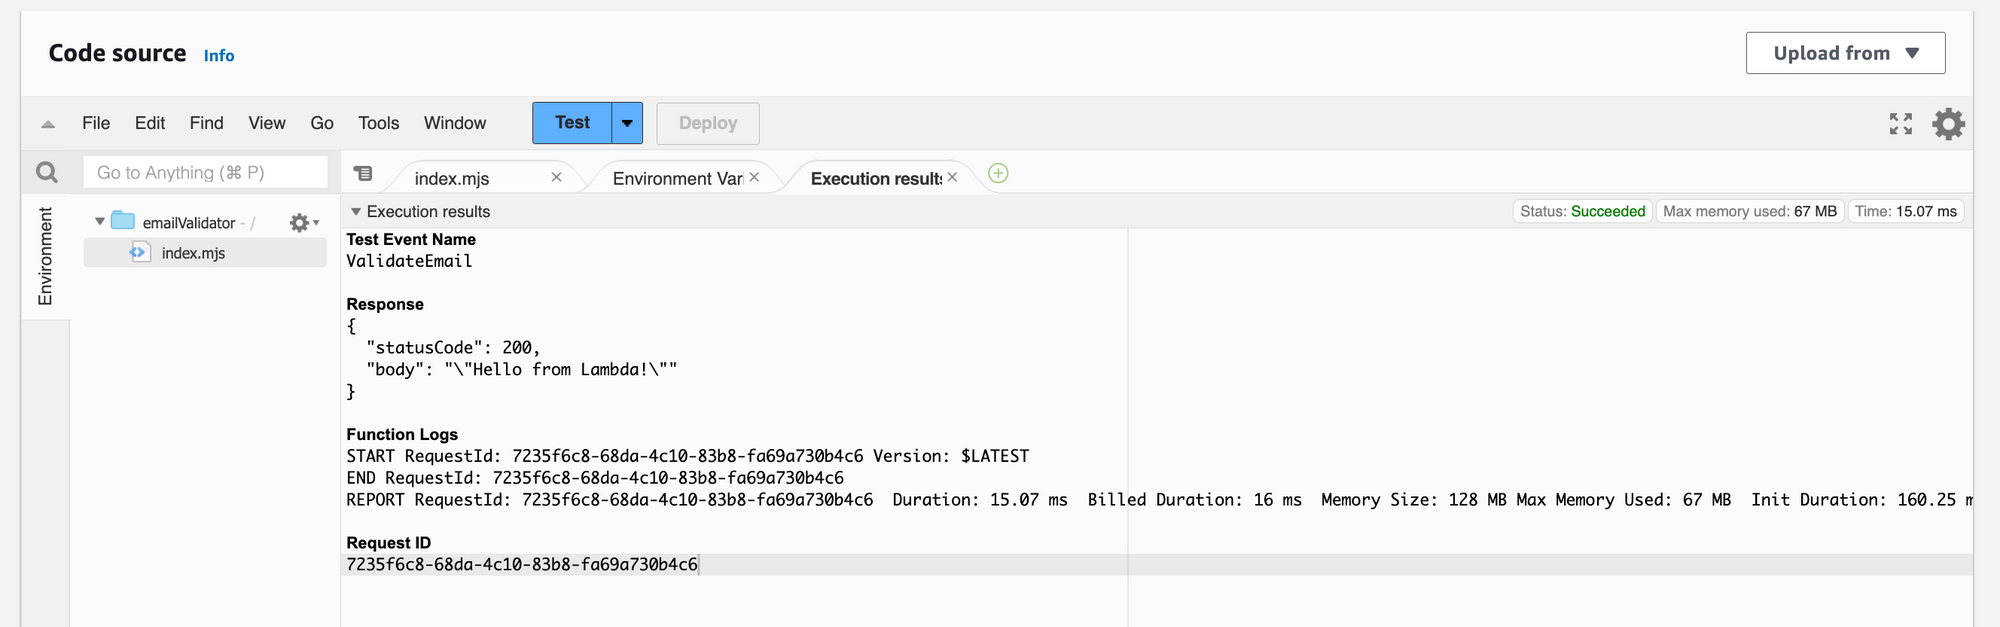
Our Lambda function doesn’t actually accept any input yet, but by configuring the Event JSON like this, we’ll be ready to go later when we do have code that tests an email in here. After saving this information and clicking on Test again, you should see that the function returned successfully.
To update our function so that it actually checks whether the email we’re passing in is valid, we could modify the function code to look like this:
This function will now return true if the provided email is valid or false if it’s not. There’s just one problem: the validator library isn’t included in the default NodeJS runtime. If you run this Lambda function, you’ll receive the error: Cannot find package 'validator' imported from /var/task/index.mjs. That’s where Lambda layers come in.
Creating a Lambda layer
To get around the problem of validator not being accessible inside our Lambda function, we’ll include it in a layer. Since layers are just .zipfiles, we can create one on our local machine and upload it to AWS through the console.
First, we need to create a folder for our layer to exist in with a nested nodejs folder where we can install any dependencies:
If you are installing dependencies for a different runtime, make sure to use the correct directory path for the runtime you are building for.
Once you are in this directory, you can run npm install validator to install the validator package. After the installation completes, you should see the validator package inside a newly-created node_modules directory.
Create a .zip file from your original validator-layer directory and your layer will be ready to upload to AWS Lambda.
Deploying your Lambda layer
Now that you have the .zip file for your layer, you can deploy it directly to your Lambda function through the Layers portion of the function UI. Navigating to the [Layers page](https://console.aws.amazon.com/lambda/home#/layers) of the AWS console will allow you to create a new layer. Specify that your layer is configured for NodeJS, give it a name, and upload your created ZIP file. Once your upload is complete, make sure to take note of the ARN in the top right corner, as we’ll need that to associate our new layer with our Lambda function.
Back in the main Lambda function interface, you can now click on Layers to add the newly-uploaded layer to this Lambda function.
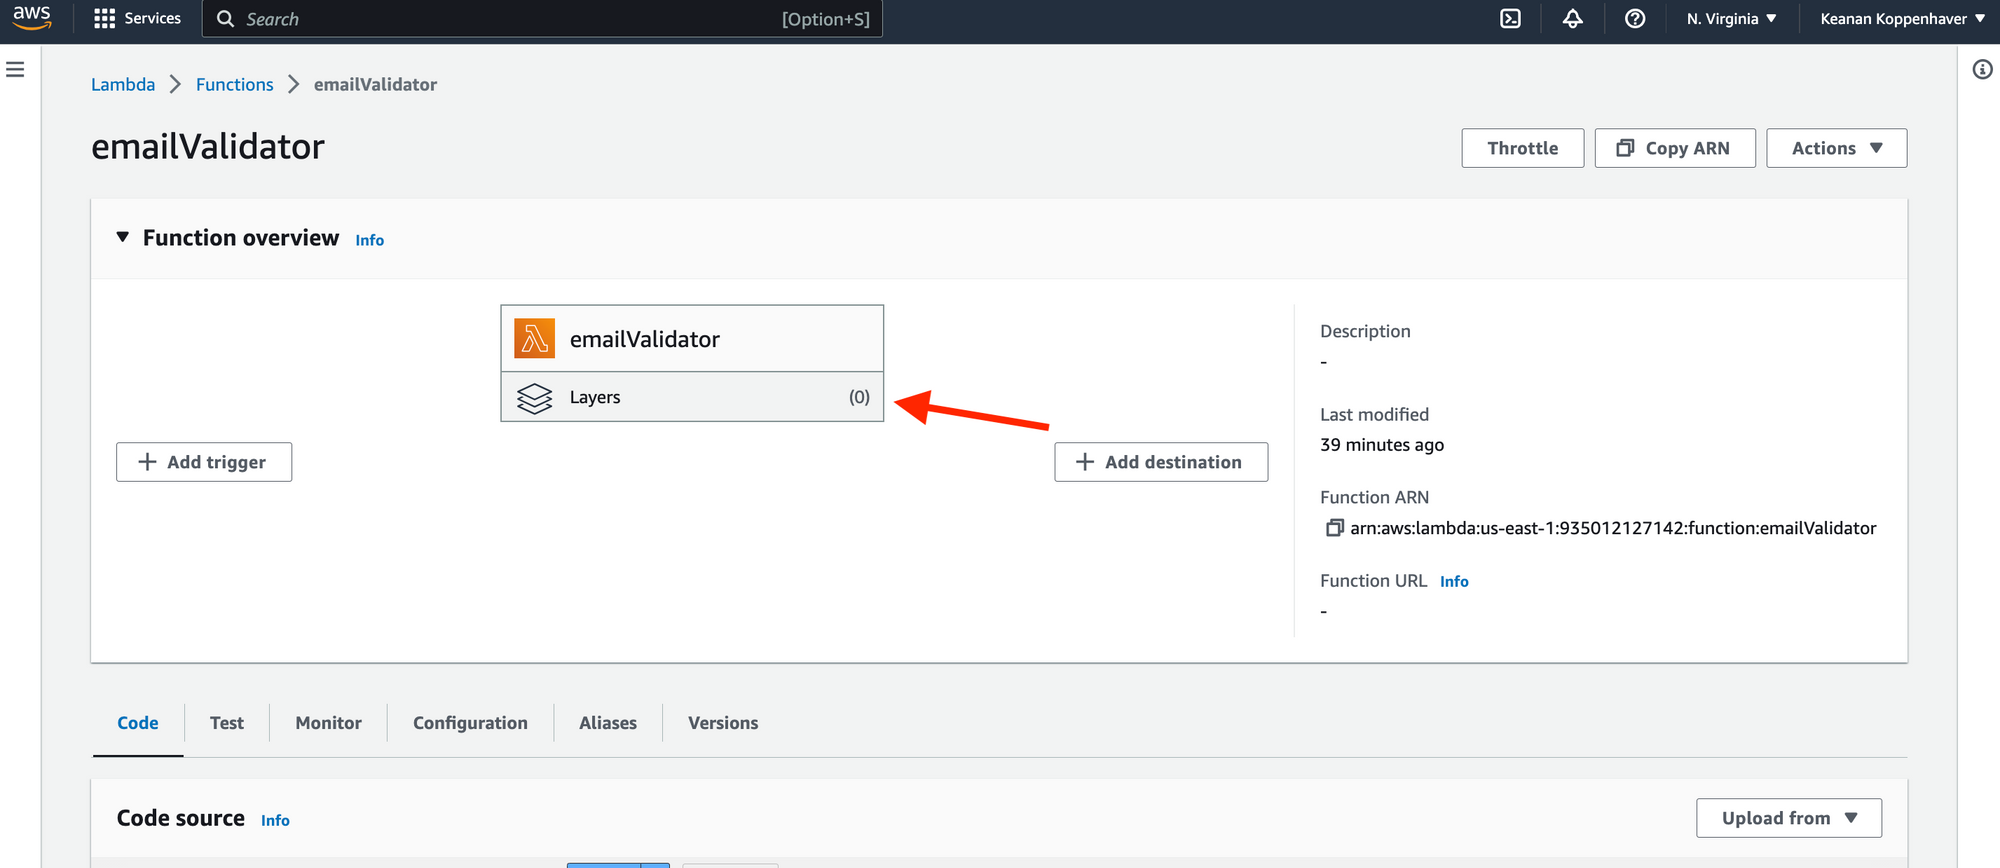
Clicking here will give you the option to specify an ARN for a layer, which is why we’ll need the ARN from earlier.

After you click Add, your new layer will be available to your Lambda function. Navigating back to your Lambda function and running it should show a successful run with a true/false response based on whether you provided a valid email. You can update your test case to check whether emails are validated successfully or build out a more complex function now that you have your dependency installed.
An easier way to do serverless
If you’re looking for a serverless platform to run functions without having to jump through the hoops of creating and managing layers, take a look at Airplane. Out of the box, Airplane supports NodeJS and Python functions (just like AWS Lambda), but instead of having to create layers for your functions to have dependencies, you can use package.json and requirements.txt files natively. Your dependencies are included when you deploy your functions so you don’t have to think about installing them or managing them in the cloud.
Airplane lets you execute your functions on a schedule, turn database queries and scripts into powerful internal tools and even has support for creating custom React-based UIs on top of the tools you build.
And with the release of Airplane’s webhooks feature, you can now invoke your tasks any time you need them, from any of your other tools or applications.
If you'd like to test out Airplane and build your next serverless function in minutes, sign up for a free account or book a demo.