If you’ve ever been faced with the task of creating a web frontend from scratch, you know how daunting that can be. That’s one of the reasons component libraries have become more popular. With a component library, you get a pre-built set of elements that you simply need to configure and style to create your frontend instead of having to build every piece from scratch.
One of the most popular component libraries, especially in the React ecosystem, is Material UI. With Material UI, you get a huge library of pre-built components that you can drop into your React application. This can save you and your development team a ton of time especially when it comes to handling edge cases on complex components.
One common component with plenty of edge cases that exists in many React applications is the <Table> component. In this article, we’ll look at how to integrate Material UI’s Table component into a React application.
Setting up your development environment
To get started, we need to make sure we have all the necessary dependencies. For this project you’ll need a recent version of node and npm installed. Once you have both of those installed on your system, we can use create-react-app to spin up our new React application. Running the following command will get you started:
This will start installing all the other necessary dependencies for creating a new React application. Once this command has finished running, you can run cd material-ui-table-example and npm start. You should see a browser tab open up with your React application running.
If you look at the code that was generated, you should see a file called App.js with some sample code in it. We won’t need most of that sample code for the purposes of this example, so we can remove it and clean up the App.js file in preparation for inserting our Material UI table. After cleaning out the sample portions of the code we don’t need, your App.js file should look something like this:
Implementing the Table component
Now that we have a working version of our React app set up, we can add the Material UI-specific pieces. Start by installing Material UI. From within our working directory, run npm install @mui/material @emotion/react @emotion/styled. This will install all the Material UI dependencies and allow us to start using Material UI components within this project.
Now that we have Material UI set up, let’s take a look at the Table component specifically. The Material UI Table component is made up of a TableContainercomponent, the actual Table component, and individual TableHead, TableBody, TableRow and TableCell components. These components come together to form a markup structure similar to what you might be familiar with in the context of an HTML table, with the added benefit of being able to use a loop to render the data instead of having to write out each individual row.
Make sure you import each of these Material UI components at the top of App.js and once you add them to your markup, it should look something like this:
In this example, we’re creating a two column table that displays the name of each cat in our data set as well as the cat’s breed. If you go back to the browser tab that Create React App opened earlier, you should see something like this:
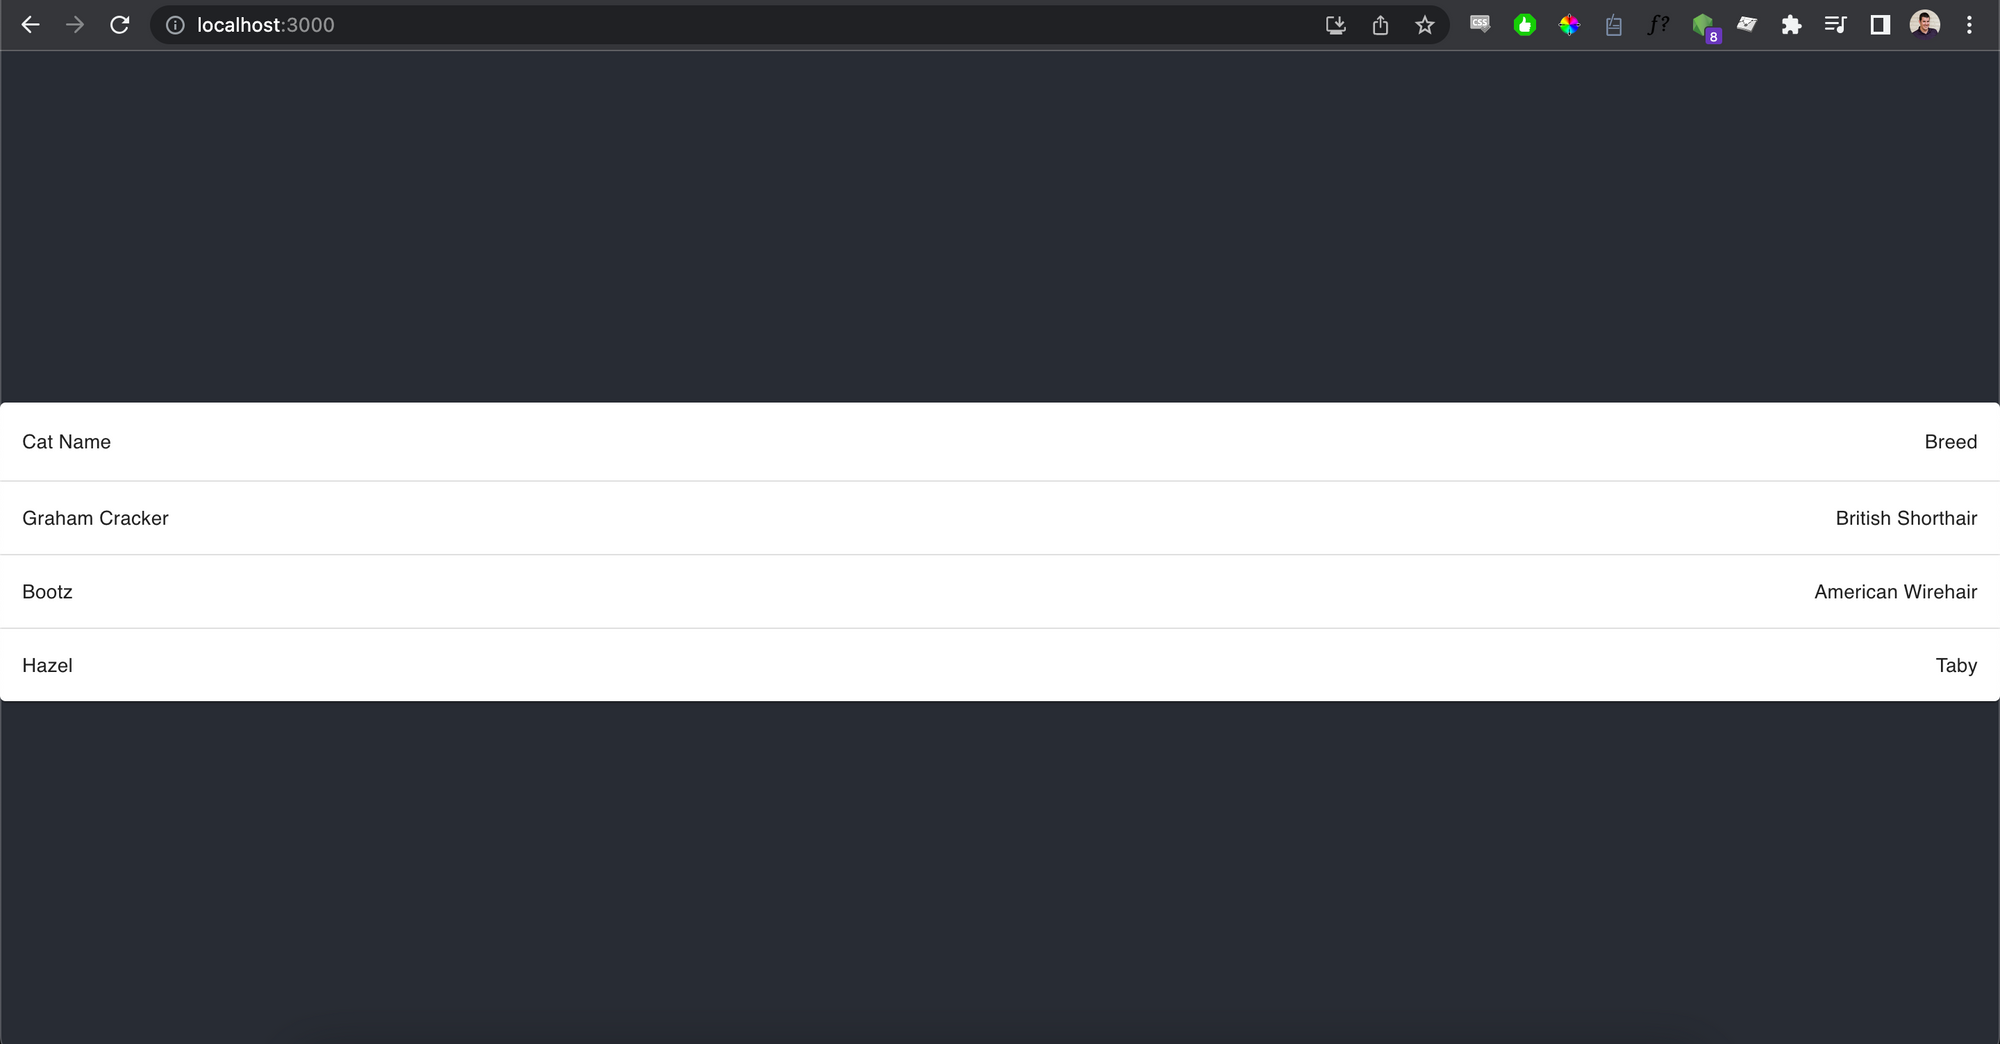
We have a rendered, styled table! You will probably want to make a few more tweaks and customizations for the specific use case you had in mind. You can style and modify any of the Material UI Table components and their children components just like any other React component.
Using the DataGrid component for more complex tables
Because Material UI’s Table component does its best to mimic the HTML table element’s structure, it is difficult to use it to build rich interactive data tables. However, if you have more data, need pagination and other complex table features, Material UI also has a DataGrid component that might be a better fit. For example, if we double the amount of data that we are representing in our table but want to maintain the same form factor, we could use the DataGrid component to paginate the table.
If you haven’t already installed the DataGrid component, you’ll need to run npm install @mui/x-data-grid. After you have done that, you can update App.js to use the DataGrid component.
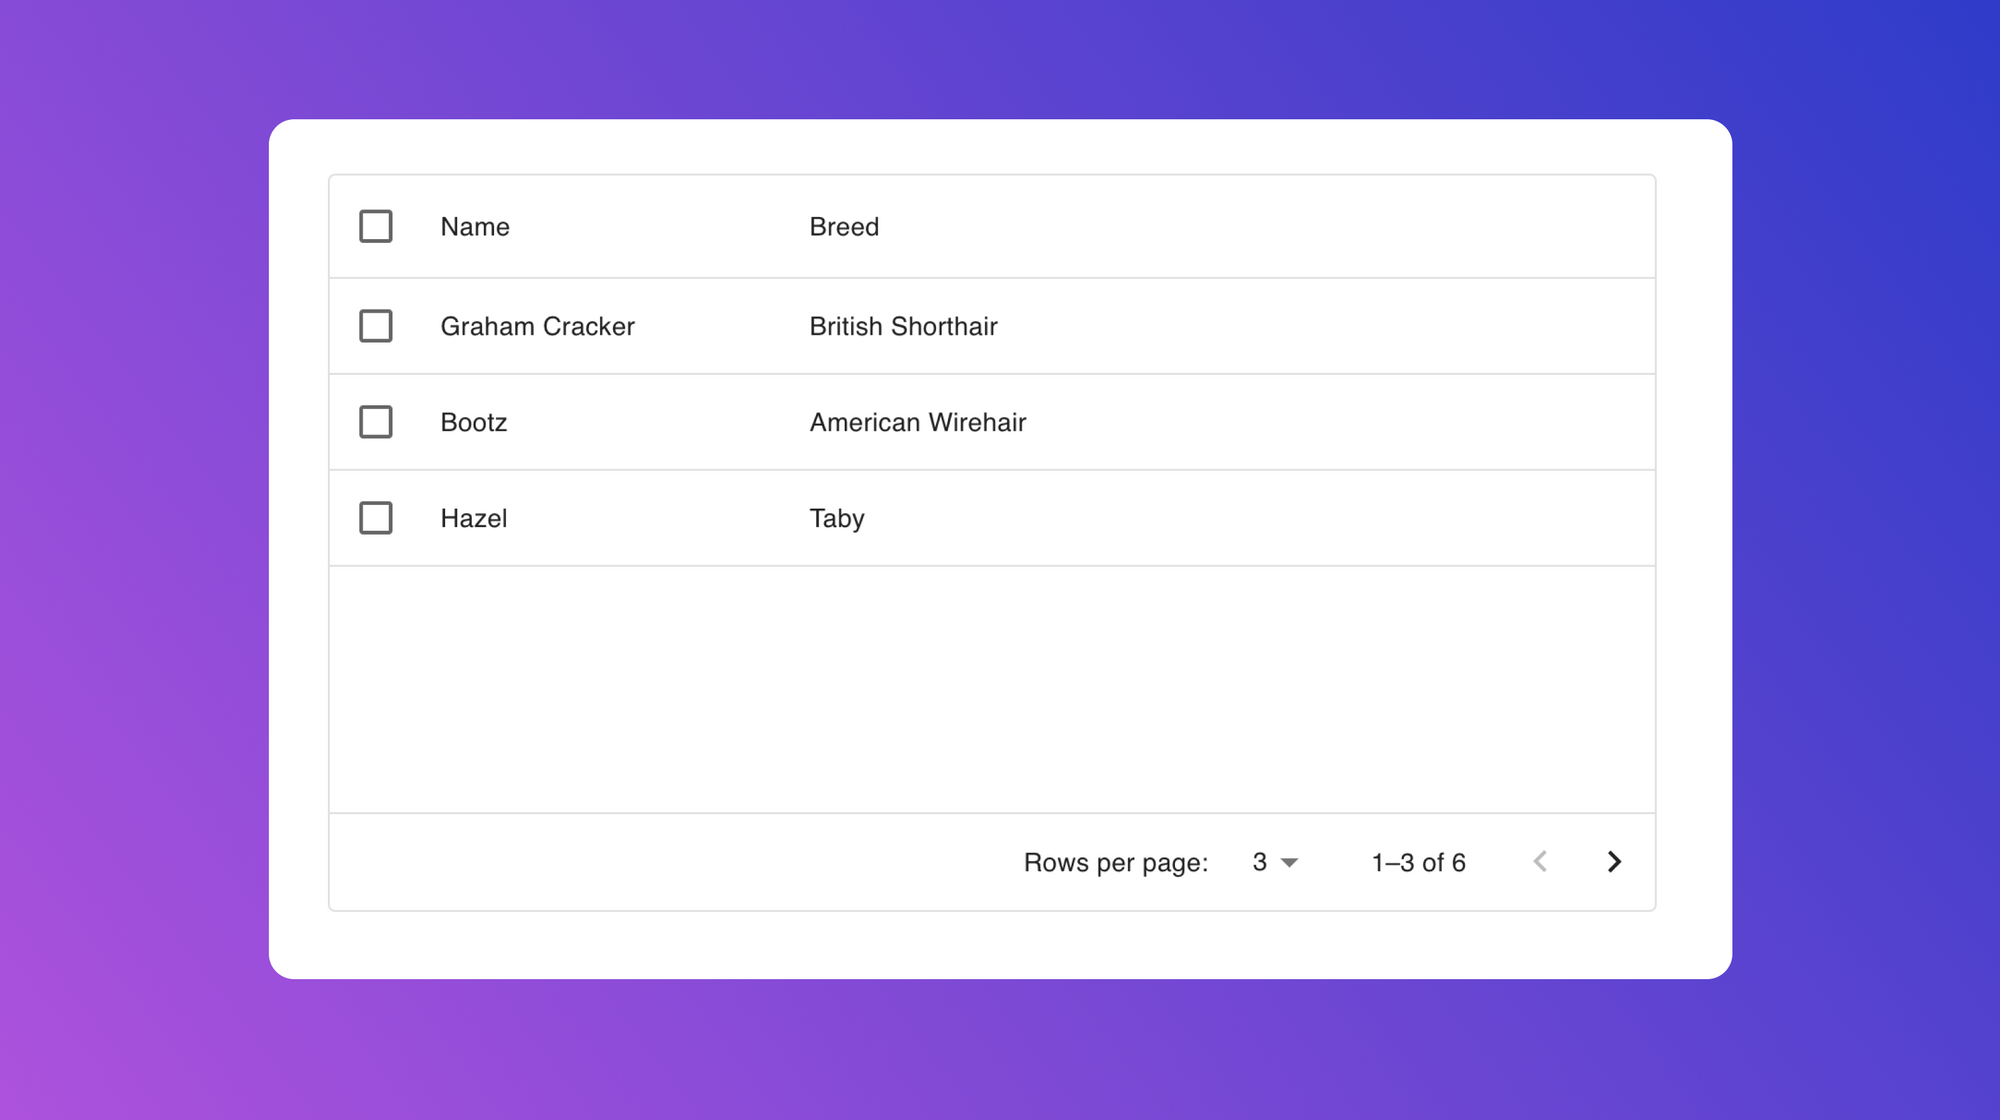
Those updates give you a rendered table that has a few more features than the basic Table component we looked at earlier. You’ll notice it now has checkboxes that can trigger interactive behavior, it has pagination and the ability to change the number of rows displayed on a given page.

Airplane Views as a component library for React-based UIs
In our examples above, we used a hard-coded set of data, but in a more real-world use case, you’ll likely want your data to come from somewhere. This means you’ll need to make an API call or query a database to get your data. To enable this, consider a tool like Airplane.
Airplane allows users to build powerful tasks and UIs using scripts, queries, APIs, and more. The basic building blocks of Airplane are tasks, which are single or multi-step functions that anyone on your team can execute.
And when you’re ready to create a user interface for these tasks, you can use Airplane Views, a React-based platform that makes it easy for engineers to build complex UIs within minutes.

Airplane comes with its own React-based, pre-built component library, making it fast and easy for developers to build complex, and custom UIs. In addition to the pre-built component library, Airplane also offers users the ability to create custom components, such as Material UI.
To try out Airplane and build your first UI using React components in minutes, sign up for a free account or book a demo. If you are at a startup that is series A or earlier with under 100 employees, check out our Airplane Startup Program to get started with $10,000 in Airplane credits for a year.