

GraphQL is a query language for APIs that allows users to request the exact data needed from an API rather than a fixed set of endpoints. This means flexible and efficient data retrieval: users can make a single request for multiple pieces of data in specific shapes.
GraphQL’s flexibility is due to its schema, which defines the types of data that can be queried and the operations that can be performed. GraphQL differs from a REST API, which requires users to make requests to multiple endpoints to receive all the necessary data. GraphQL is a better choice for projects that require flexible, efficient data retrieval and frequent changes to the data schema. Its architecture also consists of resolvers, which act as GraphQL query handlers.
Next.js is a JavaScript framework that is used to build server-rendered React applications. It is specifically designed to provide back ends to React applications with built-in support for APIs. When combined with GraphQL, this API functionality can provide back-end GraphQL API capabilities for React applications.
In this tutorial, we'll walk through how to build a GraphQL API using Next.js. We’ll configure Next.js as a GraphQL server using the built-in next/api route and the apollo server library.
Prerequisites
Before you begin, ensure you have the following:
- Access to a terminal
- Postman installed
- A code editor, such as VS Code
- Node.js and npm installed
Navigating into the Next.js application
Start by creating a new directory for the Next.js application and navigating into it. From there, initialize a new Next.js application by running the following:
This command will output a list of prompts. Select No for each prompt. Then, install the necessary dependencies to use GraphQL with Next.js using the following:
Open the project in your code editing tool of choice. This tutorial uses VS Code, but any code editing tool can be used.
The create-next-app command automatically created a pages/api folder. Now, create a file called graphql.js in the folder. The final file path should be pages/api/graphql.js.
Let's add additional code to the graphql.js file to import the necessary modules and set up the GraphQL schema and resolvers:
Then set up the GraphQL type definitions. For now, this code has created a Query type called hello, which returns a string, so we'll need to define the resolvers for this type. The resolver for the hello query is a function that returns the string Hello World.
Now let's start the development server by running npm run dev.
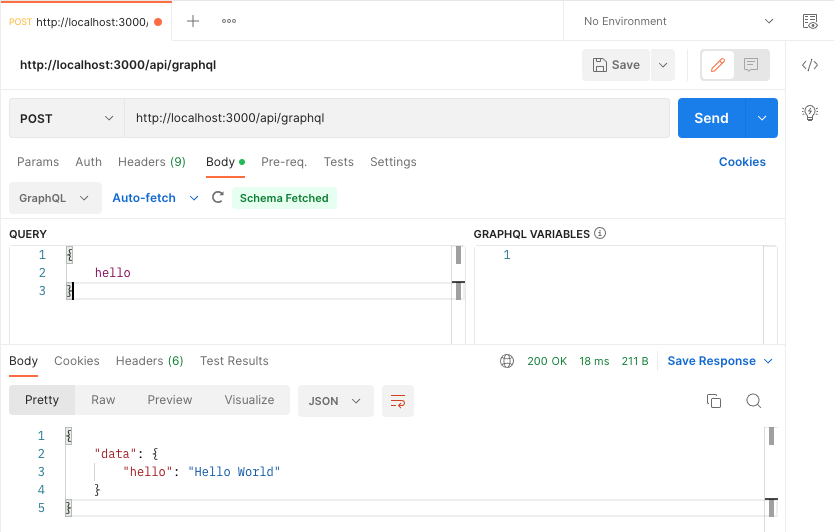
Next, test the GraphQL API using Postman. In a new Postman window, make sure the request type is set to POST, then add the URL http://localhost:3000/api/graphql. Finally, in the Body tab, choose GraphQL as the body type and add:
Press Send. We should see the Hello World response defined in the resolver function like the below image:
After following these steps, we have a basic Next.js application with an API route that uses GraphQL.
This is a functional example, but its functionality is minimal. Adding types and resolvers will help the Next.js application handle more complex data.
Defining complex types and resolvers
GraphQL works best on complex types of related data. Let's now add some dummy data by adding the following code to the bottom of the graphql.js file:
This mock data contains users, orders, and items, and it assumes that users place orders that contain one or more items. As in real life, imagine that this information is stored in a database somewhere and that we want to use GraphQL to retrieve these related entities in a single API call.
First, replace the existing typeDef declaration in the graphql.js file with:
This defines each of the entities — user, order, and item — along with their properties. It also clarifies the relationships between the entities. For example, the User type has defined an Orders property that will contain a list of Order records for that user.
Notice that the Query type has changed slightly in this context. To query for a specific user to see their details and orders, we must first define a userId parameter that can be passed when sending a GraphQL query.
Define the resolver for this by removing the existing Query resolver and replacing it with the following:
parent, args, contextValue, and info are default parameters available in GraphQL resolvers. args allows access to the userId argument previously defined in the Query type definition. The resolver is now simply a function that returns the user with the userId passed by the query.
Next, define the resolvers for each of the entities so GraphQL knows how to resolve the relationships. Add the following underneath the Query resolver:
Now the resolver names match the User and Order types. The User resolver describes how to populate the orders property, and the Order resolver does the same for the items property. The resolver specifies how to resolve the properties in a particular type.
When we perform a GraphQL query for the user by userId, GraphQL will start traversing the resolvers for each type that gets returned. In this example, the query returns a User, so it’ll then call the User resolver. If we request the orders property, the query will use the Order resolver to determine which orders should be returned.
In this User resolver, the orders function finds all orders related to a specific User. Because the User in this example is already resolved by the Query resolver, it’s made available to us in the parent parameter. This is how we can access userId and use it to filter orders.
The Order resolver does the same thing for its items property. For each Order that has been resolved on the User orders property, it will use the Order resolver to populate the items for that order.
The Order resolver has one other function that tells it how to resolve the orderPrice field. This field should amount to the sum of the itemPrice for each item in the order. To accomplish this, define a function that finds all the relevant items for a specific order and sums the itemPrice of each.
Querying complex types
Now let's run the GraphQL server and perform some example queries. Start the server by running npm run dev, and then open Postman to run some queries.
The first query we'll run is a simple User query to obtain the user’s first and last name:
The output should be as follows:
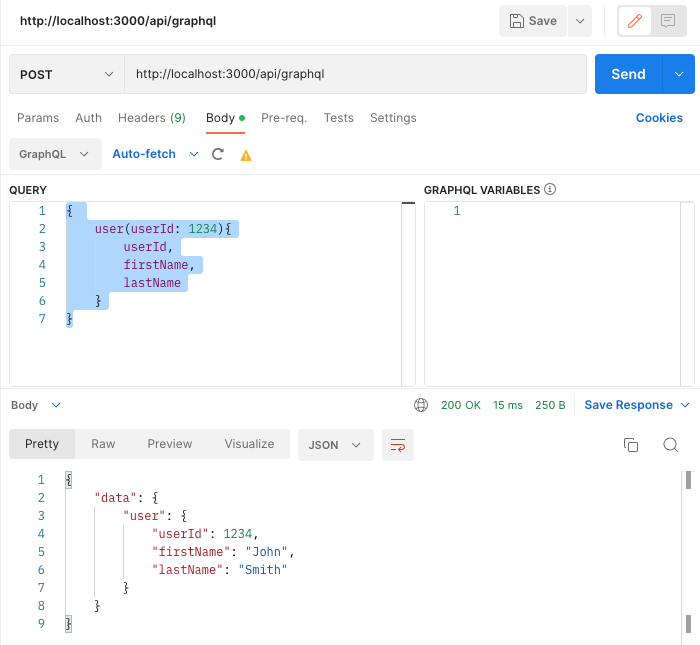
This query only required calling the User resolver because the application only asked for the userId, firstName, and lastName properties. Now query this user again, but ask for the orders property, along with the orderId and orderPrice:
Here’s the output:
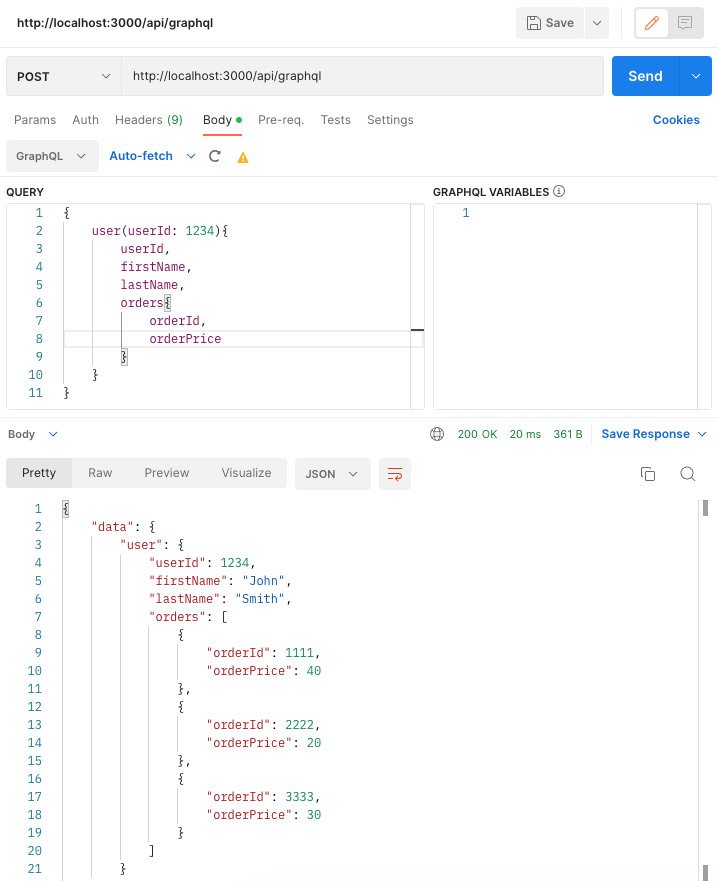
Here, GraphQL uses the orders function defined in the User resolver to fetch all the relevant orders. It also uses the orderPrice function in the Order resolver to calculate the total price of each order.
Finally, let's write a query that displays each item in the order:
Here’s the result:
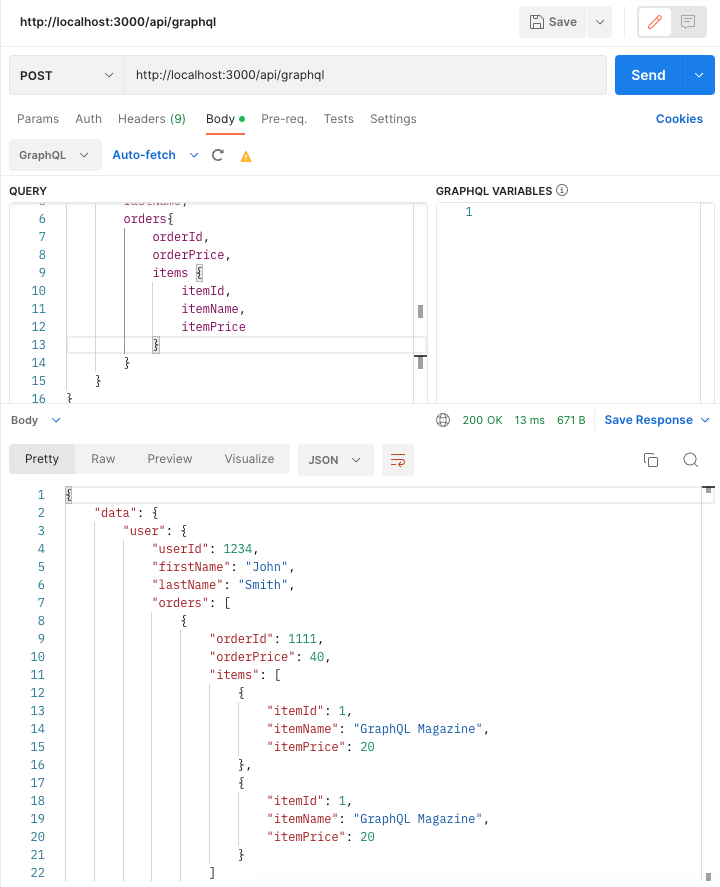
Now each order has a list of items due to the items function defined in the Order resolver.
And that's how to build a GraphQL API with Next.js. GraphQL is a powerful tool for querying data with complex relationships. Using Next.js makes it efficient to build a GraphQL API. The query examples in this tutorial demonstrate the power of GraphQL for querying complex data structures in a single API call. They also illustrated how GraphQL can limit the properties returned so that API calls are as lean as possible.
Airplane: An easy way to connect to GraphQL APIs
Airplane is the developer platform for transforming scripts, queries, APIs, and more into powerful tasks and UIs using code.
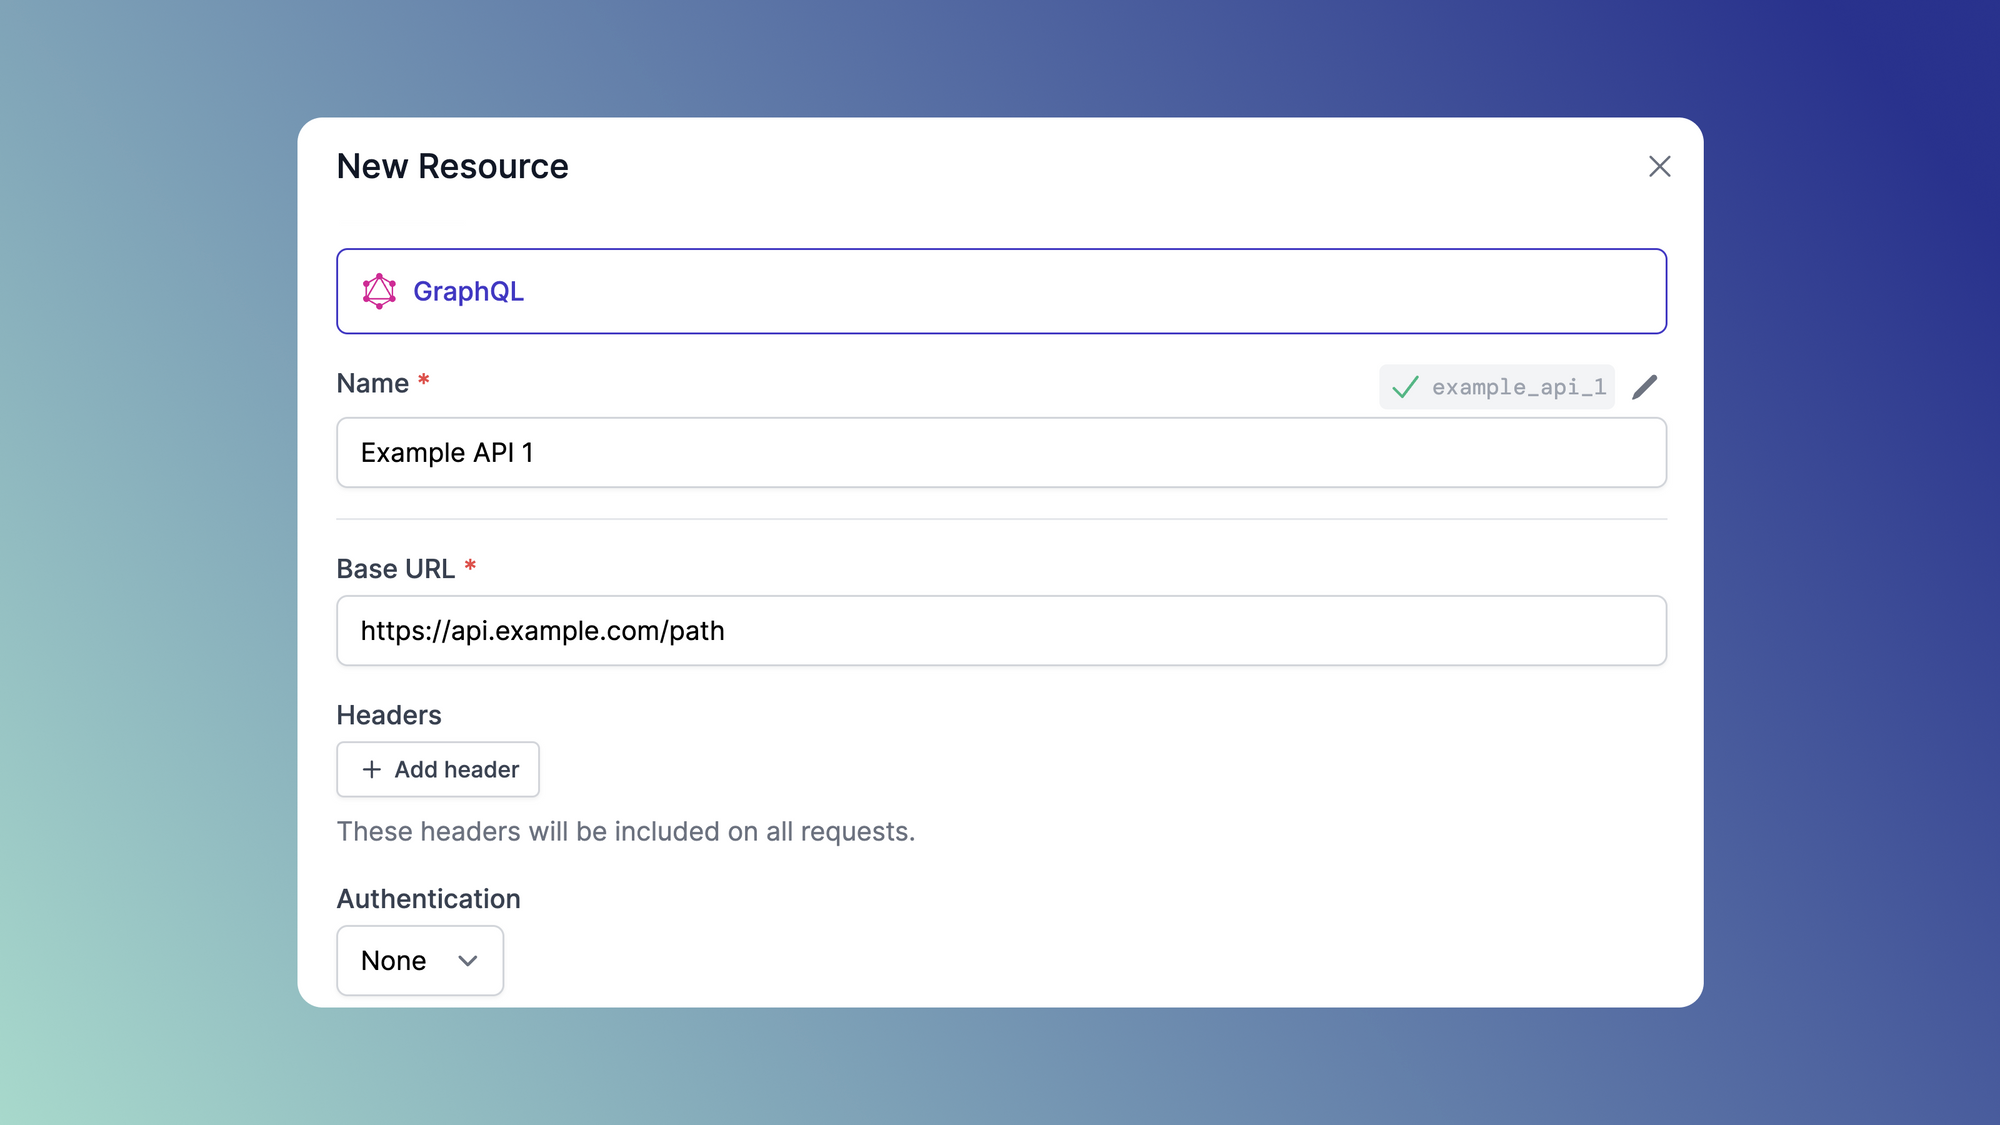
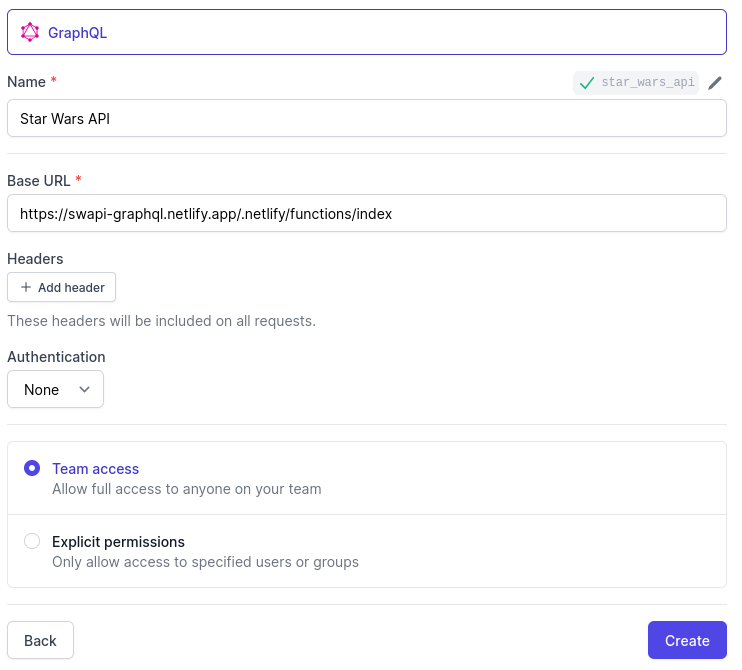
Airplane offers an easy way to connect to GraphQL APIs. With GraphQL tasks, users can connect to existing GraphQL APIs from Airplane. Check out our GraphQL tasks and GraphQL API resources docs to learn more.
Check out our blog for additional content such as GraphQL vs. REST APIs, React JS tutorial, how to make and schedule API requests in three steps, and more.
Sign up for Airplane for free to try it out yourself or book a demo! If you are at a startup that is series A or earlier with under 100 employees, check out our Airplane Startup Program for $10,000 in Airplane credits for a year.


