

Running tasks on a schedule, like sending daily emails or creating backups, is a must for almost any modern web application. Traditionally, this has been done by using cron jobs, but these jobs require complex setup and configuration, specific know-how, and access to the server via SSH. One easier alternative is to use Laravel.
The PHP framework's command scheduler makes it easy to run tasks at specific times or intervals, and it only requires a single cron entry on your server.
This article will walk through how to use Laravel's scheduler to run background tasks on a schedule.
What is Laravel scheduler?
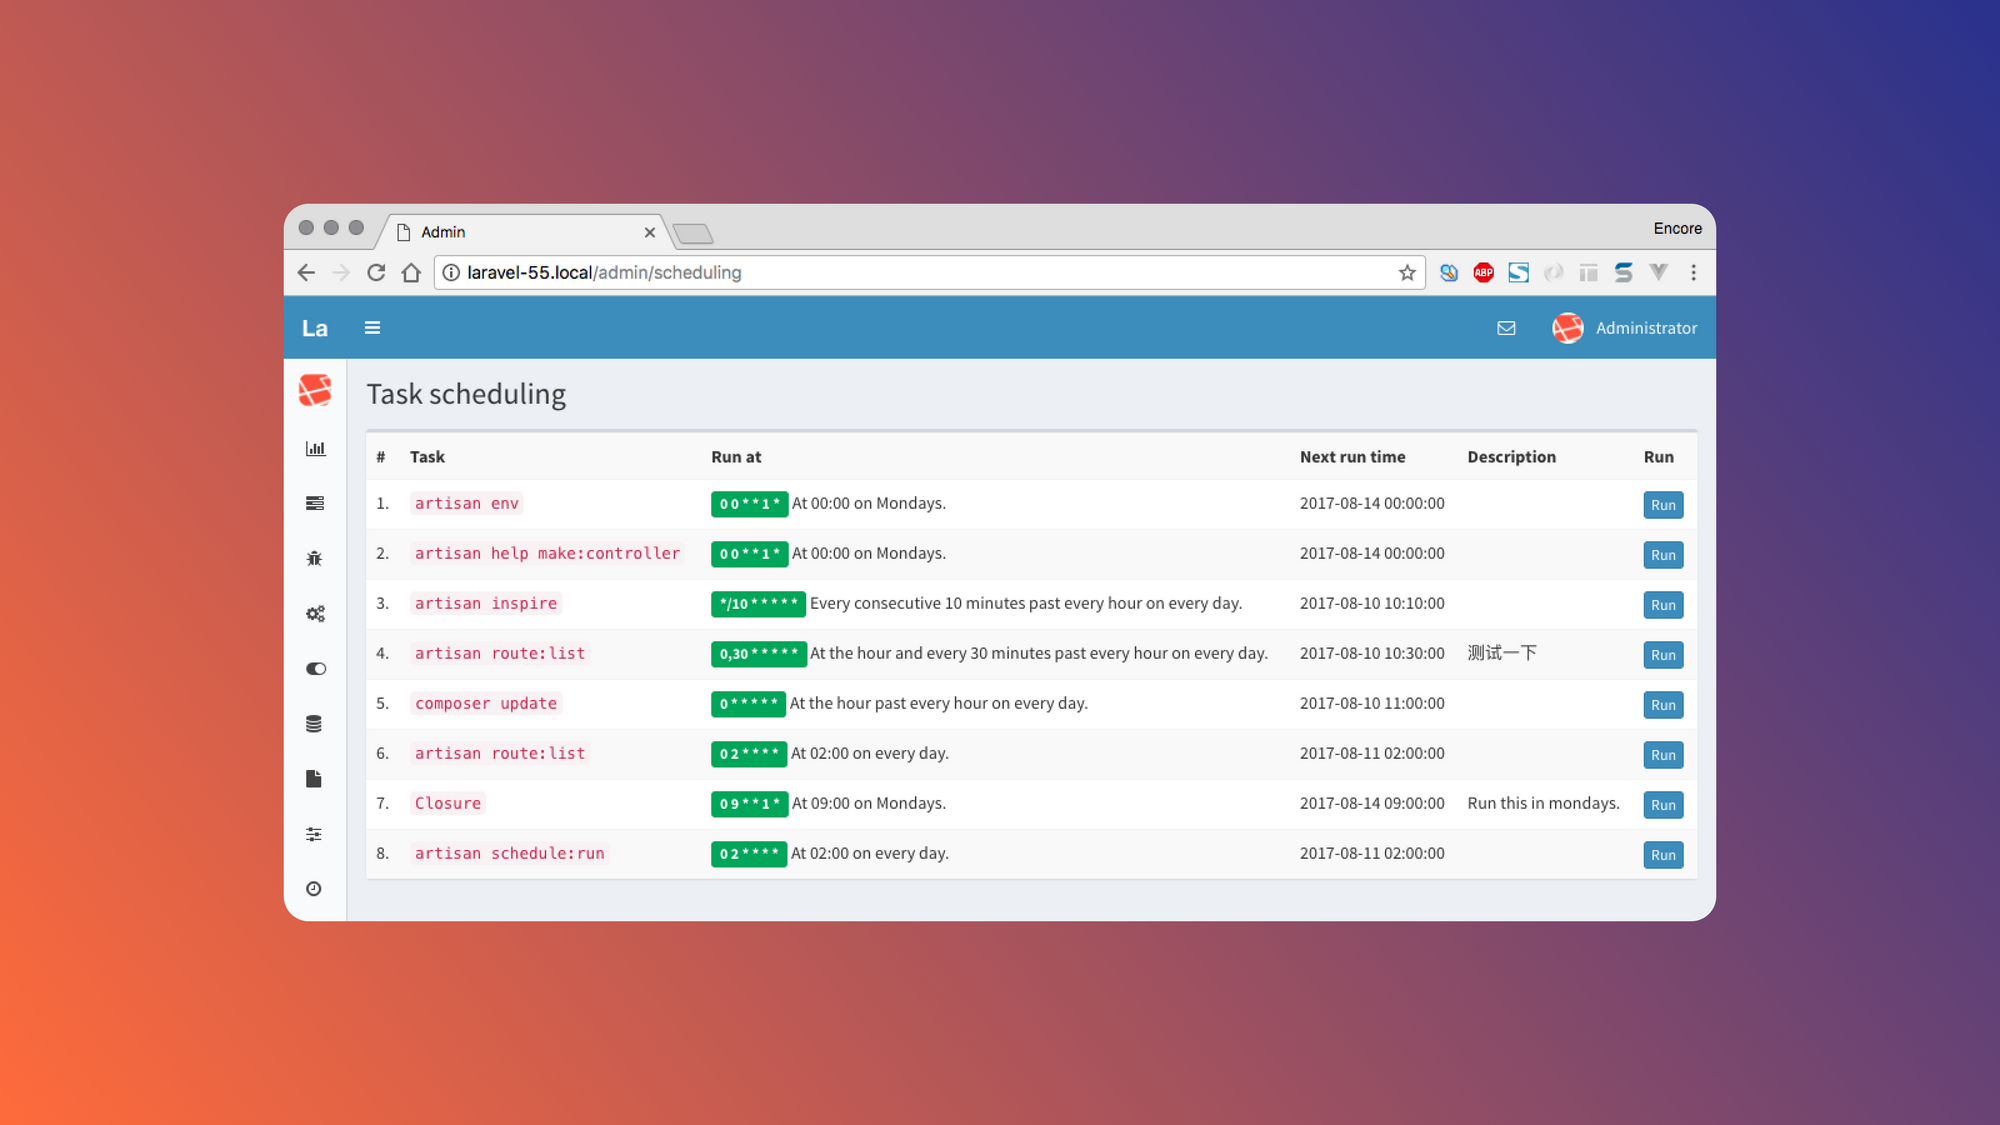
Laravel's command scheduler allows users to schedule commands and tasks to run on specific days and times. Users can schedule tasks to run every minute, every hour, every day, or every week. They can also schedule tasks to run at specific times or on a recurring schedule based on the day of the week.
The cron job for the scheduler will run every minute and check to see if there are any tasks that need to be run. If there are, it will run them. If not, it will wait until the next minute to check again.
There are many scenarios in which you might want to run tasks on a schedule. Some of the most common use cases include:
- Scheduled emails: Recurring emails, such as scheduled newsletters or automated email reminders, can be sent using the scheduler.
- Routine maintenance: Items such as data cleanup, backups, and other maintenance tasks can be scheduled.
- Reports: Users can utilize the scheduler to generate reports and send them to other team members in their organization.
- Background operations: The scheduler can be used to run tasks that take a long time to complete, such as processing large amounts of data.
An easy way to think about the Laravel scheduler is that it is a proxy for cron jobs. Instead of setting up a cron job per task, users can set up a single cron job and let Laravel handle the rest.
The scheduler is capable of working with the following types of tasks:
- Laravel Artisan commands: These are Laravel's version of console commands.
- Laravel queue jobs: These are jobs that are queued to be processed by the Laravel queue worker.
- Shell commands: Users can run any shell commands on a schedule, which is useful if they need to run a system command or a script written in another language.
Users can also set closures to run on a schedule, as in the following example:
The above is useful if a user needs to run a task that doesn't fit into the stated categories.
Setting up a command with the Laravel scheduler
To keep things simple, this tutorial will schedule an Artisan command with the Laravel scheduler. However, the principles used here also apply to scheduling queue jobs and shell commands.
Prerequisites
Ensure you have the following for this tutorial:
Try out the code in this article on an existing Laravel application, or create a new Laravel application using the following command:
Next, go into the application directory before running the Artisan command:
Creating the Artisan command
First, let's create the Artisan command that we want to schedule. This command will send a welcome email to a new user:
This will create a new command in the app/Console/Commands directory with just the stub code for the command:
The command is created with a stub signature and description. We'll need to update the signature and description to match our use case. Open the command and replace the existing code with the following:
Scheduling the command
Next, set up the command to run on a schedule. Open the app/Console/Kernel.php file and update the schedule method with the following code:
If we want to schedule more commands, we can add them to the schedule method. Each command will be run on a separate process and in parallel.
There are two ways to run the scheduler. The recommended way to do it in production is by updating the cron table on the server. Access the server cron table by running the following command:
Add the following line to the cron table:
This will run the scheduler every minute.
Otherwise, for local development and quick debugging, we can run the scheduler using the following command:
This will run the scheduler every minute and execute any scheduled commands. The output should look something like this:
The schedule will run until manually terminated.
Challenges of using Laravel
Based on the example above, the Laravel scheduler is a powerful tool that can help users automate multiple tasks in their application.
However, there are some limitations that should be considered, including the following:
- Users can't run the scheduler on a shared hosting environment
- Users must share resources with the main application if hosted on the same server
- The scheduler won't run on intervals shorter than one minute
- Users have limited visibility into the scheduler's execution
Luckily, there is an alternative solution that is easy-to-use, fast, and efficient.
Scheduling jobs easily with Airplane
Airplane is the developer platform for building custom internal tools. Airplane has Tasks, which are single or multi-step functions that anyone on your team can use. Airplane also offers Views, a React-based platform for users to build custom UIs within minutes.
Airplane offers powerful job scheduling for users. The serverless platform lets users run their code anywhere and is a great tool for running background jobs in a Laravel application. Airplane also offers run failure notifications and run logs for users to manage their job executions effectively.
Let's now see how this works using Airplane. Sign up for a free Airplane account and install the Airplane CLI on your machine to get started.
With Airplane, we can turn a REST API into a background job and set up the API call to run on a schedule. For example, let's say we have a REST API that sends a welcome email to a new user. This would look like the following code:
This is available at the following endpoint: https://my-laravel-app.com/api/welcome-email.
Creating the Airplane Task
First, create an Airplane Task that will run the REST API call. To do this, run the following command:
This command will prompt us to enter the following information:
- Task name:
welcome-email - Kind:
REST - Name of the definition file:
welcome_email.task.yaml
Running the command will create a new file called welcome_email.task.yaml in the root directory of the project. This file contains the definition of the task as well as comments about the configuration pieces of the task.
We will need to specify some information to communicate with the API. Open the file and update the file with the following parameters:
This example task is fairly simple and only needs to POST against the specified endpoint with an empty body. However, Airplane Tasks can be more complex, supporting string interpolation, environment variables, or custom headers, among other elements.
Deploying the task
Next, deploy the task to Airplane by running the following command:
We should see the following output:
This is because we haven't created the resource yet. Log in to your Airplane account and let's create a new resource under the Resources tab:
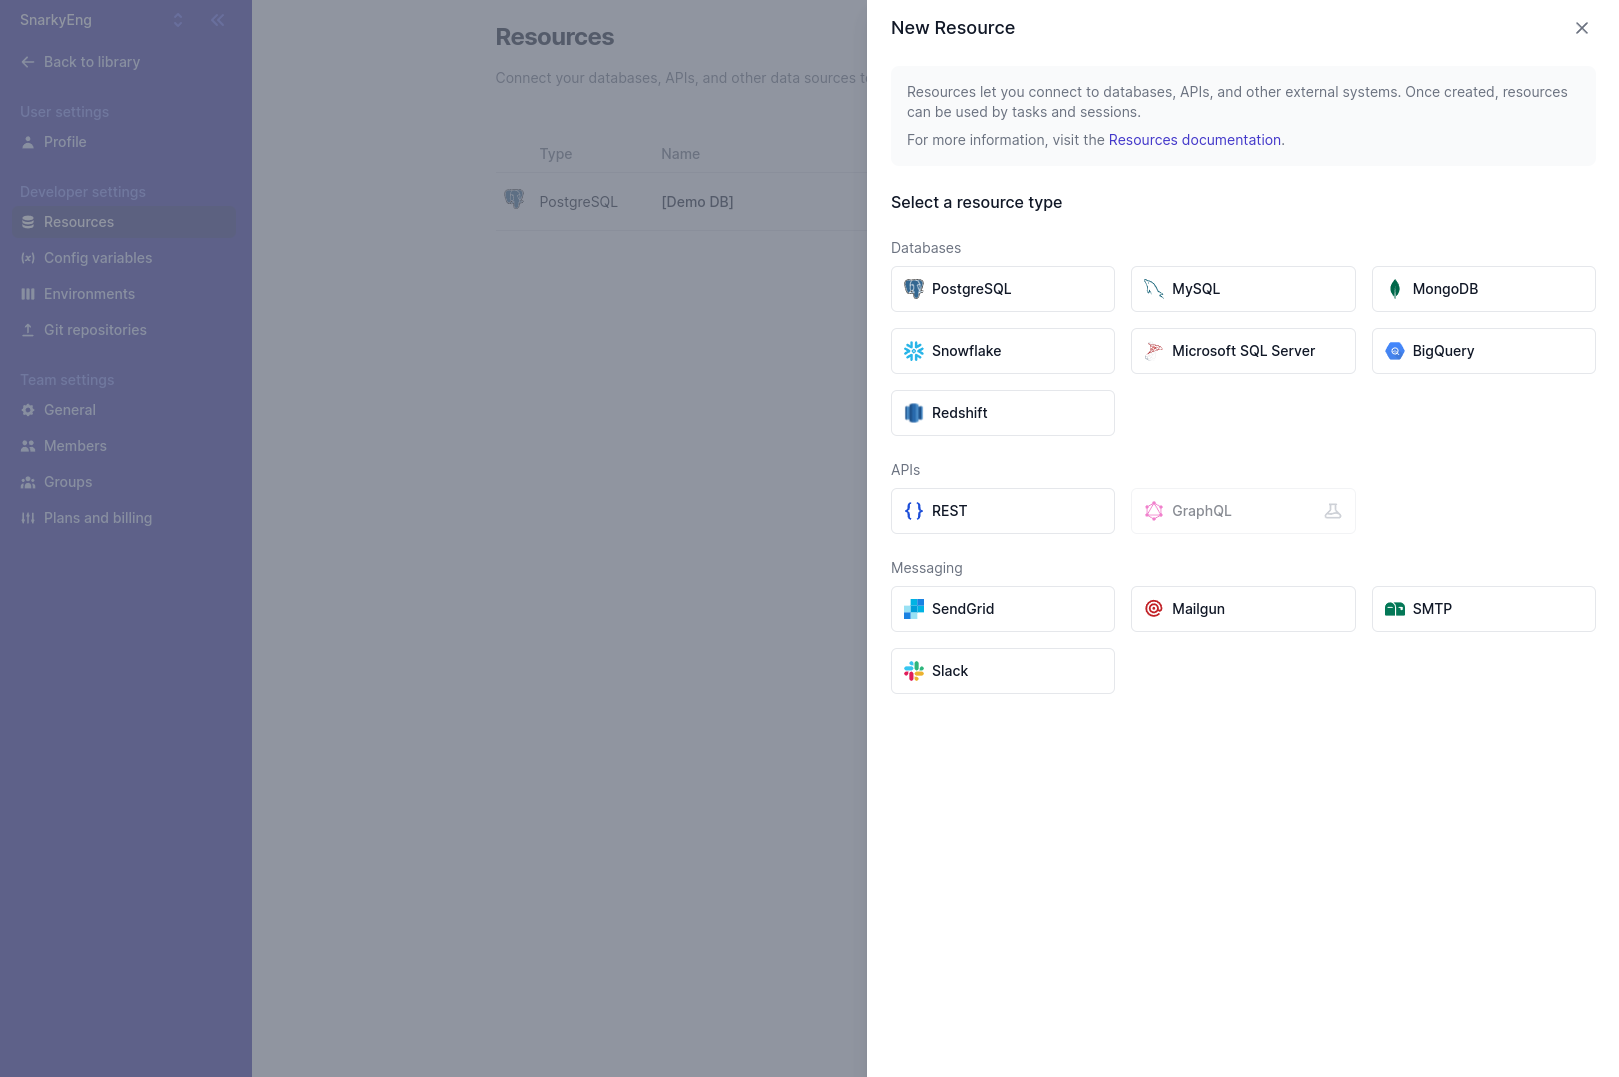
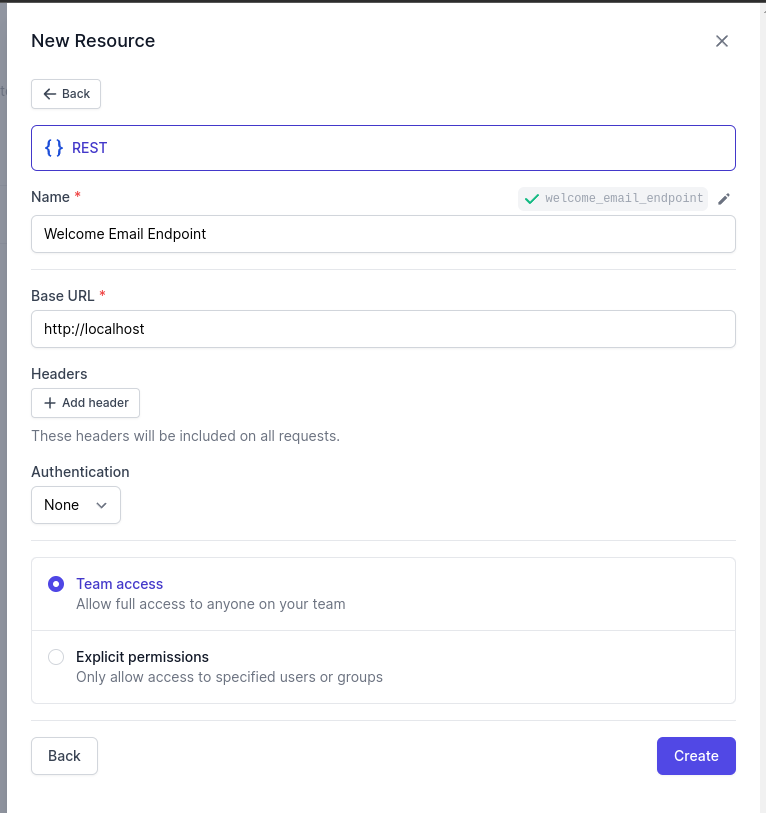
Select the REST resource type and enter the following information:
Run the deploy command again. We should see the following output:
Confirm that the task was successfully deployed by opening Airplane and navigating to the Library tab:
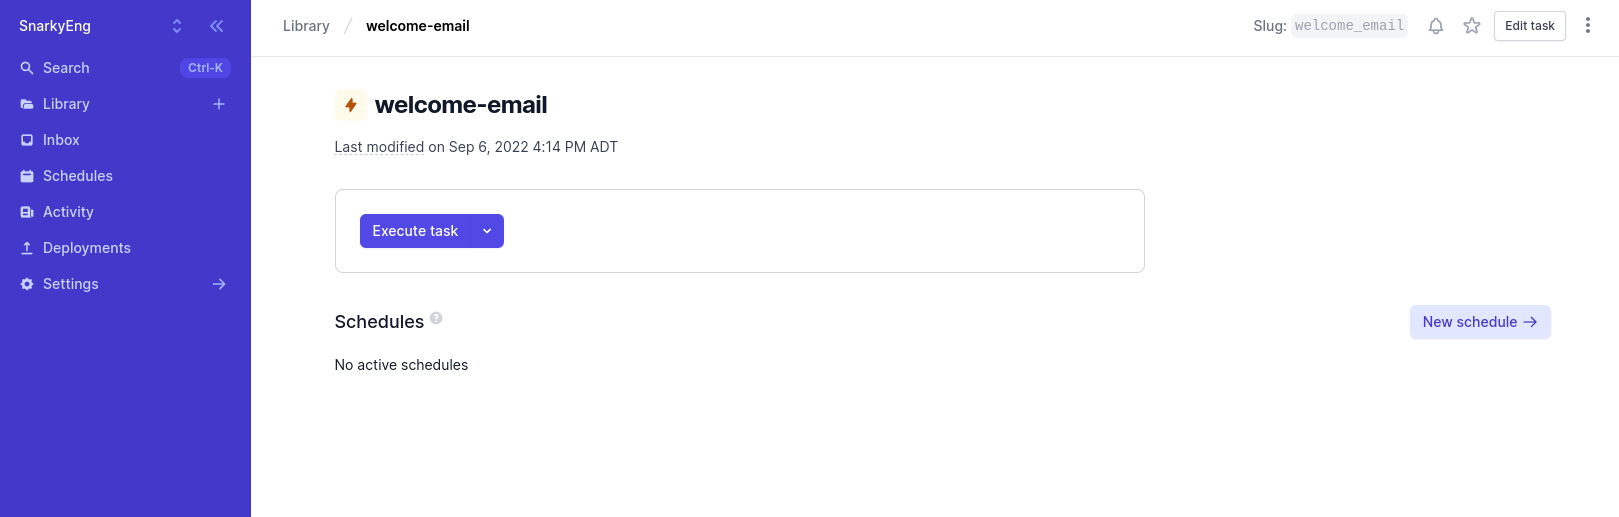
Creating a schedule
Now that our task is deployed, let's create a new schedule to run it on a specified time interval. We can do this directly from the task details page by clicking the New Schedule button and setting the task to run on a daily basis:
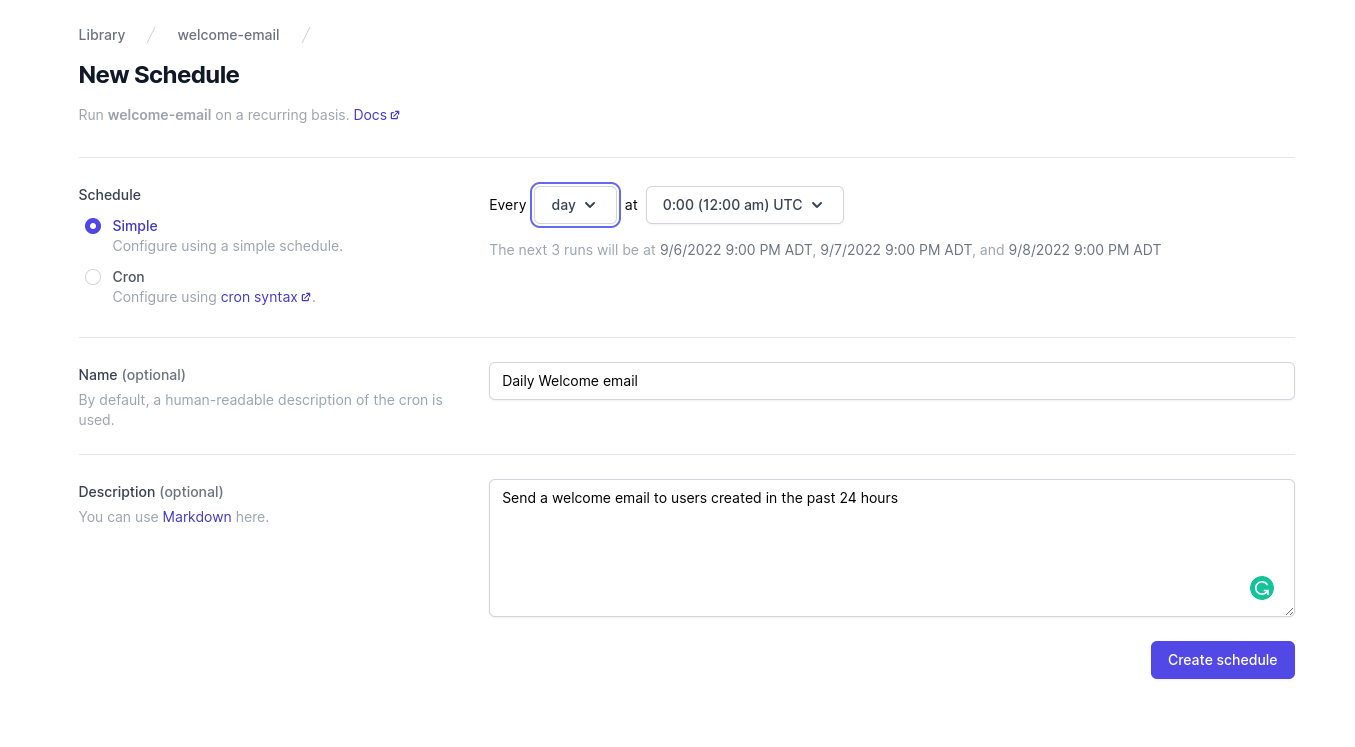
Note that Airplane has two scheduling options: simple syntax and cron syntax. The cron option follows the same cron expression syntax as cron jobs, but it also provides an easy-to-use UI for defining schedules.
In the example screenshot above, we can see that Airplane's next three runs will be at 9/6/2022 9:00 PM ADT, 9/7/2022 9:00 PM ADT, and 9/8/2022 9:00 PM ADT.
Click the Create schedule button to create the schedule. We can then monitor the schedule in the Airplane UI:
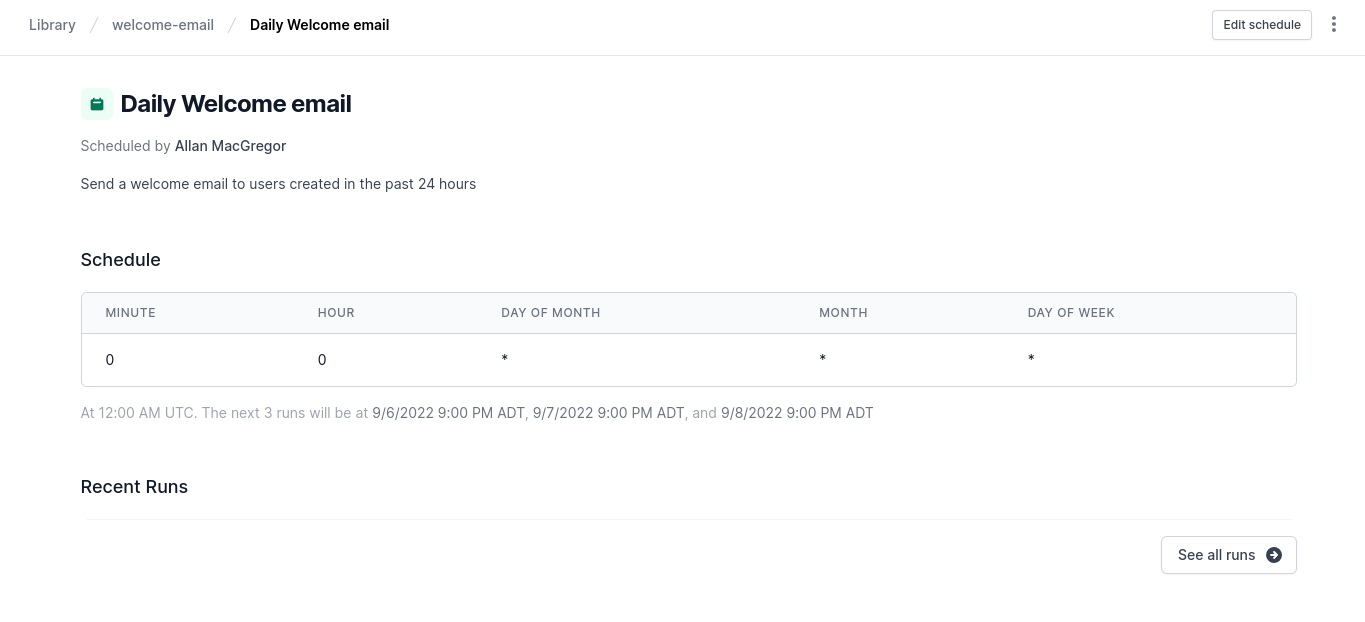
And that's how to create a schedule in minutes using Airplane. Airplane allows users to schedule jobs without worrying about the underlying infrastructure. It also gives users the ability to turn existing REST APIs into background jobs.
To schedule your first task in minutes, sign up for a free account or book a demo 👋. If you are at a startup that is series A or earlier with under 100 employees, check out our Airplane Startup Program for $10,000 in Airplane credits for a year.
Author: Allan MacGregor
Allan MacGregor is a software engineer and entrepreneur based in Toronto, with experience in building projects and developing innovative solutions.


