


Ticket management tools and dashboards form the backbone of an effective customer experience strategy. Without the right dashboards, it's not only difficult to track customer issues and respond to them in time, but it's also nearly impossible to collect important feedback that may help in the overall improvement of your product and services. When working with multiple third-party (often SaaS-based) tools to manage your CX frontier, you are left with very few options when it comes to all-consolidating dashboards.
However, Airplane Views can help with creating dashboards easily. Airplane Views helps you build React-based UIs faster by eliminating the boilerplate and providing users with ready-to-use components and integrations. With its easy-to-learn structure and seamless deployments, users can get started with a multi-tool ticketing dashboard quickly.
In this article, we'll walk through what features a strong ticketing dashboard has and how we can build one using Airplane Views, Hive, and Zendesk.
What features should a streamlined ticket tool dashboard have?
Before building a dashboard, we must understand what makes a good ticketing dashboard. There is no one-size-fits-all answer to this, as the right solution revolves around an individual's requirements:
- Are you looking for a high-level overview of your operations? You probably need to list tickets and tasks from all your tools.
- Are you looking for an interactive control panel that helps you update any record across your systems easily? You need powerful grids with editing and pagination capabilities.
- Are you looking to track the performance of your overall customer experience efforts? You need to set up metrics dashboards that track your teams' performance across tools.
In general, a good dashboard should give users an overview of their open customer tickets while also allowing them to easily dive into more specific details as needed. A strong, well-rounded tool should also include a few key metrics, such as the average response time and the average time to resolve.
Implementing a ticketing dashboard using Airplane Views
In this tutorial, we'll use Airplane Views to create a dashboard consolidating two popular productivity tools, Zendesk and Hive. We'll use Zendesk as the customer experience management solution and Hive as the internal project management solution to assign tasks to team members.
It's important to understand that these are not the only two tools that you can use to build a dashboard in Airplane. You can integrate pretty much any SaaS tool into an Airplane dashboard as long as it offers public APIs (and possibly SDKs to make things easier). For instance, here's an example ticket tool dashboard template built for Intercom and Linear using Airplane Views.
Prerequisites
To build the dashboard, ensure you have the following:
- Node.js set up on your system to develop and test the dashboard
- npm (the official package manager for Node.js)
- An Airplane account to deploy the dashboard when ready
- The Airplane CLI set up on your system to develop the dashboard
- A Zendesk account to use as a CX management tool
- A Hive account to use as a project management tool
- An IDE of your choice, such as Visual Studio Code or IntelliJ IDEA
To use Airplane, your system must have one of the following Node.js versions: ^14, ^15, ^16, ^17, or ^18. To check your Node version, run node -v. To change your Node version, you can use nvm.
Once you have all of these requirements, proceed to configure the necessary tools and services before developing the dashboard.
Configuring Airplane
Our first step is to create a new Airplane project, which will hold the source code for the dashboard. It will also help us easily deploy and test the dashboard.
Before creating the project, make sure you're logged into the Airplane CLI. To do that, run the following command:
This command will generate an output that looks like this:
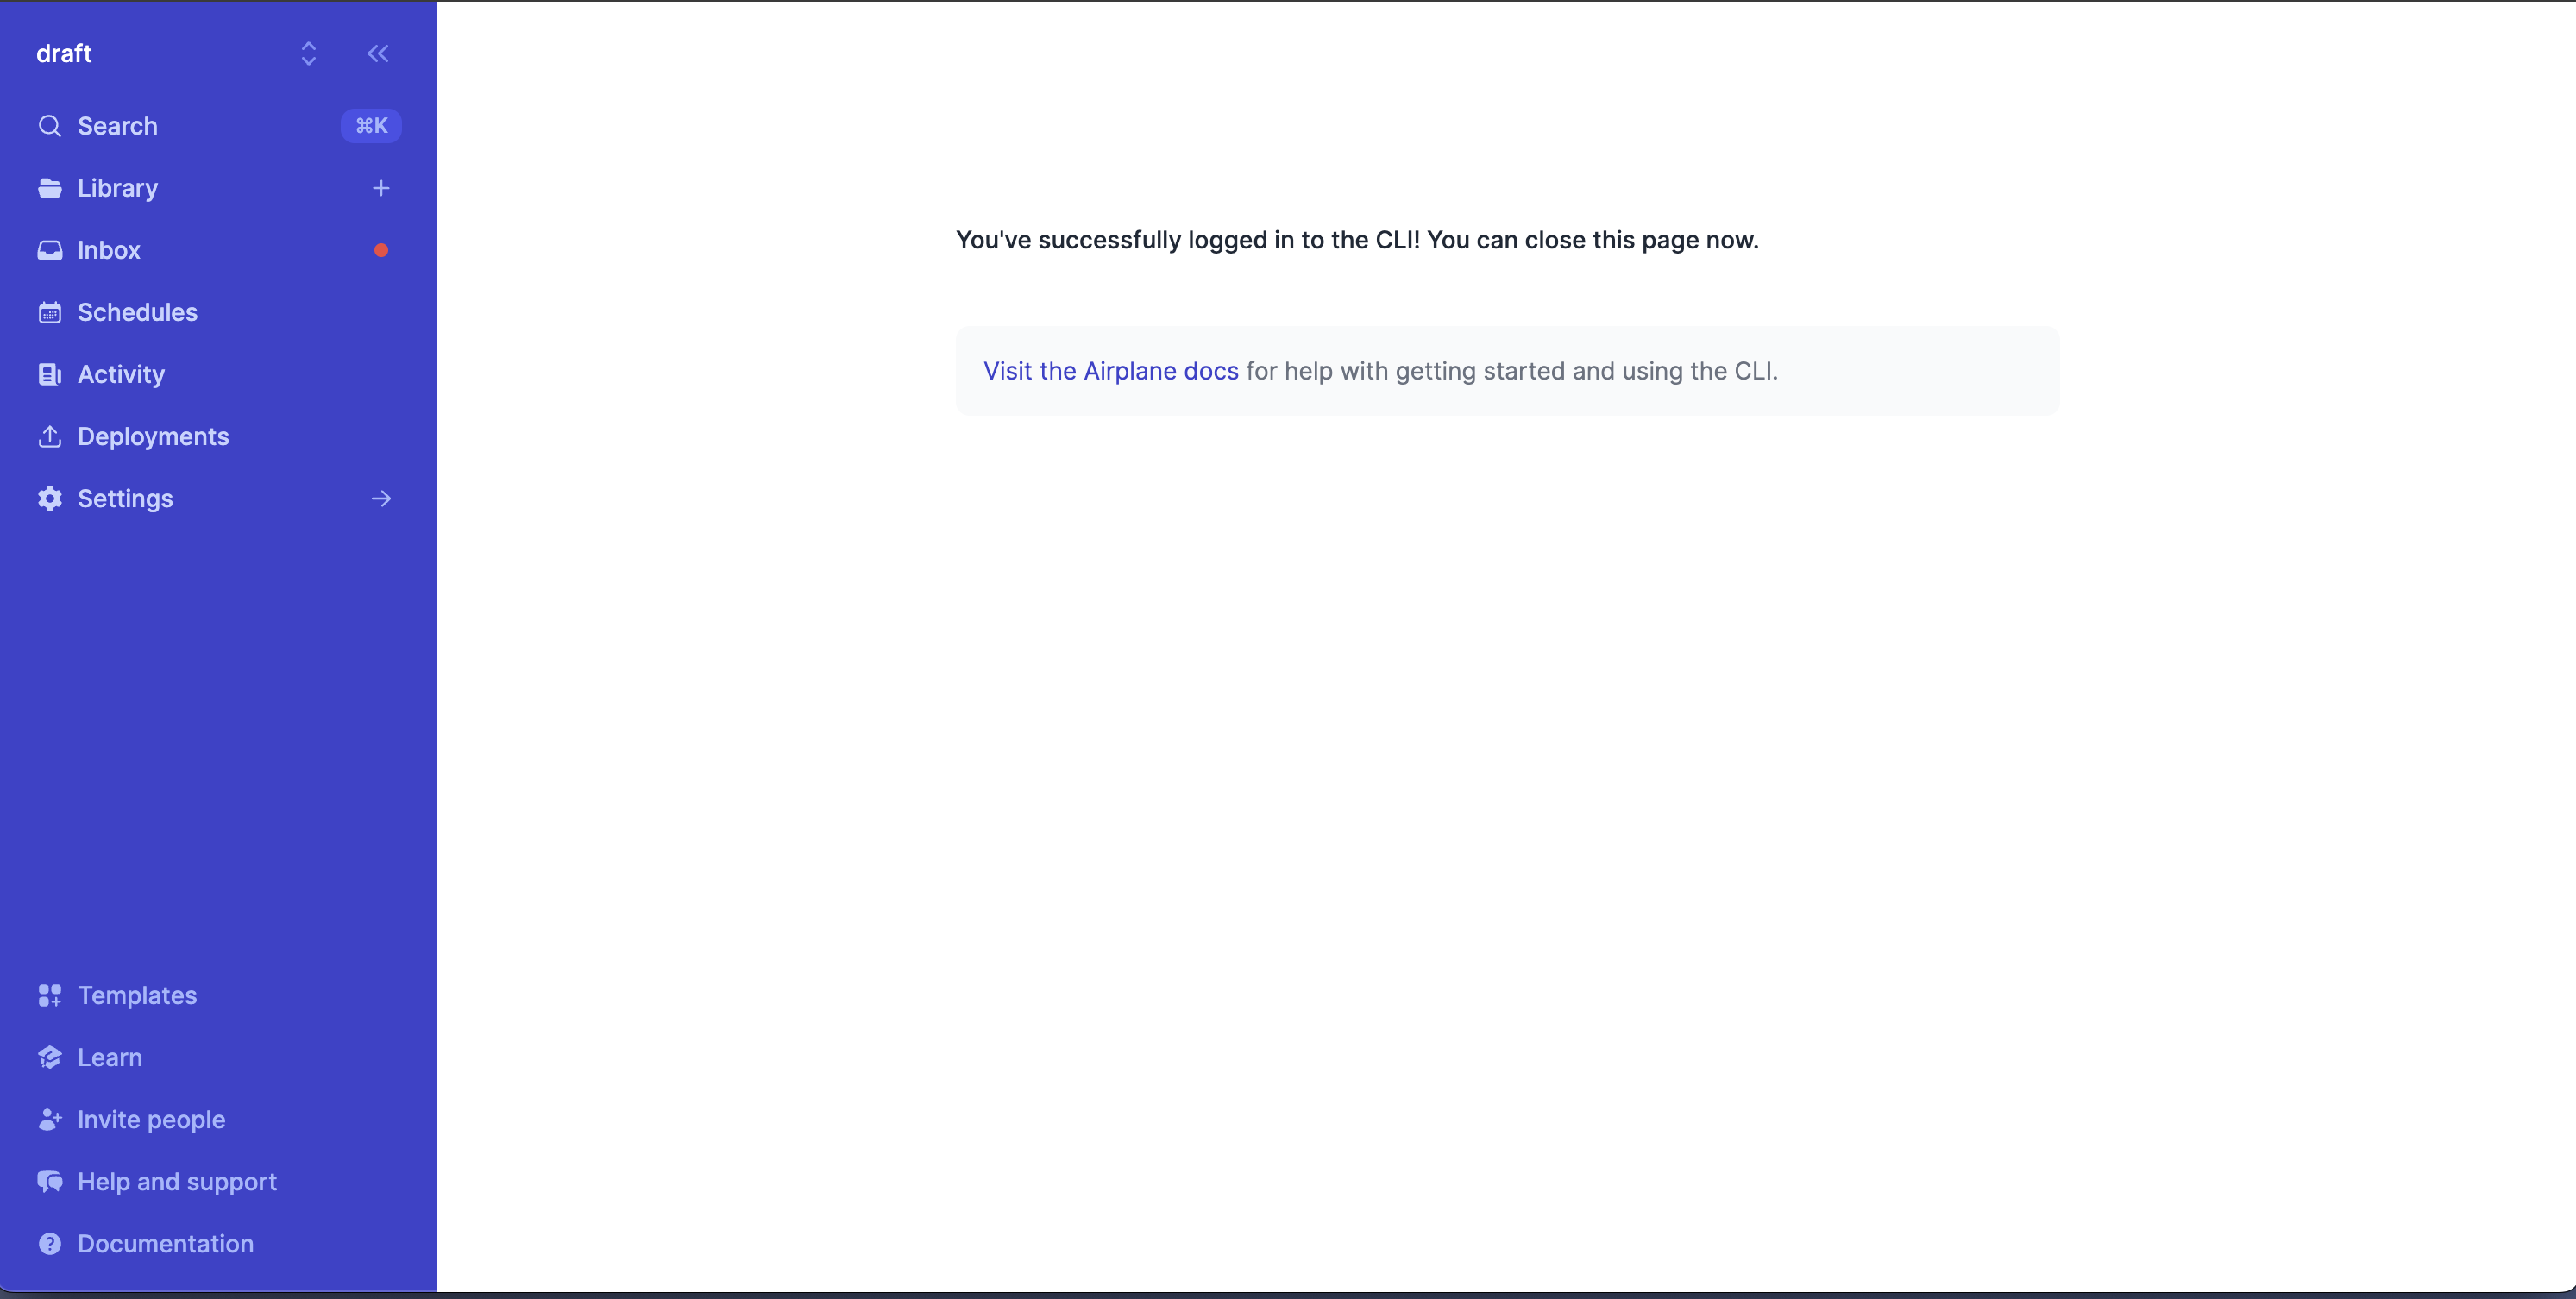
Press the Enter key to be redirected to the Airplane login page in the browser. Once logged in, we'll see a screen that looks similar to this:
The CLI automatically accesses the Airplane credentials from the browser, and the terminal will display the following output:
Next, create a new folder for the project, change the working directory to it, and run the following command to create a new Airplane project:
The CLI will ask us a series of questions to set up the new project. Make sure the answers match the following output:
This completes the setup of a new Airplane View project. We can start up the development server by running the following command:
We'll see a View similar to the one below in the browser:
We'll now extract the API-related credentials from each third-party tool to use in the new View.
Setting up Zendesk
We can access the Zendesk API using the username and password of the user account. However, we need to enable this access via the Zendesk settings page. To do that, head over to https://<your-zendesk-subdomain>.zendesk.com/admin/apps-integrations/apis/zendesk-api/settings. We'll see a page similar to this:
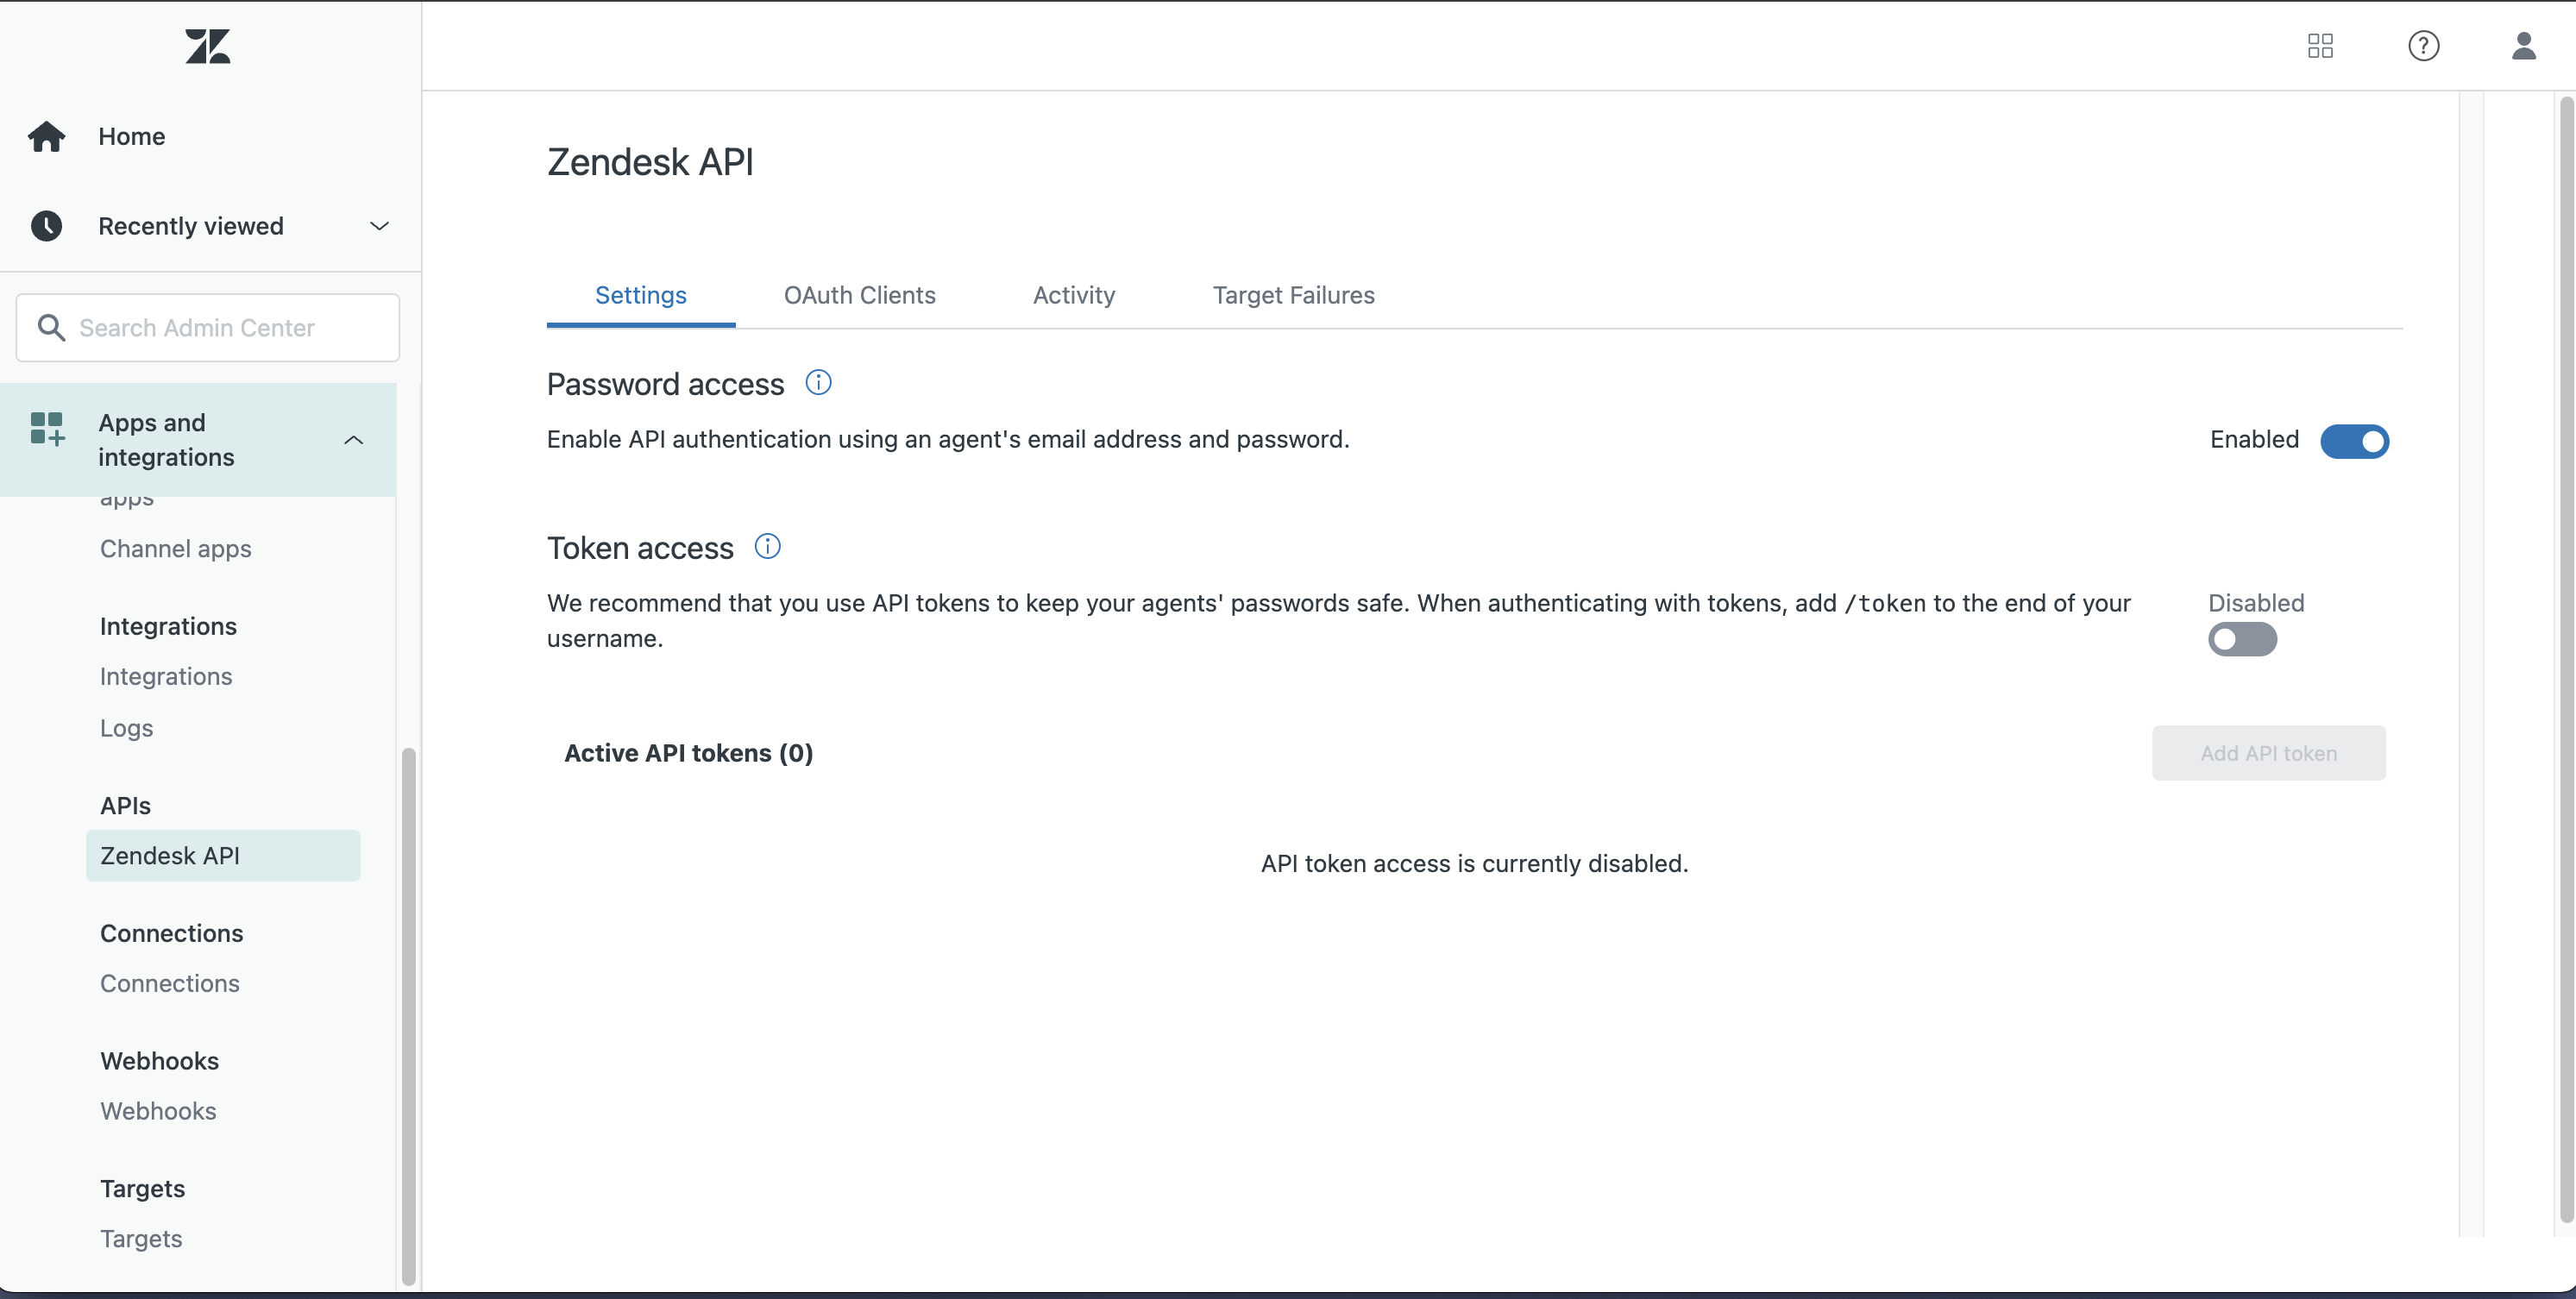
We'll need to ensure that the switch next to Password access is set to Enabled, as in the screenshot above. This will allow us to use the agent email address and password to access the Zendesk API.
Setting Up Hive
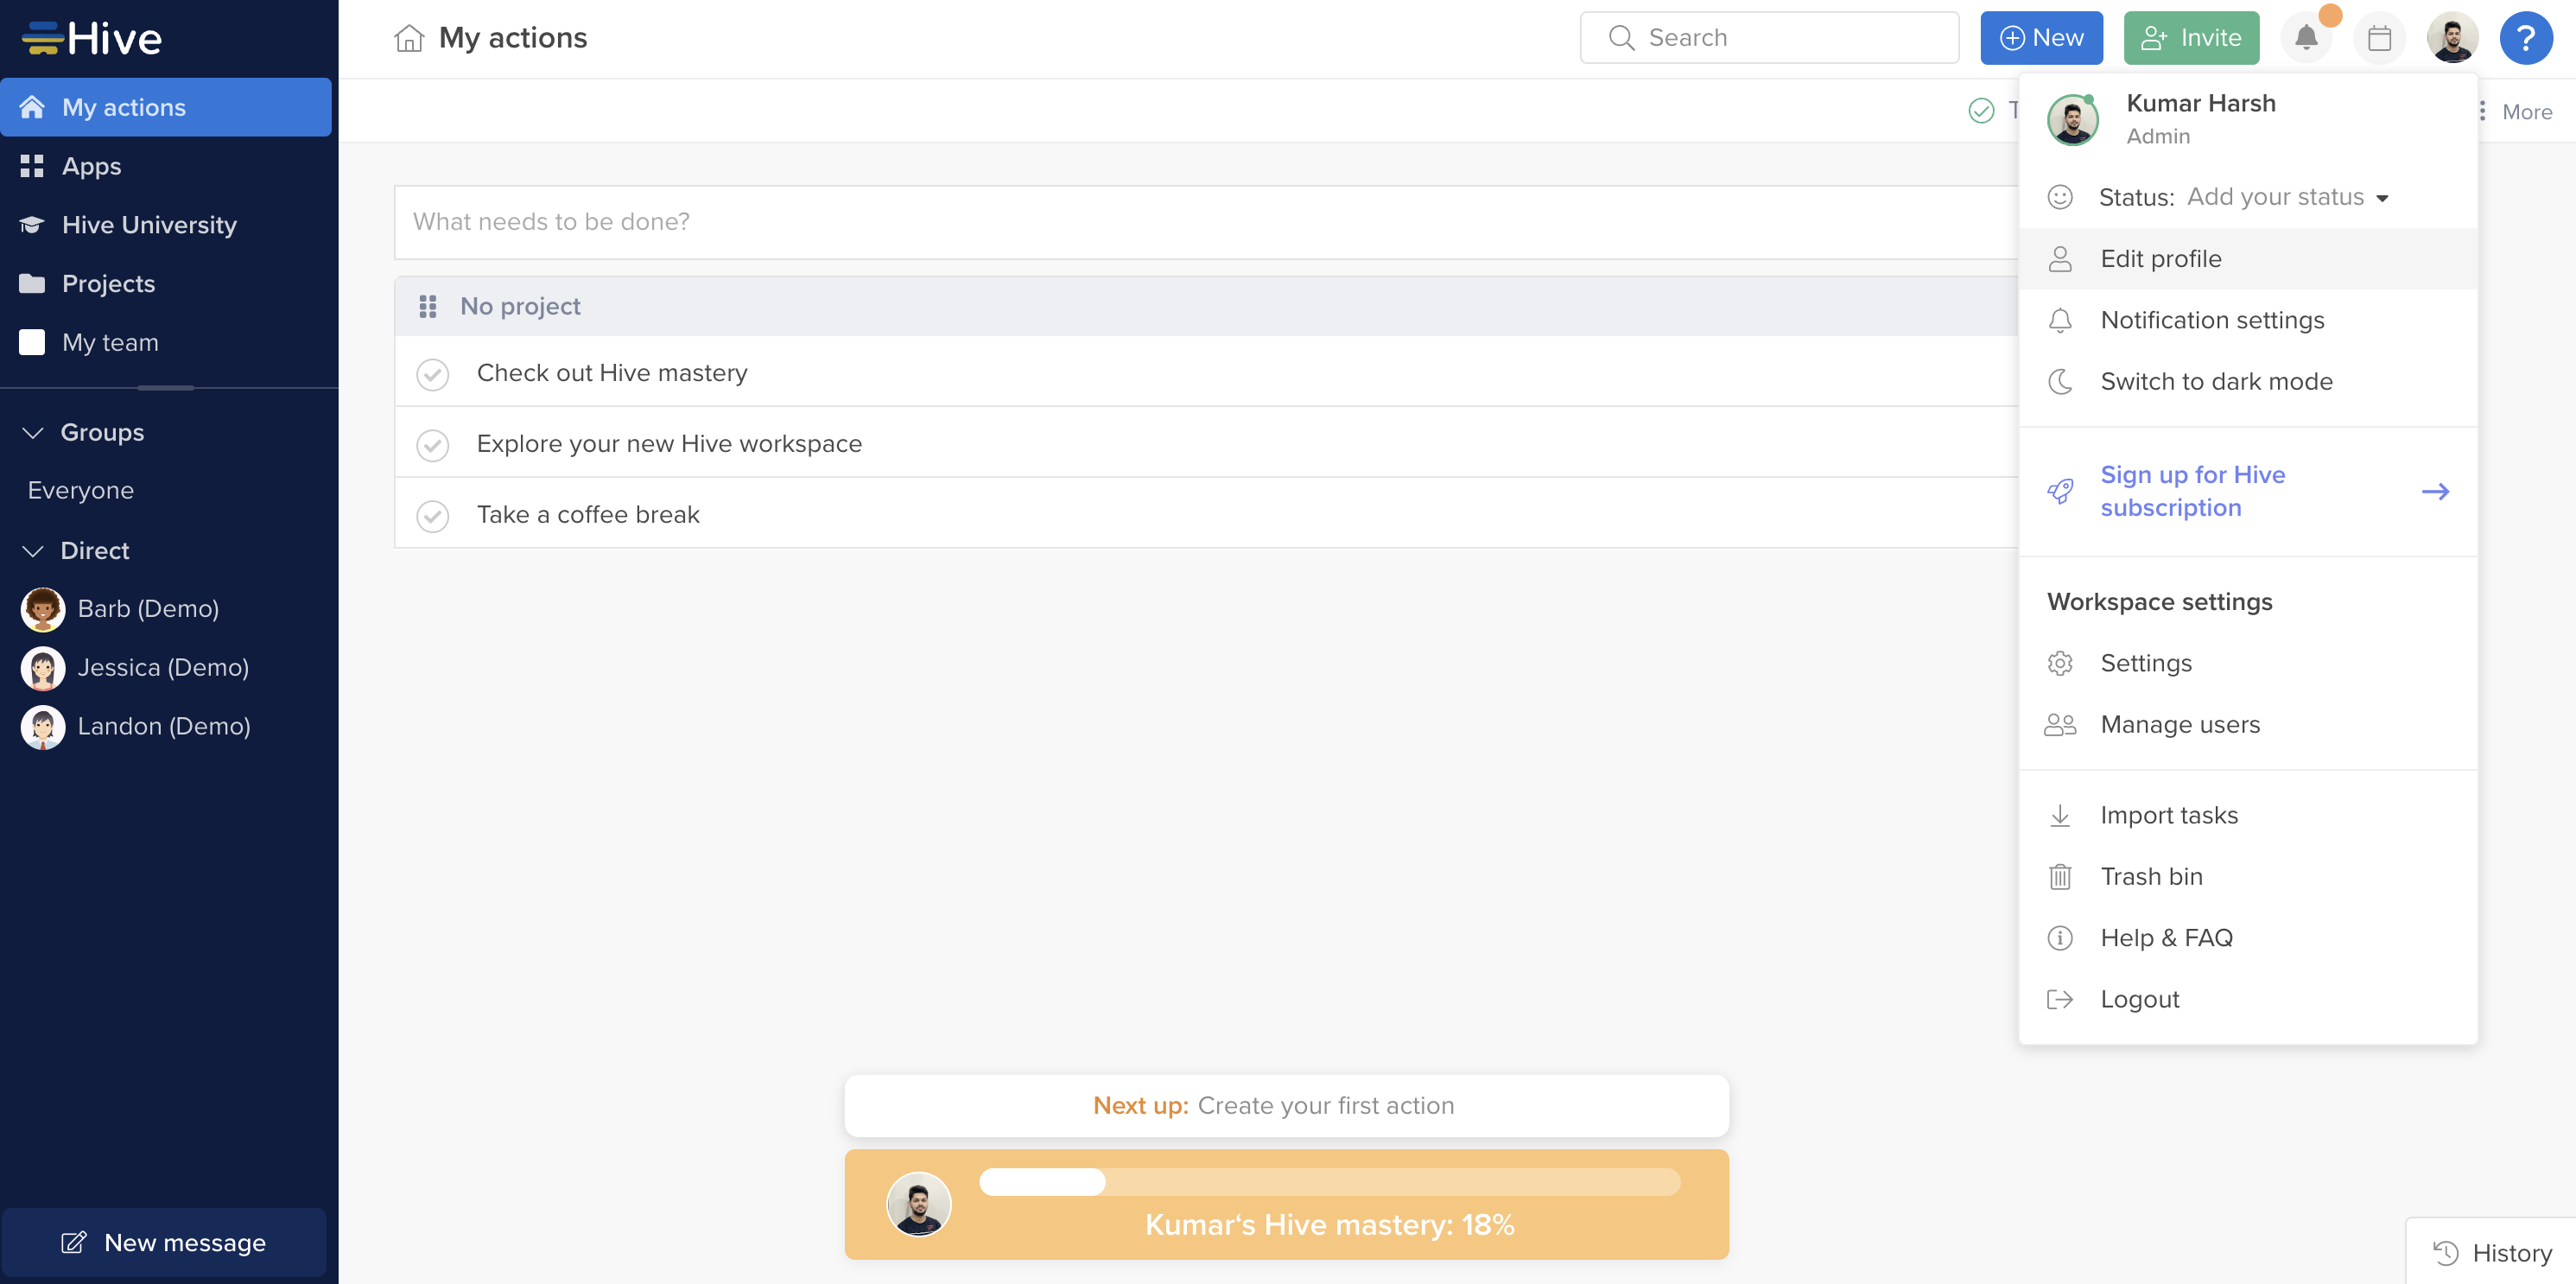
For Hive, we need to create and retrieve the API info from the profile page. To do that, head over to the Hive dashboard and click the profile icon in the upper-right corner. In the list that appears, click the Edit profile option:
On the next screen, choose the API info tab from the left navigation pane. The API information will be displayed:
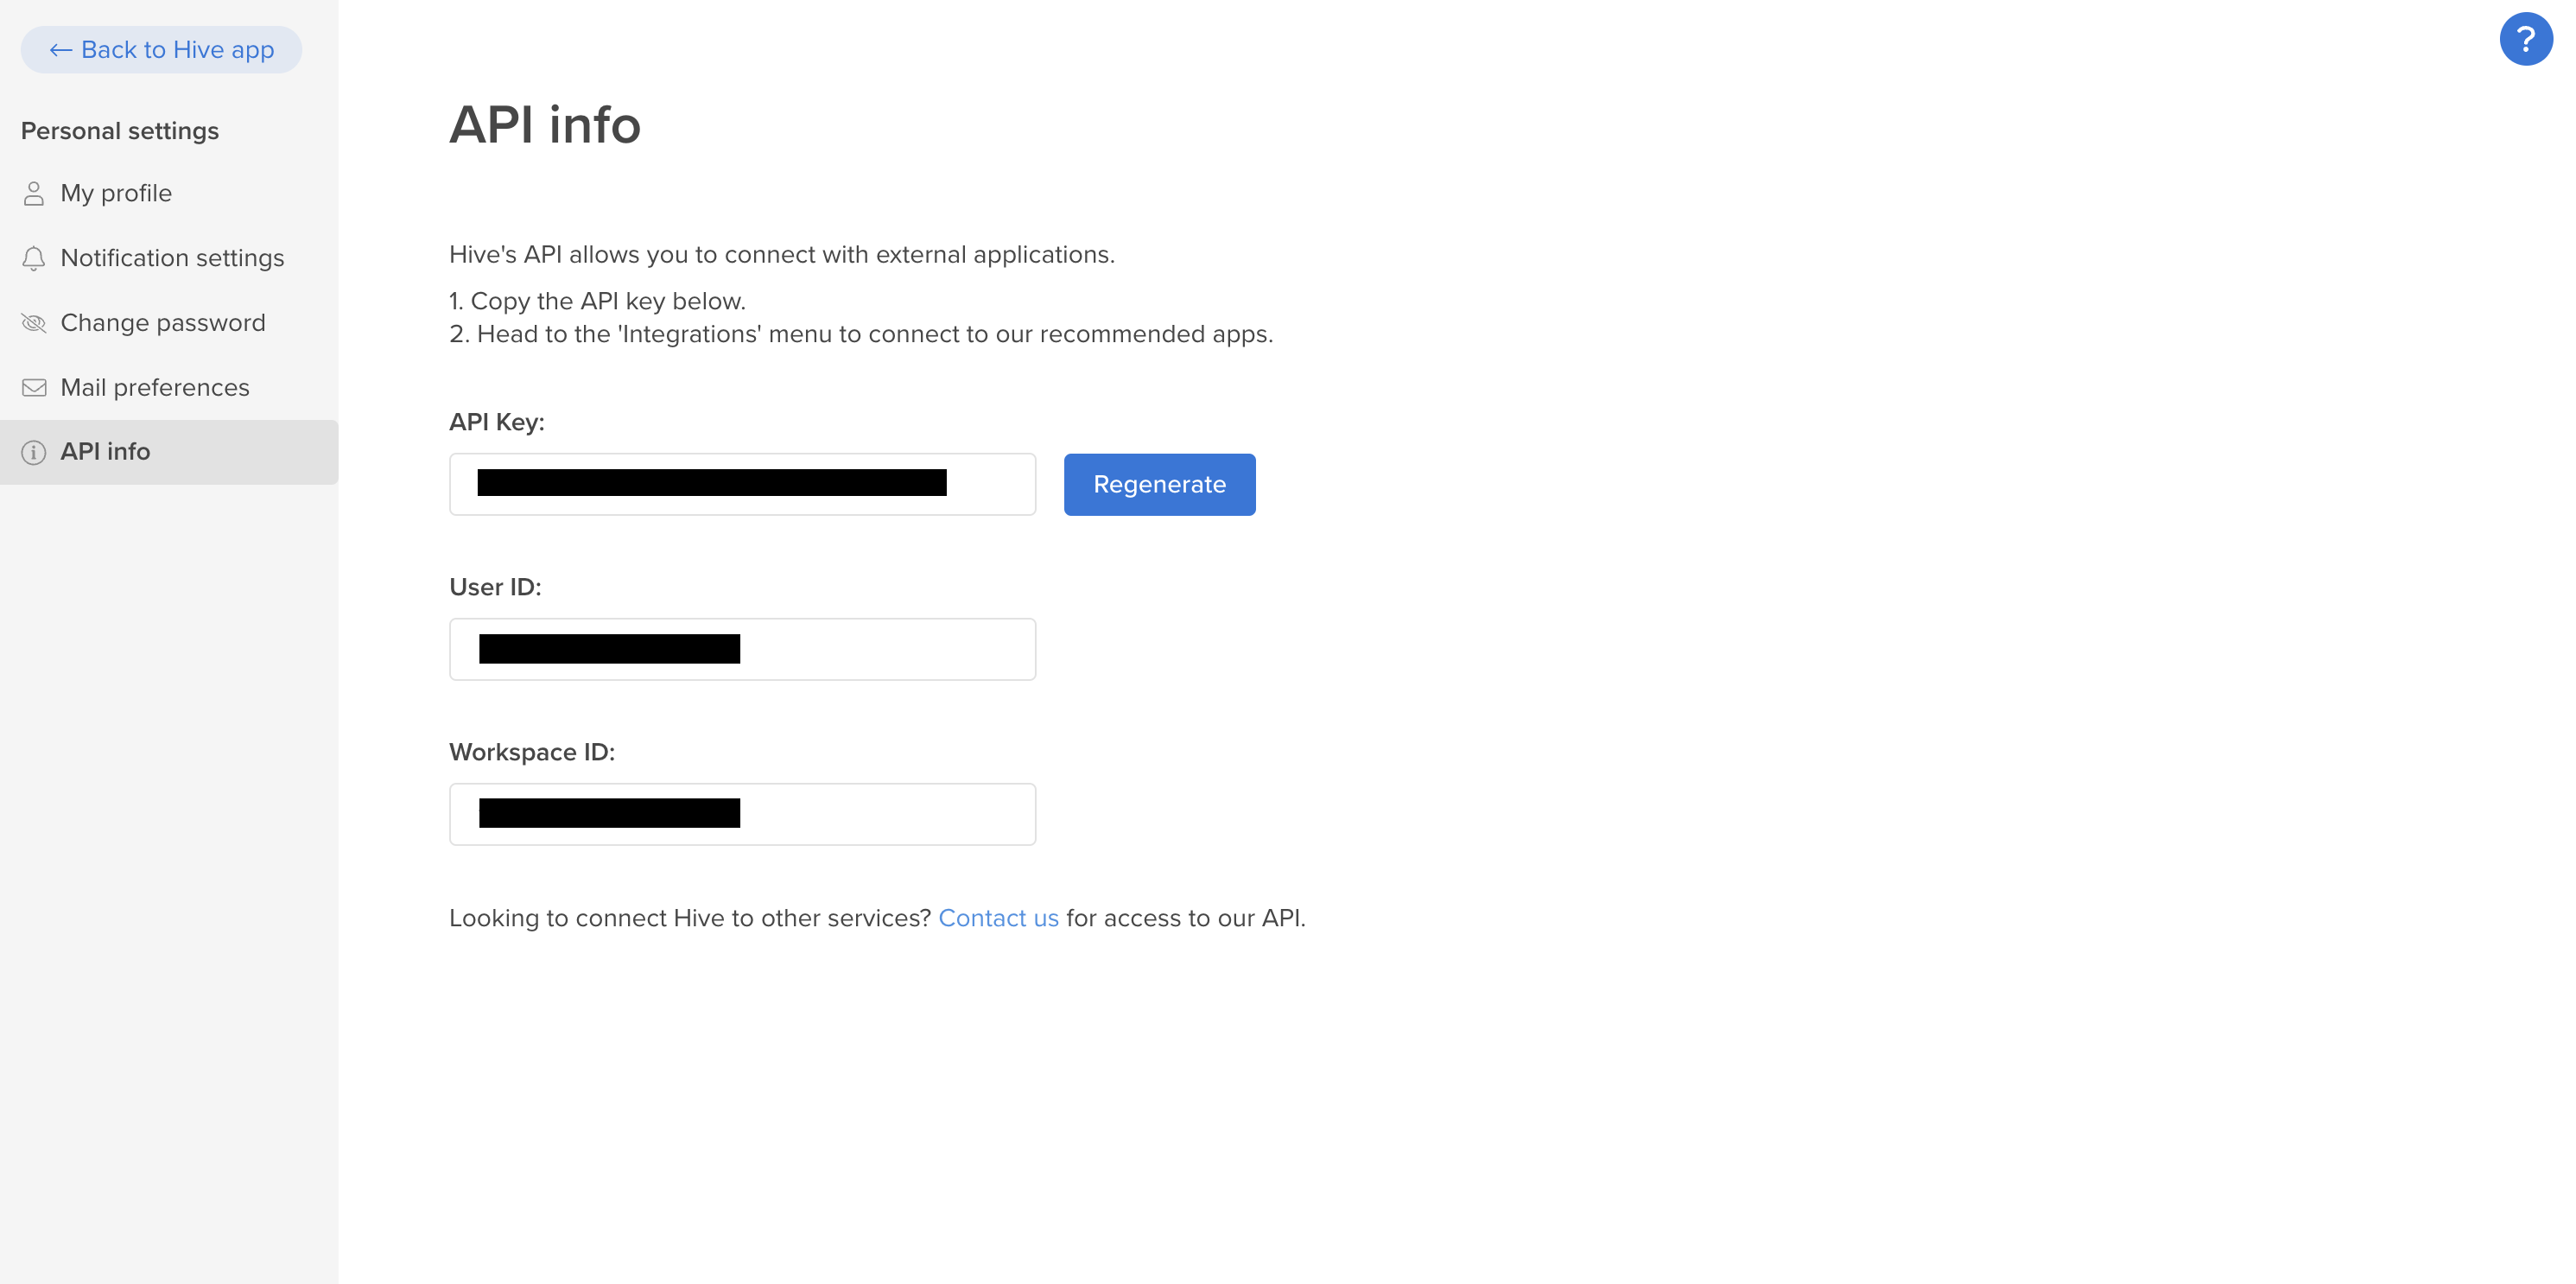
Save all three secrets (API Key, User ID, and Workspace ID), as we'll need them when interacting with the Hive API.
Understanding the dashboard's structure
We've now set up all of the required tools and services to start building the dashboard. However, since this is a complex project, looking at an overview of its final structure will help us understand how everything fits together.
We'll create the View in the file titled ticket_dashboard.airplane.tsx stored at the root of the project directory. We should move the file to a new directory titled views inside the root folder, as we'll create a few tasks in this project as well.
We'll create the following Airplane tasks to handle the integration with third-party services:
list_open_zendesk_ticketsto fetch open tickets from Zendesklist_hive_usersto list the active Hive users to assign the taskcreate_hive_taskto create a Hive task (also known as an action)fetch_zendesk_metricsto fetch raw metrics data from Zendesk and calculate the desired metrics
The source files will be created inside a tasks directory in the project's root directory as we create these tasks in the project via the Airplane CLI.
Building the dashboard
With a clear idea of what we're going to build, we can now proceed with developing the dashboard.
Building the Tasks
Start by installing Axios in the project. We can do that by running the following command:
Next, create the required tasks (as listed before). Run the following command (with input values as shown below) to create the list_open_zendesk_tickets task:
Open the tasks/list_open_zendesk_tickets.airplane.ts file in the IDE and paste in the following code snippet:
Next, run the following command (with input values as shown below) to create the list_hive_users task:
Open the tasks/list_hive_users.airplane.ts file in the IDE and paste the following code snippet:
Next, run the following command (with input values as shown below) to create the create_hive_task task:
Open the tasks/create_hive_task.airplane.ts file in the IDE and paste the following code snippet:
Next, run the following command (with input values as shown below) to create the fetch_zendesk_metrics task:
Open the tasks/fetch_zendesk_metrics.airplane.ts file in the IDE and paste the following code snippet:
We've now set up all the supporting tasks for the View. Next, we'll update the code for the View itself.
Building the View
To update the View, paste the following code snippet into the file views/ticket_dashboard.airplane.tsx:
There are inline comments to help understand the code above. We must also make sure to update the value of zendeskSubdomain before proceeding.
This completes the setup of the View. We can test it out locally by running the following command:
The following screen will be displayed in the browser:
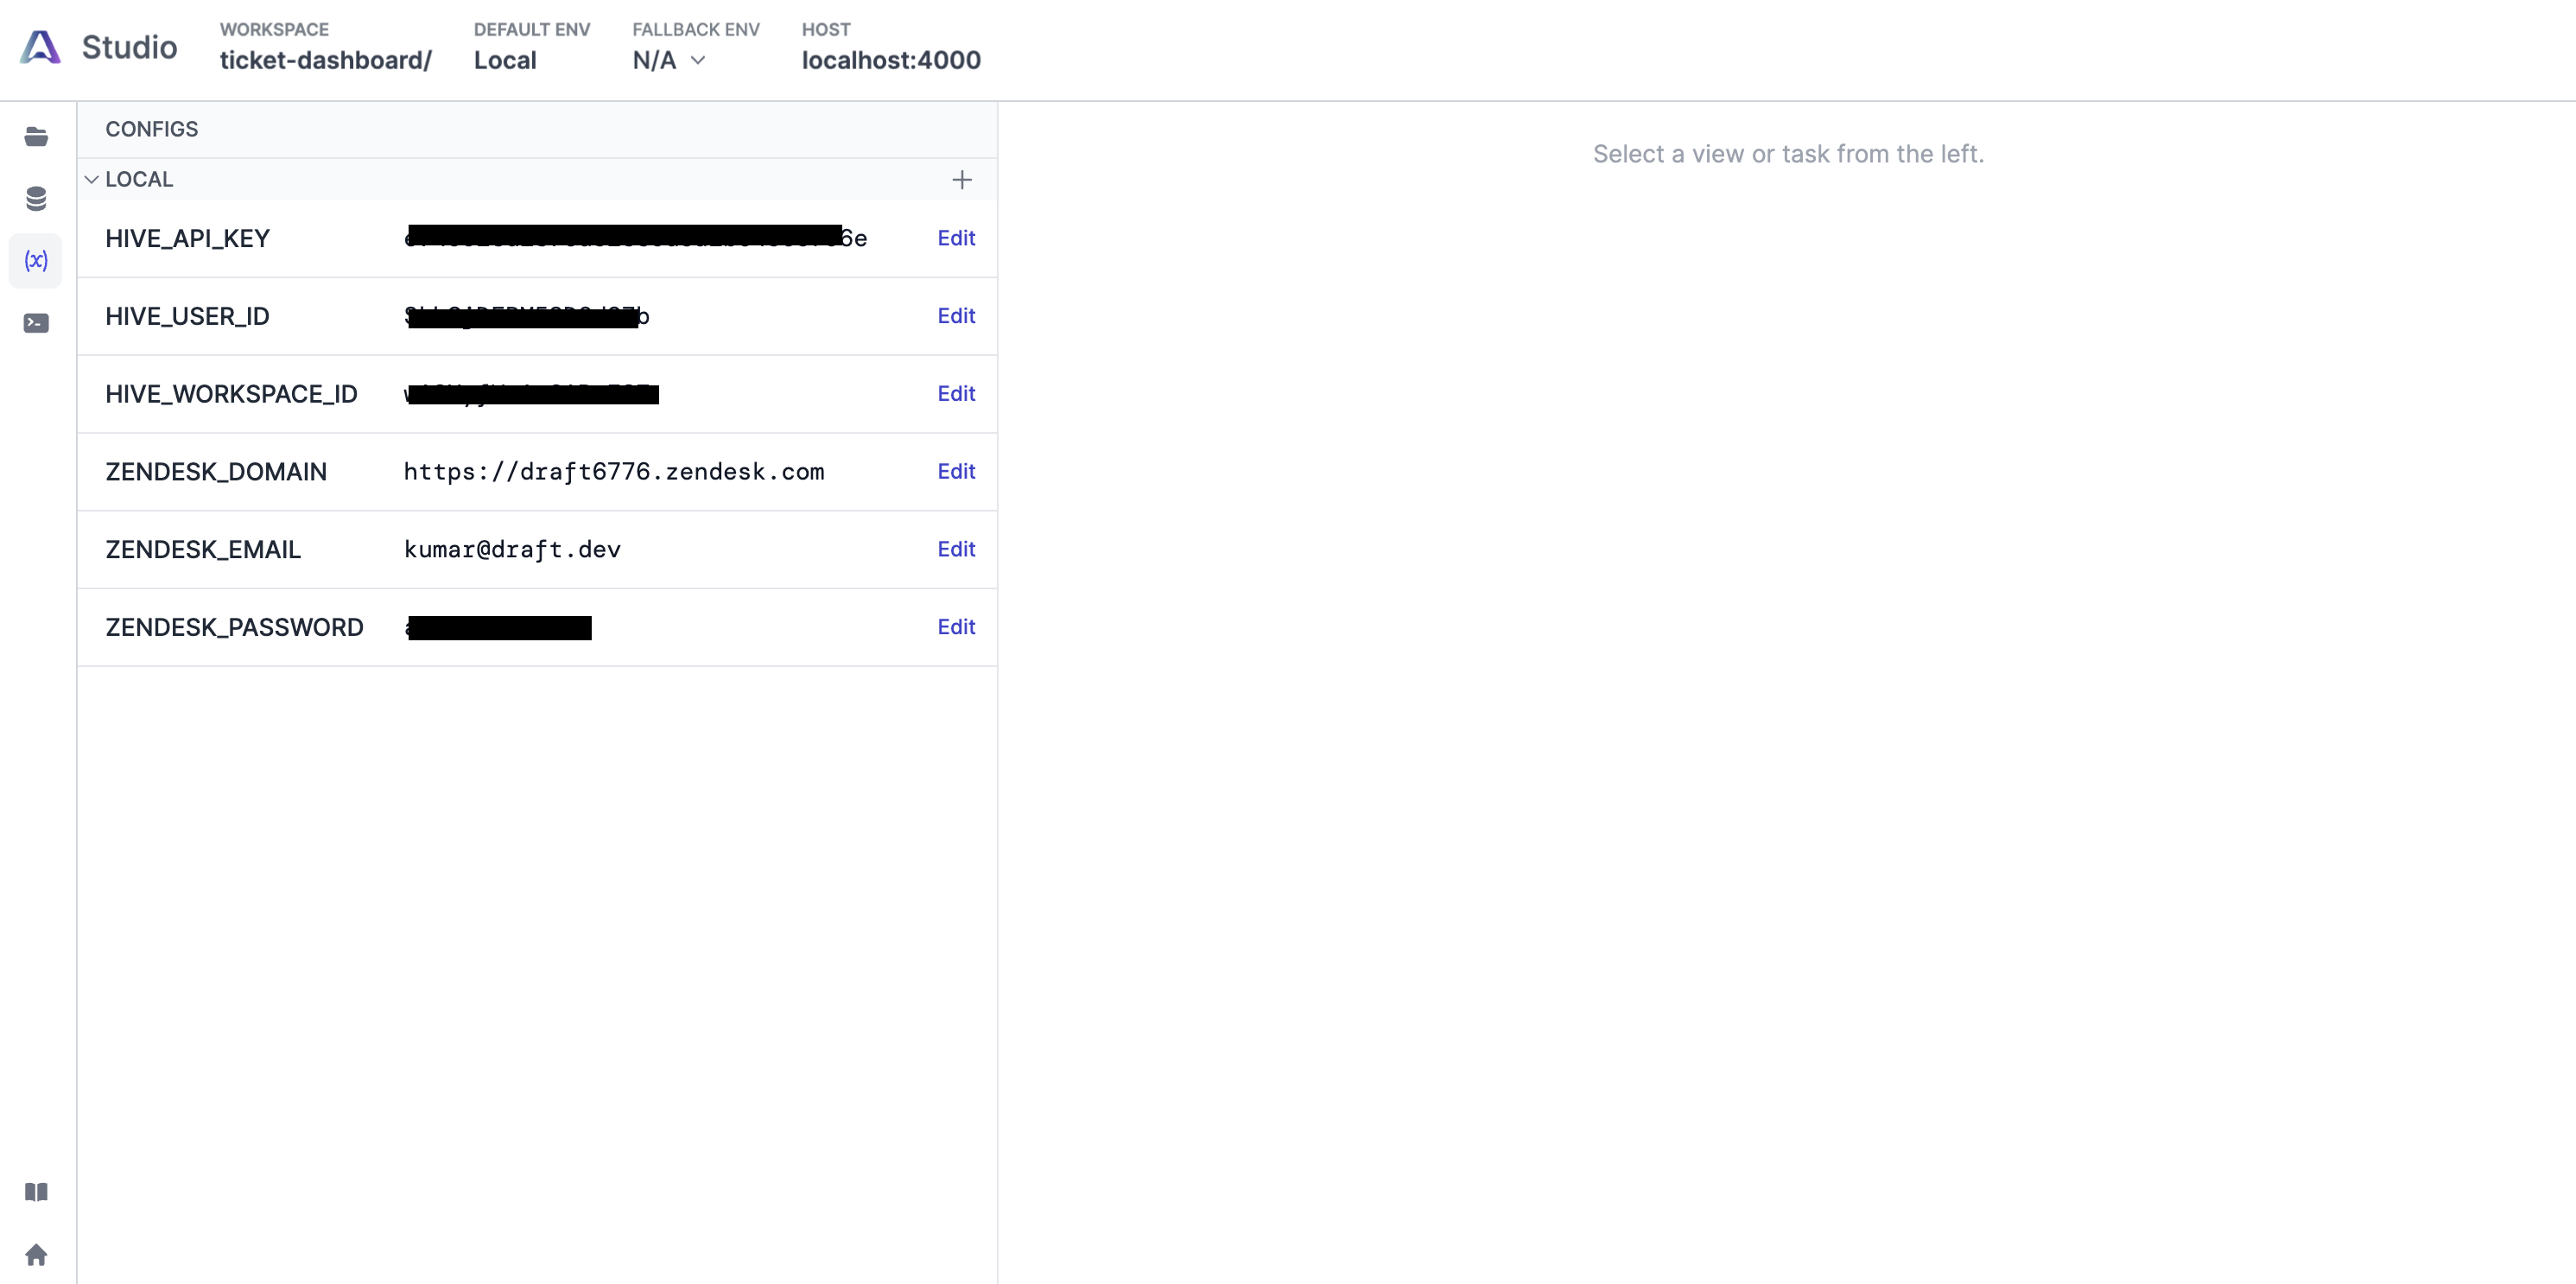
At present, the View is non-functional, as it depends on environment variables to access the sensitive third-party credentials. To add those, navigate to the Configs page using the left pane, and add the following values for the config variables:
Here's how the Configs page should look once we've added all the config variables:
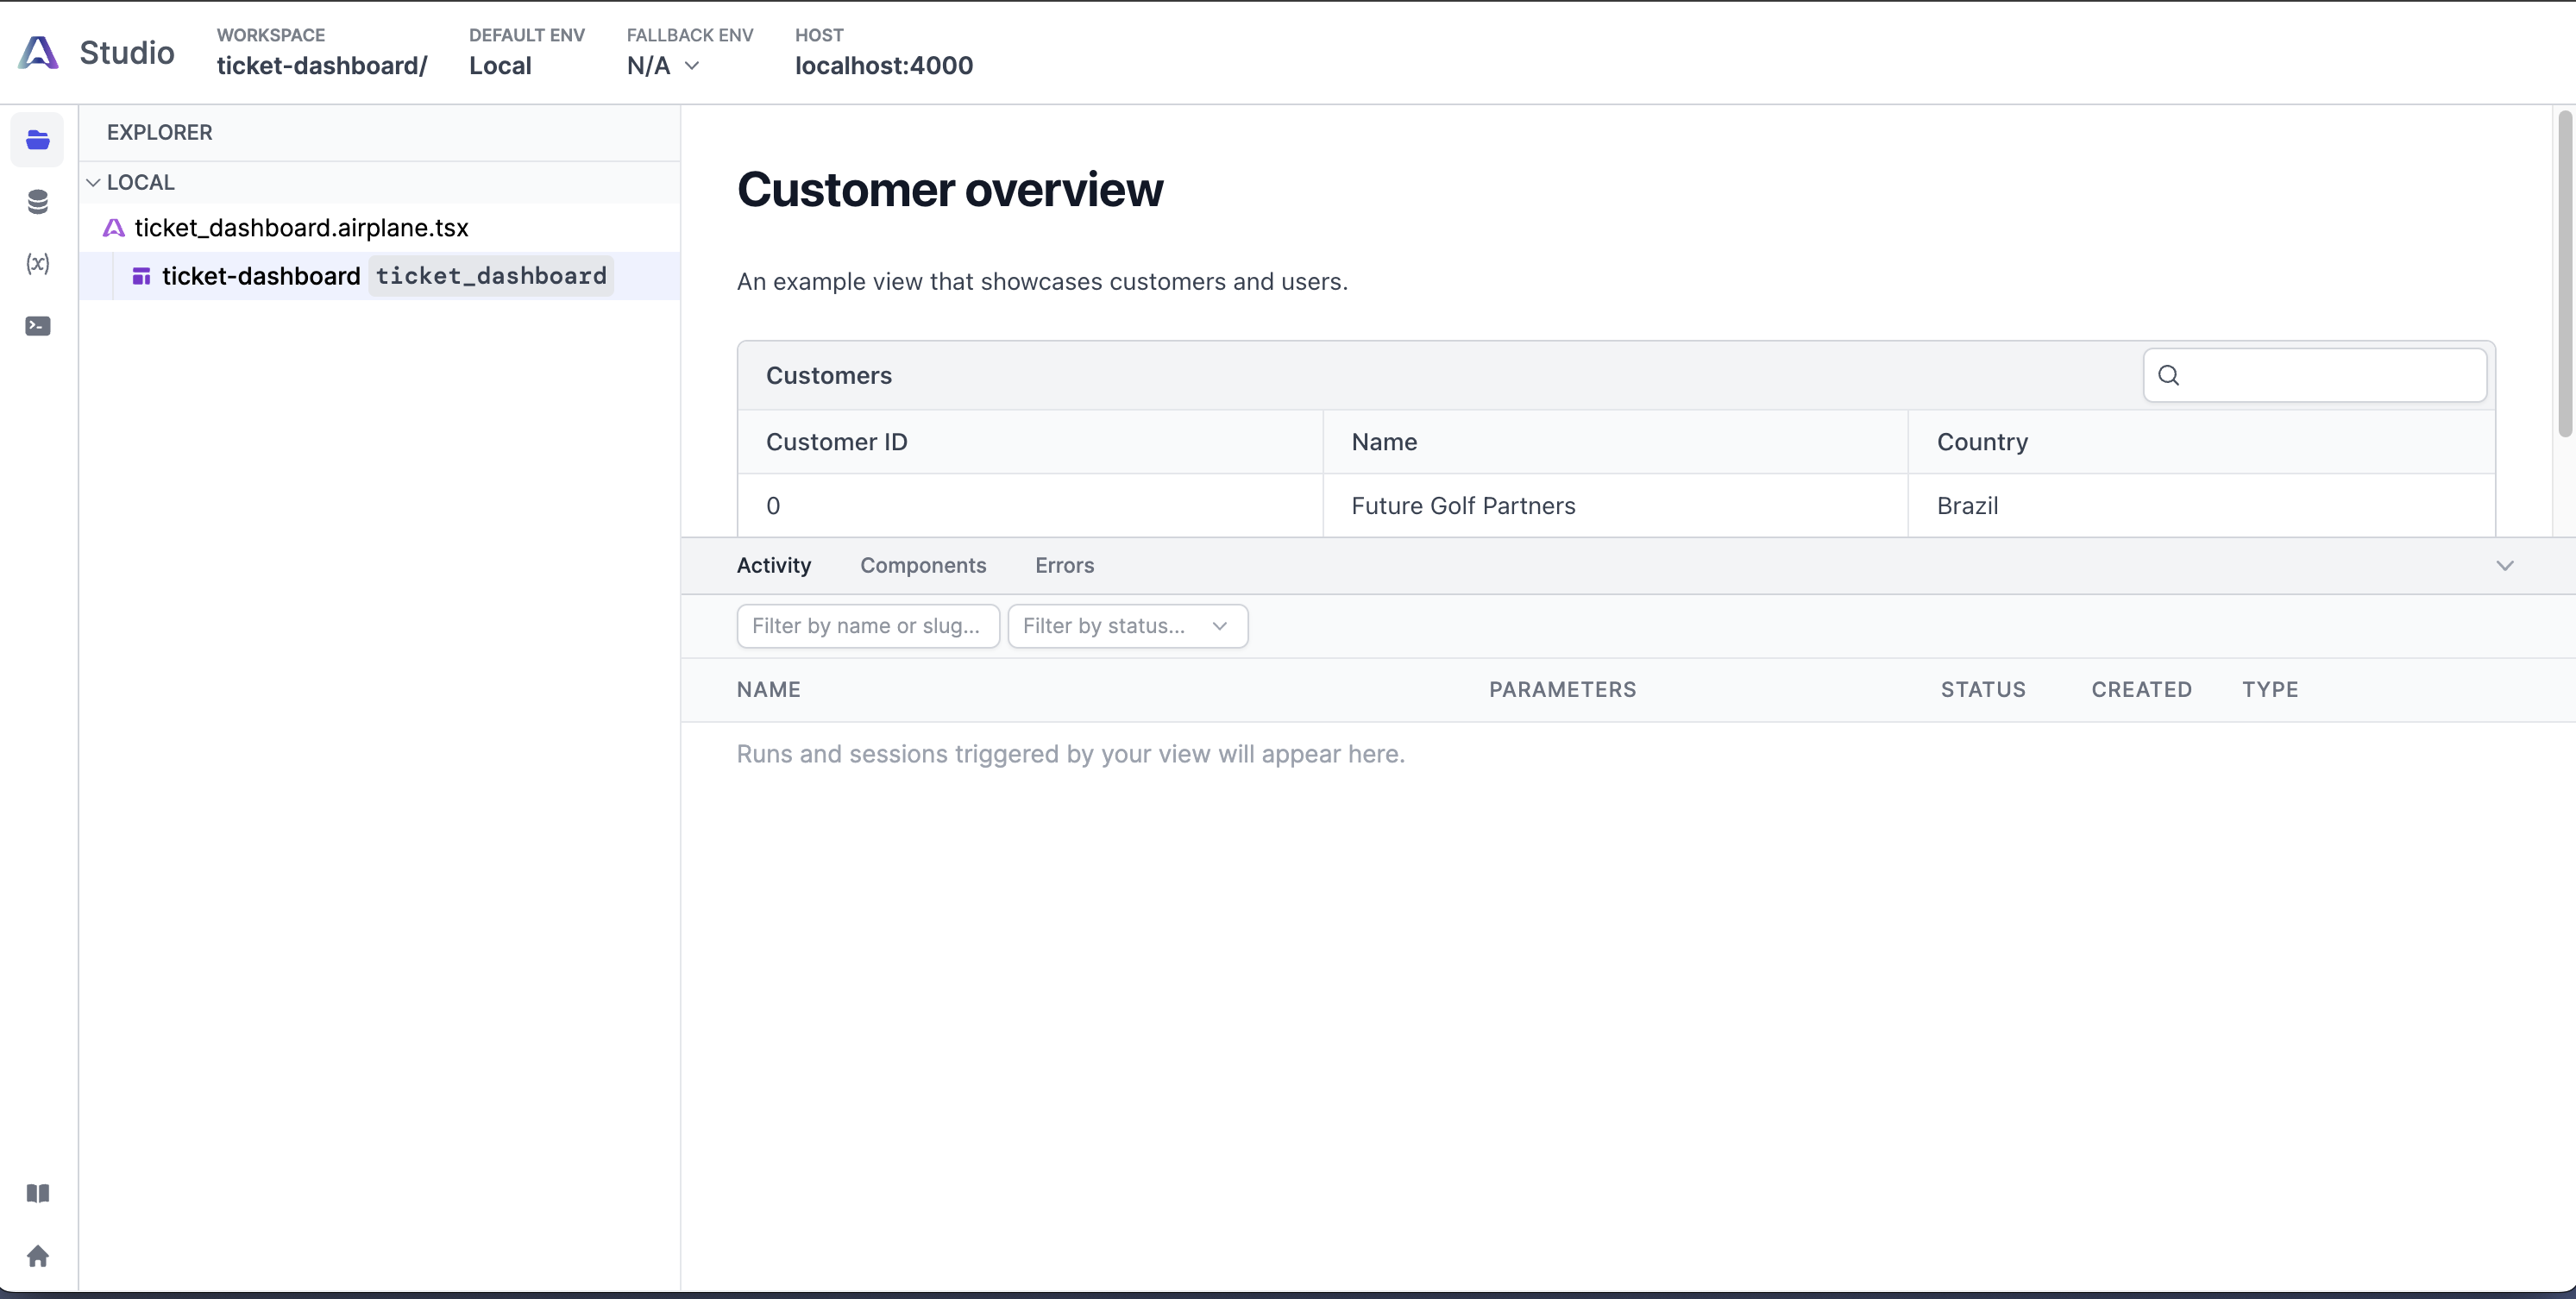
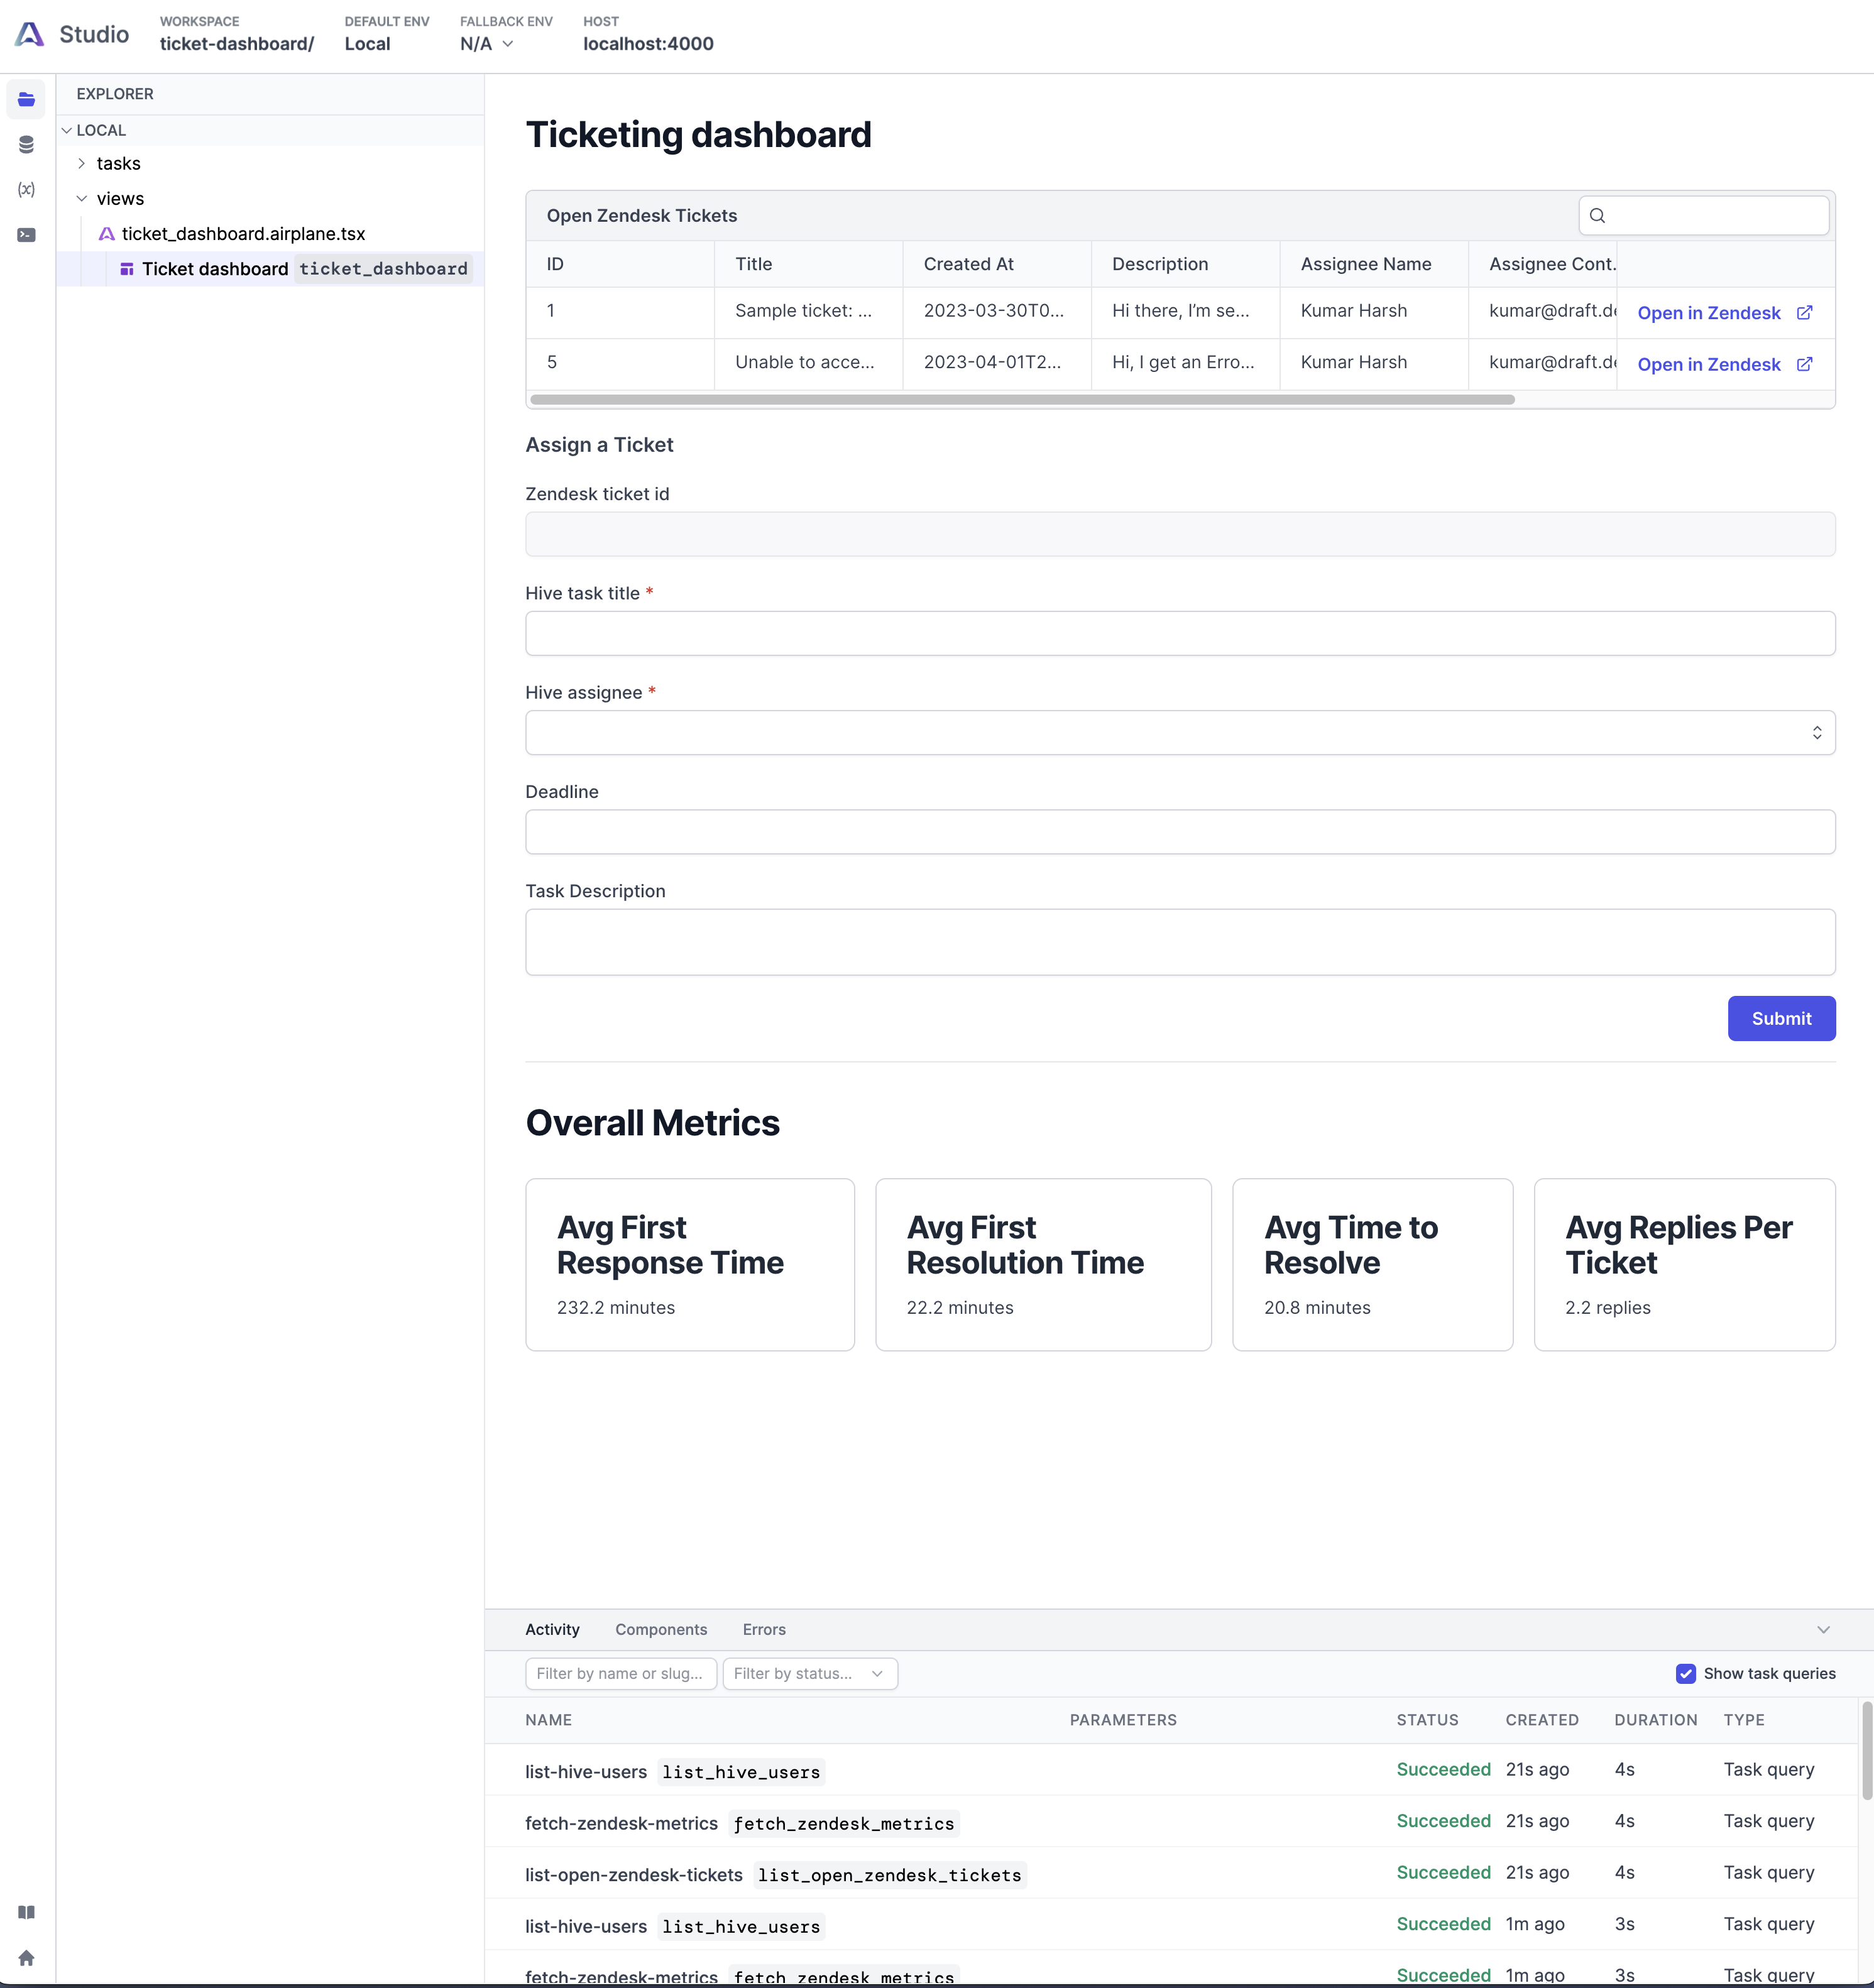
If we try running the View now, it should load data and metrics correctly:
Deploying and testing
The final step in the tutorial is to deploy the dashboard to Airplane's remote server and see it in action.
Deploying the setup to Airplane
Before deploying, we'll need to define the values for the config vars in the Airplane account.
The environment variables we previously set up through Airplane Studio while running the dashboard locally are only set for the dev environment. For the remote deployment environment, we have to set the values using the following commands:
Once that's done, deploying an Airplane View or Task is very straightforward. All we need to do is run the following command:
Enter Y when asked whether to continue deploying to the default environment. Once the CLI completes the deploy operation, it will print an output that should end similarly to this:
We can copy and paste the link printed by this command in the browser to see the result of the deployment:
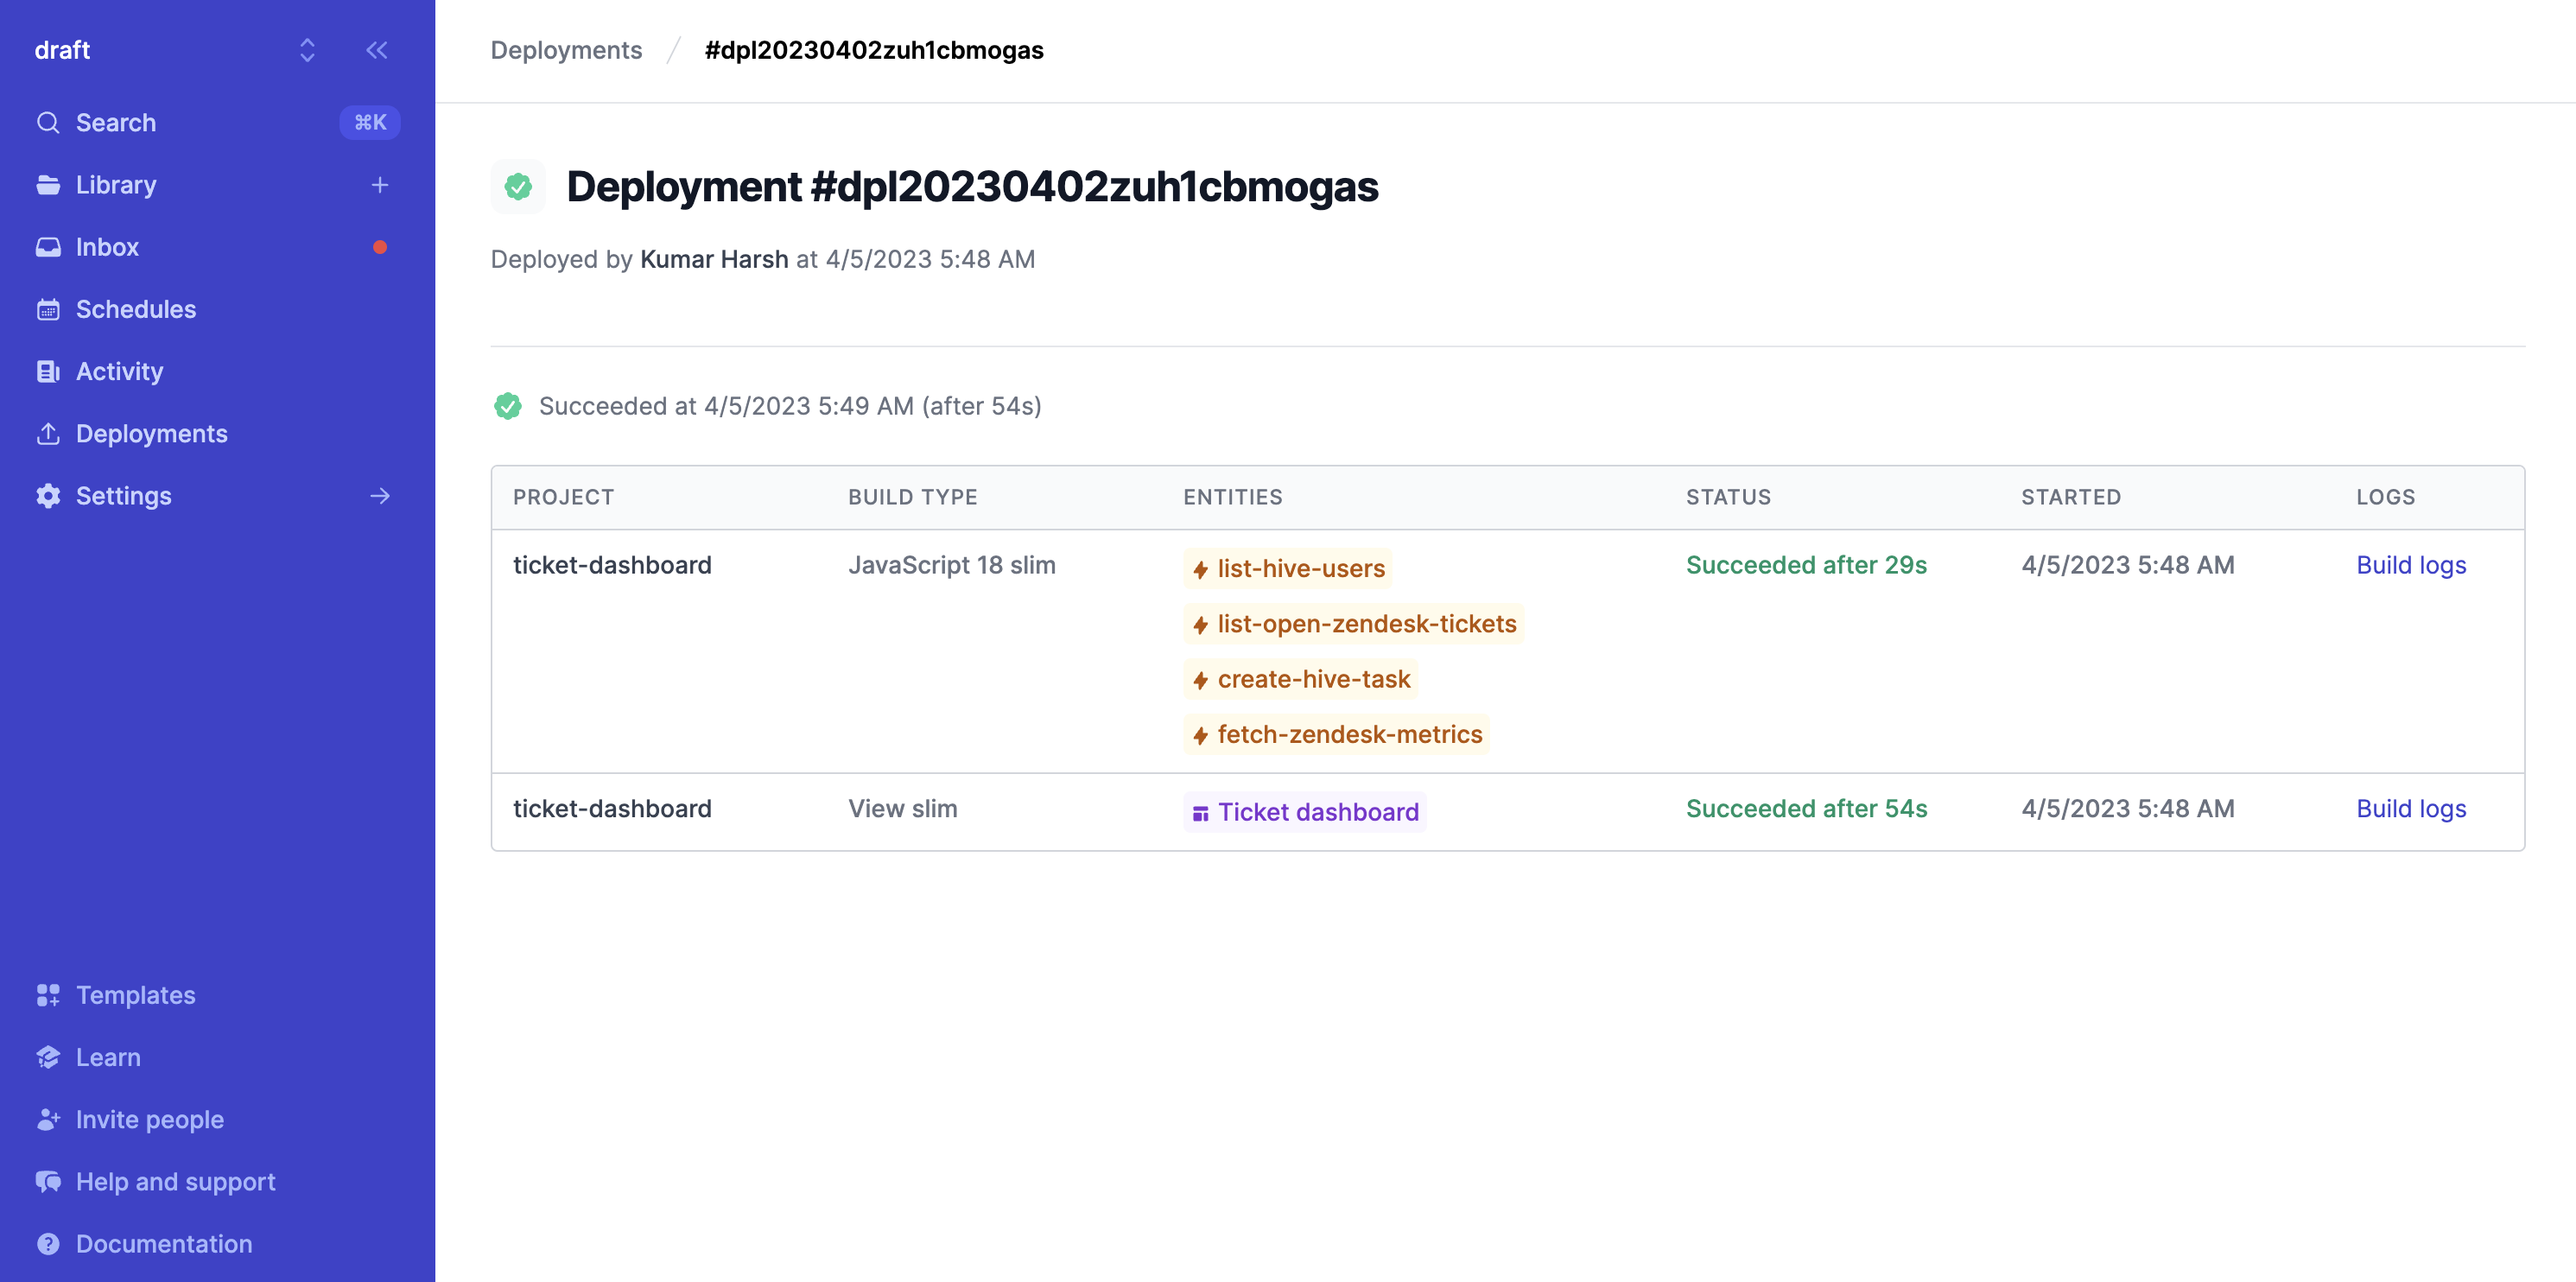
Click the Ticket dashboard chip in the Entities column to navigate to the deployed View.
Seeing the new dashboard in action
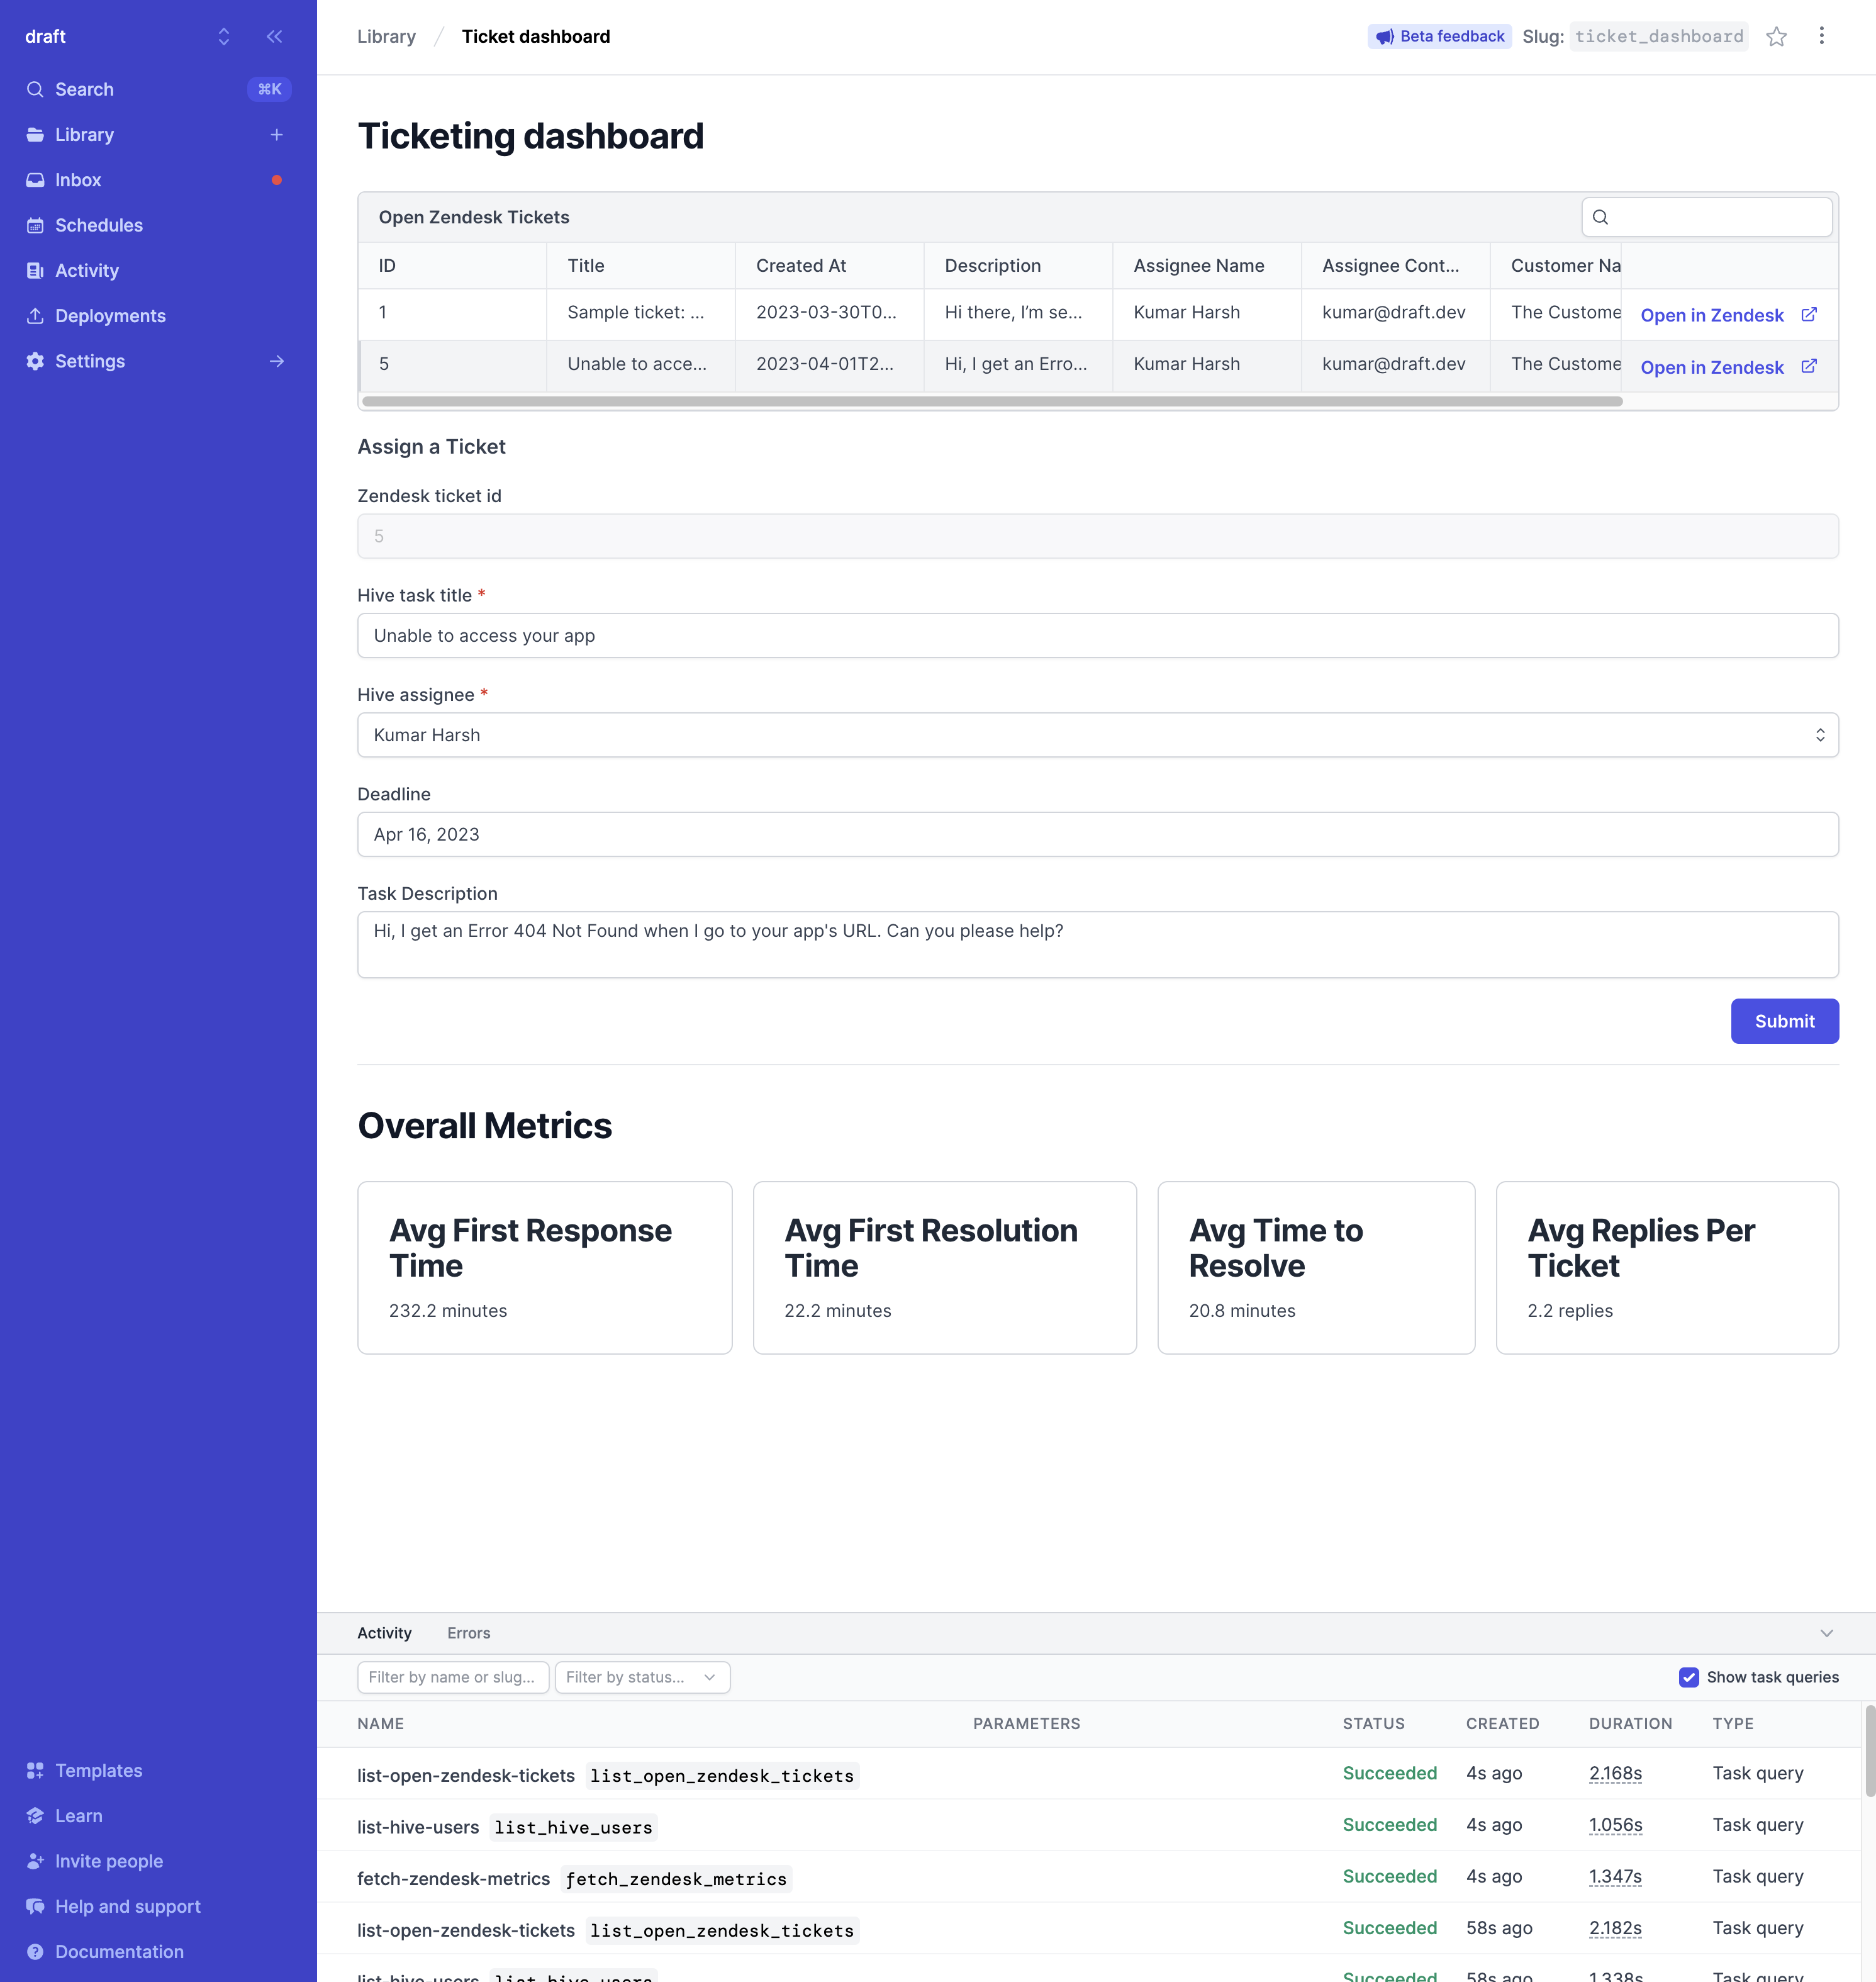
The View should look like this once it's deployed:
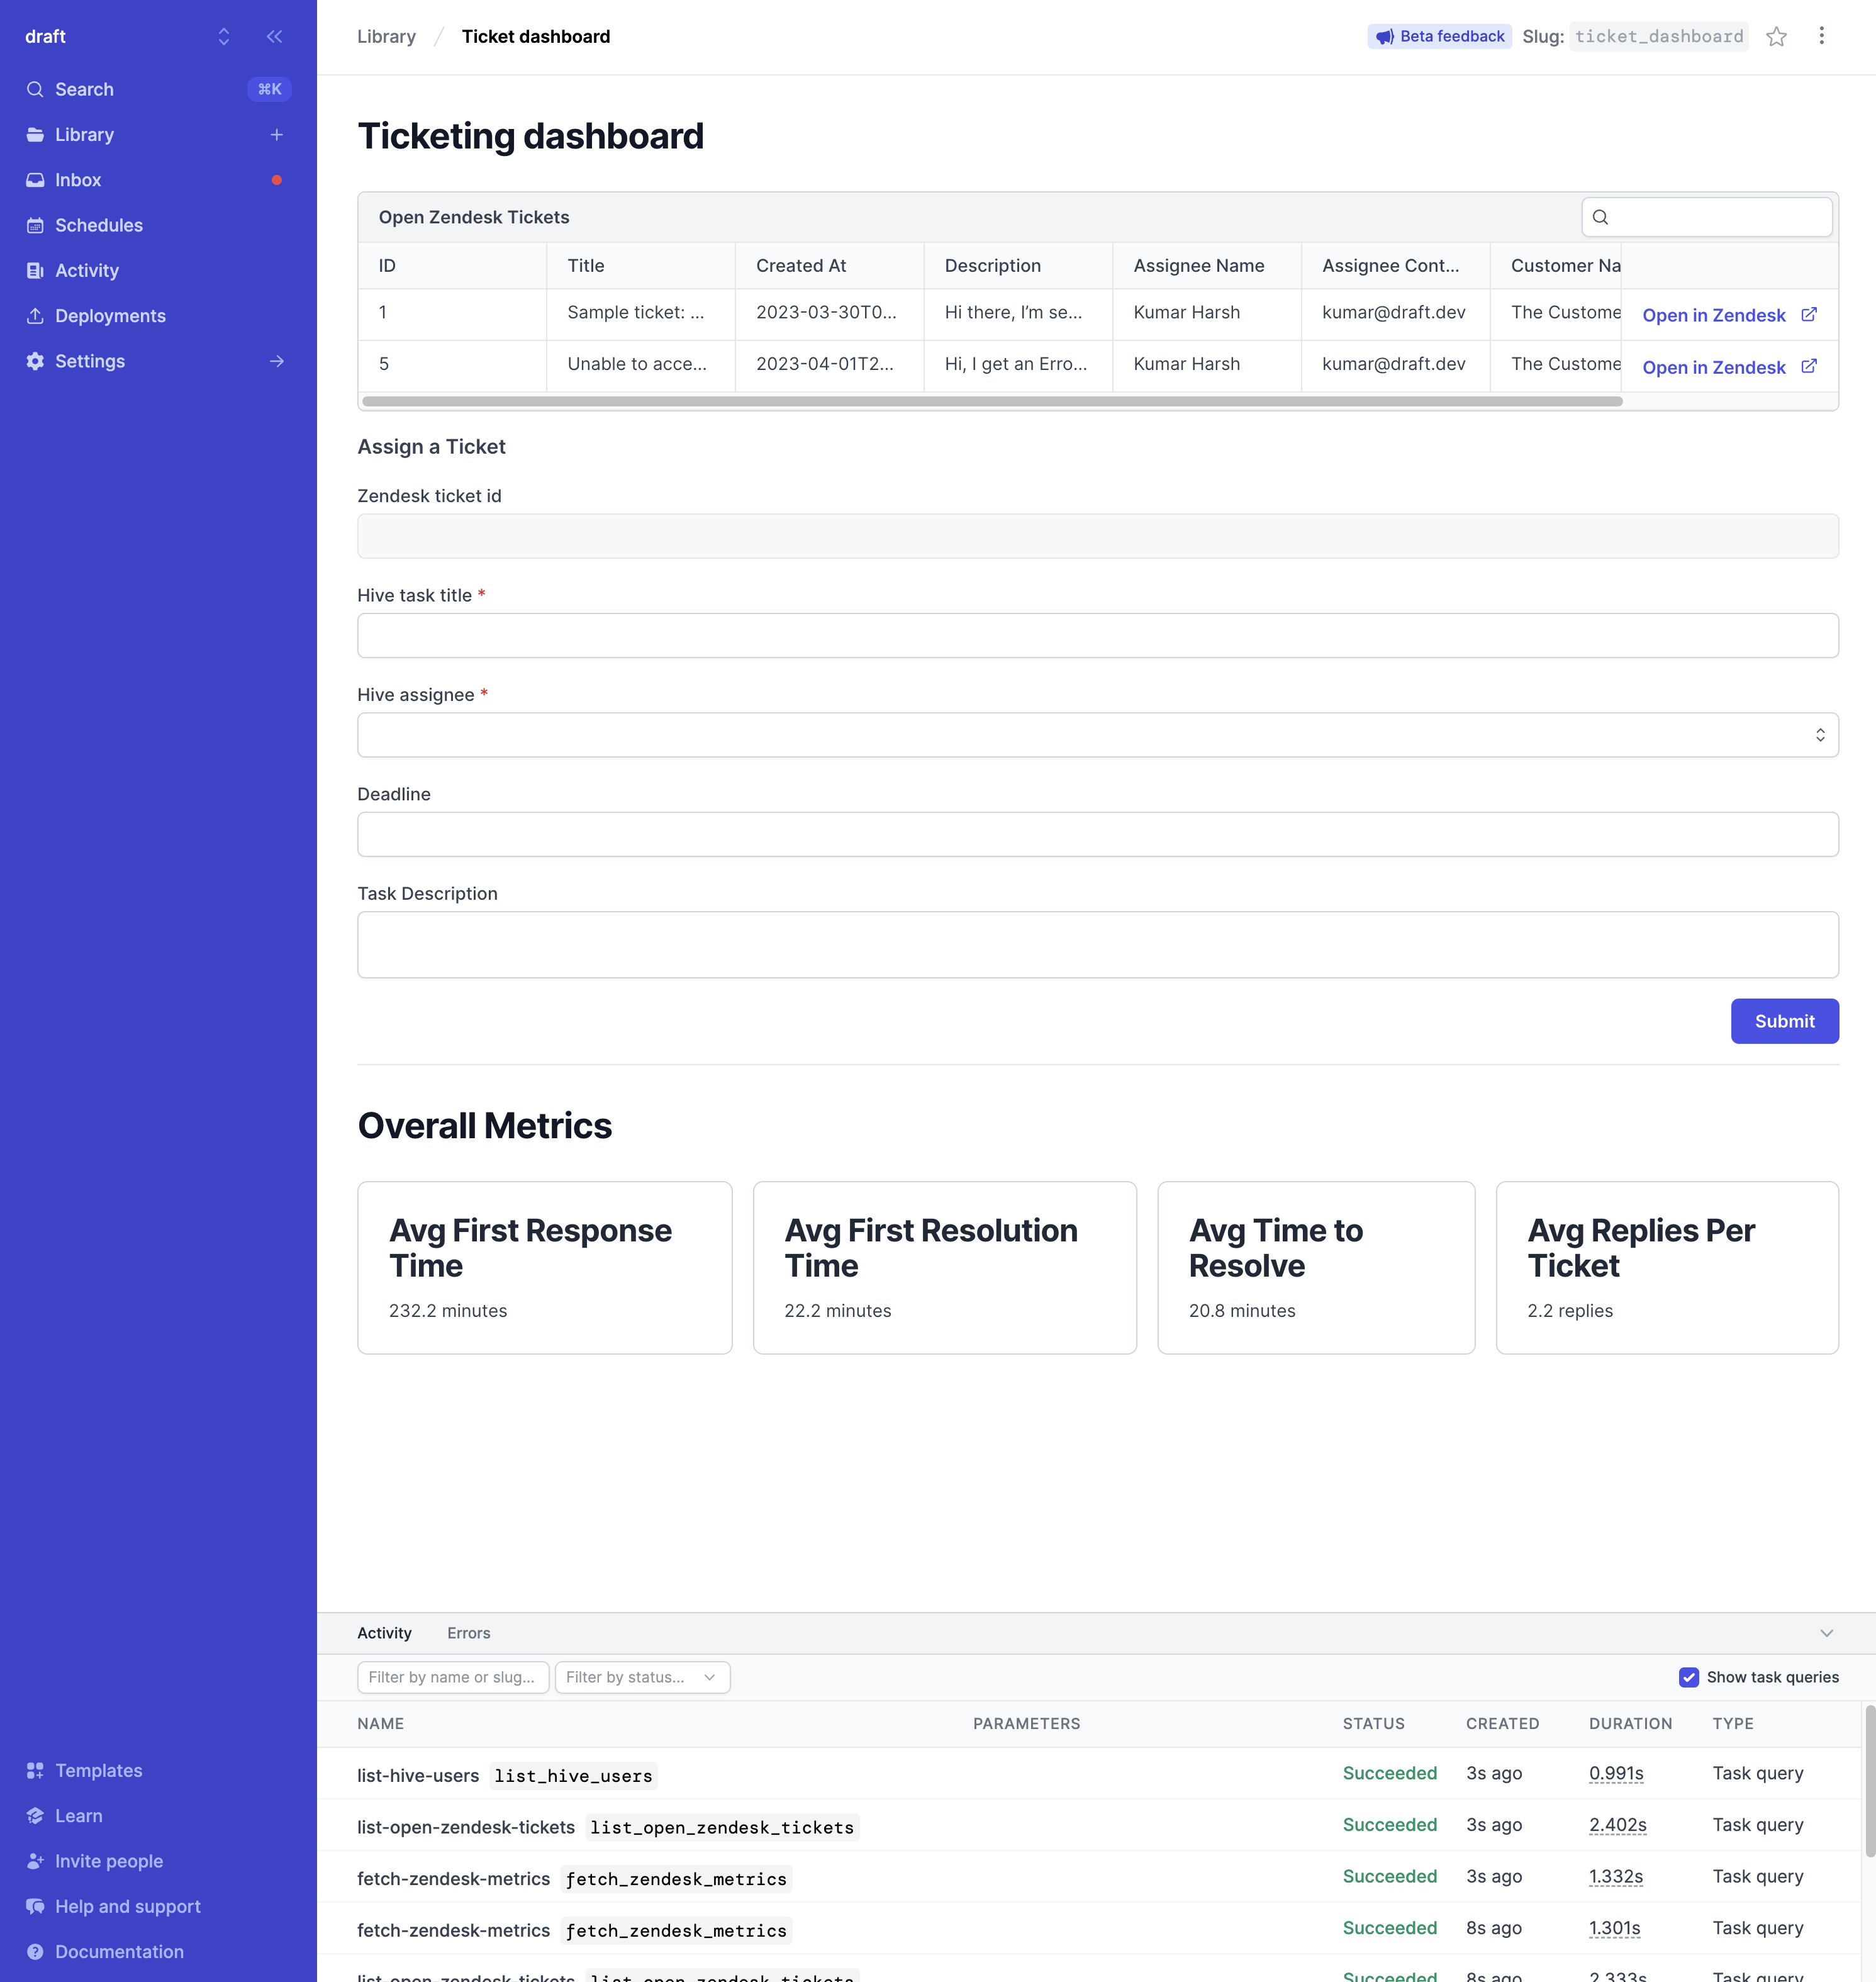
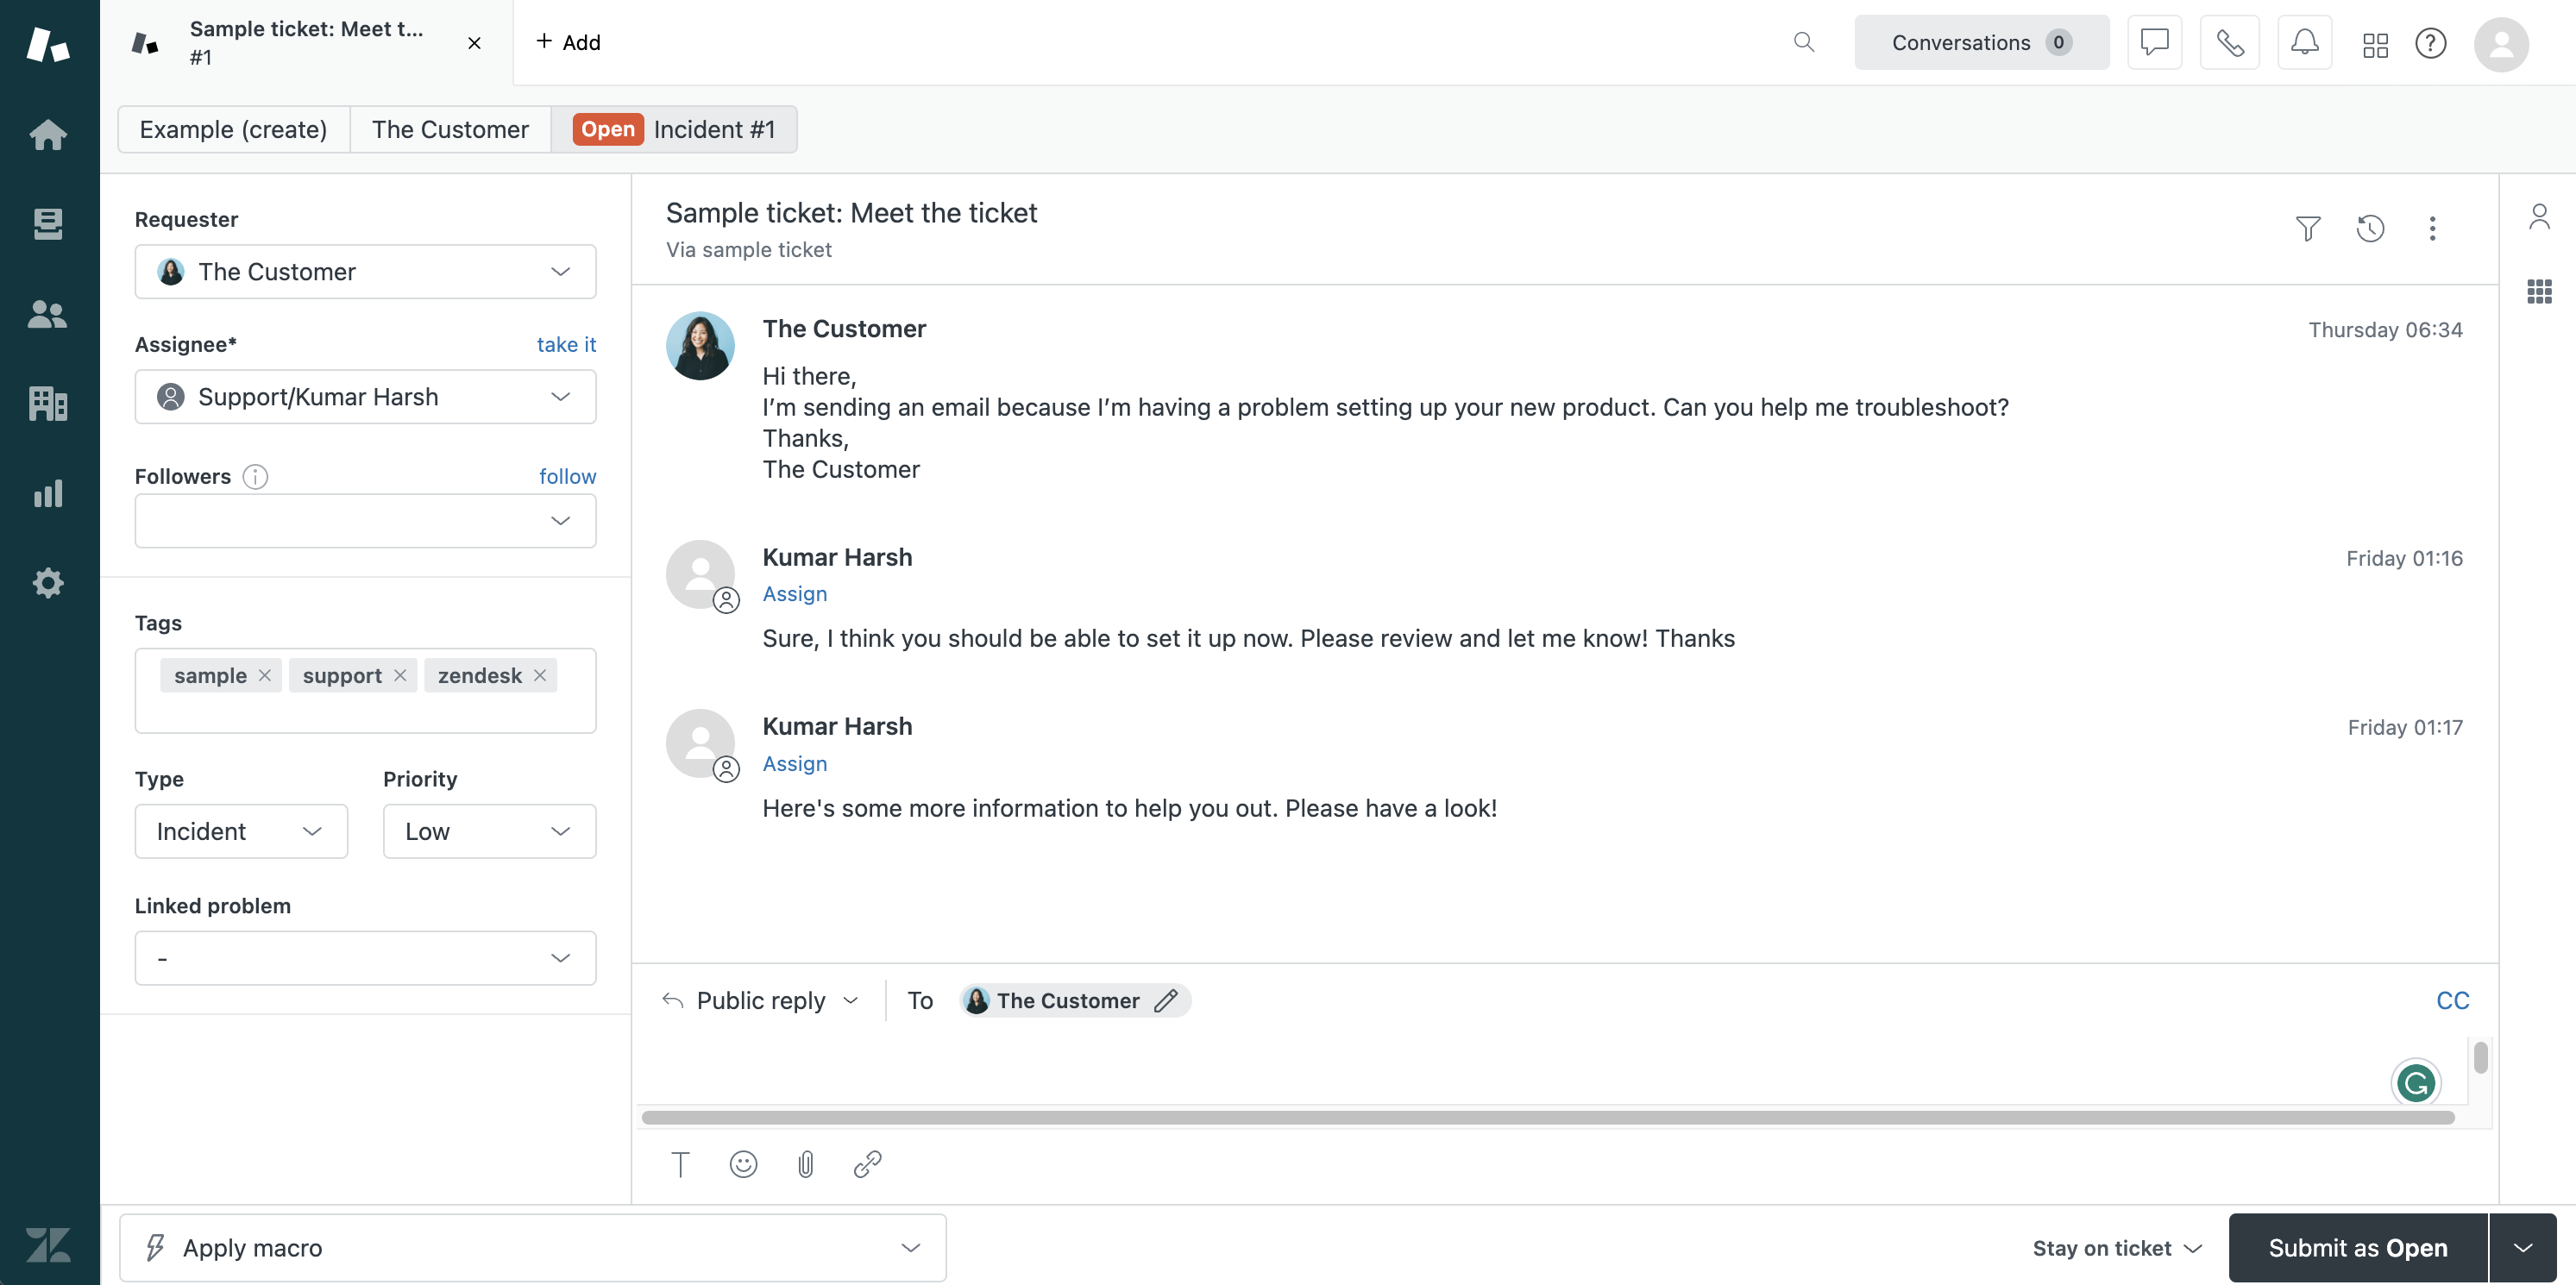
We can view the list of open tickets in Zendesk at the top. The dashboard shows some basic details about the tickets, such as their titles, when they were created, who they were assigned to, and more. To view more details about a ticket, click the Open in ZenDesk button at the very end of the ticket record. It will take us to the Zendesk page for the ticket:
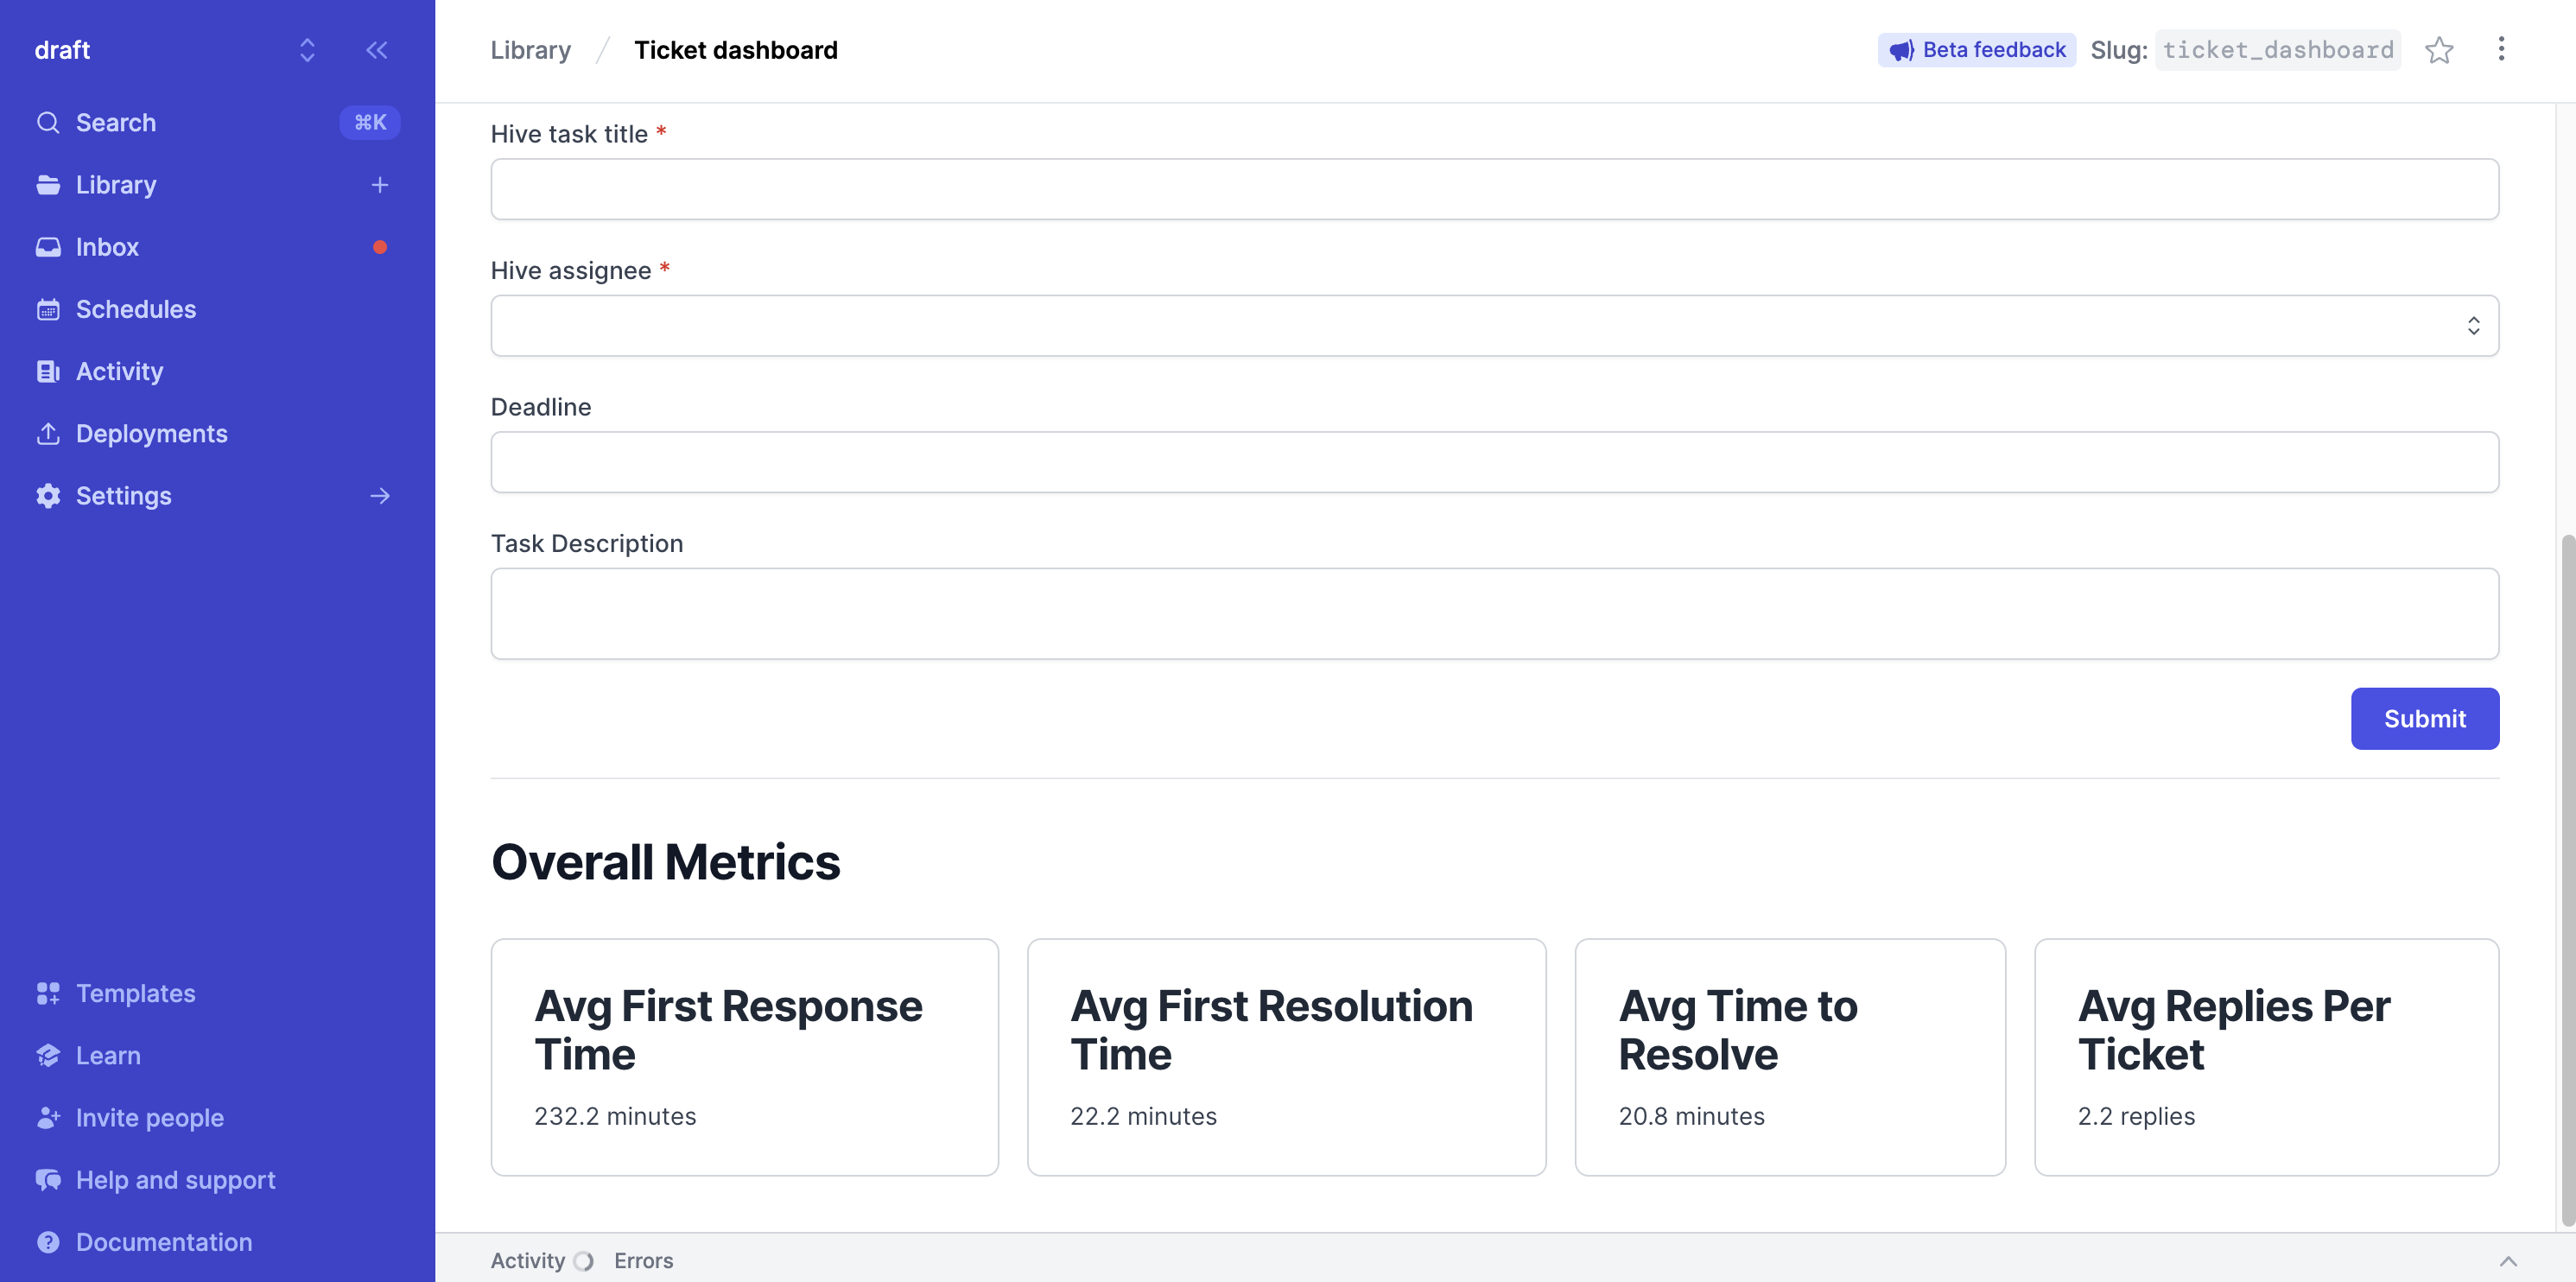
We can try assigning a ticket to teammates in Hive by clicking a ticket record in the table. It will auto-populate the ticket assignment form with some basic details:
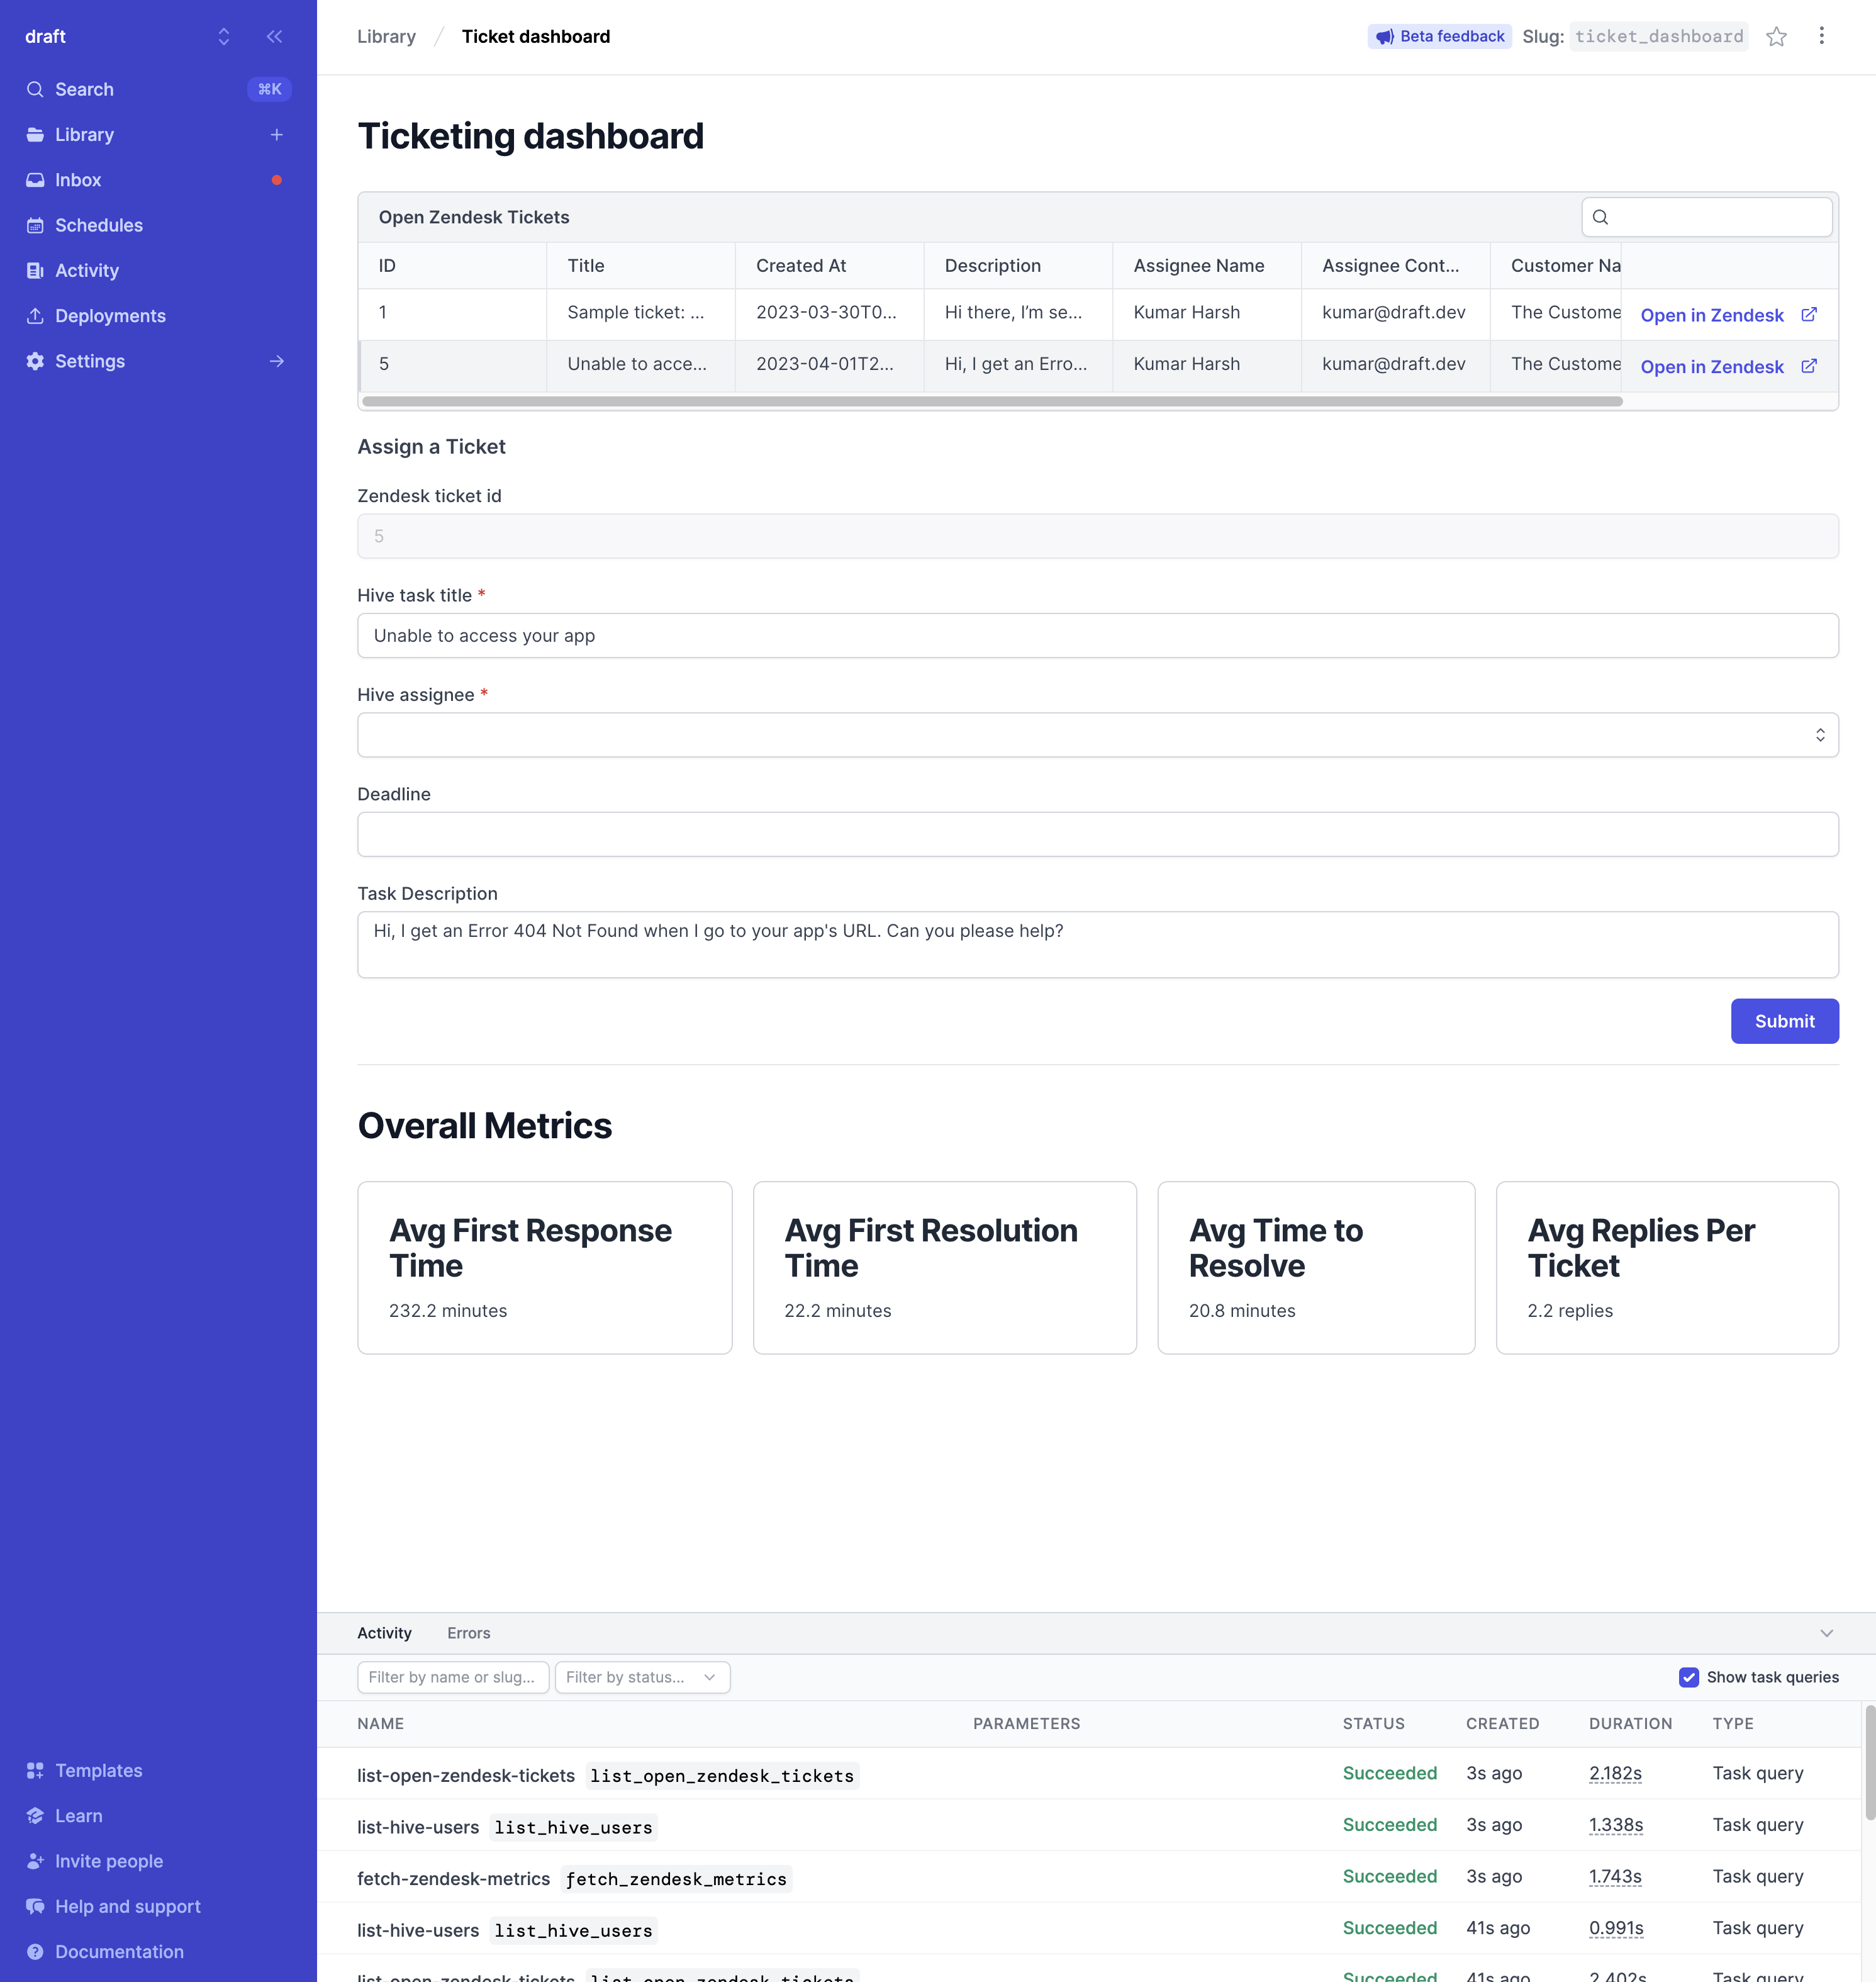
We can use the assignee dropdown to choose a Hive user to whom this task will be assigned. We can also optionally set the due date for the task and click the Submit button to create a Hive task for the ticket:
The task will be created in Hive. We can go to the Hive dashboard and view the newly created task's details:
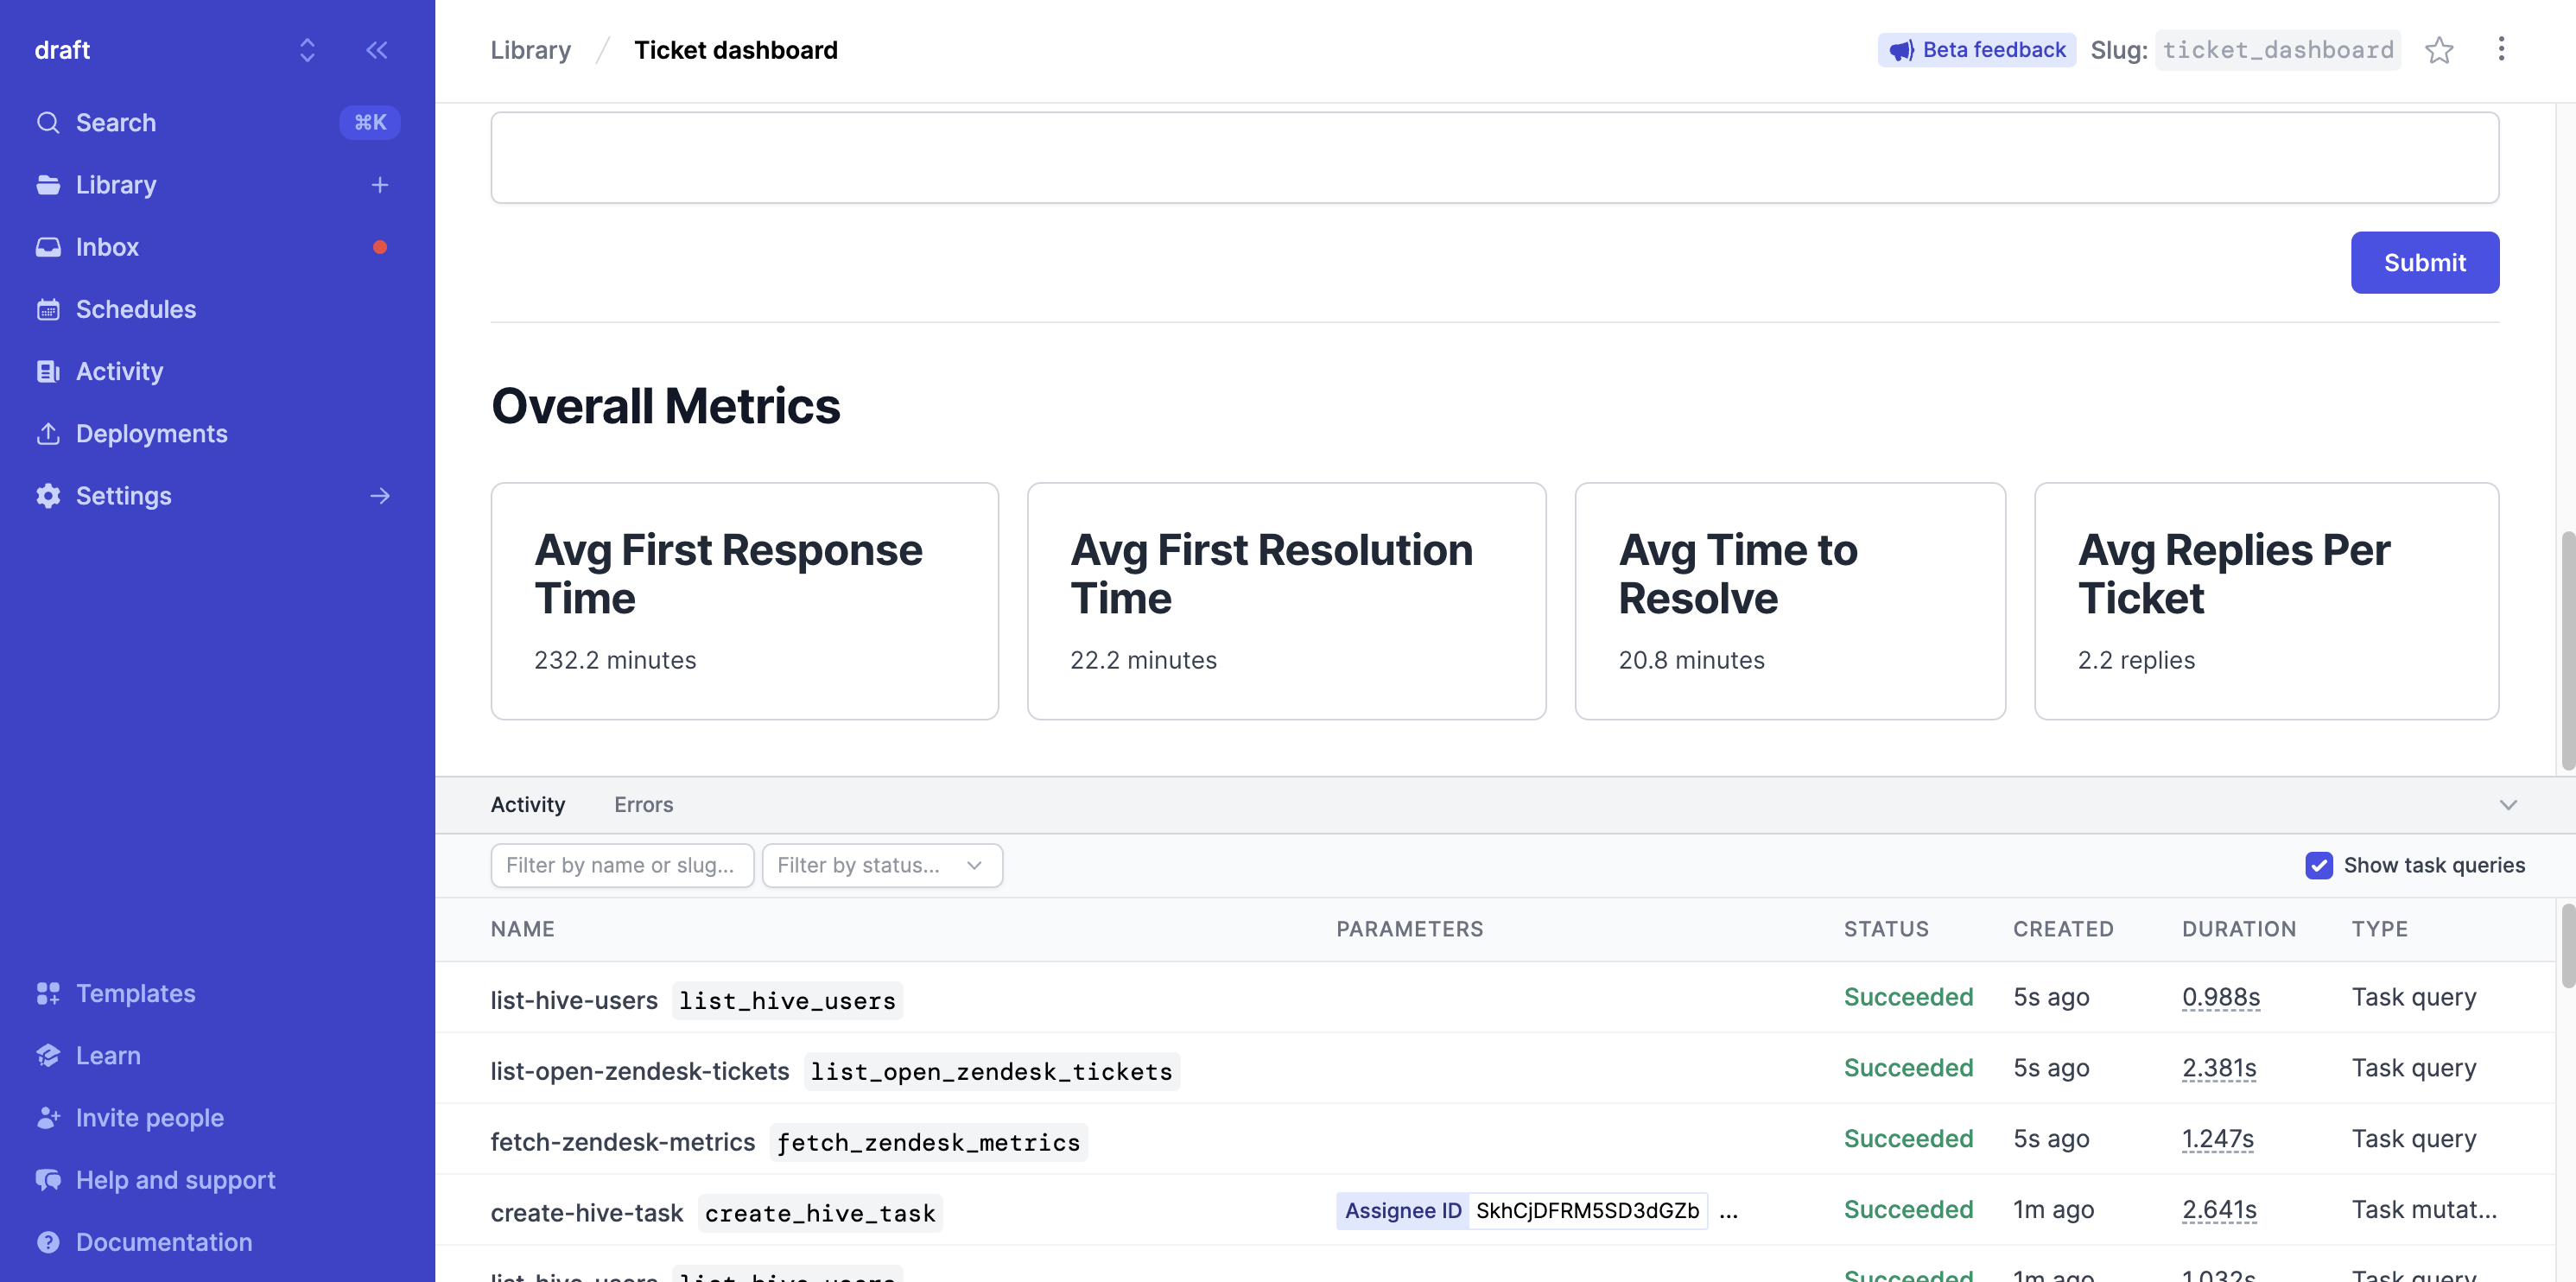
Towards the bottom, we can see four basic metrics from the customer experience tool:
This dashboard could benefit from some more features, such as displaying a list of active Hive tasks related to the tickets, updating both Hive tasks and Zendesk tickets, and running bulk operations on tickets, such as updating due dates, reassigning, etc. That's because this dashboard is meant to serve as a starting point for the ticket dashboard. Once you reach this point, you can further develop the dashboard according to your unique requirements, some of which may include the features listed above.
You can find the complete code for this dashboard on GitHub.
Building a dashboard is easy using Airplane
In this tutorial, we walked through how to create a ticketing dashboard using Airplane Views. We saw how seamless it is to create layouts and integrate them with backend tasks using the Airplane runtime and CLI.
Ticket dashboards can get quite complex very quickly. Engineers may struggle to write boilerplate code for connecting the dashboard's backend to the frontend or designing the user interface. That's where Airplane Views can help. It offers a prebuilt set of components and a hassle-free connection to backend tasks, allowing users to quickly transform their ideas into functional tools.
To build your own ticketing dashboard, sign up for a free account or book a demo. If you’re a startup with under 100 employees and are Series A or earlier, check out Airplane for Startups to get even more out of Airplane.
Author: Kumar Harsh
Kumar Harsh is a technical writer based in India. He loves to build robust and scalable MERN applications to solve problems and automate repetitive tasks. He enjoys learning and writing content on technical topics.


