


Airplane is the developer platform for building custom internal tools. The basic building blocks of Airplane are Tasks, which are single or multi-step functions that anyone on your team can use. Additionally, Airplane offers Views, a React-based platform that allows users to build custom UIs quickly.
Users can build various tools by integrating Asana, a popular project management solution, with Airplane. For instance, they can set up a central internal tool that consolidates data from third-party tools, including Asana, in one place for easy viewing. Users can also implement bulk operations using the Asana API rather than the sometimes sluggish Asana UI. They can even use Airplane to draw out a set of productivity metrics from the Asana workspace data.
In this article, we'll walk through how to build a dashboard that displays a list of open Asana tasks, updates the tasks, and creates new ones using Airplane Views.
How to build a dashboard using the Asana API and Airplane Views
To follow this tutorial, ensure you have the following:
- Node.js (versions ^14, ^15, ^16, ^17, and ^18 will work)
- npm
- An Airplane account
- The Airplane CLI set up on your local system
- An Asana account
- An IDE of your choice (such as VS Code)
Once these are set up, we are ready to get started. All of the code for this tutorial can be found in this GitHub repository.
Configuring Airplane
Once we've set up the Airplane CLI, log in using the following command in order to create a new Airplane project:
The output should look like this:
Press Enter to open the login page in the browser. Once the authentication process has been completed, we should see the following screen:

This indicates that we have successfully logged into the Airplane CLI. Next, create a folder on the system to store the project files. We can use the following commands to do so:
Then, create a new Airplane project with the following command:
The CLI will prompt us for a list of configurations for the project. Make sure the answers match those given below:
We've now created a new Airplane View in the project. Next, we'll set up Asana to interact with it via the dashboard.
Setting up Asana
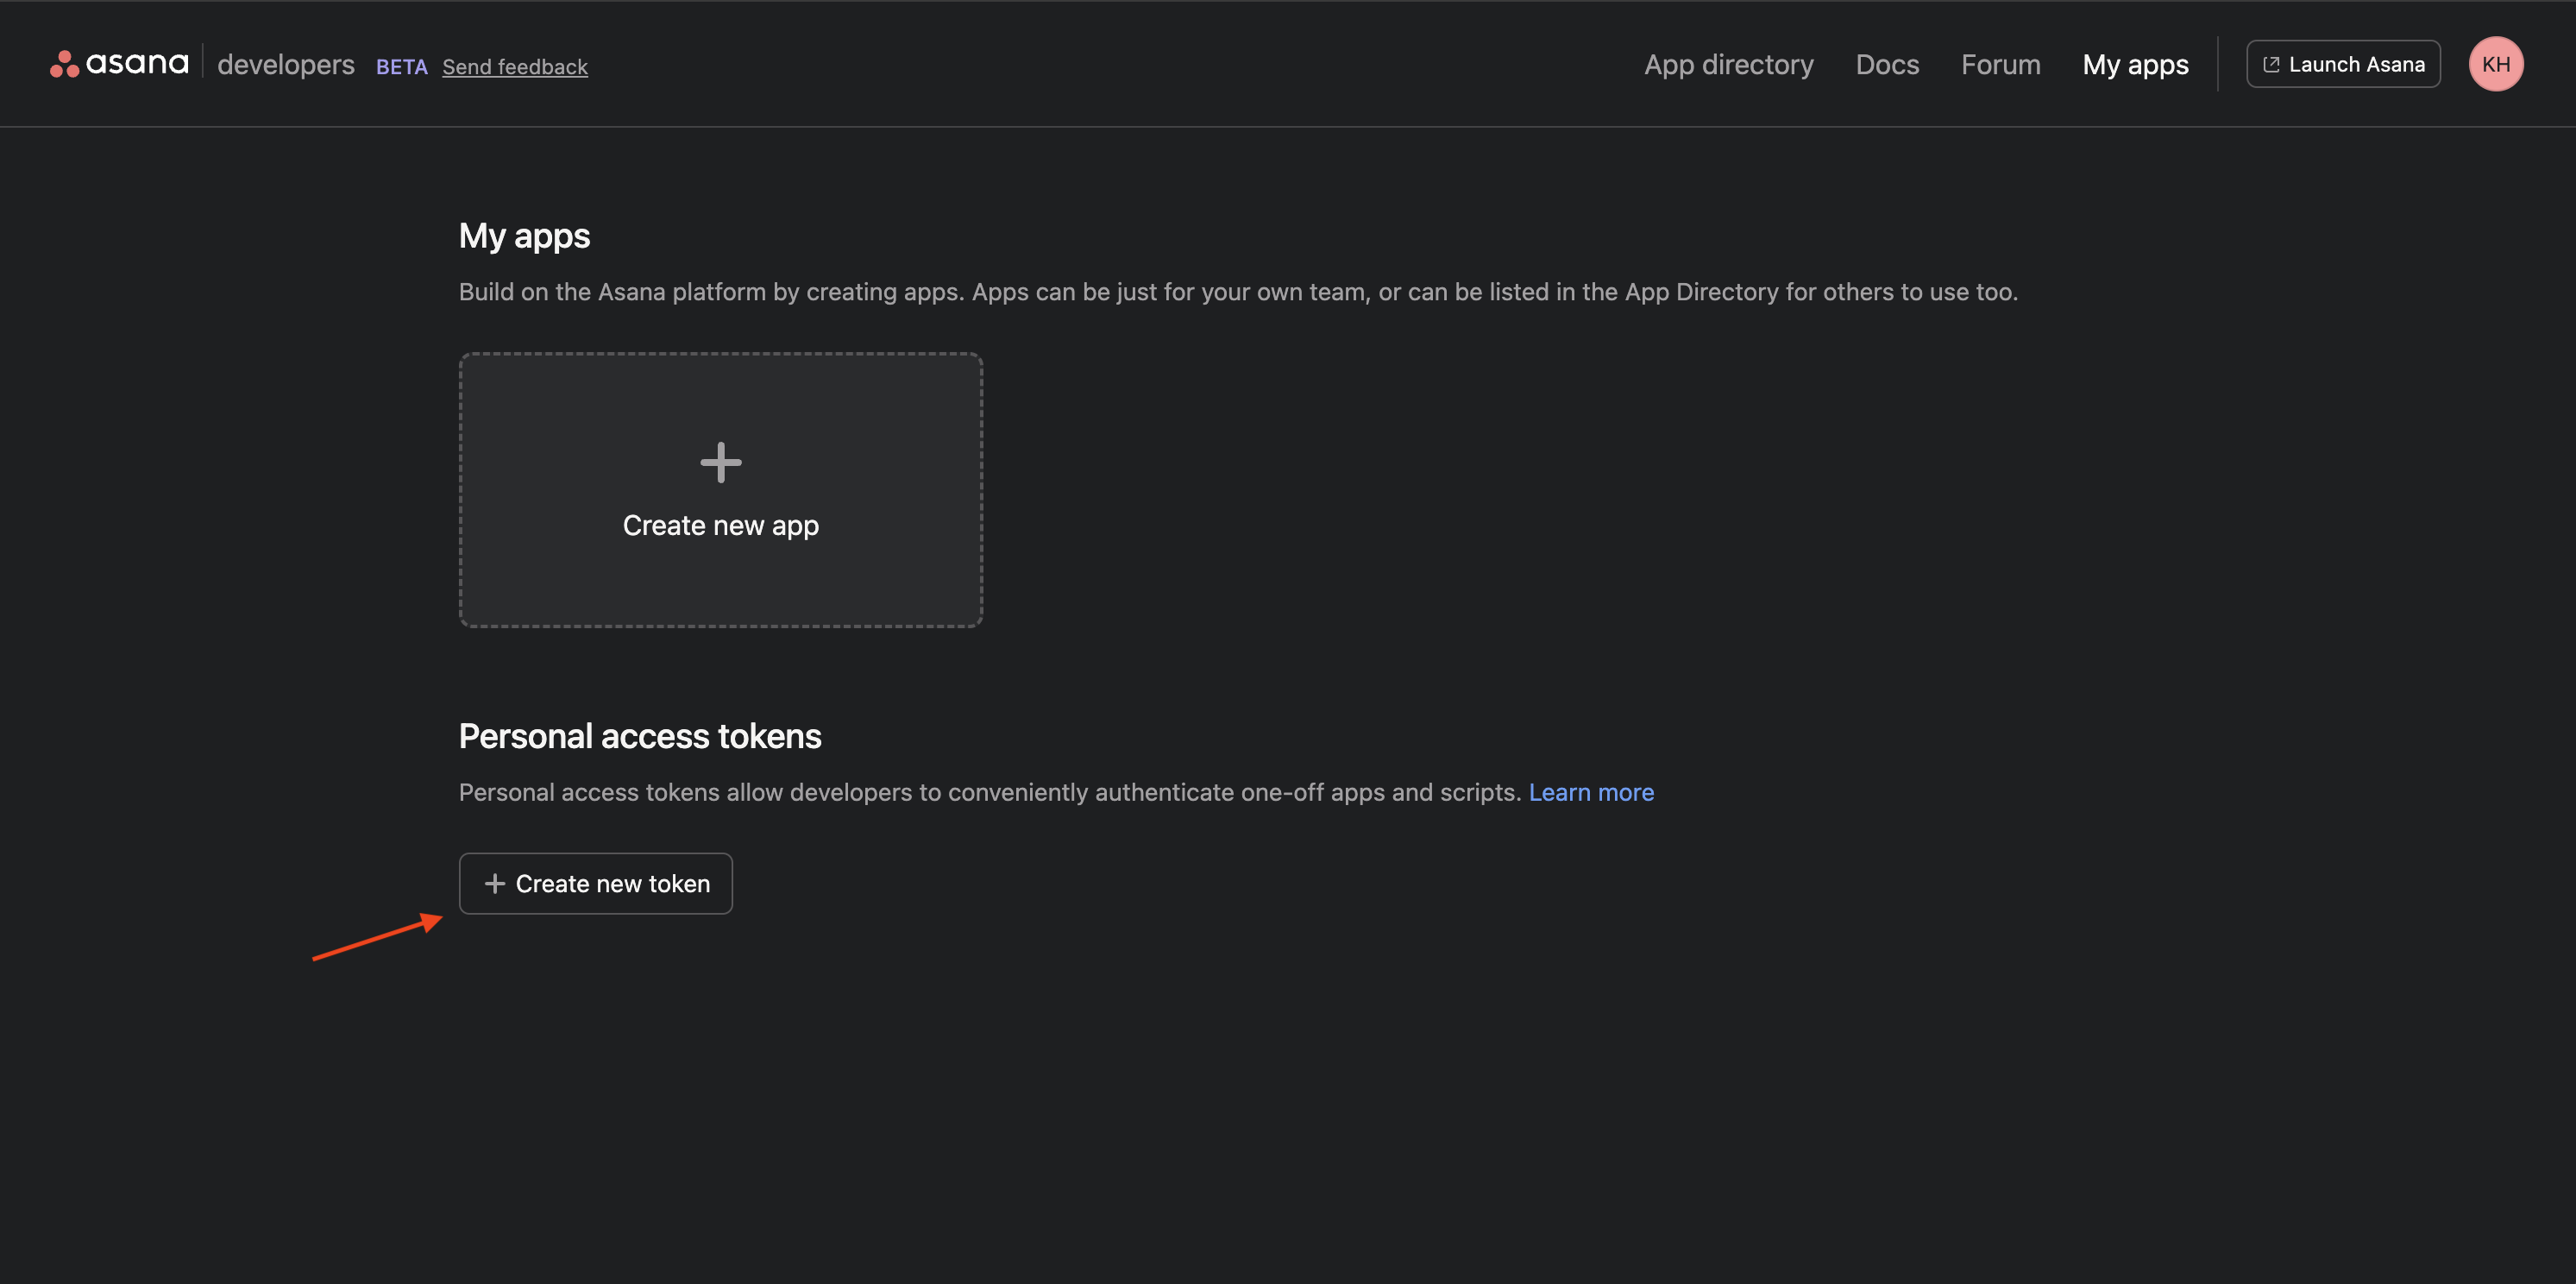
For Asana, we'll create a personal access token to authenticate with the API. Navigate to the Asana developers page and click Create new token:
Enter a name for the token and click Create token:
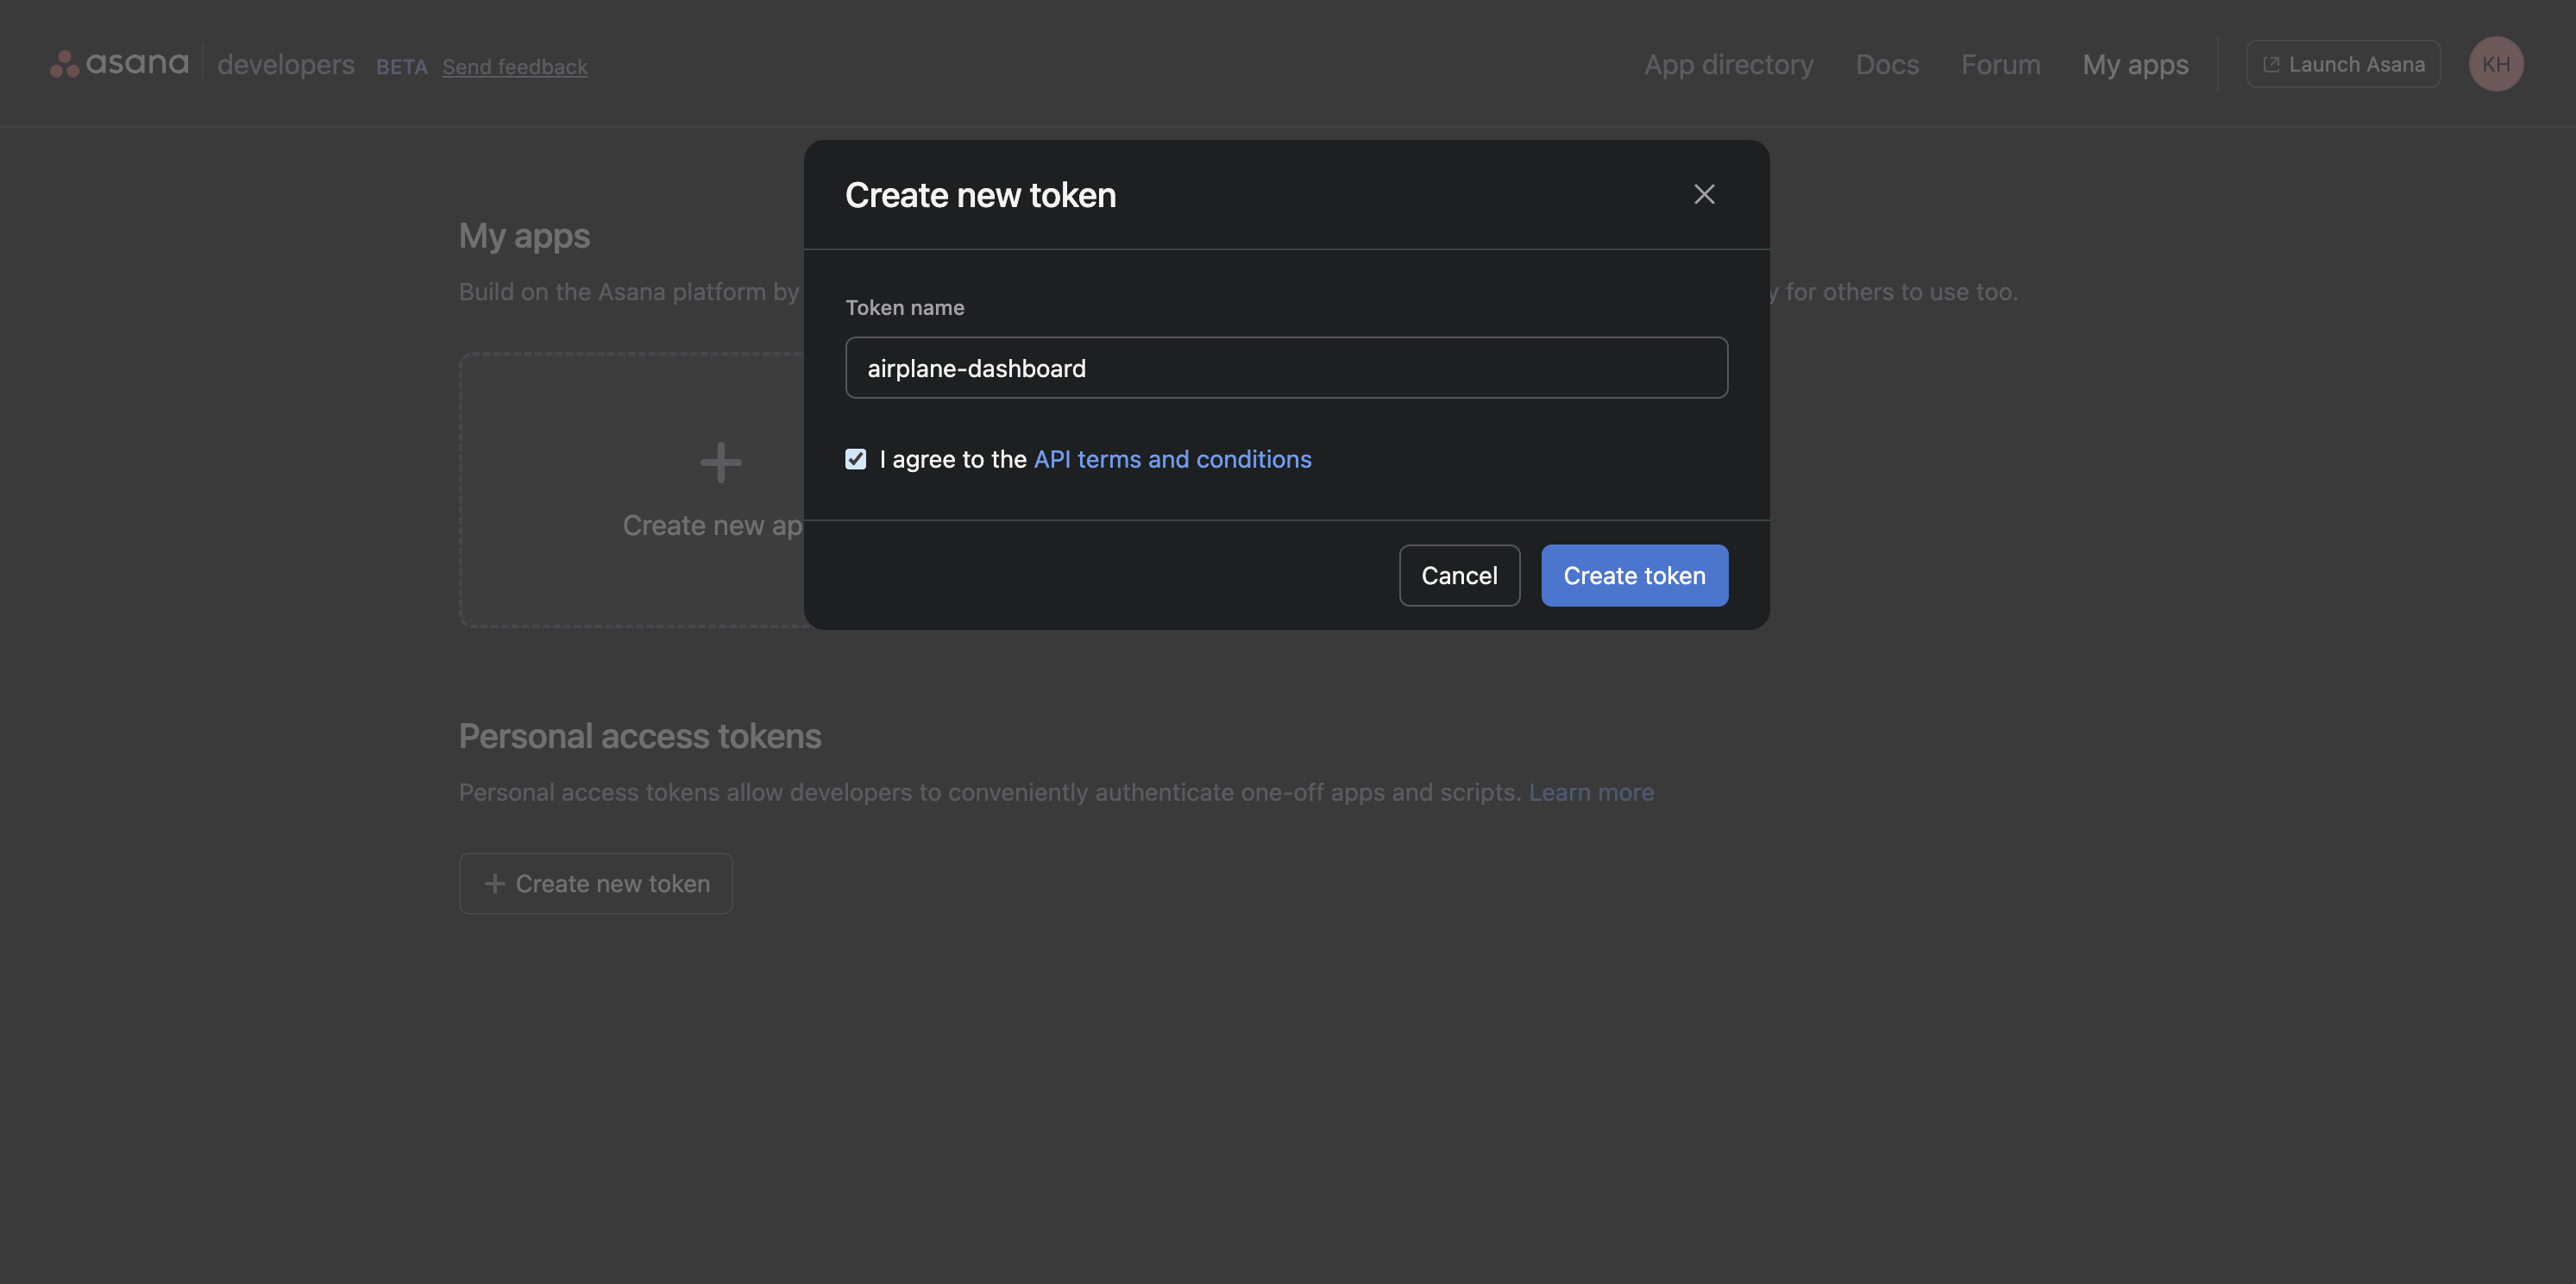
After we click Create token, the access token will appear. Store it somewhere safe, as we'll need it later when setting up tasks.
Overview of the dashboard's structure
Now that we've set up Asana and Airplane, we can start building the dashboard. Here's a quick overview of the structure of this project:
We've already created a View titled asana-dashboard in the project that will hold the code for the View. We will also need five supporting tasks that will fetch data for the View and help us update or create tasks as needed:
list-open-tasksto list all open tasks from Asanalist-projectsto list all projects in Asanalist-usersto list all users in Asanacreate-taskto create an Asana taskupdate-taskto update an Asana task
We'll create these source files inside a tasks directory in the project's root directory while also creating these tasks in the project via the Airplane CLI.
Now let's start building the dashboard.
Building the Tasks
To build the dashboard, begin by installing Axios in the project with the following command:
Then, let's create the required tasks mentioned previously. Run the following command (with prompt input values as shown in the code snippet) to create the list-open-tasks task:
Open the list-open-tasks.airplane.ts file and paste the following code into it:
Next, run this command (with input values as shown below) to create the list-projects task:
Open the list-projects.airplane.ts file and paste the following code into it:
Next, run this command (with input values as shown below) to create the list-users task:
Open the list-users.airplane.ts file and paste the following code into it:
Next, run the following command (with input values as shown below) to create the create-task task:
Open the create-task.airplane.ts file and paste the following code into it:
Run the following command (with input values as shown below) to create the update-task task:
Open the update-task.airplane.ts file in an IDE and paste the following code snippet into it:
At this point, we've created all the supporting tasks required to build the dashboard.
Building the View
To create the View, paste the following code into the asana_dashboard.airplane.tsx file:
With this code, we've built the dashboard's UI. There are inline comments in the code to describe how it works.
We can test it out locally by running the following command:
After running it, we'll see something like this in the browser:
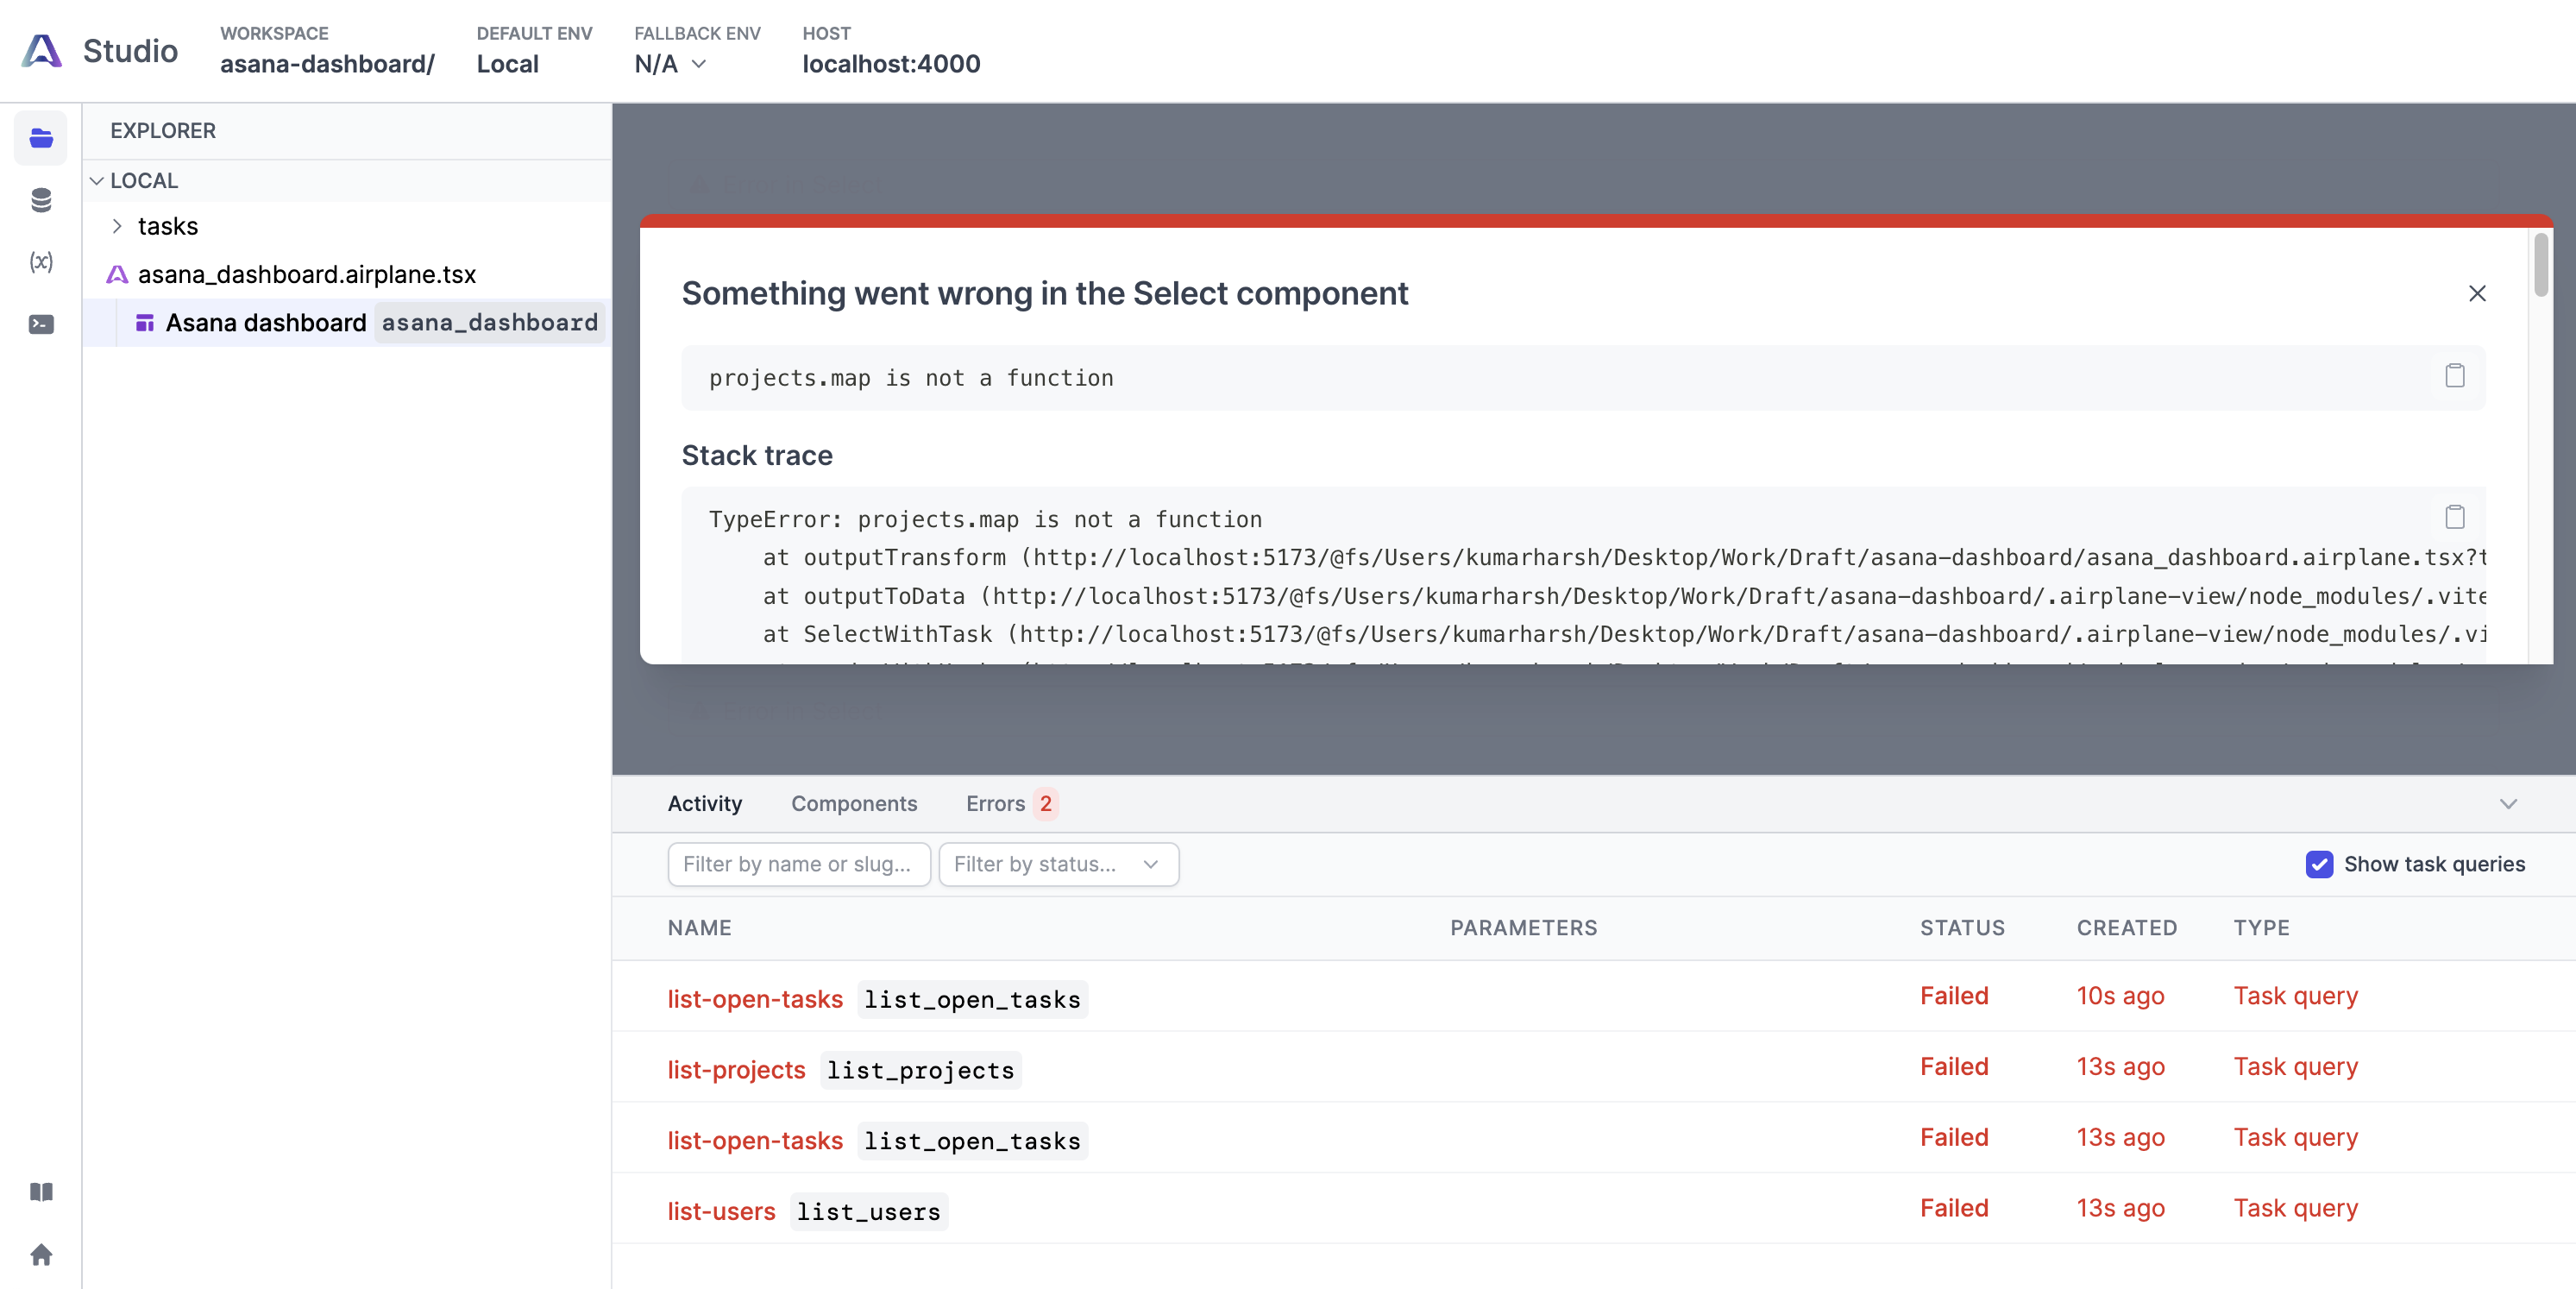
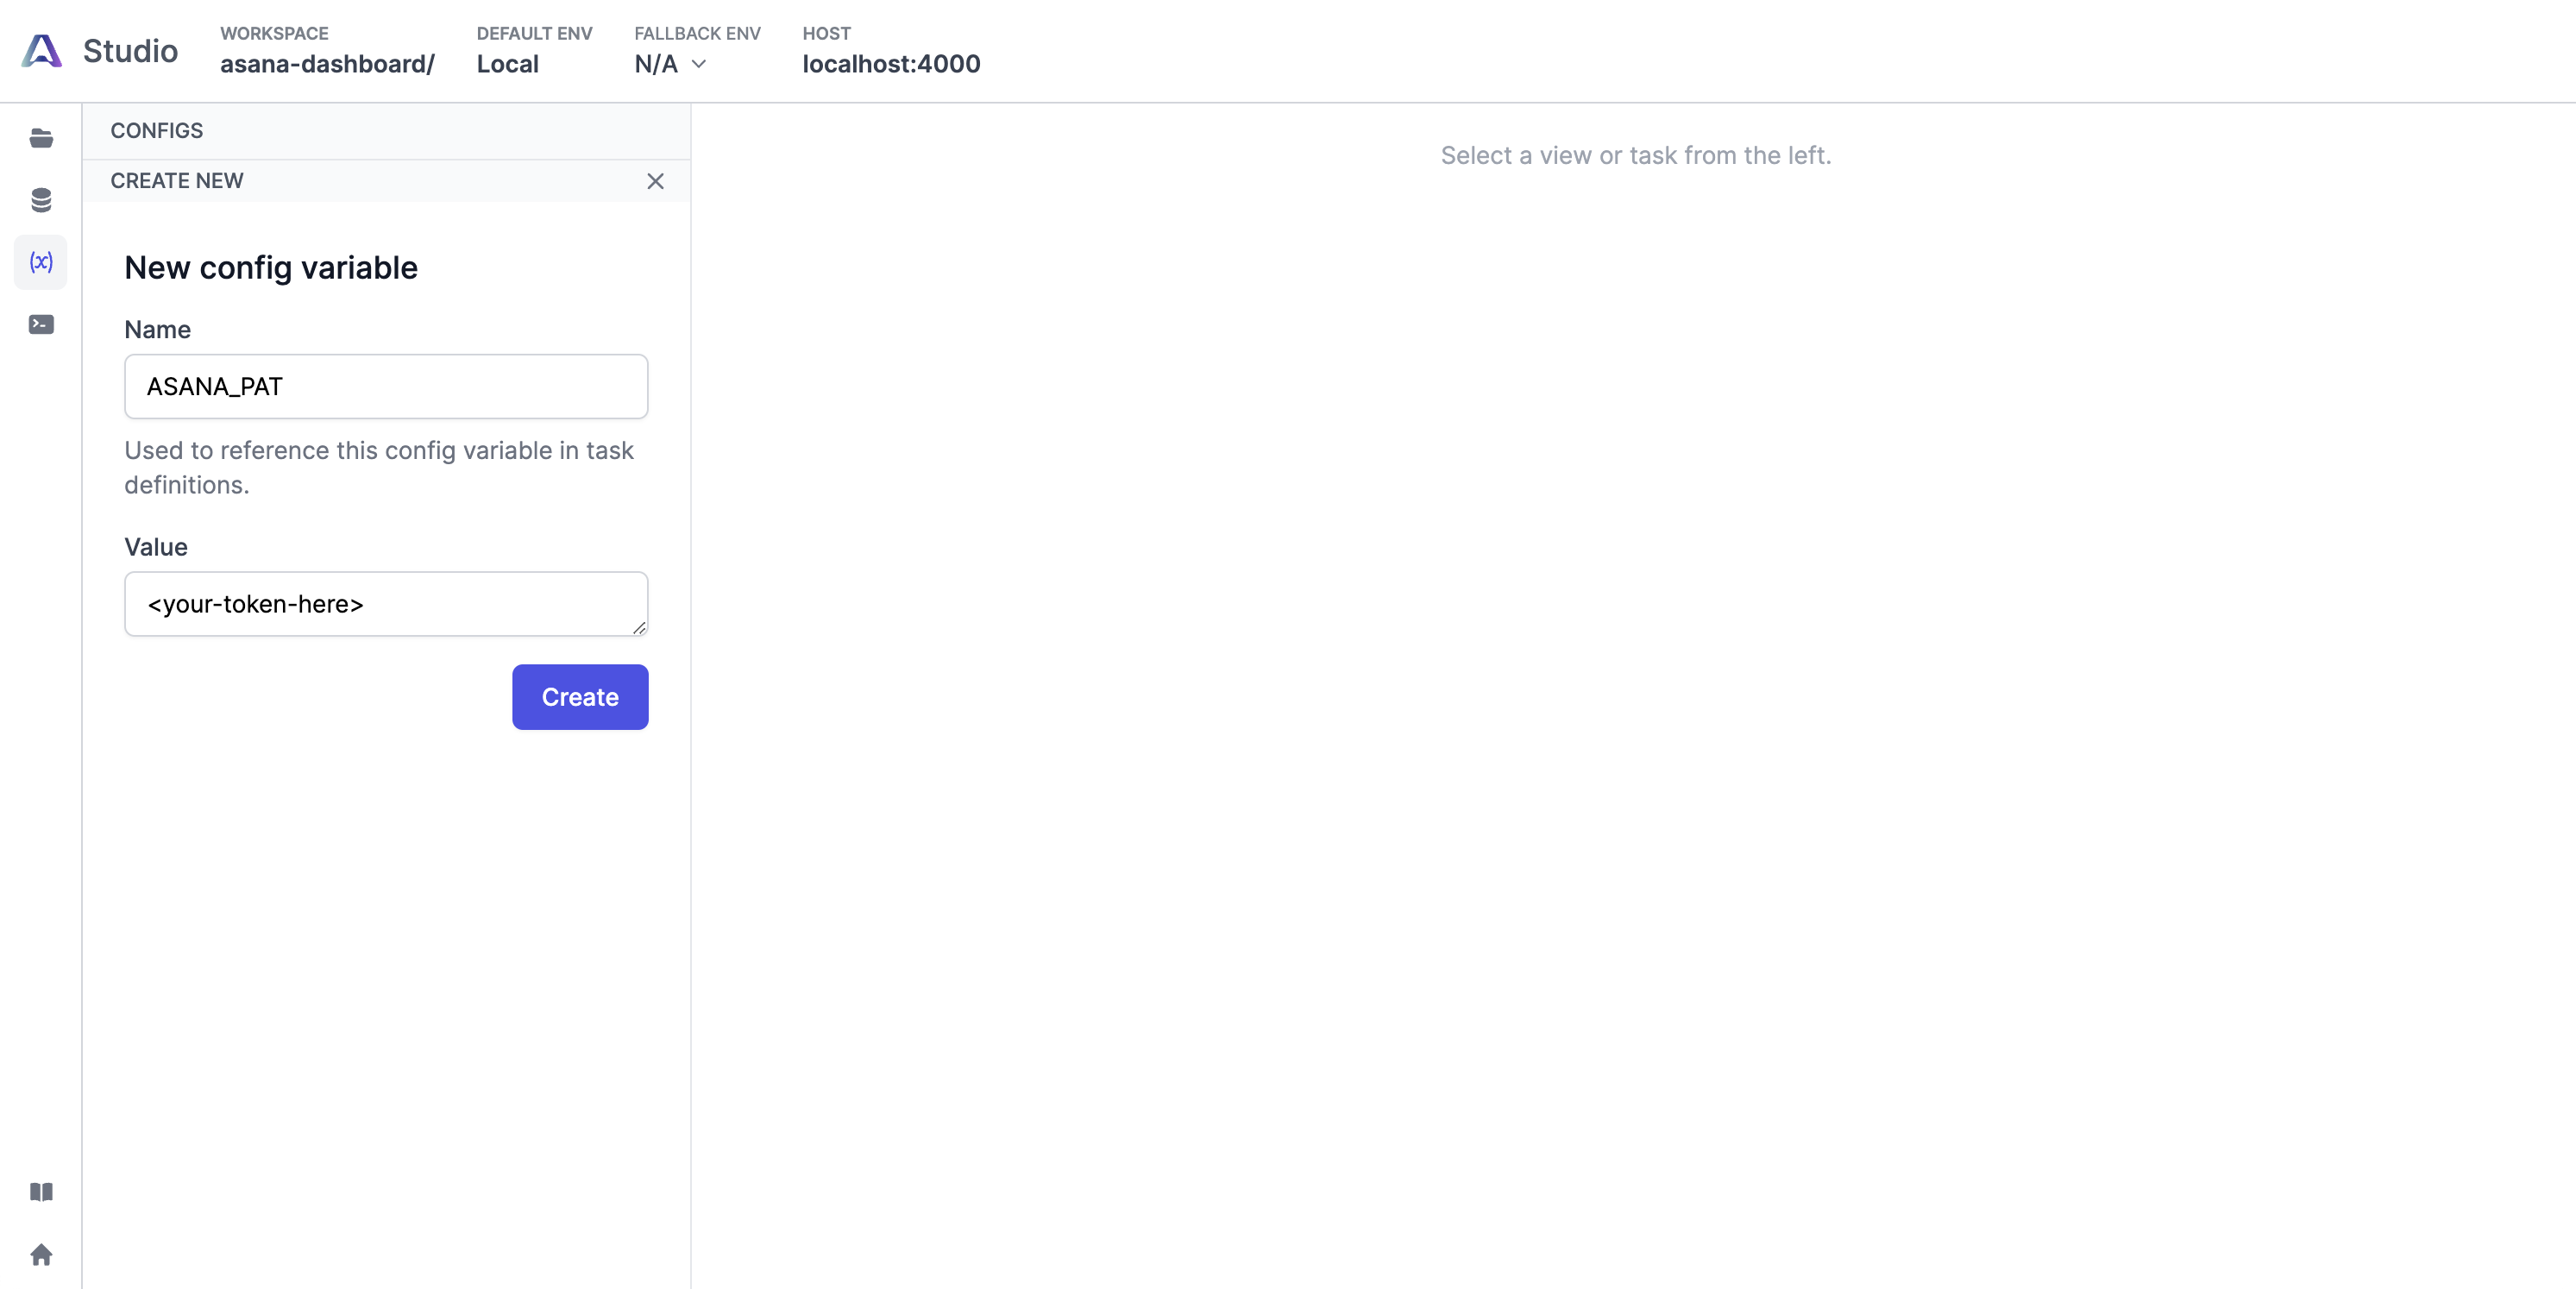
This View doesn't work because it relies on environment variables to provide the tasks with the Asana personal access token. To add the token to the dashboard, we'll need to head over to the Configs page using the left pane and add the config variables.
We'll also need to create a new config variable titled ASANA_PAT and store the Asana personal access token in it:
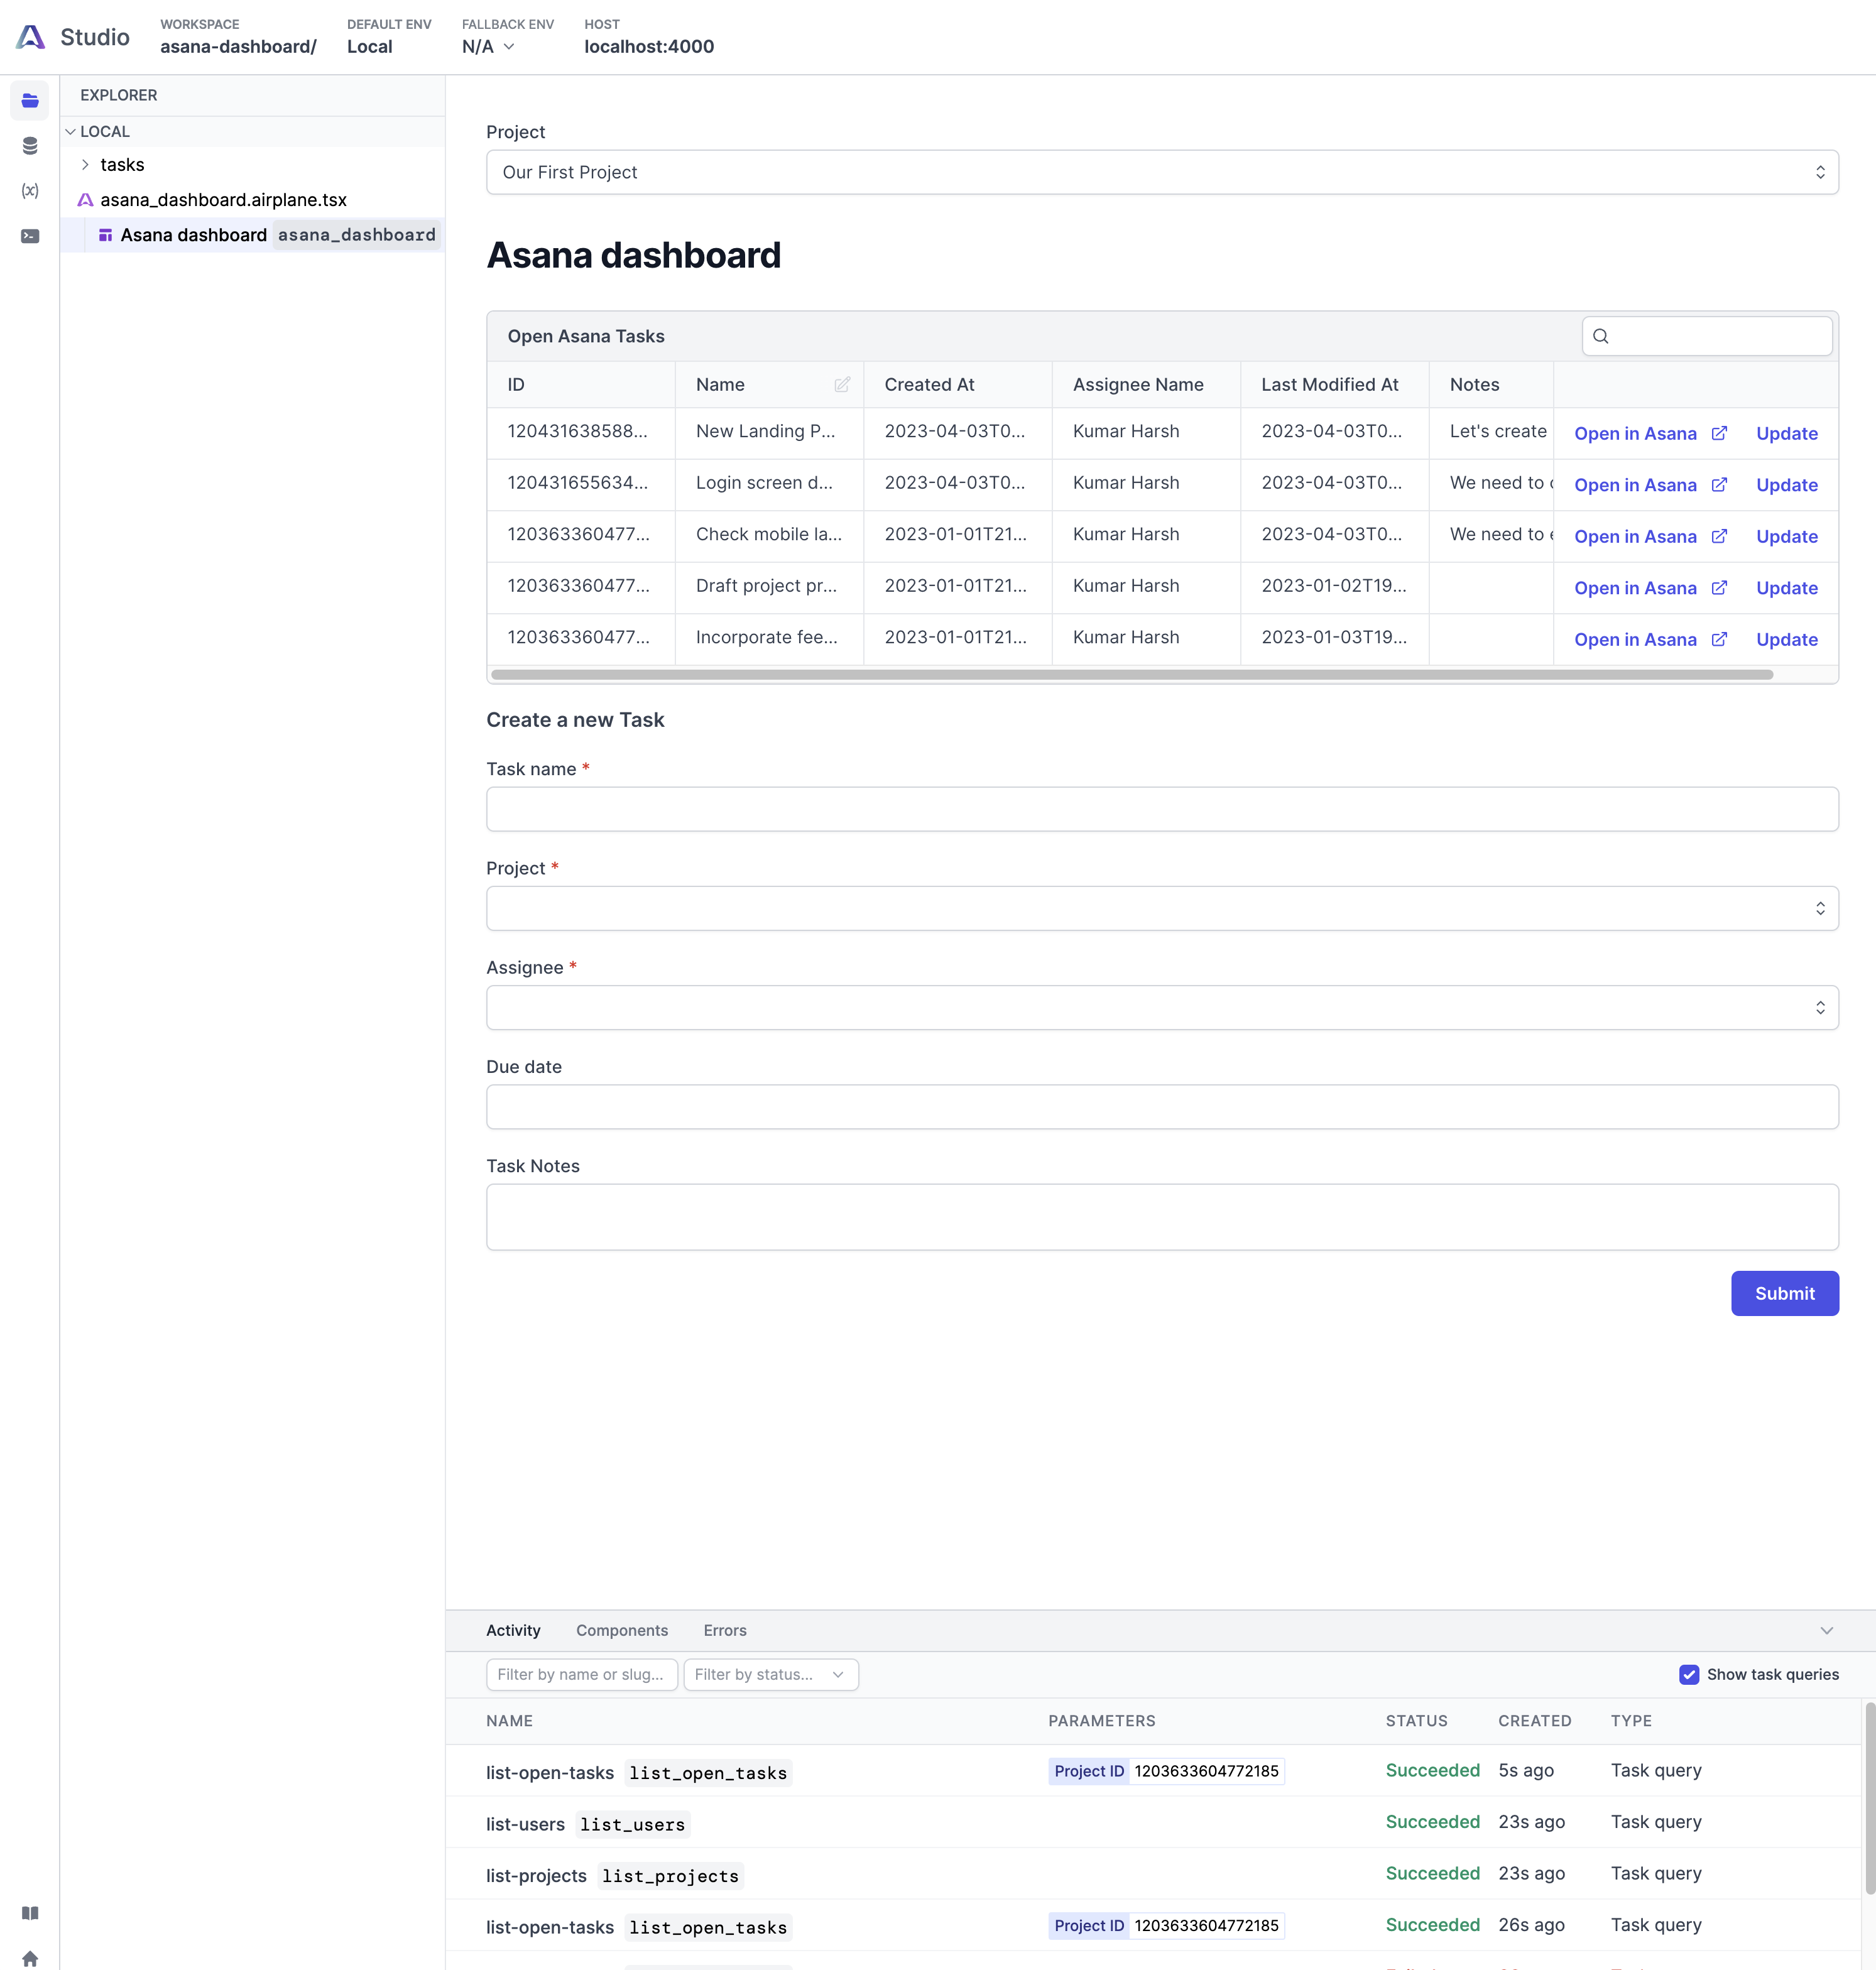
If we try running the View now, it should load the data correctly:
The final step in this tutorial is to deploy the dashboard to Airplane's remote environment.
Deploying the setup to Airplane
Deploying an Airplane project is straightforward. All we need to do is run the airplane deploy command. However, before that, we'll need to define the value of the Asana personal access token in the Airplane account. We did that for the local environment using the Configs page in Airplane Studio. However, we'll need to run the following command to set it for the remote deployment environment:
We can then run the following command to deploy it to the dashboard:
Enter Y when asked whether to continue deploying to the default environment. Once the deploy operation is completed, an output like the following will print:
We can navigate to the link printed by this command using the browser to see the result of the deployment:

Finally, click the Asana dashboard option in the Entities column to access the deployed view.
Watching the dashboard in action
Currently, this is what the View should look like:
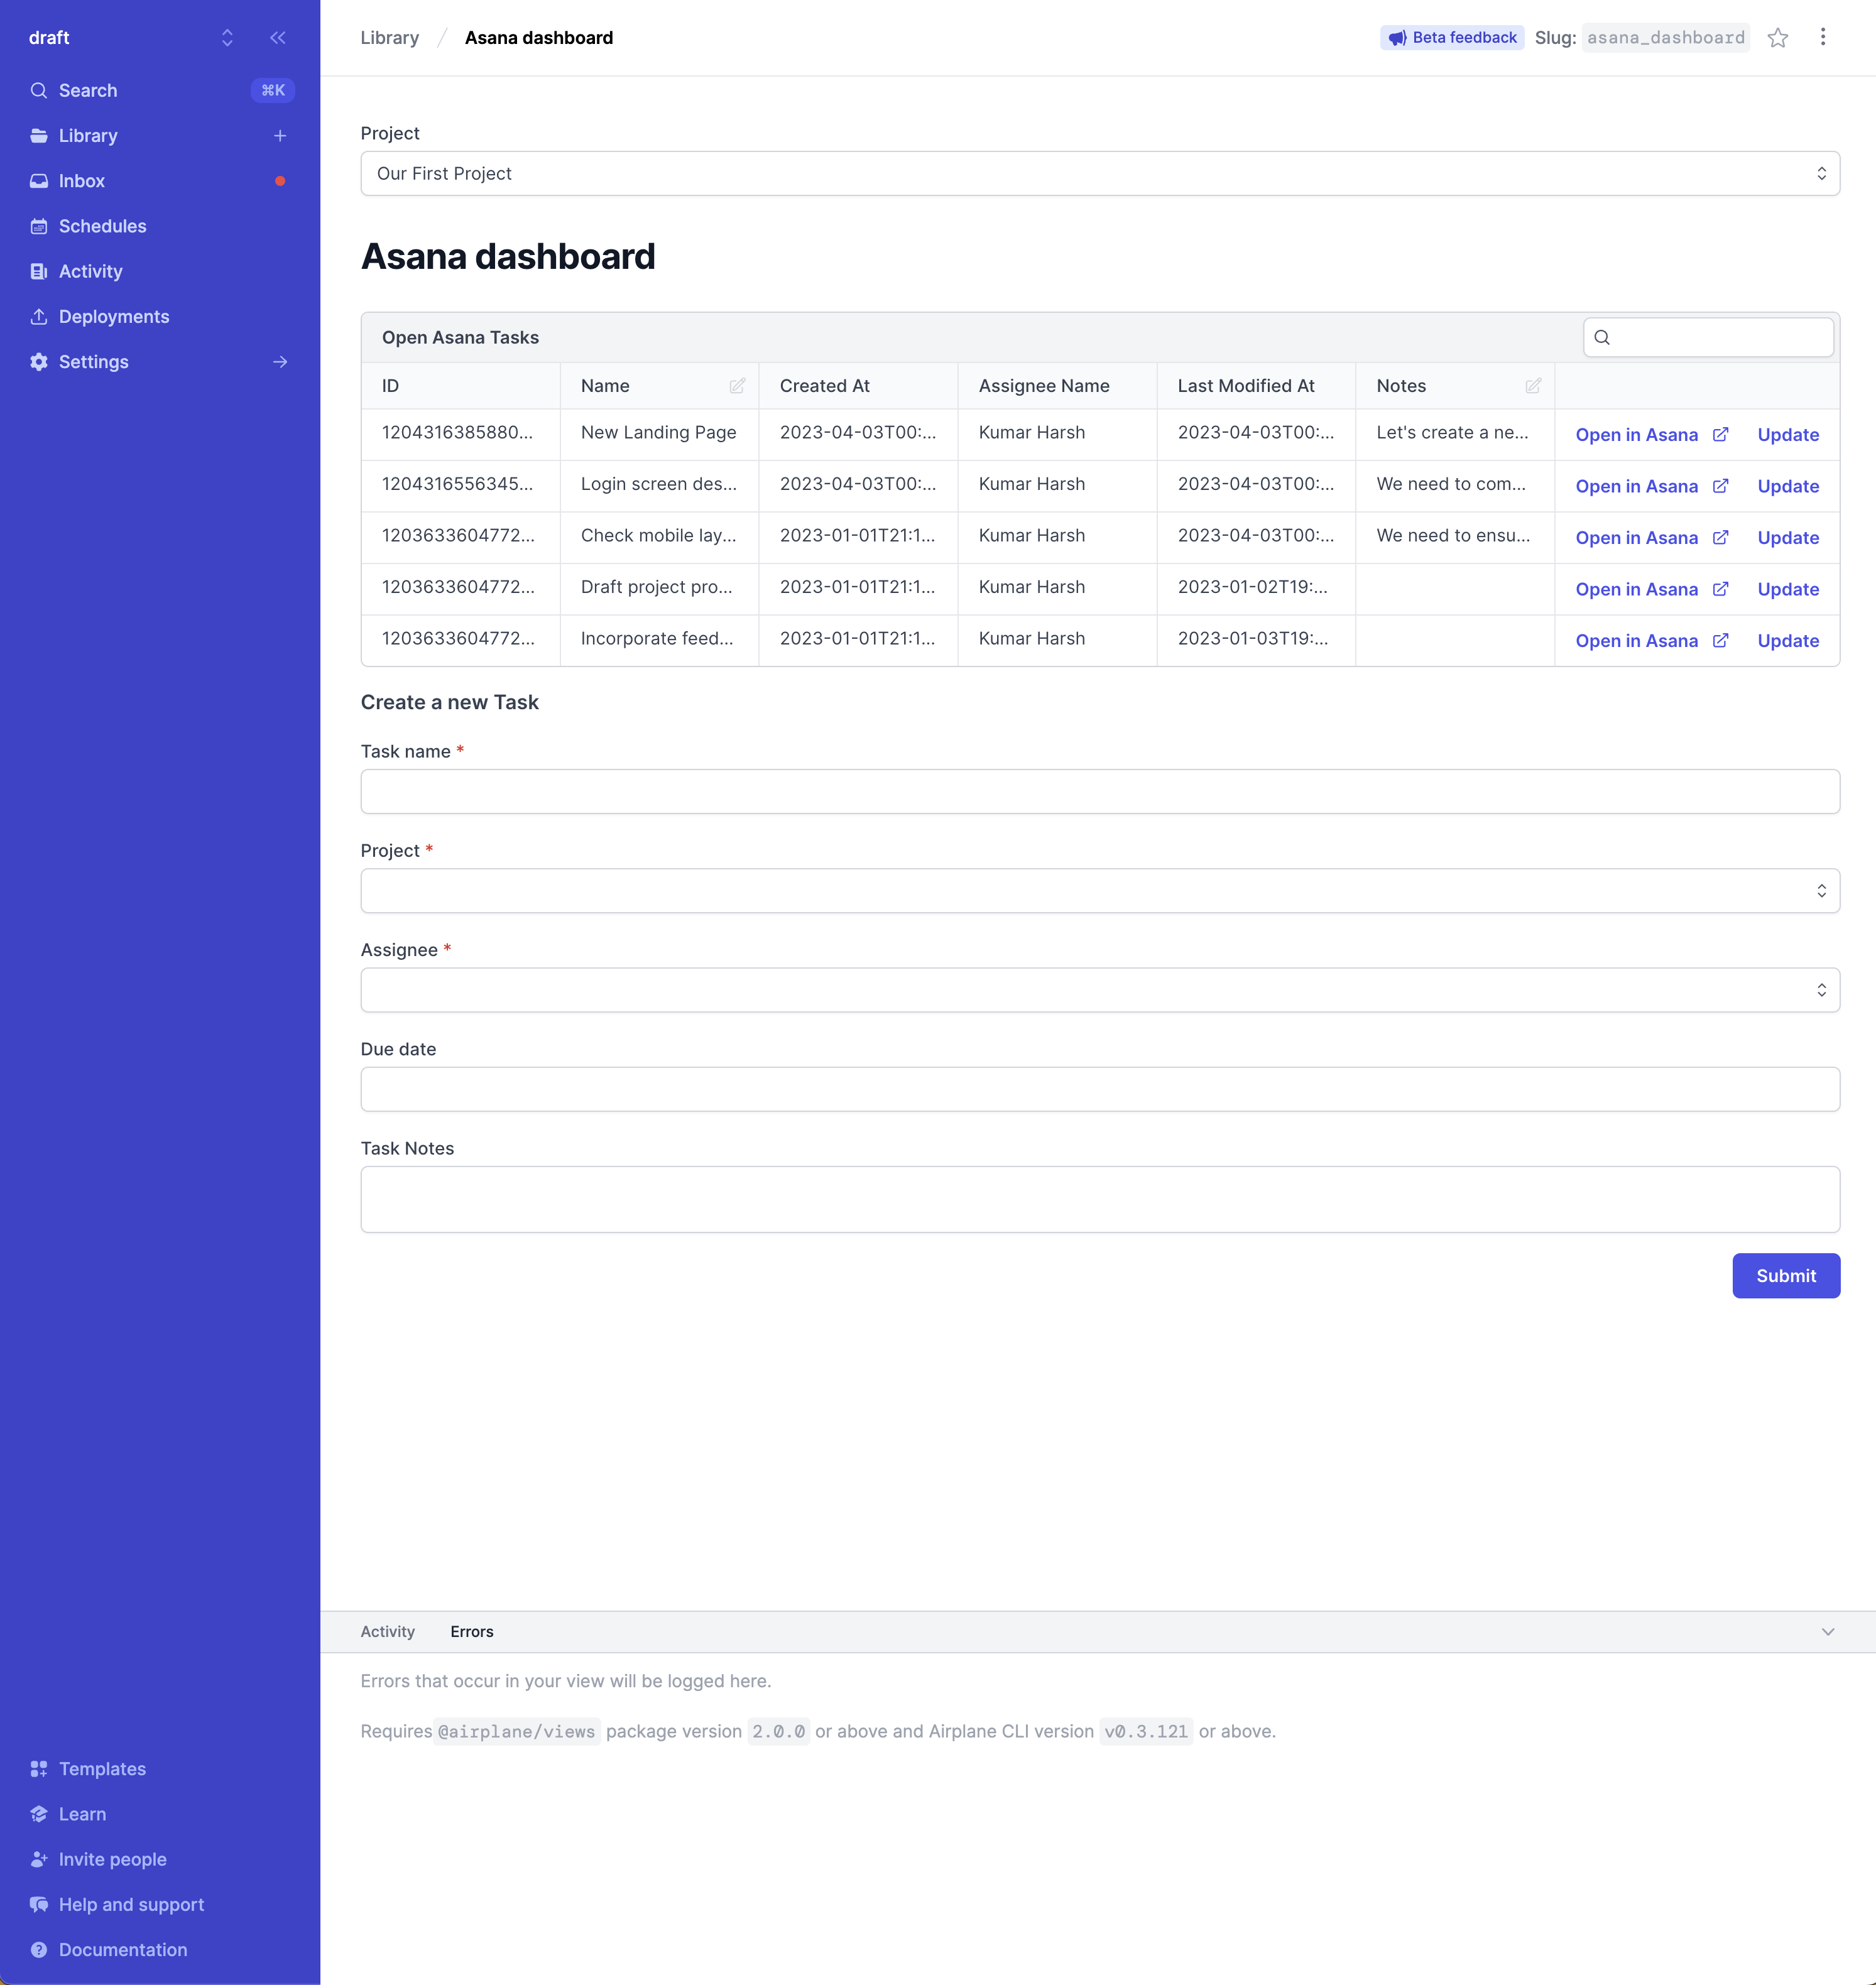
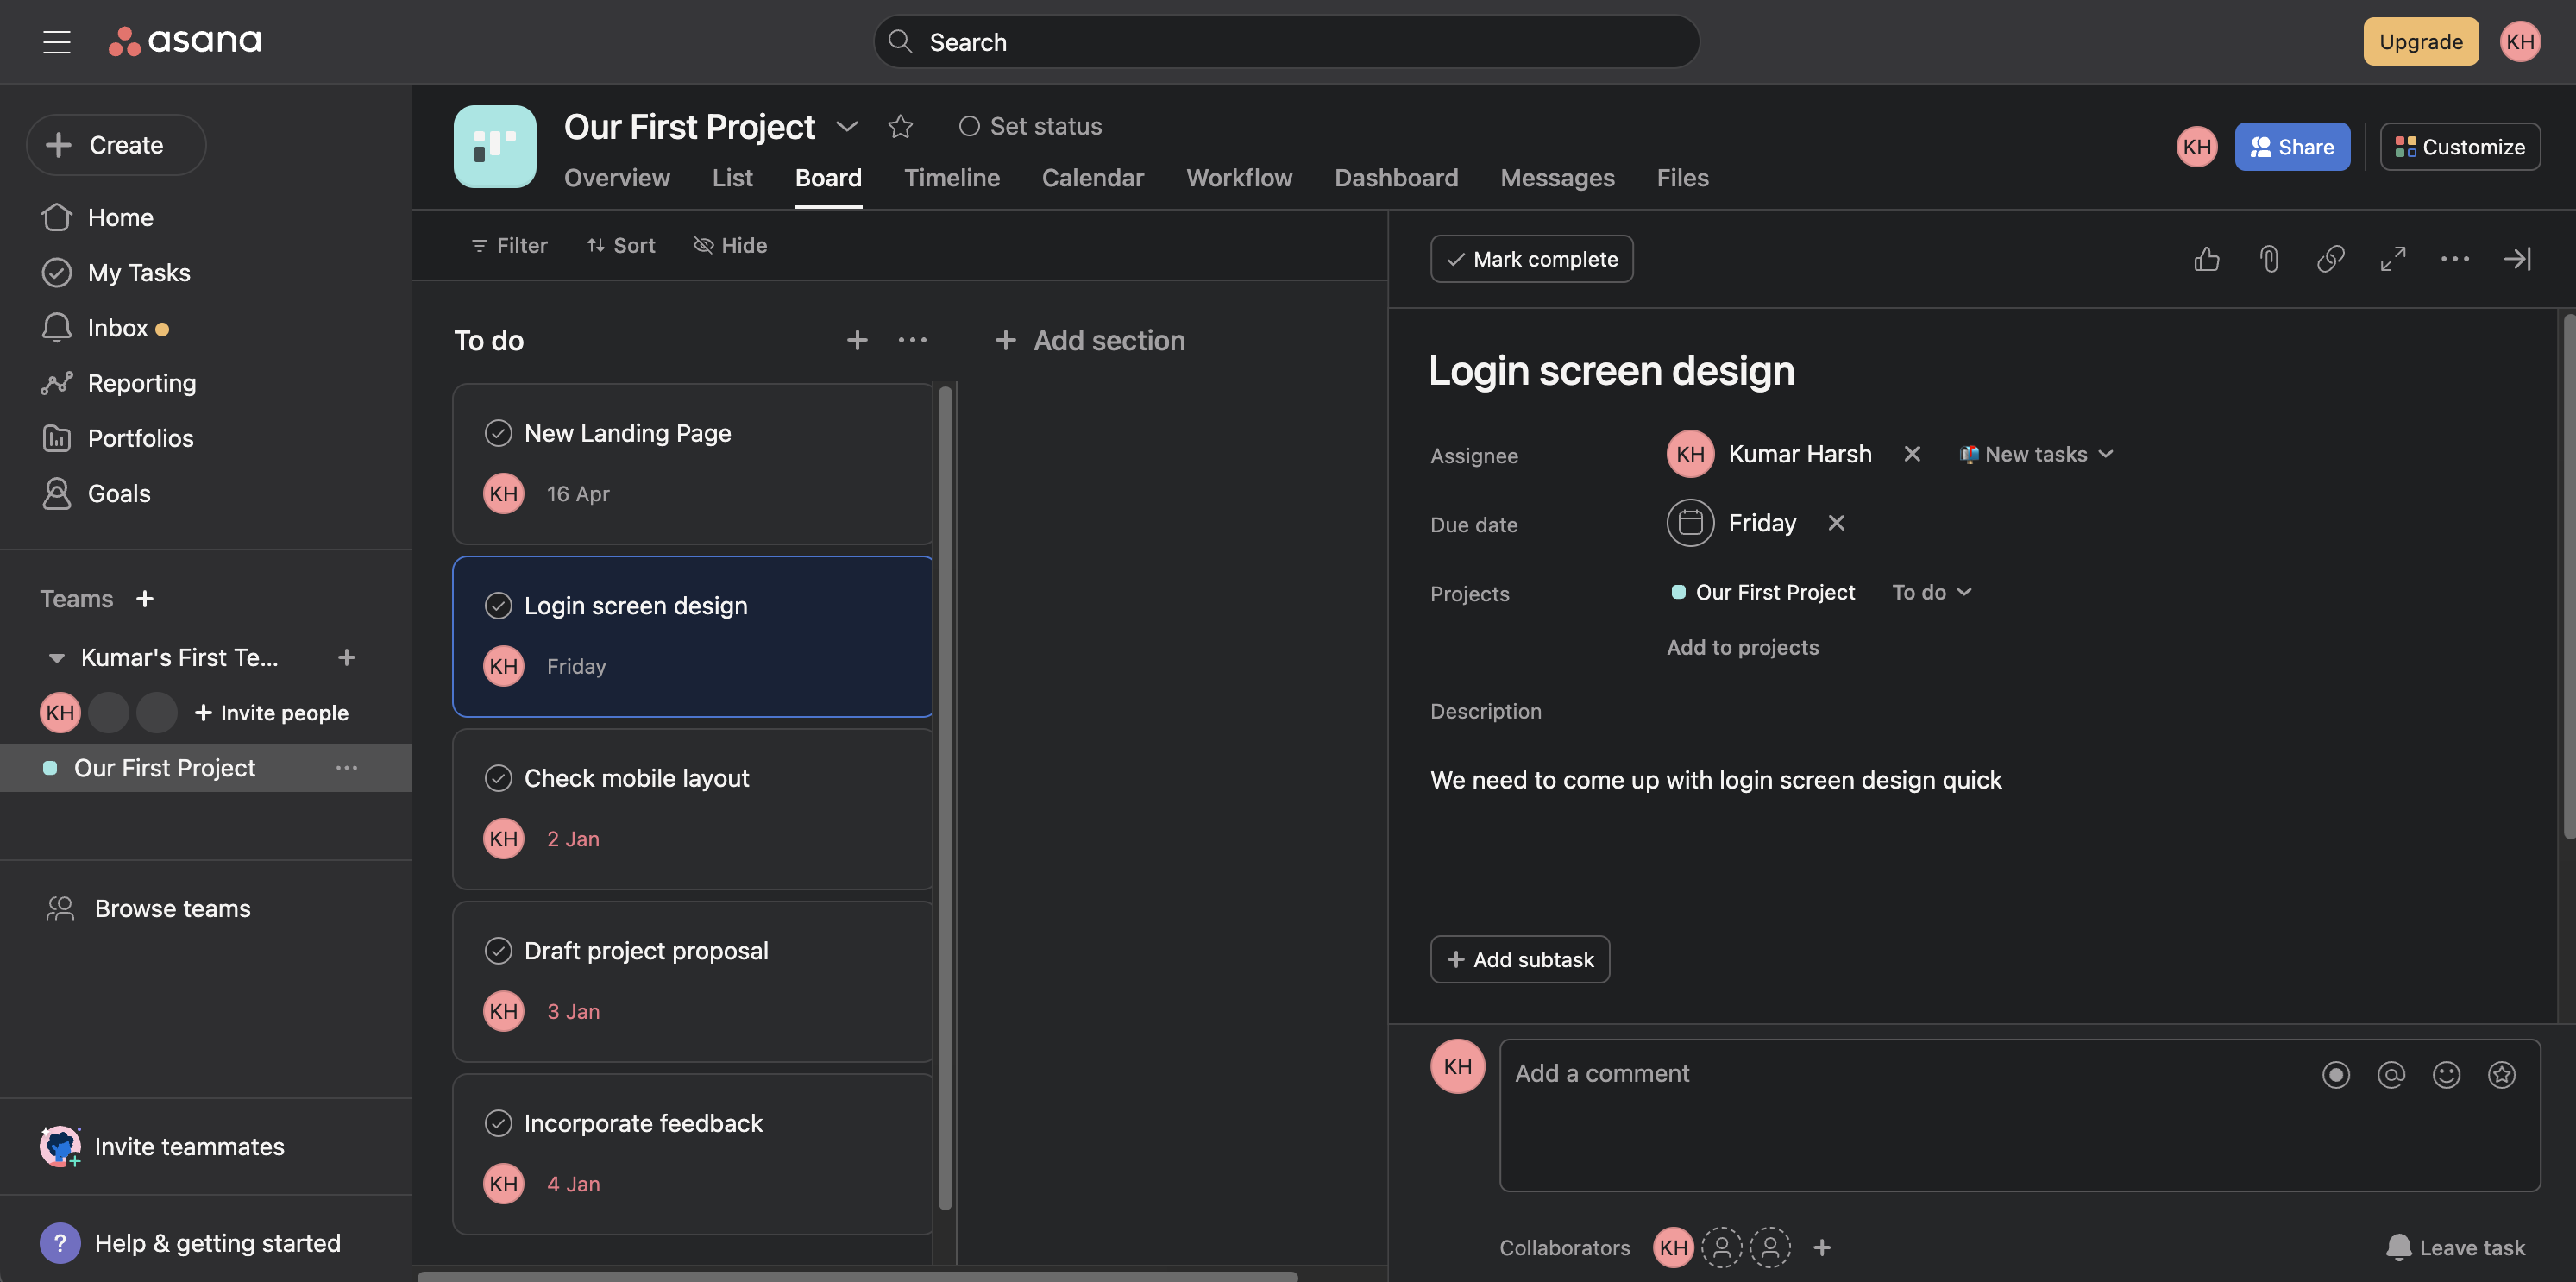
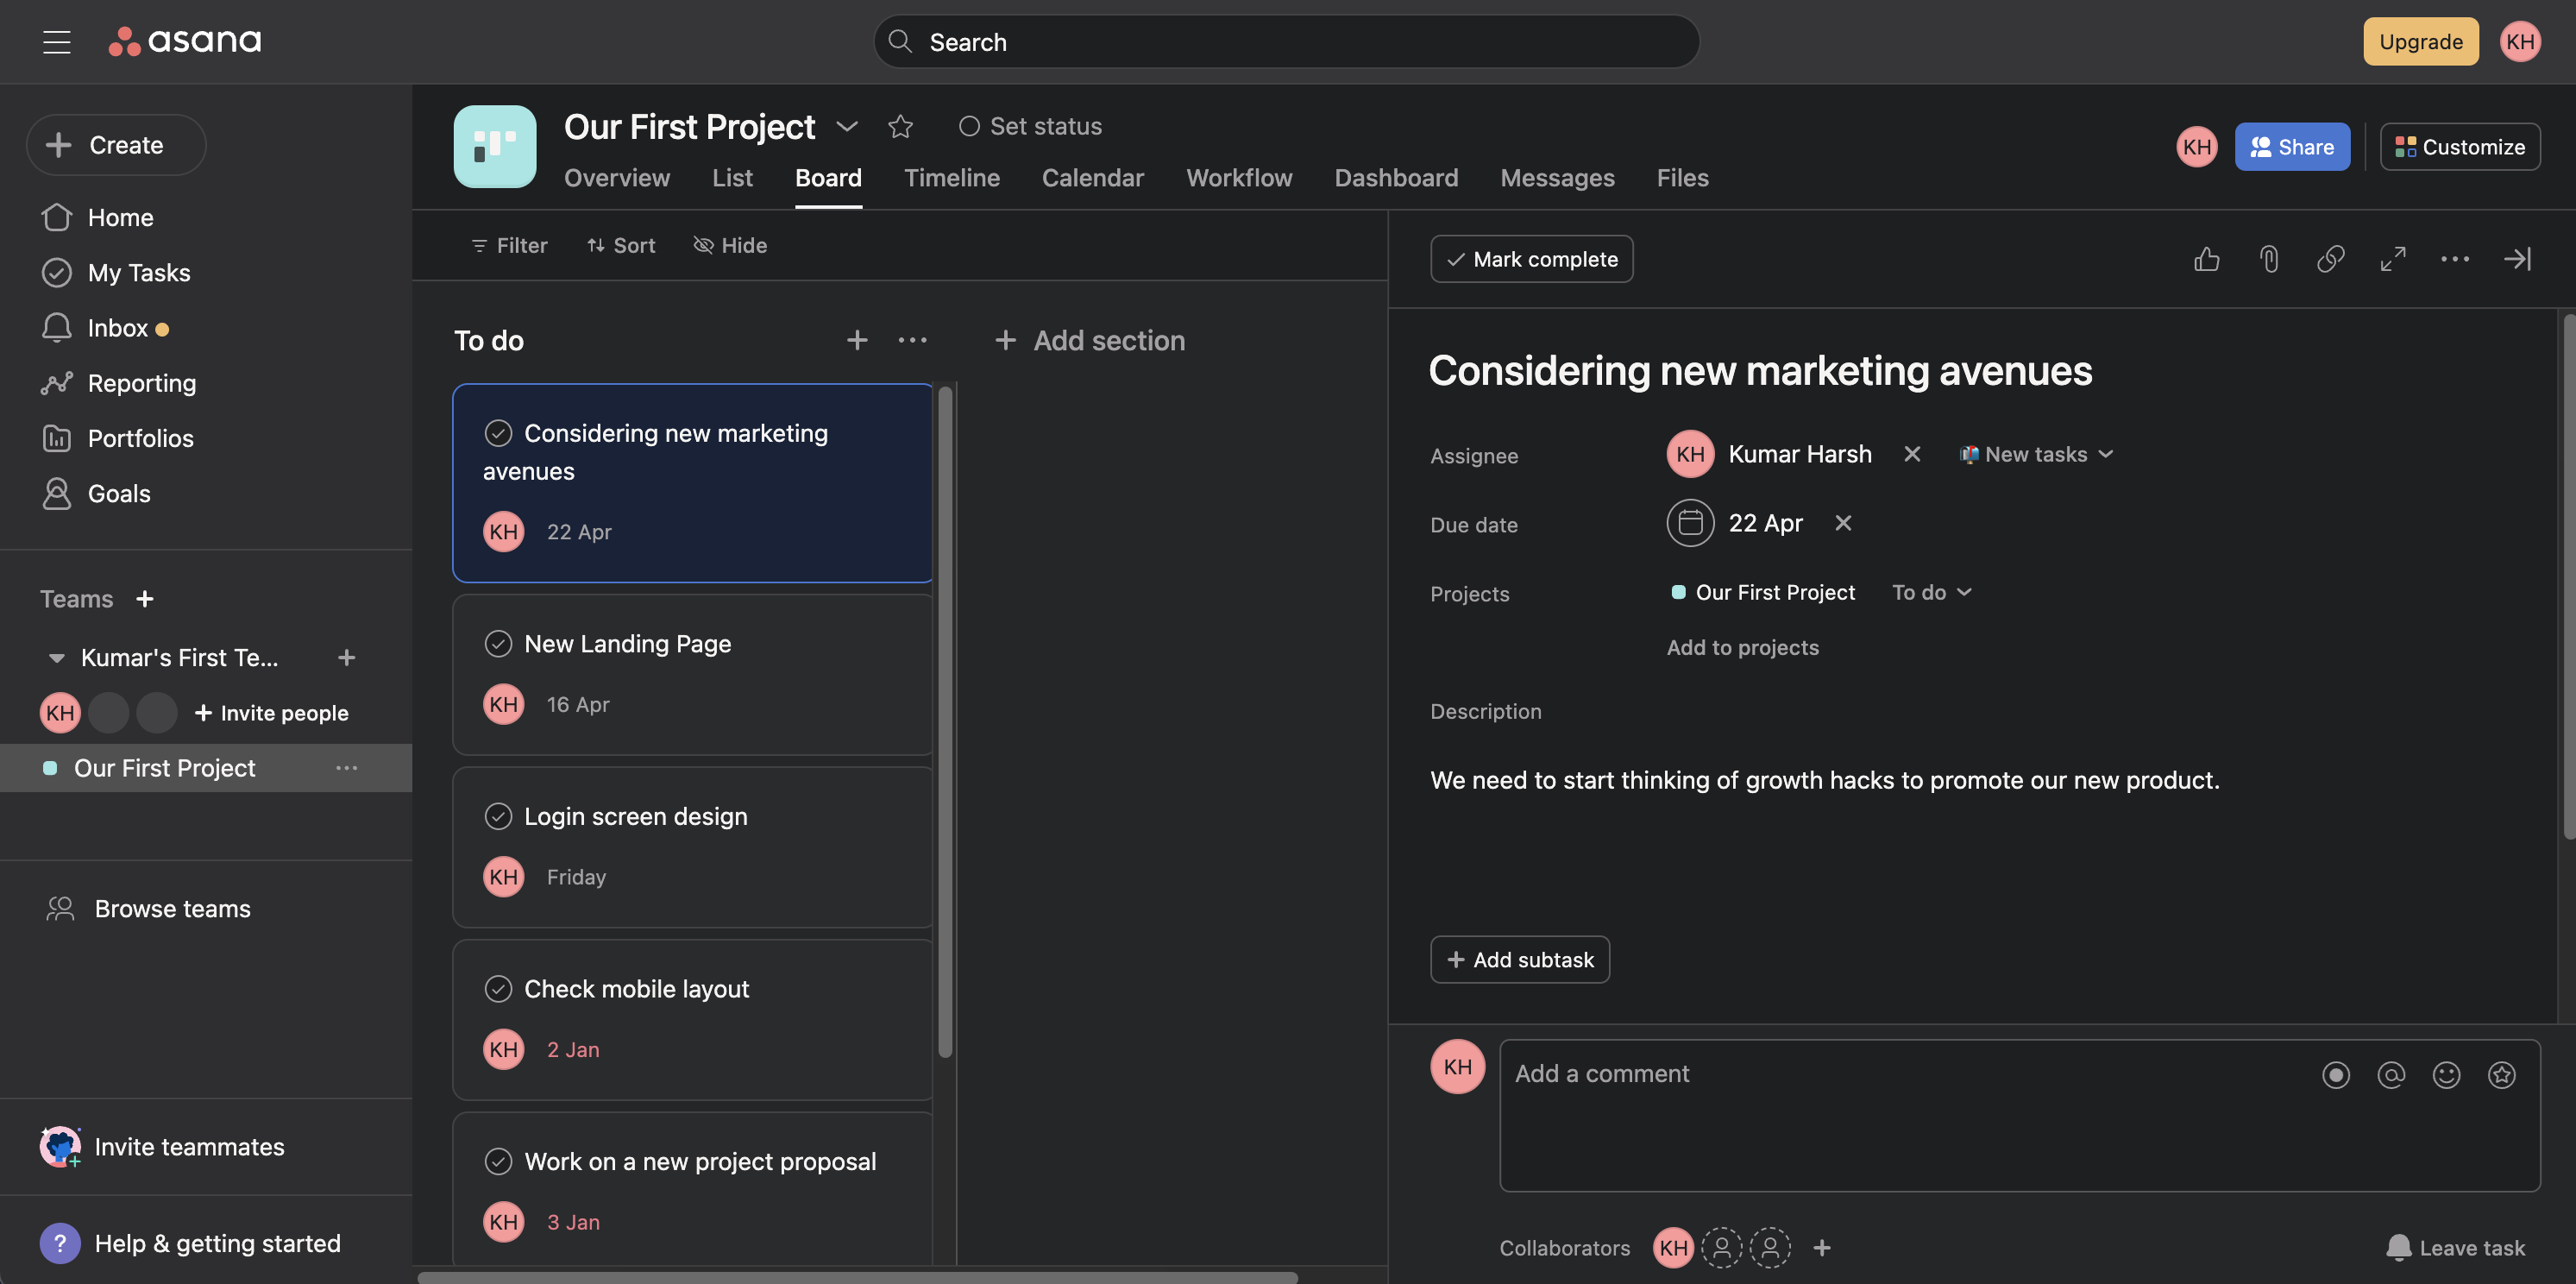
We can view the list of open tickets at the top. It shows basic details about each task, such as its name, time and date when it was created, and who it's assigned to. To see more details about a task, click Open in Asana at the right of the task record. If logged into the Asana account in the browser, we should be taken to the Asana page:
Try updating a task's name and notes by clicking the small pencil icon that appears when hovering the mouse pointer over a name or note cell:
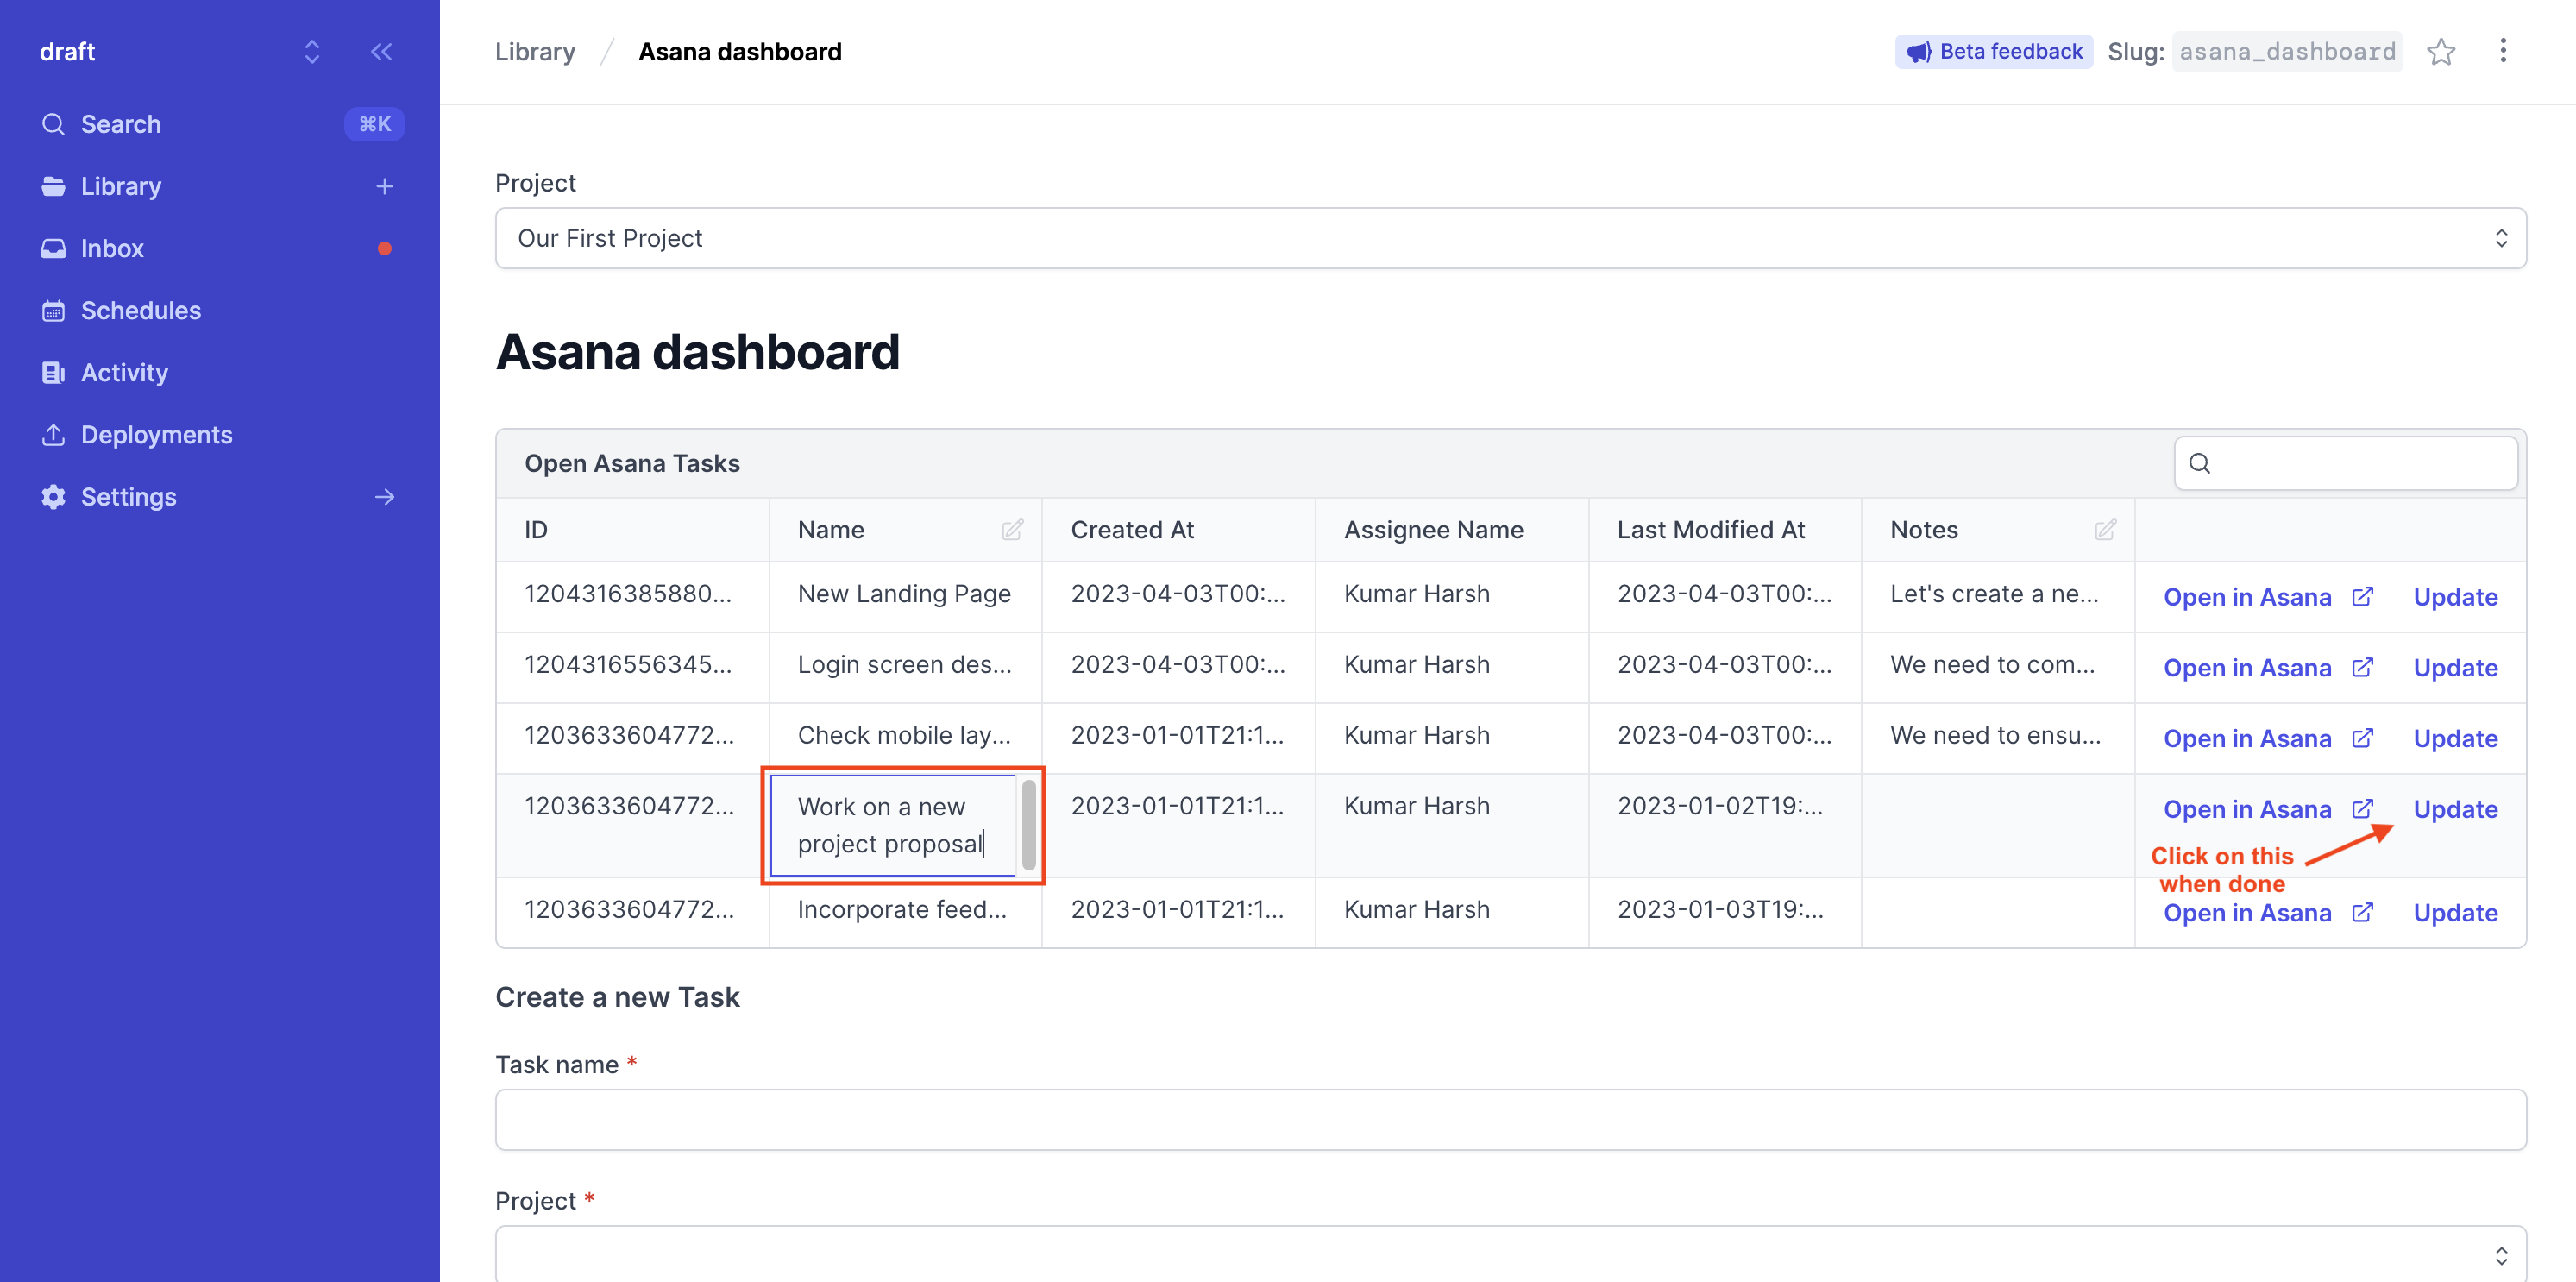
When done editing, click Update to the right of the edited record. This will save the new values to the Asana workspace.
Lastly, we can use the form at the bottom to create a new Asana task:
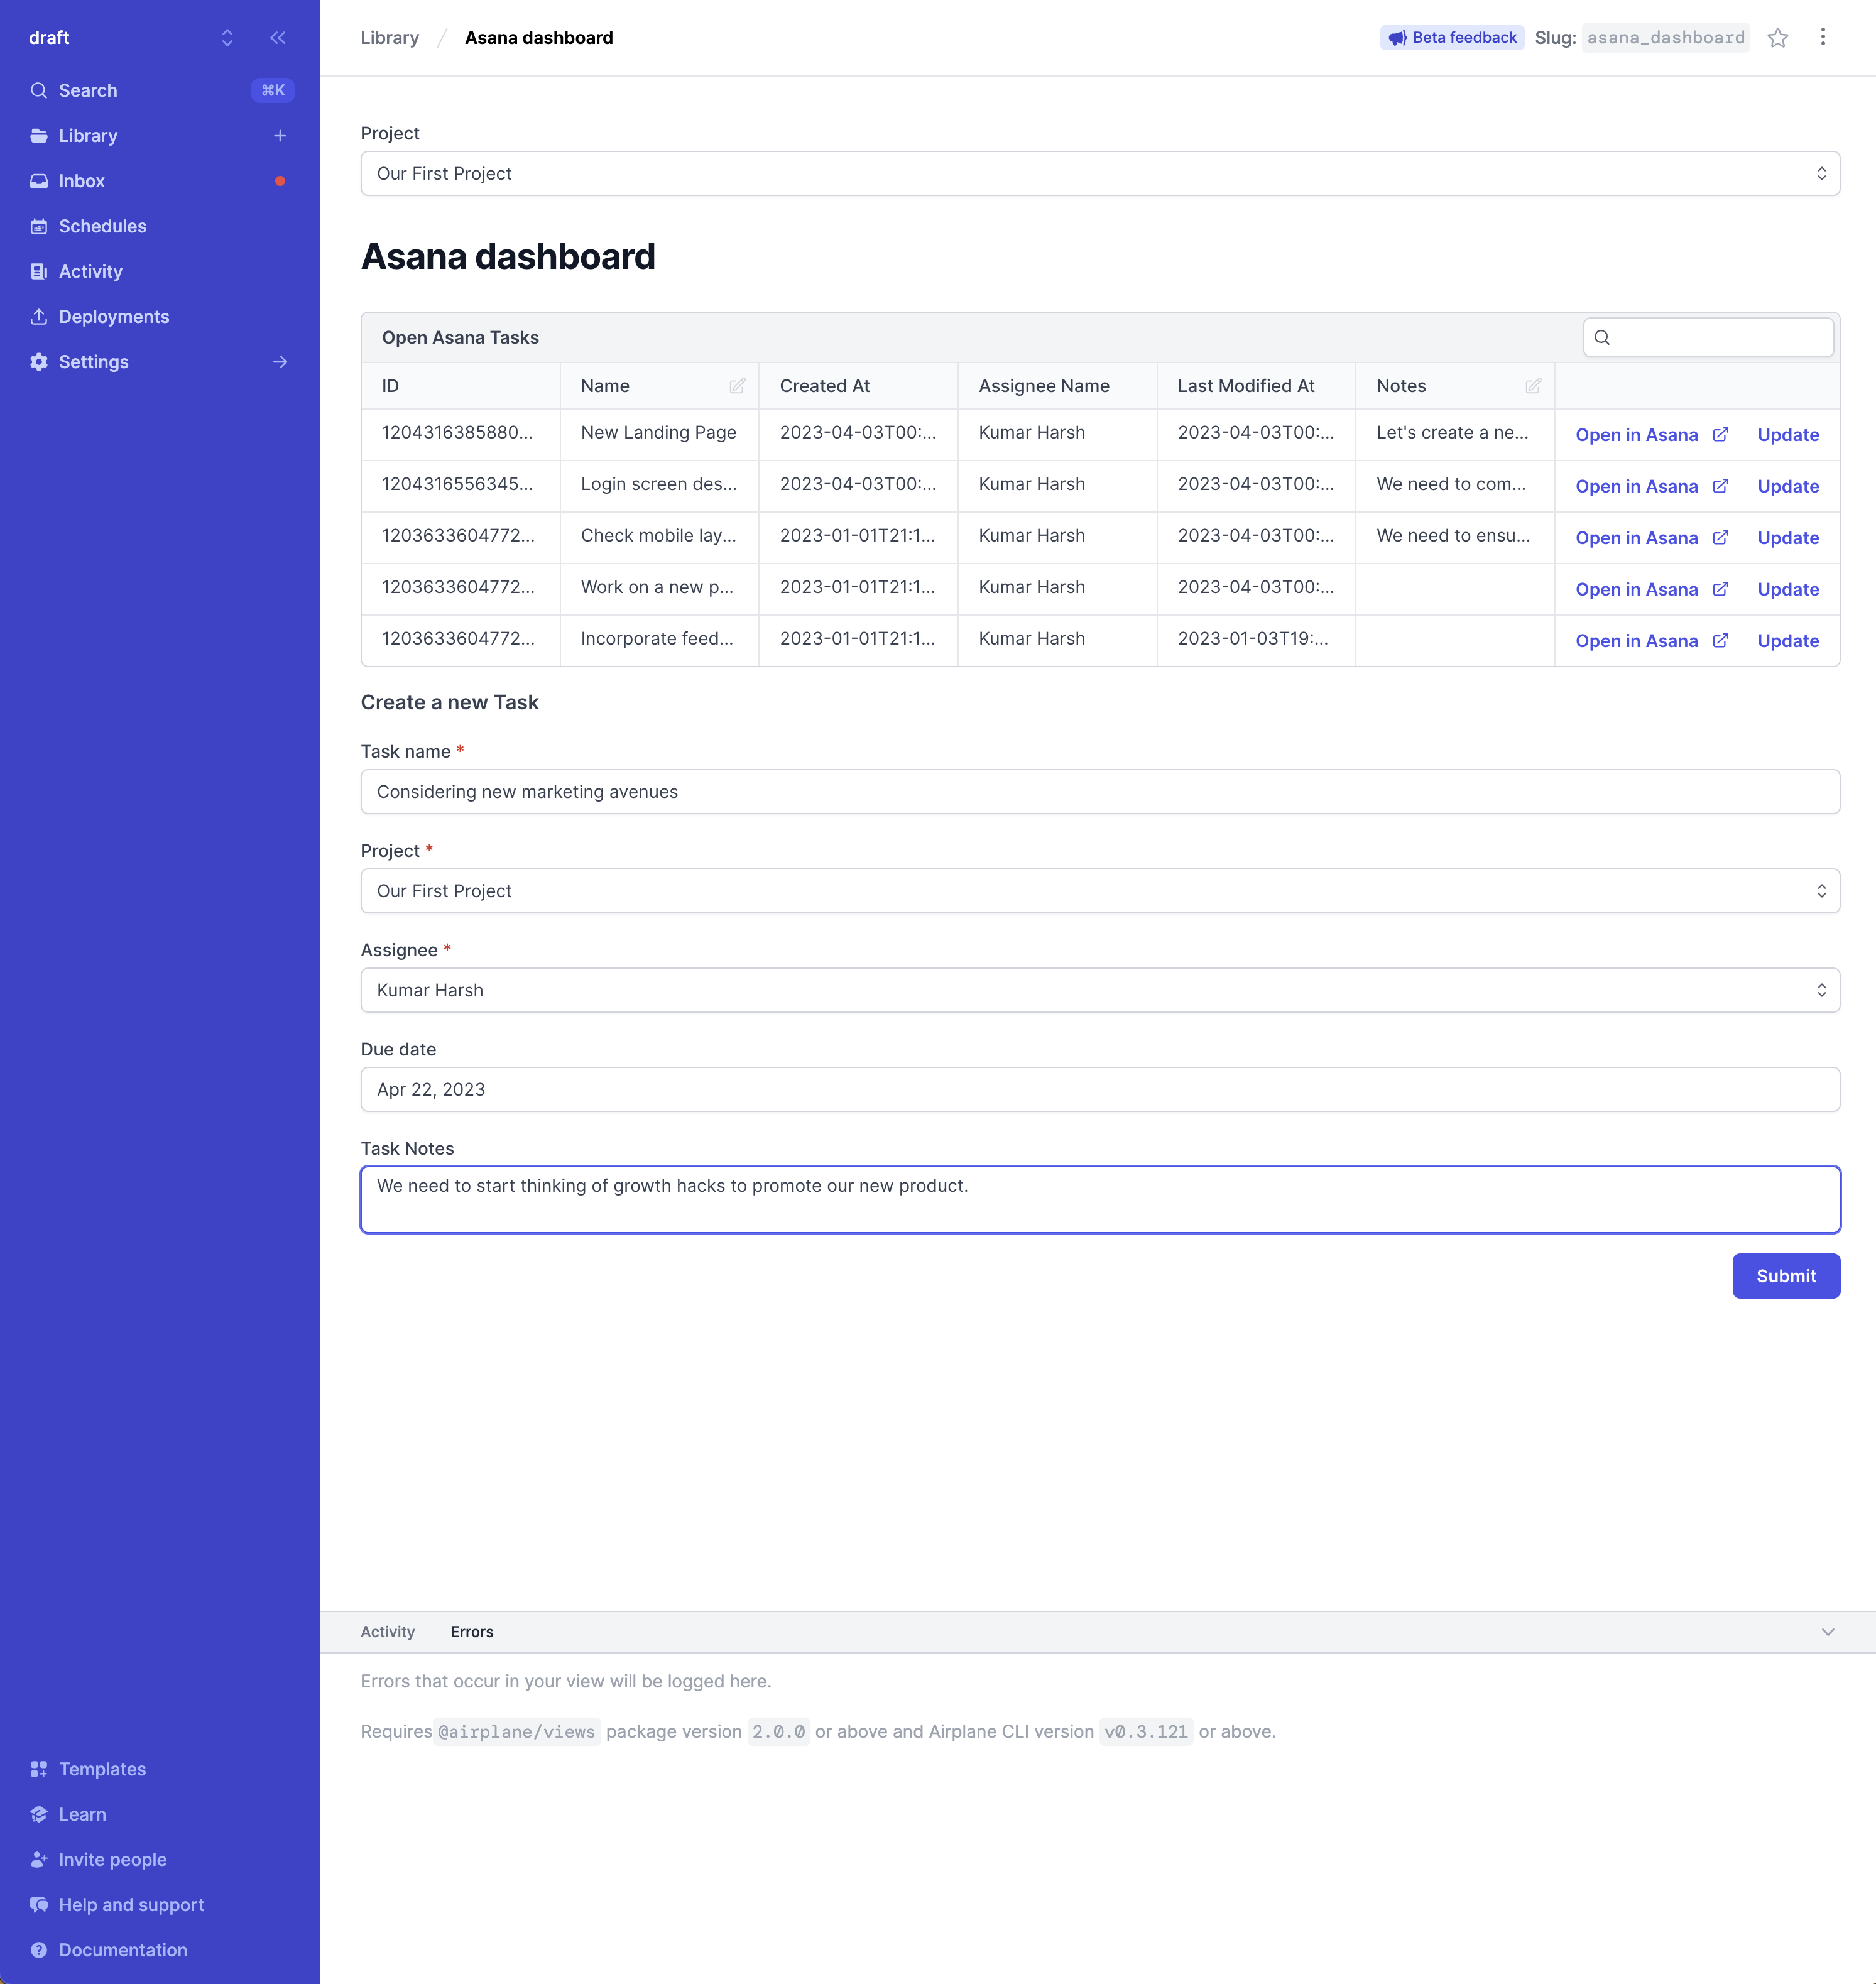
The task will be created in Asana, and we'll be able to see the updated table in a few seconds. Click Open in Asana to see the complete details:
And that's how to build a dashboard using the Asana API and Airplane Views! You can find the complete code for this dashboard on GitHub.
Conclusion
In this tutorial, we walked through how to create an Asana dashboard using Airplane Views. Airplane does the heavy lifting in terms of integrating objects, populating data, and managing UI and state so that you can focus on developing your dashboards quickly. With Airplane's ready-to-use set of components and templates, you can go from idea to tool in a matter of hours.
To try it out yourself, sign up for a free account or book a demo.
Author: Kumar Harsh
Kumar Harsh is an indie software developer and devrel enthusiast. He is a spirited writer who puts together content around popular web technologies like Serverless and JavaScript.


