Scheduled tasks allow you to run specific code at a specified interval of time and are primarily used within a CI/CD system to perform a variety of operations like nightly builds, GitHub repository cleanup, newsletters, and service monitoring, among others. You can use scheduled jobs to send notifications when a process succeeds or fails and to perform batch tasks without any human involvement.
In this article, we'll walk through how to create cron jobs in Golang, a statically typed, compiled programming language designed by engineers at Google. Golang contains the best features from C and Python, like memory safety, automatic garbage collection, structural typing, and concurrency, to name a few. Specifically, we'll discuss how to use gocron and cron.v2 to schedule tasks, explore the limitations of using these packages, and then consider a serverless and easy-to-use approach to task scheduling using Airplane.
Using cron for scheduled tasks
One way to schedule operations is using cron. Cron jobs are run using CRON syntax which is depicted below:
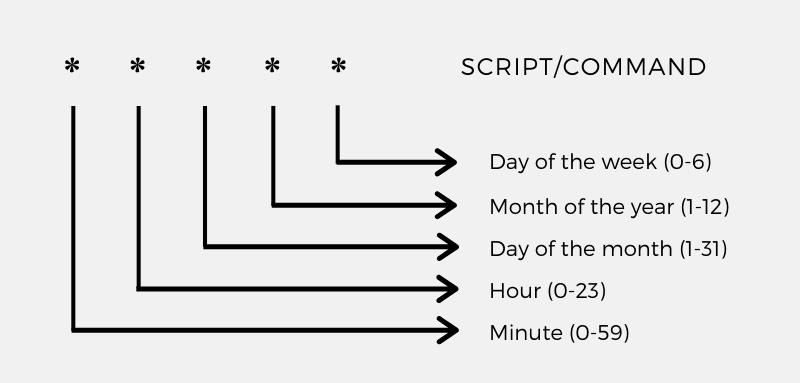
With this syntax, you can create different date and time combinations to run your tasks on a regular schedule.
For example, to run a task every day at 5:30 UTC, you can use 30 5 * * * as your cron schedule timestamp. To make things even easier, you can check out crontab.guru for a quick and simple tool to create cron schedule expressions.
However, using the raw cron syntax is difficult when you need to create complex schedules. To overcome this difficulty, you can use external packages in Golang to create scheduled tasks that allow you to define cron syntax in an easy-to-read signature such as the following:
run.every.month.task(function)
With cron jobs, you can write up a GitHub Action workflow that runs every day at a specific time with the purpose of adding a “stale” label to the issues with no activity in the past fifteen days. Another example is writing a cron script that runs every Sunday and organizes your “Downloads” directory.
Implementing scheduled tasks in Go
There are a number of packages that can help you implement scheduled tasks in Golang. This article will focus on gocron and cron.v2. Before getting into the details of how we use them, we'll first need to create a Golang project.
Setting up your Golang project
To set up a Golang project, first open up a Unix-like terminal, navigate to a path of your choice, and run the following commands to create a project directory for your Golang project:
mkdir golang-cron-jobs cd golang-cron-jobs
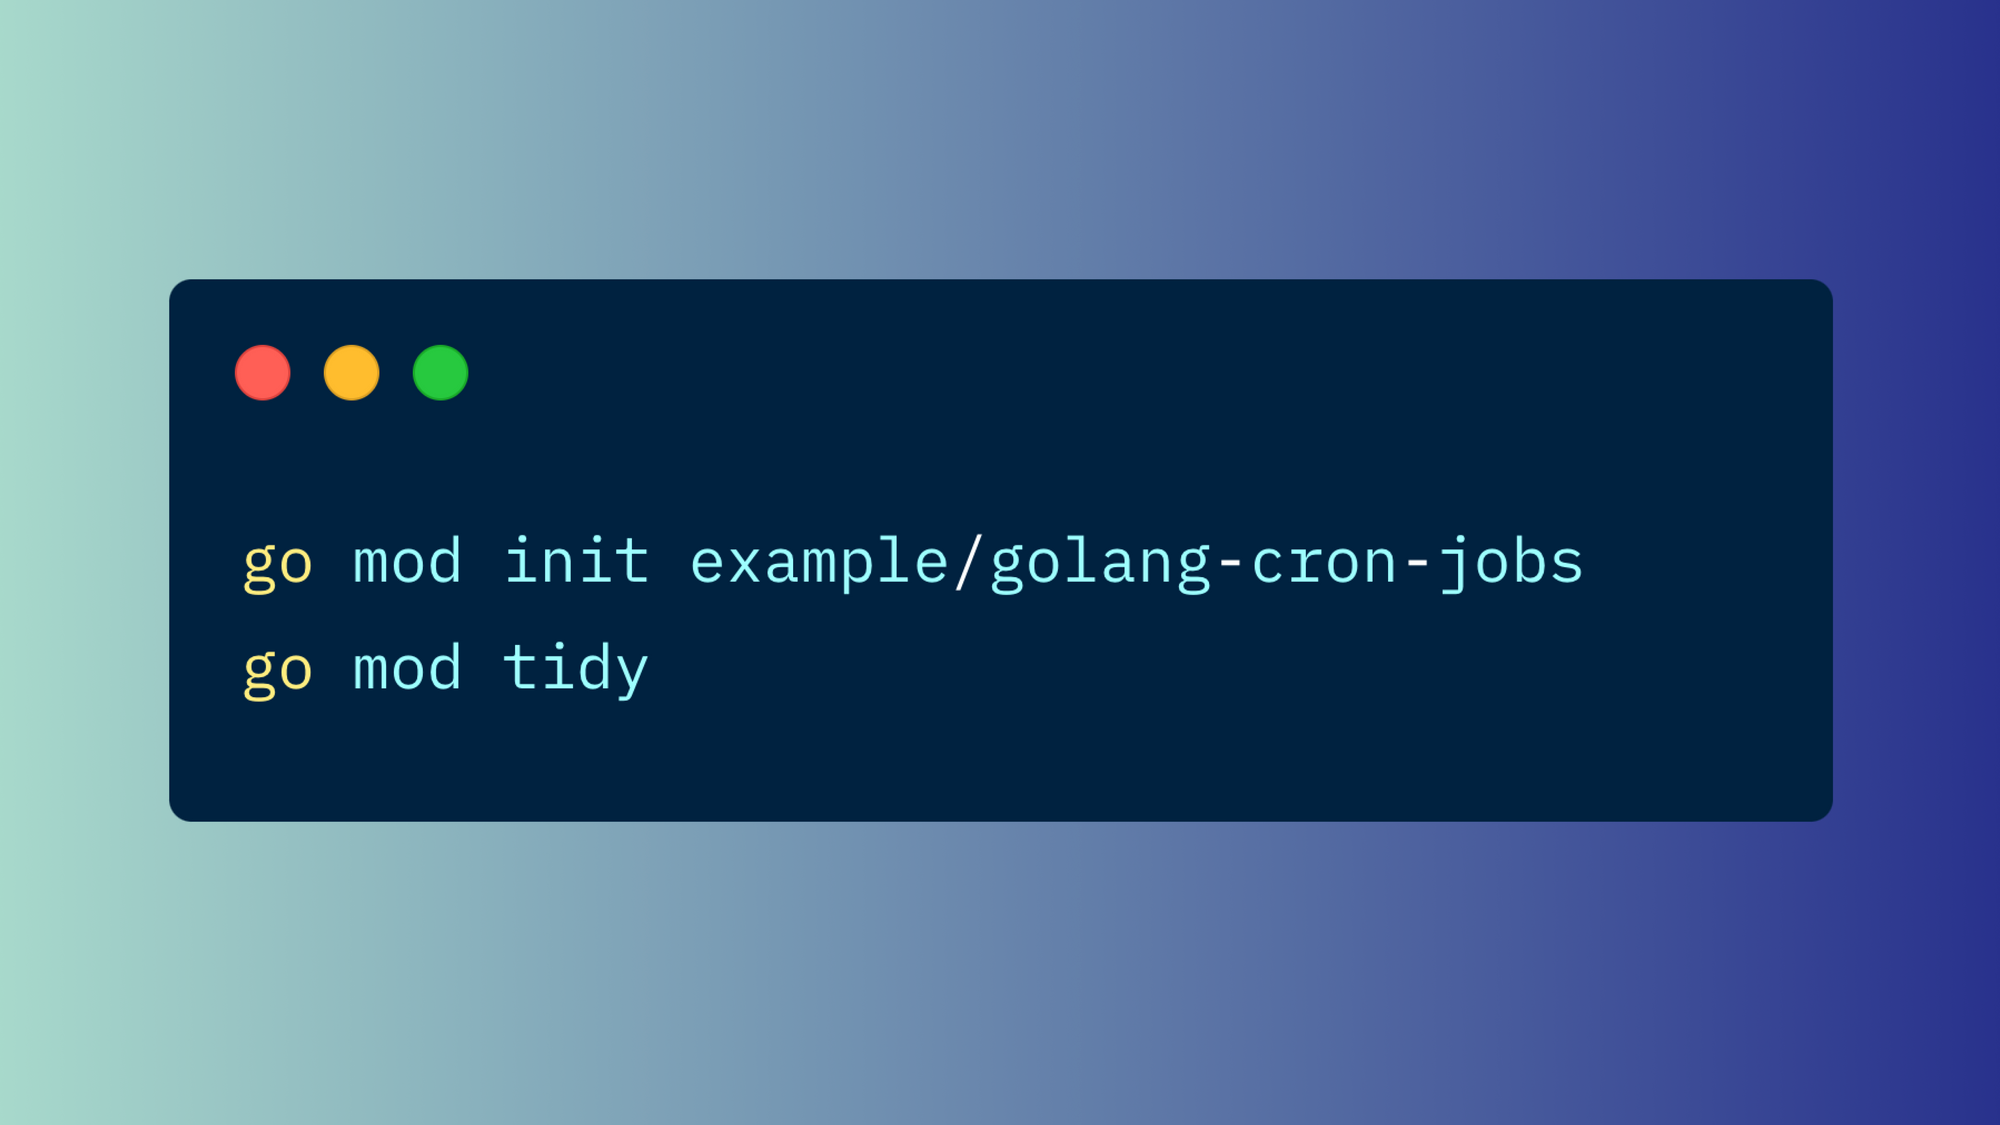
Next, create a module for your Golang project by running the following command:
go mod init examplem/golang-cron-jobs go mod tidy
This will create the files go.mod and go.sum in your project’s directory.
Using the gocron Package
gocron is a job-scheduling package that lets you run Go functions at predetermined intervals by defining a simple, human-friendly syntax. Let’s start by writing a small Golang application that prints a message on the terminal in one-second intervals.
First, we create a main.go file in our project’s root directory and add the following code to it:
The above code accomplishes the following:
- Imports the required packages
- Defines the
hellofunction that prints amessageand takes a string parameter calledname - Creates a new scheduler instance
sin therunCronJobsfunction using thegocronpackage - Defines a cron job that runs every one second (
Every(1).Seconds()) and calls thehellofunction - Starts the scheduler in blocking mode (
StartBlocking()), which blocks the current execution path - Calls the
runCronJobsfunction inside themainfunction
Next, we'll save our file and install the included packages (i.e., gocron) by running the following command in our terminal:
go mod tidy
This will add the gocron package to the dependencies in the go.mod and go.sum files.
Finally, we'll execute our project by running the following command in our terminal:
go run main.go
You should see a message printed to the terminal every second:

Using the cron.v2 package
cron.v2 is another popular package that allows you to implement scheduled jobs in Golang. Let’s implement the above example again, but this time with the help of the cron.v2 package.
First, we'll install the cron.v2 package by running the following command in our terminal:
go get gopkg.in/robfig/cron.v2
Next, we'll replace the content of our main.go file with the following code:
This code accomplishes the following:
- Imports the required packages
- Creates a new scheduler instance
sin therunCronJobsfunction using thecron.v2package - Defines a cron job that runs every one second (
@every 1s) and calls thehellofunction - Starts the scheduler in blocking mode, which blocks the current execution path
- Calls the
runCronJobsfunction inside themainfunction. However, since therunCronJobsfunction runs asynchronously, the execution falls through. TheScanlnmethod, which requires you to press a key before the program exits, prevents this.
Finally, we'll save our file and execute our project by running the following command in the terminal:
go run main.go
Again, you should see a message printed to the terminal every second:

Limits of embedded schedulers in Golang
While using packages like gocron and cron.v2 provides useful functionality, there are some limitations to be aware of.
First, you can’t improve what you can’t measure. Properly measuring stats like memory usage or total automation-execution time can help you speed up and optimize your workflows and these are not supported while using packages like gocron and cron.v2.
It's also essential to understand what's going on in the code. While this is less of an issue with small and simple workflows, cron makes it very difficult to track the data flow between different tasks as the complexity increases.
Additionally, in order to log the data, you have to write the logic for logging and find a way to persistently store your logs, which may require setting up a storage solution.
Failure handling and failure management are also crucial considerations. Cron runs strictly at specified times, meaning that if a task fails, it will only run again at the next scheduled time and there are no auto-retry mechanisms for failed jobs. This means that in order to use cron safely, you'll also need to build out some way to get notifications (e.g., via Slack or email) to receive alerts when schedules fail.
Finally, if your team is dependent on a code-based solution for writing automation, engineers may turn into bottlenecks and cause latency because nontechnical members of your team are unable to create and manage automation workflows without them.
A better alternative with Airplane scheduled tasks
Airplane is a developer-first SaaS platform with first-class support for running scheduled and nonscheduled operations. Using Airplane you can easily set up new jobs, debug scripts, manually execute tasks, and much more. While covering all the drawbacks of embedded schedulers in Golang, Airplane also provides audit logs, approval flows, failure notifications, and other features that promote security.
Setting up scheduled tasks in Airplane takes minutes. Let's walk through an example of scheduling a Node.js task in Airplane.
Create a new task
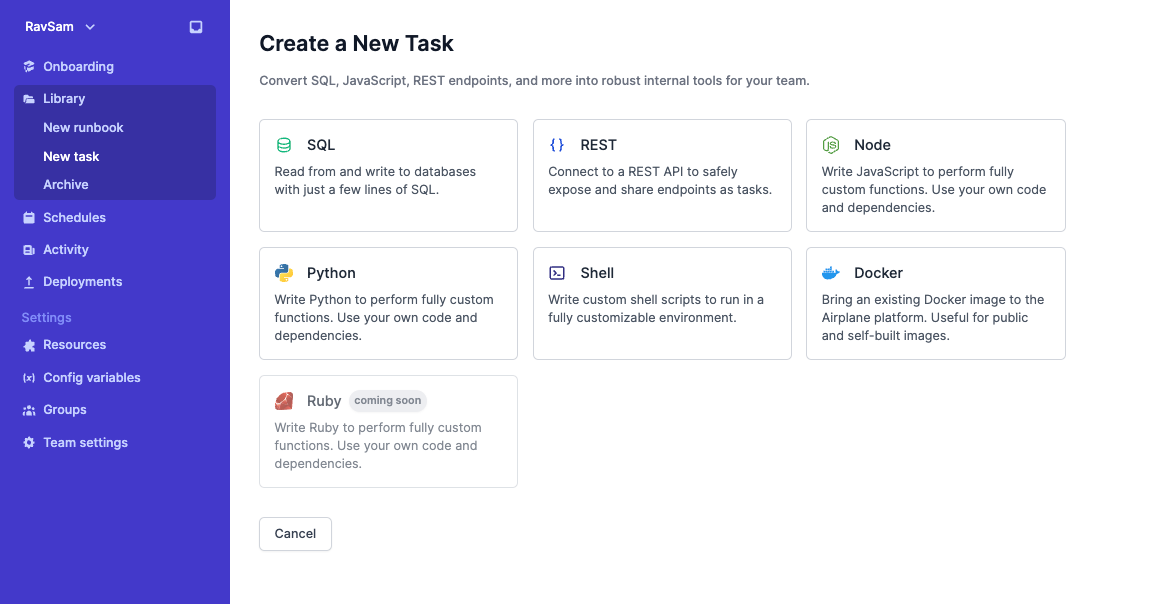
First, sign up for a free Airplane account. Once you’re logged into the platform, click Library > New task on your dashboard and select the Node option:
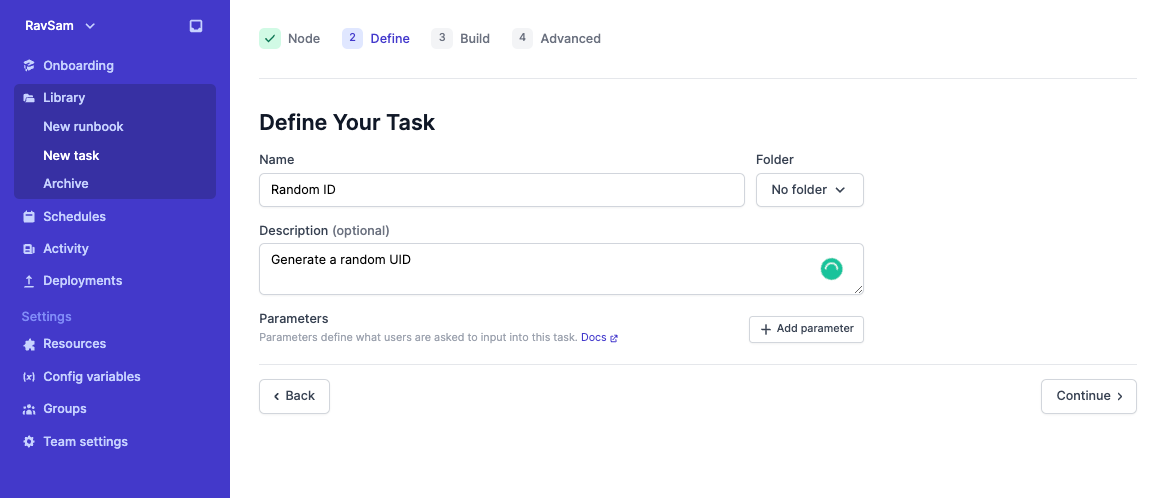
Give your task a Name and an optional Description, and click Continue.
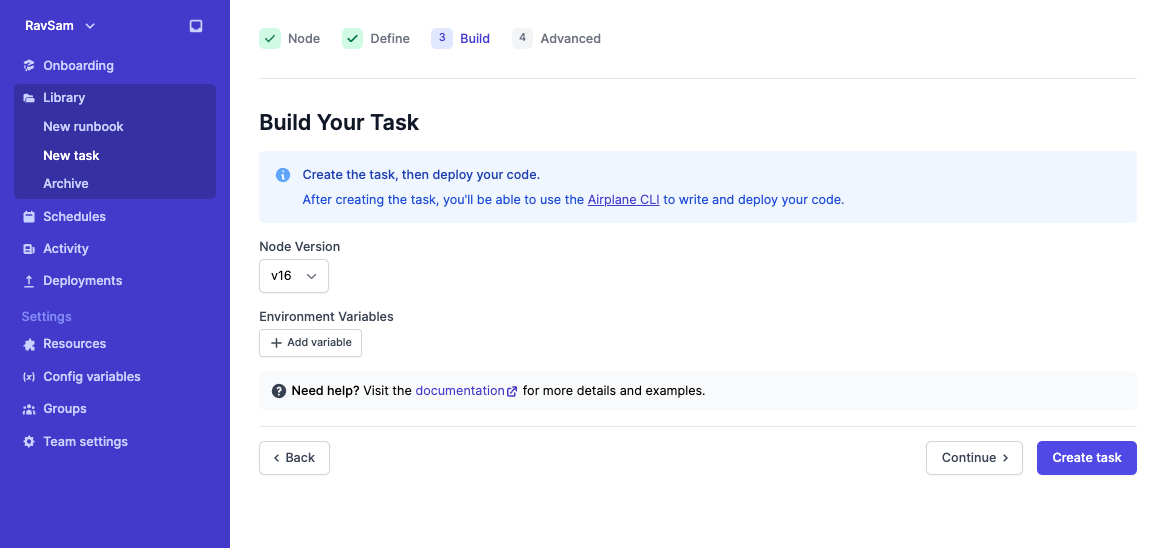
Then you can specify the Node version for your task, add any environment variables in case you want to use them in your task code, and click on Create task.
Next, follow the instructions to set up the Airplane CLI on your local machine specific to your OS.

Once the Airplane CLI is installed, it’s time to write the code for the scheduled task.
Write the code for your task
First, create a script file associated with your task by running the following command in your terminal. These instructions are also provided in the Airplane app.
airplane init --slug-random_id
The above command will create a random_id.js file as it is a Node-based task.
Next, to generate a random ID, you can use the nanoid NPM package. To install it, run the following commands in your terminal:
Next, update the random_id.js file by adding the following code to it:
Finally, deploy the script to Airplane by running the following command in your terminal:
airplane deploy random_id.js
The Airplane CLI will deploy your task script to the Airplane platform.
Create a schedule
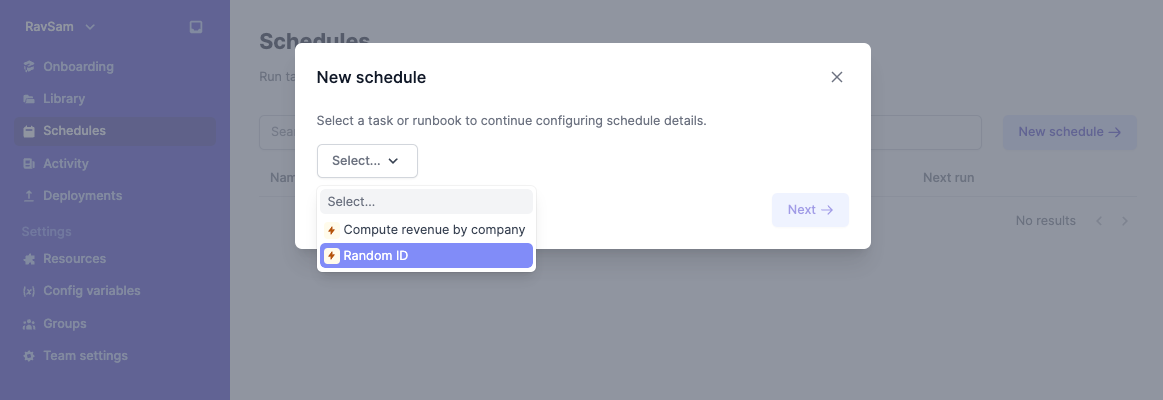
Now that we've created this task, it's very easy to create a new schedule. On the Airplane dashboard, click Schedules > New schedule and select the task that you want to schedule.
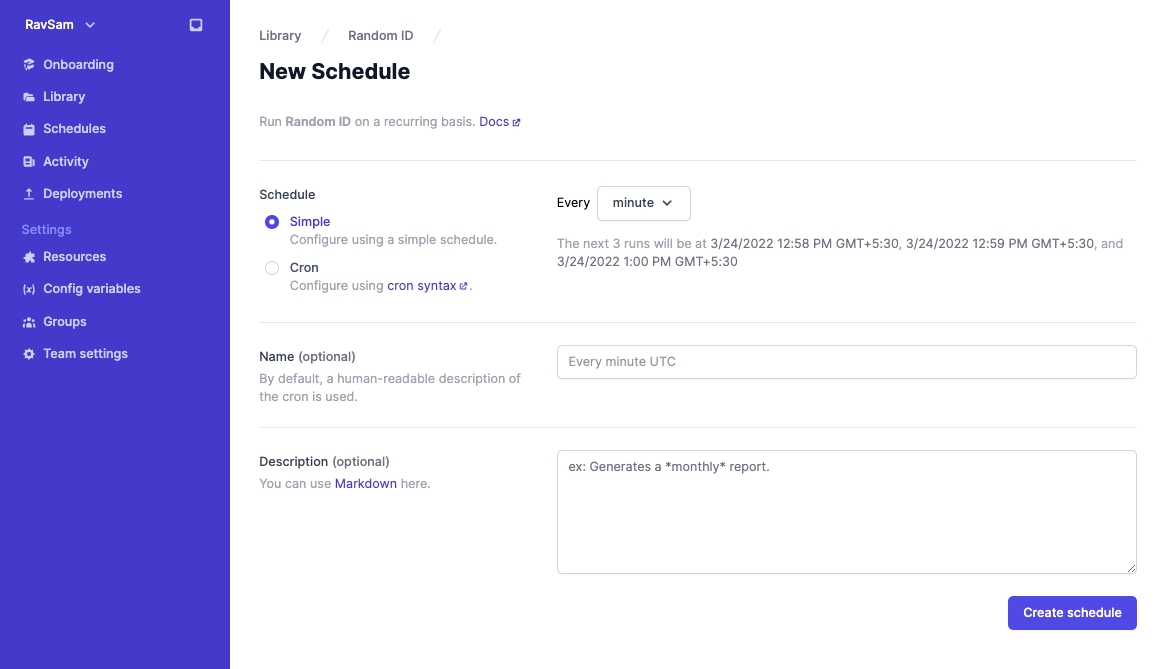
Use the Simple method or Cron method to specify the schedule for the task. For this example, let's set the schedule to Every minute using the Simple method and click Create schedule.
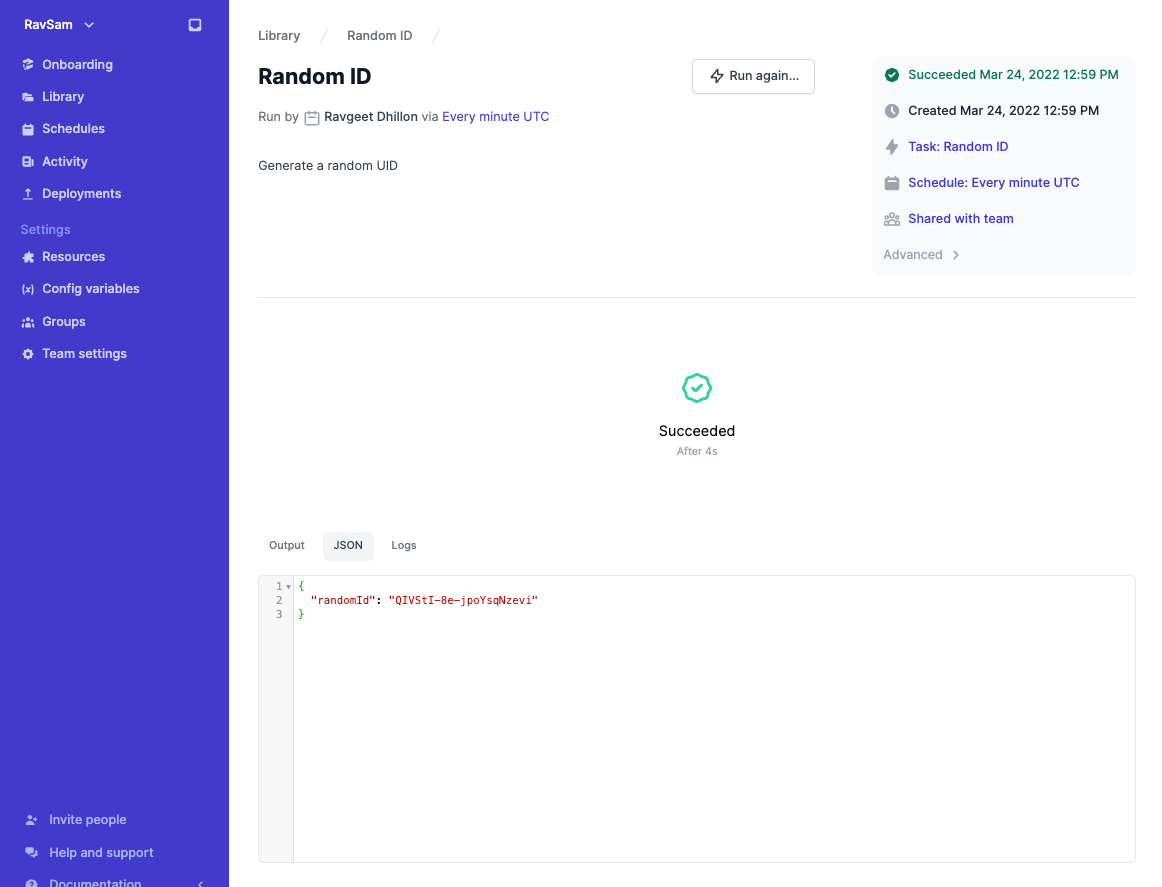
Next, let's click on Activity on the left-side menu bar. Since the schedule is set to run every minute, we should see the executed run after a minute.
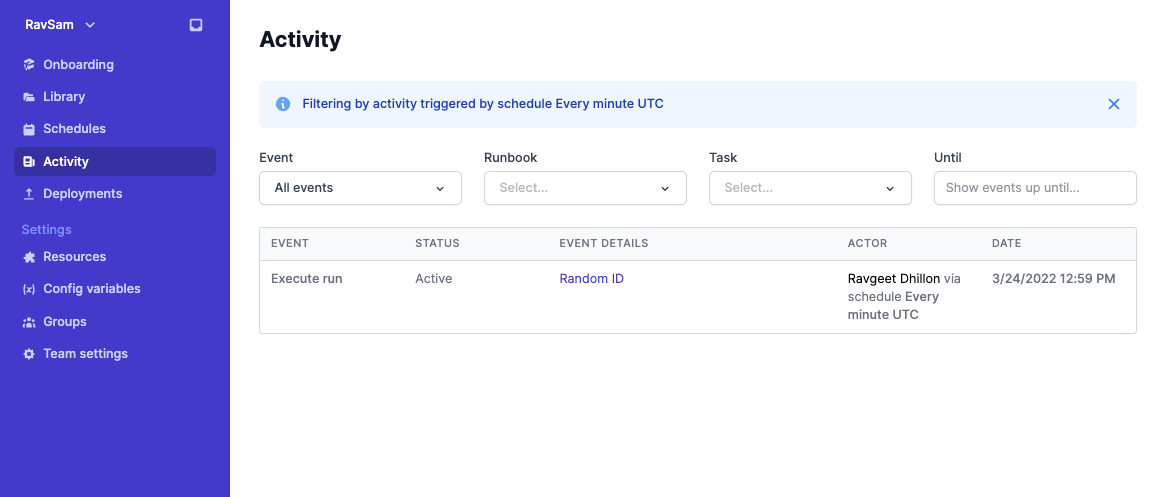
You can click on the event to check out the event details. Under the JSON tab, you can see the output of the script.
And that’s all! Now your scheduled task is set to run consistently without any interruption or maintenance.
Airplane is simpler than the embedded-scheduler approach. You can focus on defining when and what tasks to run and Airplane handles logs, maintenance, alerts, and more.
If you’d like to give Airplane a try, you can sign up for a free account today or email us to learn more.
The entire code for this tutorial is available in this GitHub repository.
Author: Ravgeet Dhillon
Ravgeet Dhillon is a full-time software engineer and technical content writer who is experienced in React, Vue, Flutter, Laravel, Node, Strapi, and Python.