
One of the first things that a scaling startup builds as soon as they have a reasonable amount of customer volume is an admin panel, sometimes called an admin dashboard or control center. From here, people on support, customer success, ops, and other teams can read and write customer data to help resolve customer issues.
Examples of the types of things you might need to do in an admin panel:
- Read data: Lookup a user's metadata and transaction history; see a list of users on a team
- Simple write operations: Change a user's email address, name, or other metadata; extend their free trial length; manually apply a discount; change the team owner
- Complex write operations: Perform a GDPR deletion and scrub data from backups; export an archive of all of a customer's data; refund the last transaction
In this guide, we'll build an admin panel that does all of the above in just 10 minutes of work. After going through this guide, you'll have a strong understand of how Airplane works and you should be able to customize Airplane to your business-specific admin panel needs.
How Airplane works
The basic building block of Airplane is a task, which represents a single, distinct business operation. All of the above examples around reading and writing data–looking up a user, extending a free trial, changing an email address–can each be represented by tasks in Airplane. Below, we'll see how to create tasks for these kinds of operations.
Airplane also supports more complex workflows in the form of runbooks. A runbook is a multi-step operation that can be composed out of multiple tasks. An example might be a customer onboarding runbook which involves many read and write steps.
Read operations via SQL tasks
Let's start by modeling a simple read operation in Airplane. Login to Airplane, click on the Library in the left sidebar, and then click "new task." You'll see a screen that asks you to select the task type:
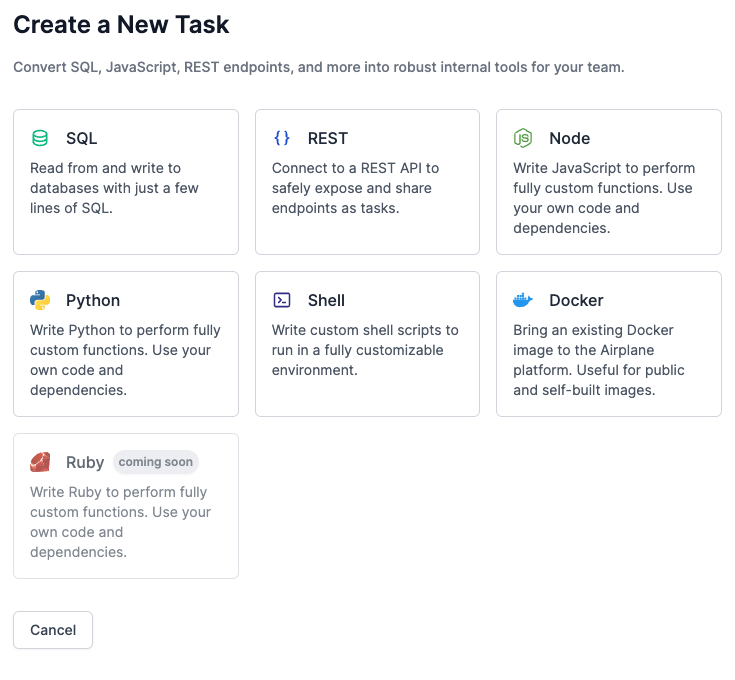
A lot of the power of Airplane comes from its ability to turn SQL, REST, scripts, and more into tasks. For this task, we'll chose SQL.
The next step is to define the task name, description, and parameters. The parameters represent the inputs that this task will take in.
We're going to make a task that searches for a user based on their email address or name. So let's call the name "Lookup User" and add a single parameter called "Search."

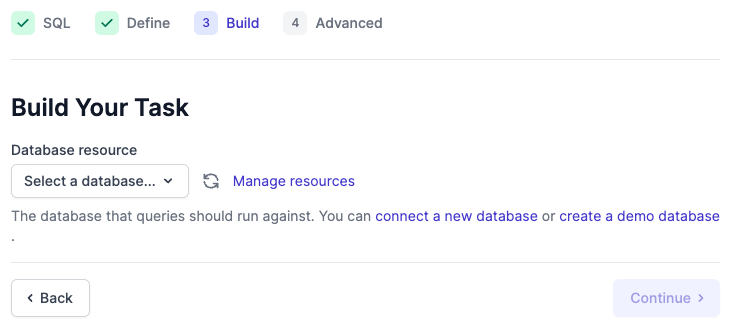
After we click "Continue," we can build our task. Since this is a SQL task, you'll be prompted to select a database resource. If you haven't already set up a resource, you can click "connect a new database" to select a database to connect to, or you can click "create a demo database" to spin up a sample dataset test things out. Everything we're building in this tutorial will work against our demo database.
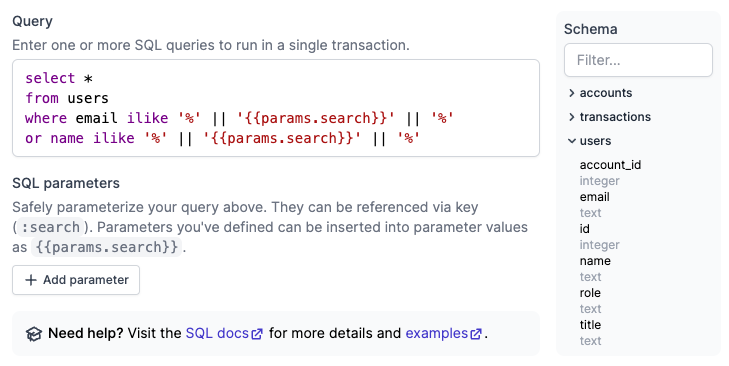
Once we connect and choose a database, we can enter a query. We can use the syntax {{params.search}} to refer to the "search" parameter we specified previously. Using the following query, we can search for case insensitive keyword matches of our search string against the email or name field in our users table:
select * from users where email ilike '%' || '{{params.search}}' || '%' or name ilike '%' || '{{params.search}}' || '%'
See below:
Click "continue" again to proceed. The final step is to specify permissions. By default, all tasks have "team access" which means that anyone in your Airplane team can run them. However, if you choose "explicit permissions," you can decide to give access only to certain people or groups. We won't cover permissions in this guide, but see the Permissions documentation to learn more.
Click "Create Task" at this point to finish creating your task. At this point, we'll see our task ready to be used:
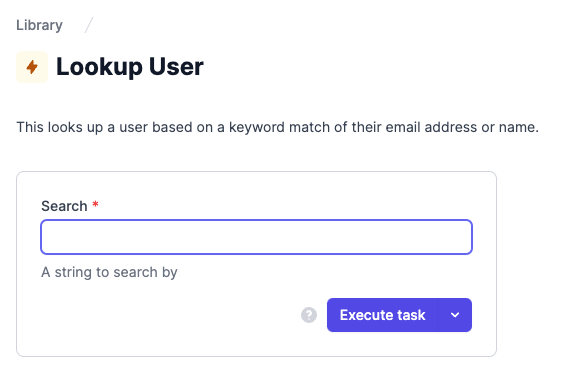
Let's try out a sample search to make sure our task is working. If you connected the demo database, the search string "sarah" should show a couple results. Type in "sarah" and hit "Execute task" to run this query. Here are the results you'll see:
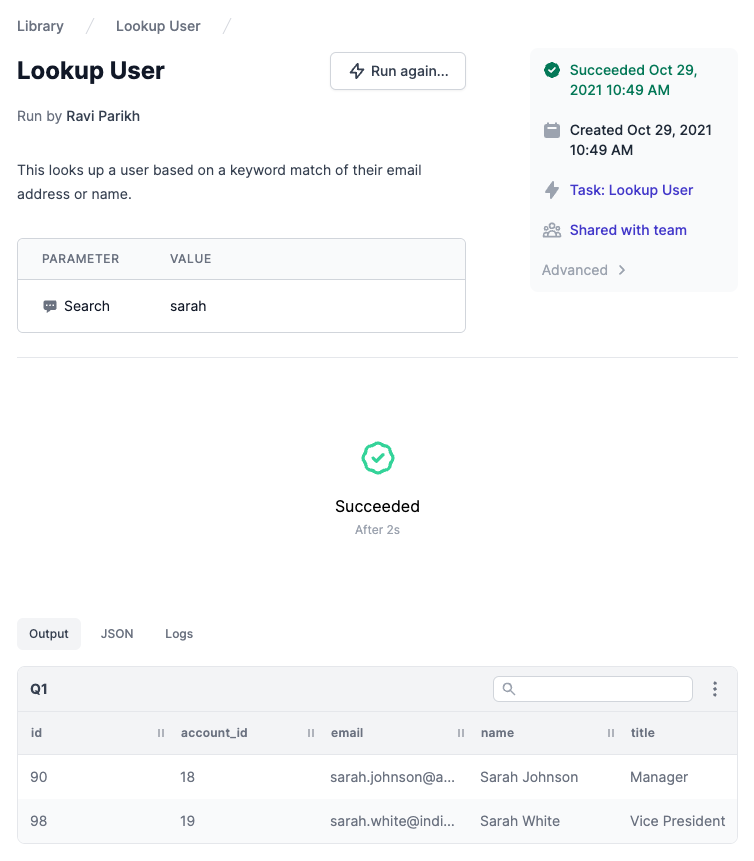
At the top, we see the task metadata and the parameters we used. At the bottom, we see the output structured as a table.
Write operations via SQL and REST
Now that we can lookup users, let's create a task to modify user data as well.
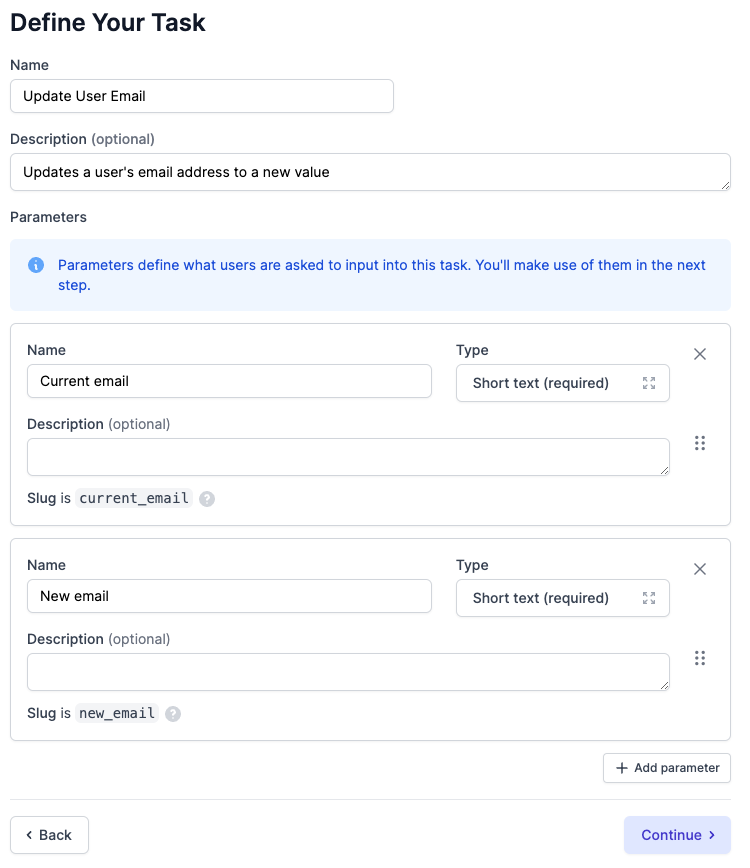
First, we'll create another SQL task. This task will allow us to update a user's email address to a new value. We'll create a task that takes in two parameters, their current email, and the desired new emails:
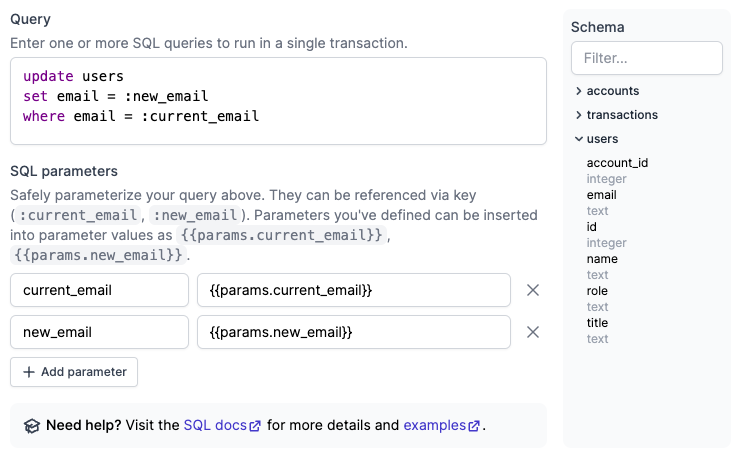
Then, we'll use an update query to lookup the user based on their current email and set the email to the new email. This time, instead of just interpolating the string values into the query directly, we'll use SQL parameters. This will prevent SQL injection in case one of our teammates running this Airplane task does something accidental or malicious. Click the "Add parameter" button as shown below, name the parameter, and use the {{params.current_email}} syntax to refer to the initial input parameters.
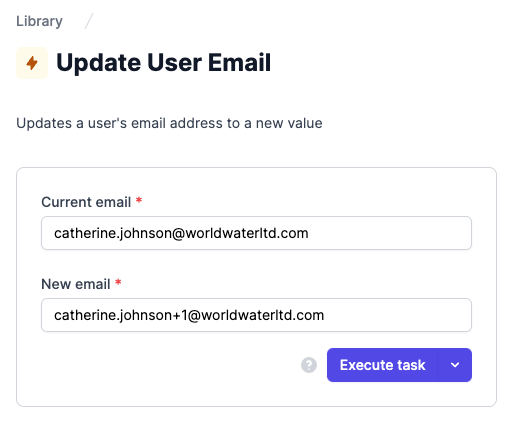
After going through the rest of the task creation process, we'll see a web form representing the task once again. If you used our demo DB, the email "[email protected]" will refer to one of the people in the database. Try changing their email as follows:
Our run results page shows that 1 row was affected, indicating that the query was successful. If we want to confirm, we can go back to our Lookup User task from before and search for "catherine."
As expected, their email has been updated:

REST tasks
For many situations, you may not want to run write operations as SQL update/insert/delete queries. If you instead want to hit an API endpoint in your application backend, use the REST task type instead. Check out our docs on how to create REST tasks for more detail on how this works.
Complex operations via custom code
Let's do something a bit more complicated. One of Airplane's most unique features is the ability to take Python, JS, or shell scripts from your codebase and turn them into tasks.
Once again, create a new task. This time, select "Node" instead–we're going to use a JS script to run this operation.
Let's call this task "GDPR User Deletion" and add a single parameter called "User Email." This task is going to permanently delete a user in a GDPR-compliant way and use their email to look them up. Because of how GDPR works, we can't just use a simple database query or REST endpoint–we have to delete the user from our production database, as well as from backups, and third-party systems. That's why we need a script to execute all of that logic.
Once we get to the build step, it looks a bit different than the SQL tasks we created previously:
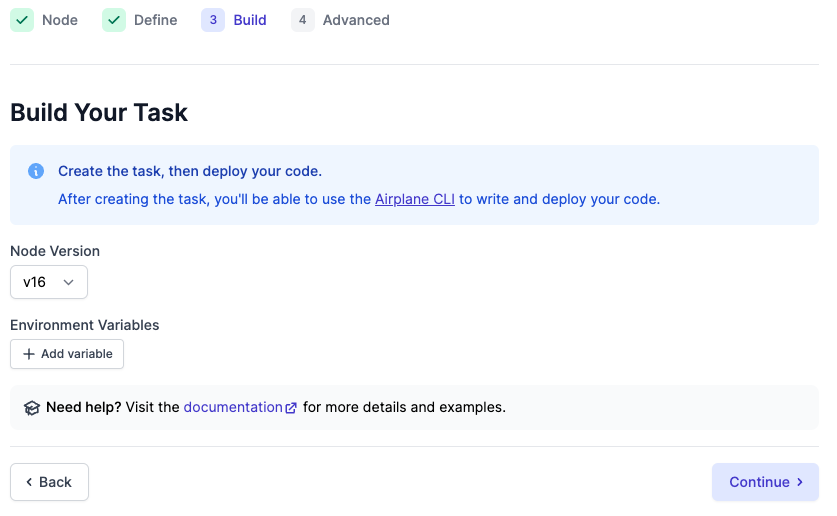
Since this is a Node task, we're asked what version of Node we should use to run the script. Also, we can add in environment variables if any are needed in the execution of this script. We'll skip this for now, but you can learn more here.
Hit continue, then hit create task. Now, we have one more remaining step–we need to write the script and deploy the task:
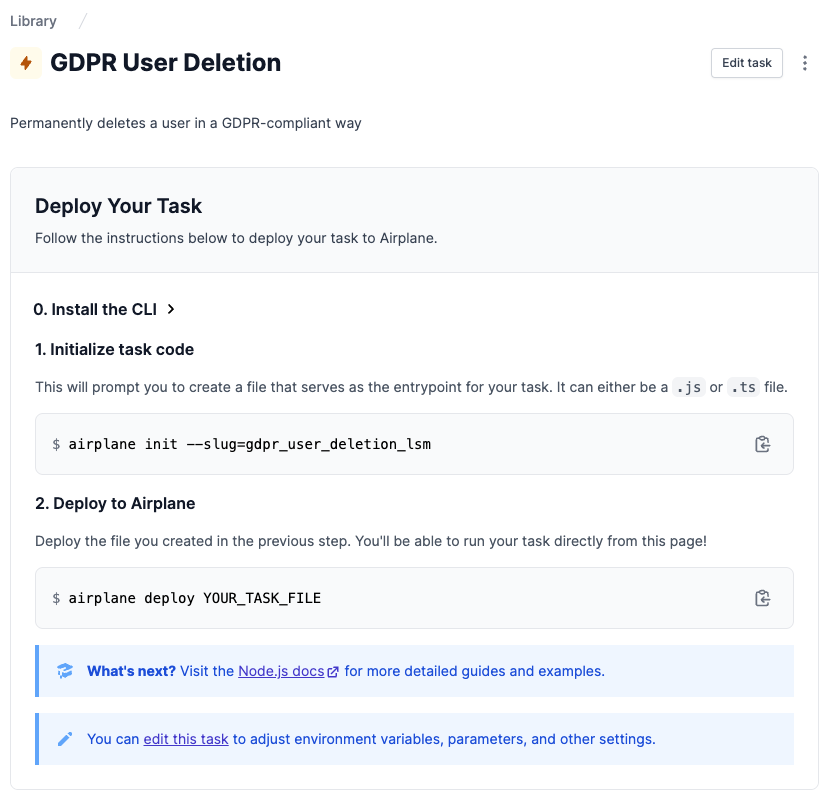
If you haven't already, install the Airplane CLI.
Once you've installed and logged in to the CLI, you can run the init command shown on the task page. Airplane expects you to run this command in a Node app directory folder or subfolder. If you don't have one, create an empty folder (don't just place the script in your home directory):
You can choose any path you want for where the script is stored. To use TypeScript, use a .ts extension instead of .js.
This will create a script that looks something like this:
Airplane looks for the default export function and calls it. The first argument will contain the parameters for the run.
By default, all this script does is print the parameters object (which contains the user email we specified earlier). At this point, you can update the script as needed as long as you leave the first line unchanged. The Airplane CLI uses that line to identify which task your code corresponds to.
If you need to import any Node modules or application context, feel free to do so–when you deploy your task, Airplane will take that into account.
Finally, deploy the task to Airplane as follows:
This will bundle up the source code, build it, and deploy it to Airplane.
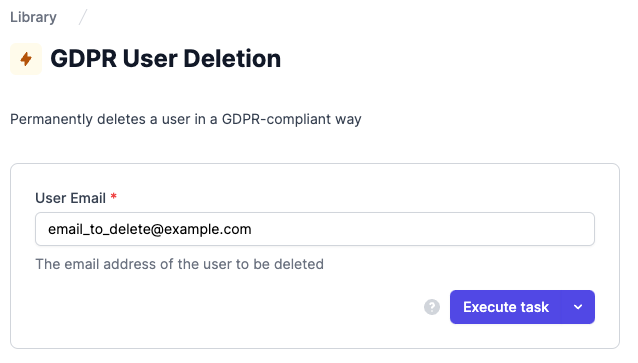
Reload the task page and you'll now see a form to run this task.
Runbooks for multi-step operations
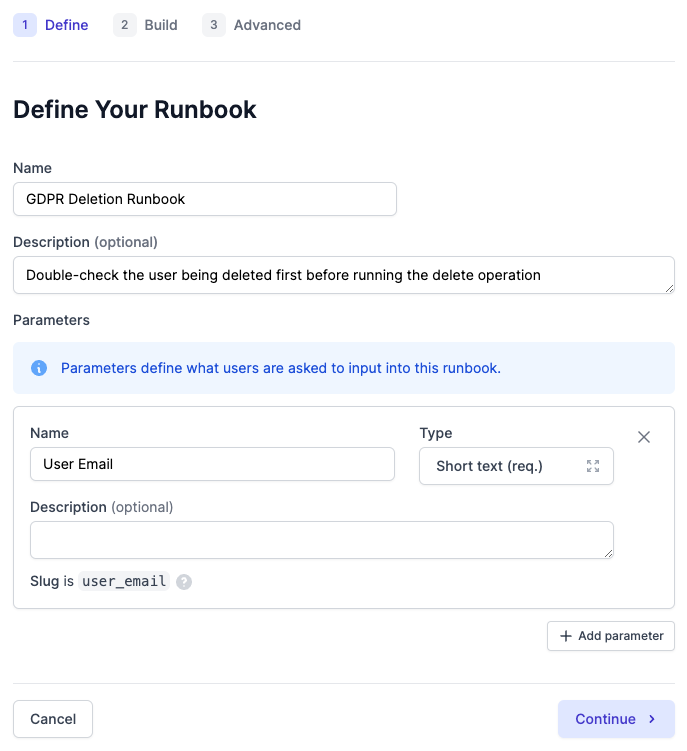
Finally, you can use Airplane to create runbooks, which are multi-step operations composed out of multiple tasks. We'll create a really simple runbook building on the previous GDPR deletion example. We'll first do a lookup to make sure that the user we're about to delete is the right one, confirm it looks good, and then run the deletion step.
Click "Library" in the left sidebar, but this time, click "New Runbook." Fill out the runbook definition the same way you would for a task:
The build step is a bit different. This time, we're presented with a menu of "blocks" which represent steps in our runbook. We can choose any task we've already created as a block, and we can also choose things like Slack message that represent off-the-shelf common functions so we don't have to create dedicated tasks for them ourselves.
Let's start with the Lookup User task we created before.
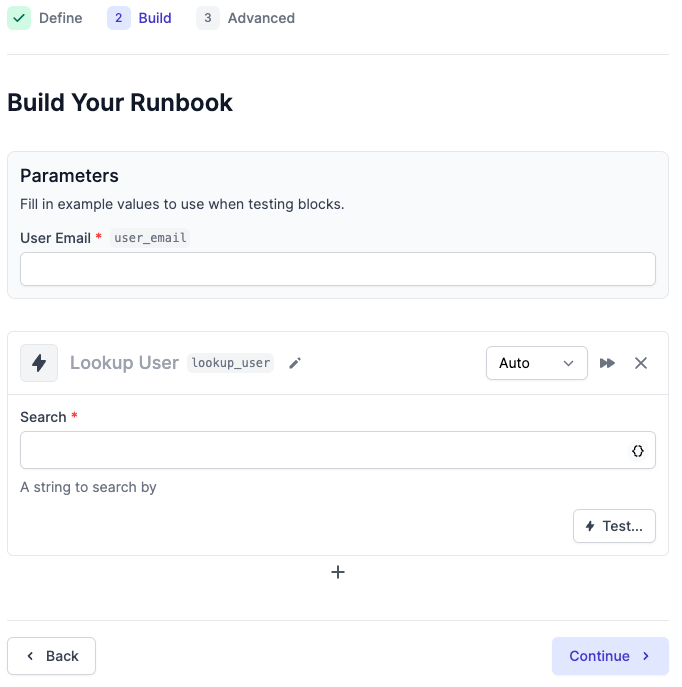
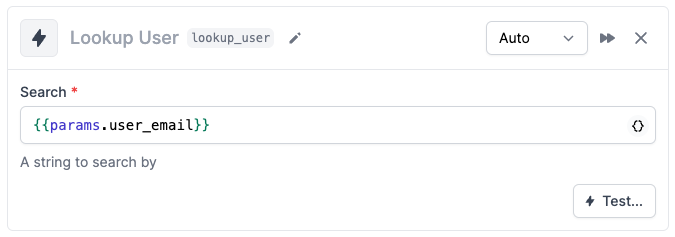
We see the Lookup User task block, and above that, we see the top-level runbook parameter of "user email" we specified before. We want to pass the email into the Lookup User task so we can check who this is. Let's use the same {{params.user_email}} syntax from before to pass it in:
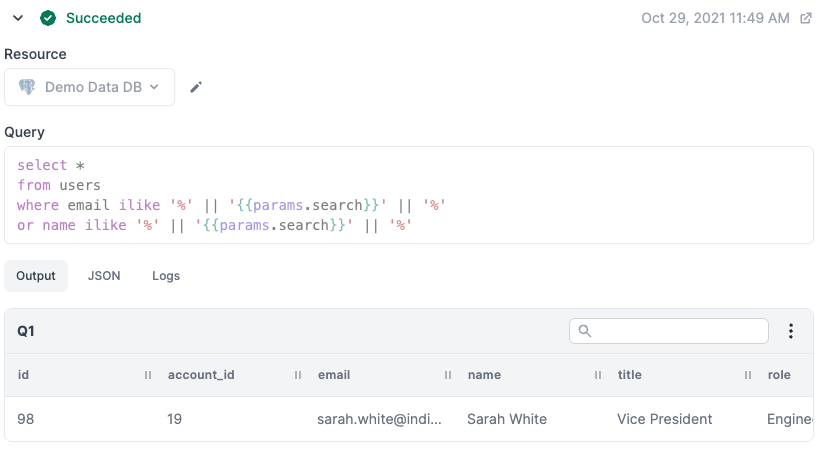
We can test this out if we'd like. To test it out, first, enter in a sample value in the Parameters section above. If you're using our Demo DB, use the value "[email protected]" to test out. Enter this into the "User Email" field, then hit the "Test" button in the lower-right corner of the Lookup User block. Click "Test" again on the modal that comes up, and then you'll see the query run:
Looks good! Now we can go on to the next step. Hit the "+" button at the bottom to create a new block, and this time, choose the GDPR User Deletion task we created earlier. We'll use {{params.user_email}} here as well as an input. However, we'll also change the dropdown that says "Auto" in the upper-right corner of this block and change it to Manual:
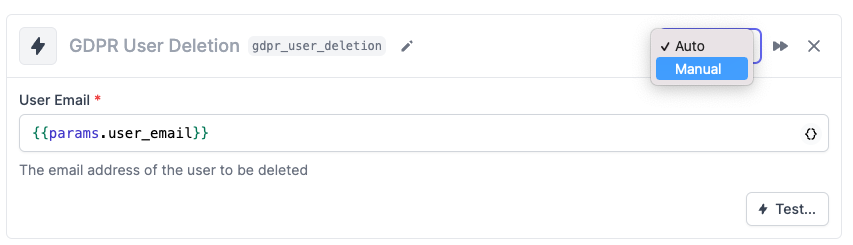
This means that this block won't run automatically when the previous block finishes–instead, it will pause and wait for us to confirm before proceeding. This will let us confirm that the looked up user is indeed the right person to be deleted before moving forward.
Click "Continue" at the bottom of the page, and then "Create Runbook" to finish creating your runbook. We'll see a form similar to a task form
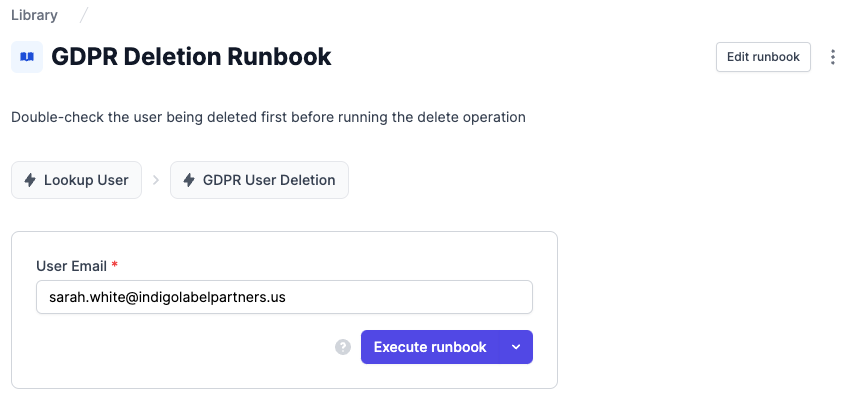
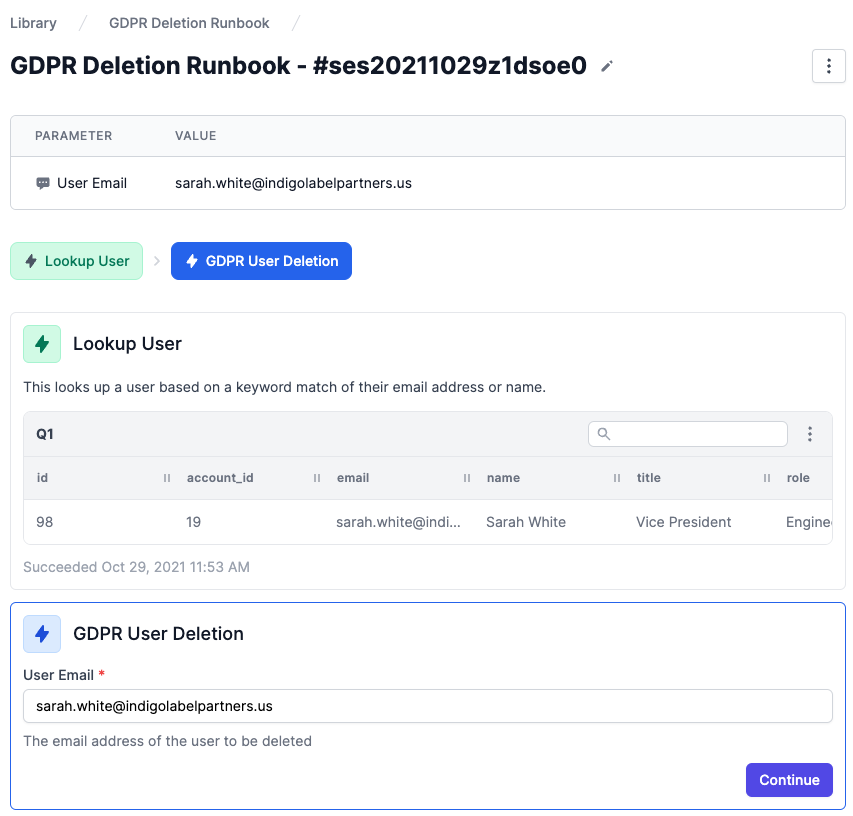
When we execute this runbook, we'll see that the first task runs right away, but the GDPR deletion step doesn't happen unless we hit "Continue" below:
That's it! This is just a brief glimpse of what runbooks are capable of. To learn more about different block types, start conditions, how to pass outputs, and more, check out our runbooks documentation here.
In this guide, we created a SQL read task, a SQL write task, a code-based task, and a runbook that all represent common admin operations that a support, ops, customer success, or other customer-facing teams might need to do. From here, it's easy to create dozens of other operations to build out a comprehensive admin panel in a short amount of time.