


Operations engineers are constantly on the lookout for new continuous integration and continuous deployment (CI/CD) tools to improve their workflow. Spinnaker, for example, is an open-source continuous delivery platform created by Netflix to enable engineers to release software changes seamlessly. It works natively with several different orchestration tools and cloud providers, like Kubernetes, and it provides the building blocks you can use to build the delivery pipeline the way you want.
In this article, you will set up a new Spinnaker cluster and build a delivery pipeline, deploying code changes automatically to your Kubernetes cluster.
Here is an overview of what you are going to build:
- A developer pushes changes to GitHub;
- which builds a new Docker image in Docker Hub;
- which triggers a pipeline in Spinnaker;
- which deploys changes in Kubernetes.
Prerequisites
To follow along with this tutorial, you will need:
- A Kubernetes 1.16+ cluster. I’m running a local Kubernetes cluster using Docker for Mac, but you are free to create a cluster using another method or use a managed cluster from a cloud provider.
- The
kubectlcommand-line tool installed and configured to connect to your cluster.
Running Spinnaker
Spinnaker is composed of several services that run independently, and running each of them manually would be a lot of work. Thankfully, the Spinnaker team also provides a CLI tool called Halyard, to help install, configure, and upgrade Spinnaker.
Using Halyard, you will run all these services that compose Spinnaker in your Kubernetes cluster. In this article, I will run Spinnaker in the same Kubernetes cluster as my applications, but you could also have a dedicated cluster just for Spinnaker.
Running halyard
The first thing you need to do is run halyard:
Here you are running a container named halyard, using the stable image provided by the Spinnaker team, and mounting two volumes:
- One for the directory where Halyard stores its configurations,
~/.hal - One for your
.kubedirectory, because Spinnaker will need to access yourkubeconfigfile
After the Halyard daemon is running and you start seeing its logs, run this command in another terminal window to get a bash session in this container:
Make sure Halyard is running fine by checking its version:
Configuring a Spinnaker provider
In Spinnaker, you need to enable the providers you want to use, ie, integrations to cloud platforms where you can deploy your applications. For example, you can register AWS and GCP as providers.
In this case, you will run both Spinnaker and your applications in Kubernetes. Spinnaker has a native Kubernetes provider, so that’s the only thing you will need to enable:
Then, you need to add an account to this provider, which is how Spinnaker will know how to access it. As you are using the Kubernetes provider, the only thing you need is to give this account a name and tell Spinnaker which context from your kubeconfig should be used.
Here, I’m defining a demo-account account, saying it should use my demo-cluster context:
If you were using multiple clusters, such as one for production and another for Spinnaker, you could add two accounts here, setting the right context from your kubeconfig for each one.
Now that you have your account defined and ready to be used, you can tell Halyard where your Spinnaker microservices should be deployed:
The --type distributed flag is what tells Spinnaker to run its services in Kubernetes, and it’s the recommended environment for production deployments. Alternatively, you can also use the type localdebian, which will install all the services on a single machine, where Halyard is running.
The --acount-name demo-account flag is saying Halyard should use the demo-account you just configured to deploy Spinnaker. It’s here that you could set a different account if you were using separate clusters for your apps and Spinnaker.
Configuring external storage
When you change your application’s settings and pipelines, Spinnaker persists in external storage. Several providers are supported out of the box, like Amazon S3, Google Cloud Storage, and Azure Storage.
In this example, I’ll use Amazon S3.
First, you need to set the storage type to s3:
Then configure this storage with your S3 credentials:
Above, you’re providing your AWS access key ID, and Halyard will prompt you for your secret access key.
Deploying Spinnaker
With all the configuration in place, you can now finally deploy Spinnaker! Still using the Halyard container, you’ll set the Spinnaker version you want to use and then apply these configs:
When you run hal deploy apply, Halyard will check that everything is fine and start running the Spinnaker services in the account you configured.
Assuming you have kubectl running and using the same context you used for Spinnaker (demo-cluster), you can see the pods being created in the spinnaker namespace:
$ kubectl get pods --namespace spinnaker
| # spin-clouddriver-648796f8d8-d8rfs | 0/1 | ContainerCreating | 0 | 12s |
| # spin-deck-77444987dd-r4fkl | 0/1 | ContainerCreating | 0 | 12s |
| # spin-echo-f6d78ddd5-f5m6p | 0/1 | ContainerCreating | 0 | 12s |
| # spin-front50-5d9c9fbd65-gpqt8 | 0/1 | ContainerCreating | 0 | 12s |
| # spin-gate-76db474459-f6wf5 | 0/1 | ContainerCreating | 0 | 12s |
| # spin-igor-555cd9745b-xzrwr | 0/1 | ContainerCreating | 0 | 12s |
| # spin-orca-6648cb9875-nvzs9 | 0/1 | ContainerCreating | 0 | 12s |
| # spin-redis-6f84989bfd-rdpmn | 0/1 | ContainerCreating | 0 | 12s |
| # spin-rosco-7c468bc6dc-nnpwh | 0/1 | ContainerCreating | 0 | 12s |
Accessing Spinnaker locally
After all this work, now it’s time for a reward: seeing Spinnaker running.
In your host machine (not in the halyard container), you’ll use kubectl again to expose two Spinnaker services:
deck: the actual UI you will access in your browsergate: the API gateway the UI uses to communicate with all the other services
Now go ahead and use kubectl port-forward to expose these services (you will need to run each command in a separate window):
And that’s it. You’ll be able to access Spinnaker locally on http://localhost:9000.
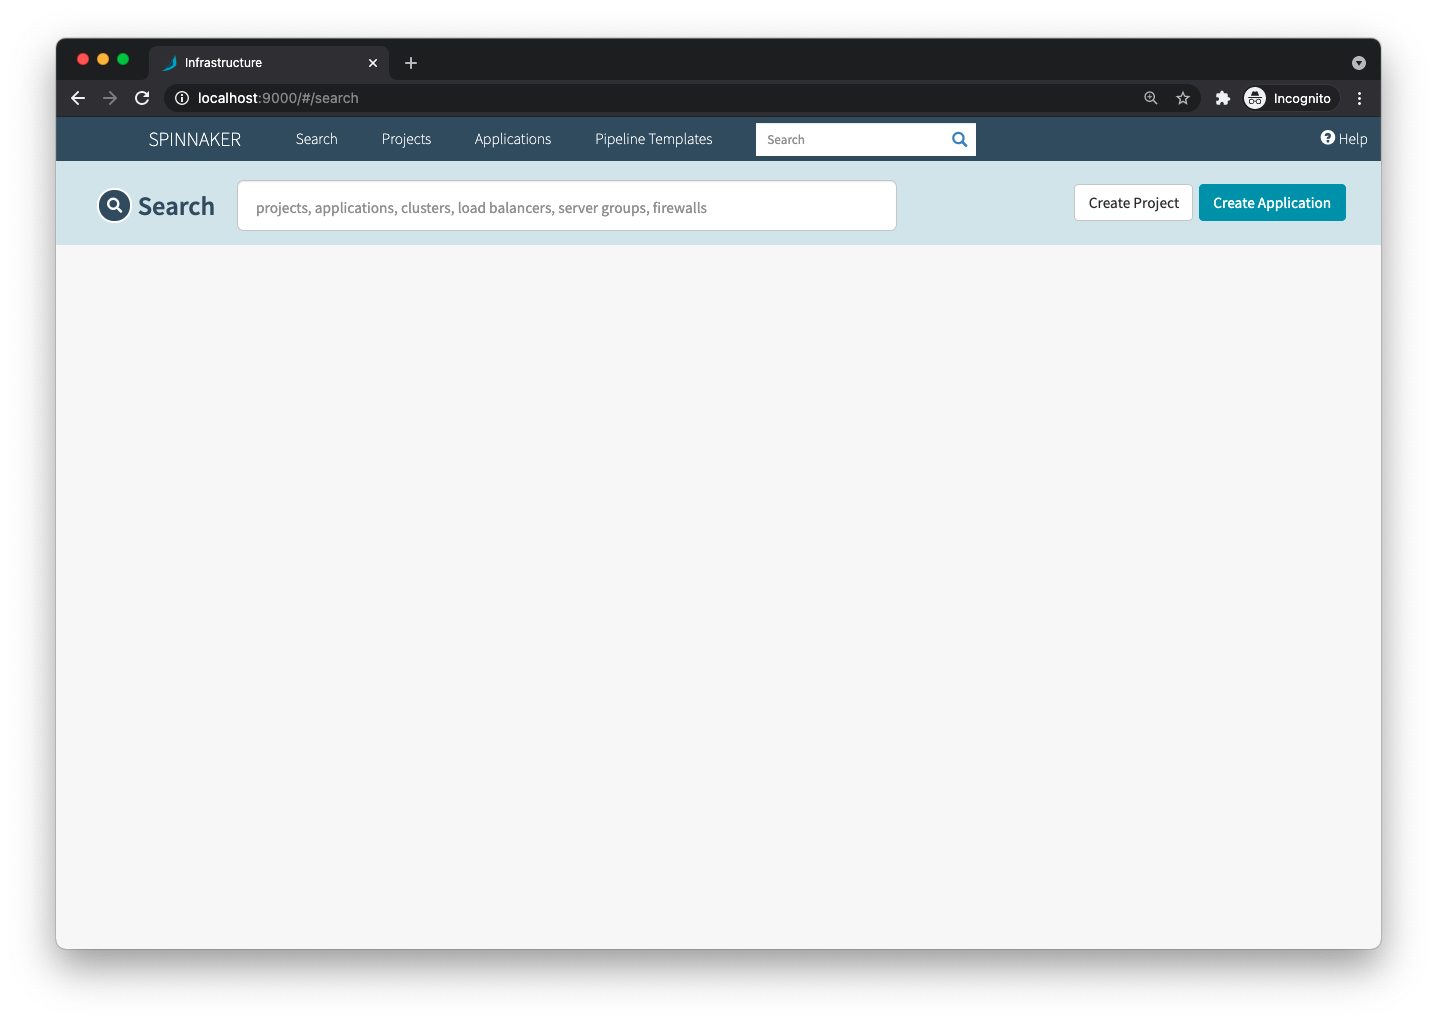
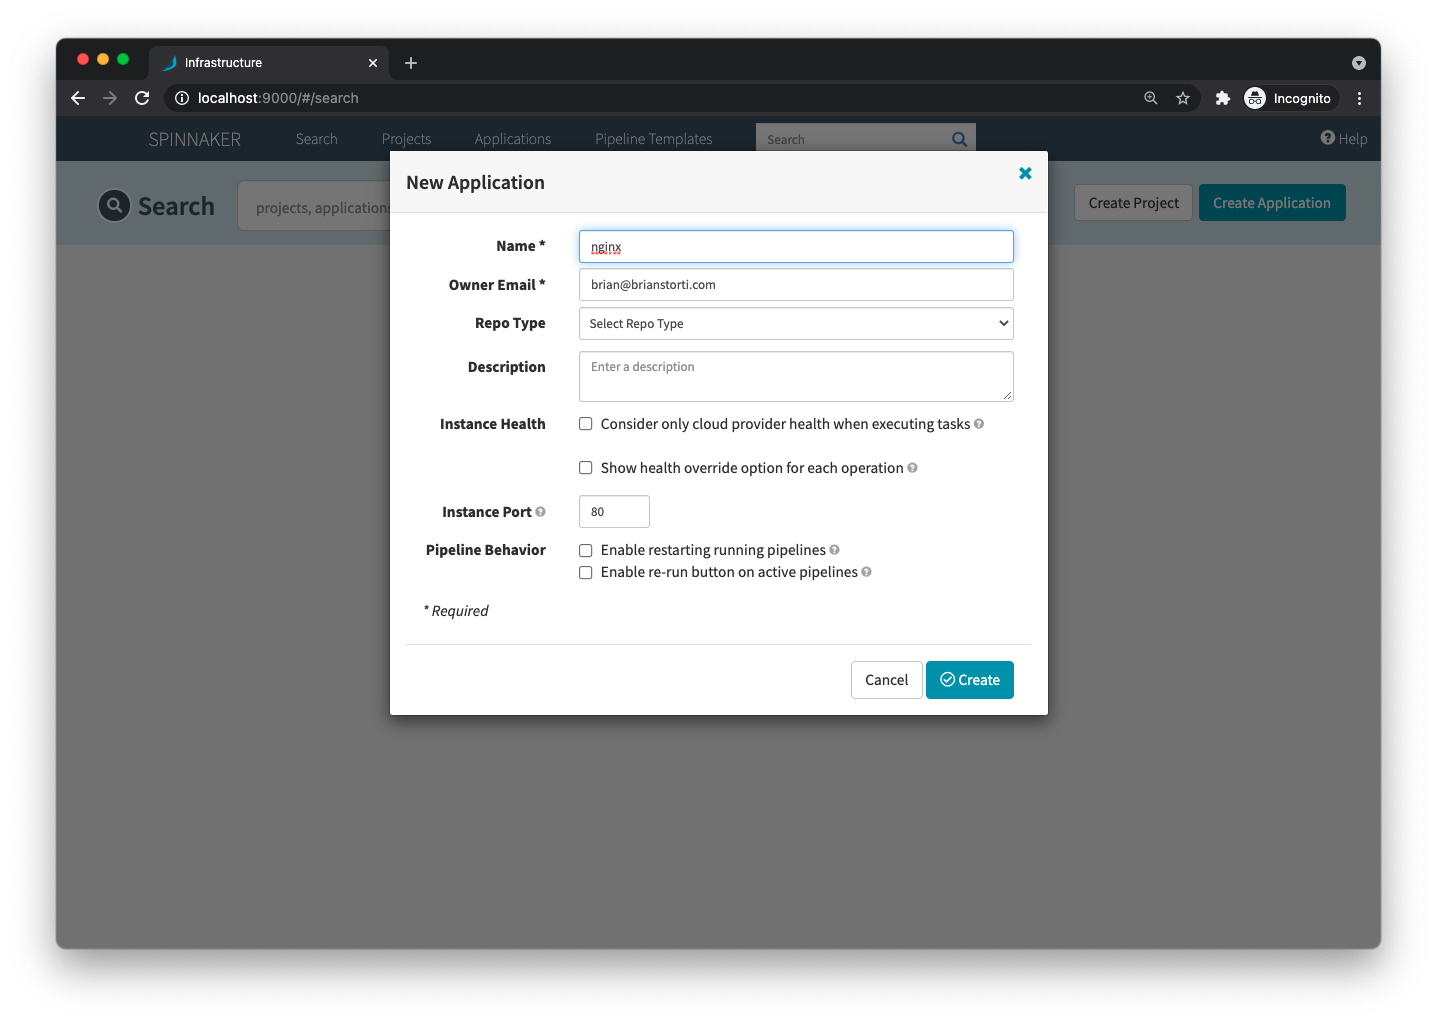
Deploying your first service with Spinnaker
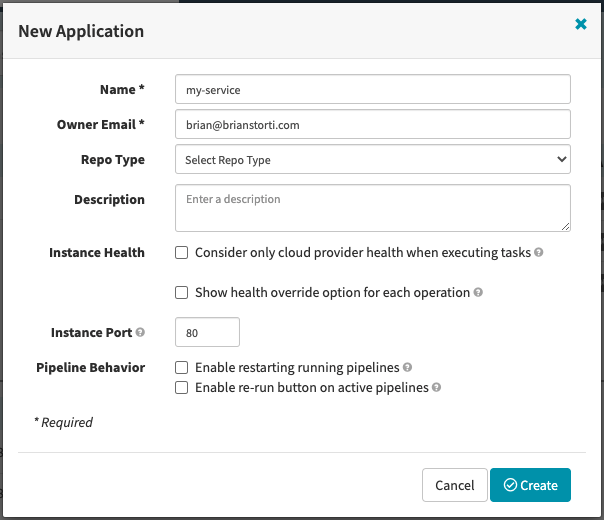
To get a taste of Spinnaker, you will create your first pipeline, deploying a simple NGINX container. On the Spinnaker home page, click Create Application and set a name and the owner’s email.
On the left side, click the Pipelines menu, and then Configure a new pipeline.

Give this pipeline a name, like Deploy Nginx and click Create.
You will be taken to the pipeline configuration page. Every pipeline is composed of a configuration and one or more stages, and each stage can have a different type.
For this example, you don’t need to change any configurations, so just create a new stage by clicking Add stage.
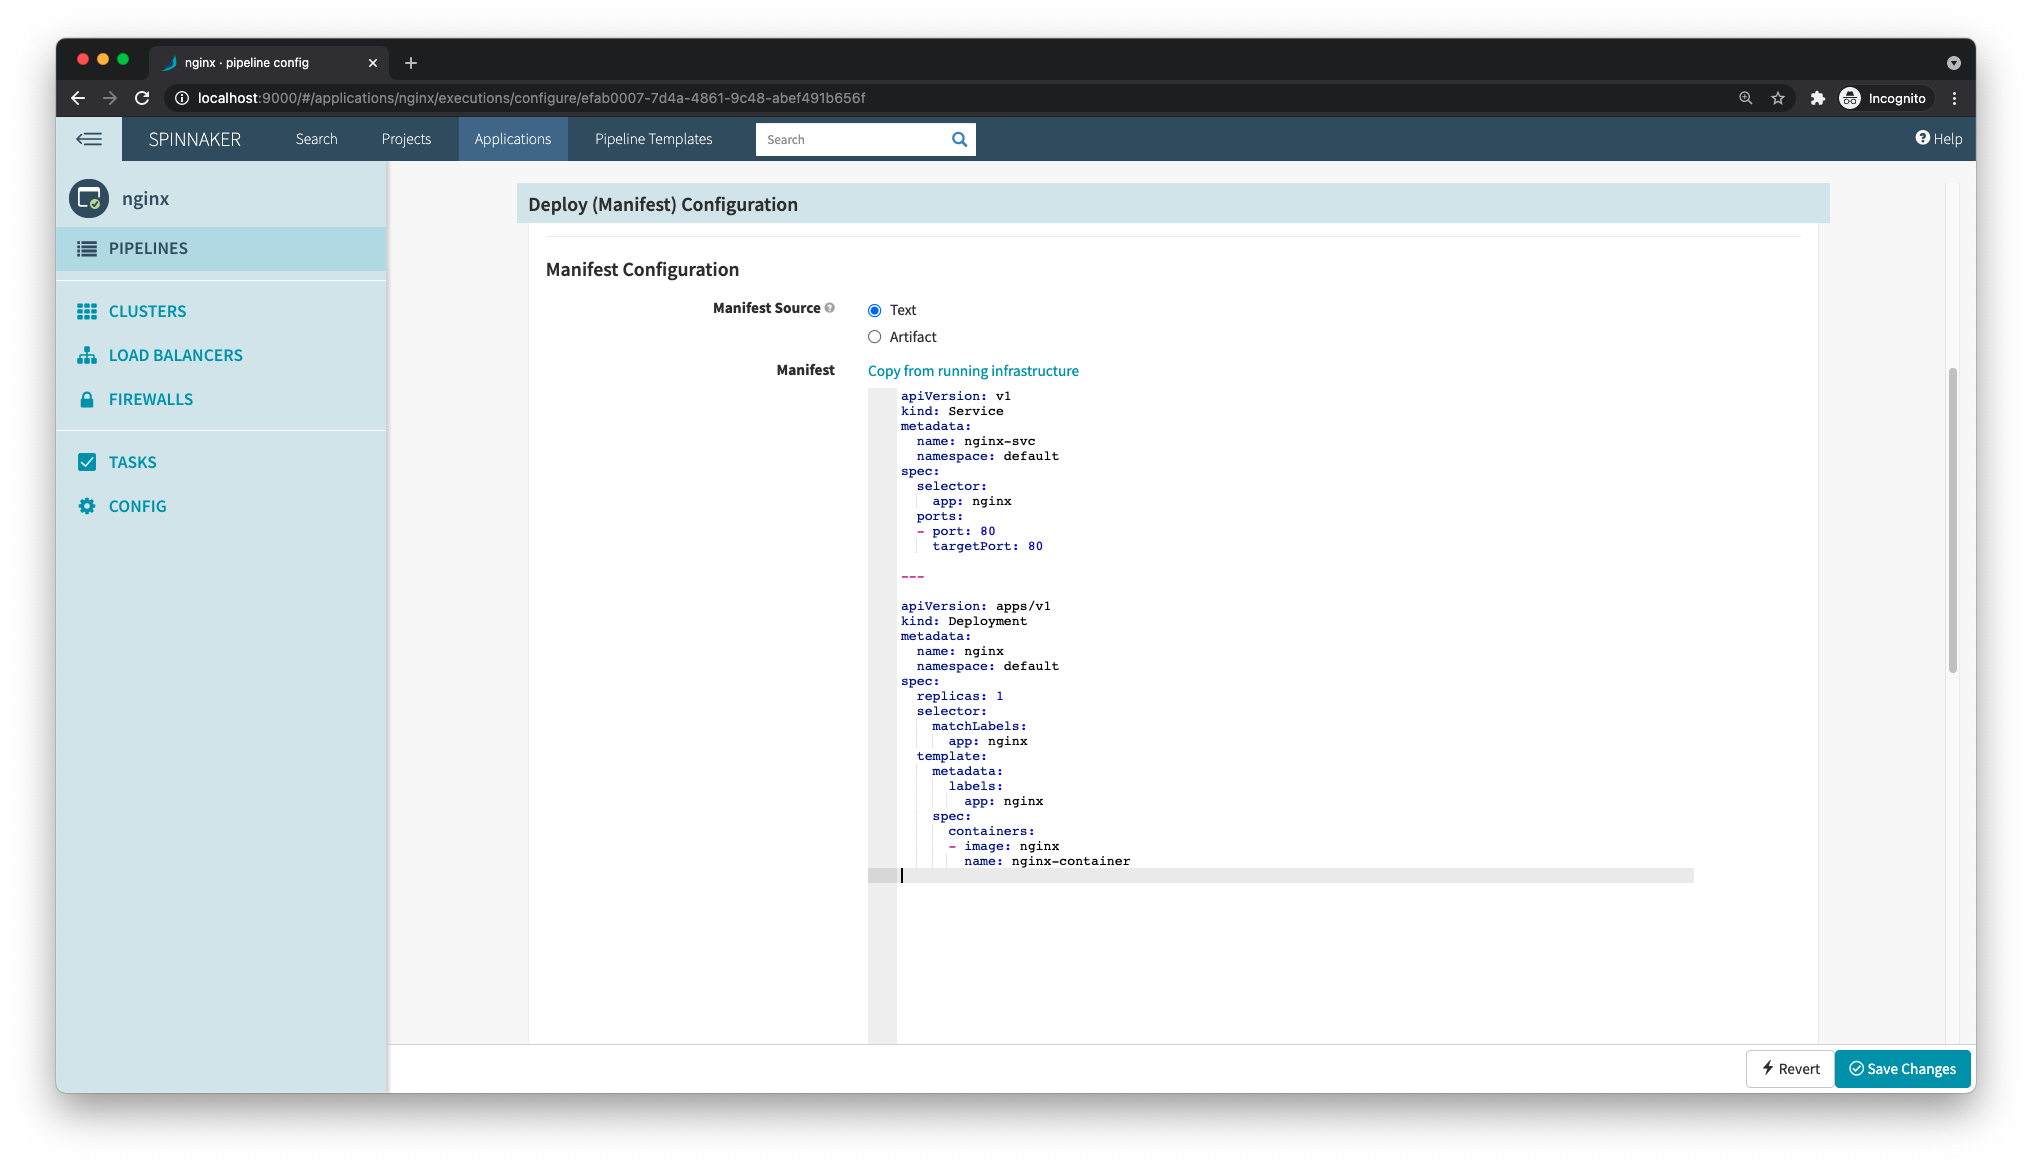
In the new stage page, select the type Deploy (Manifest), which is used to deploy Kubernetes manifests, and the account demo-account, which is where this manifest will be applied. If you had multiple clusters, like one for staging and another for production, each one would be a different account—this setting is what would tell Spinnaker in which cluster that stage should run.

In the Manifest Configuration section, you can either have the manifest text hard-coded in the page, or choose an artifact, which means an object that references an external source, like, for instance, a GitHub file.
To keep things simple for now, you can select Text and paste a manifest directly in the Spinnaker UI. Here’s a simple manifest defining a Kubernetes service and a deployment for NGINX:
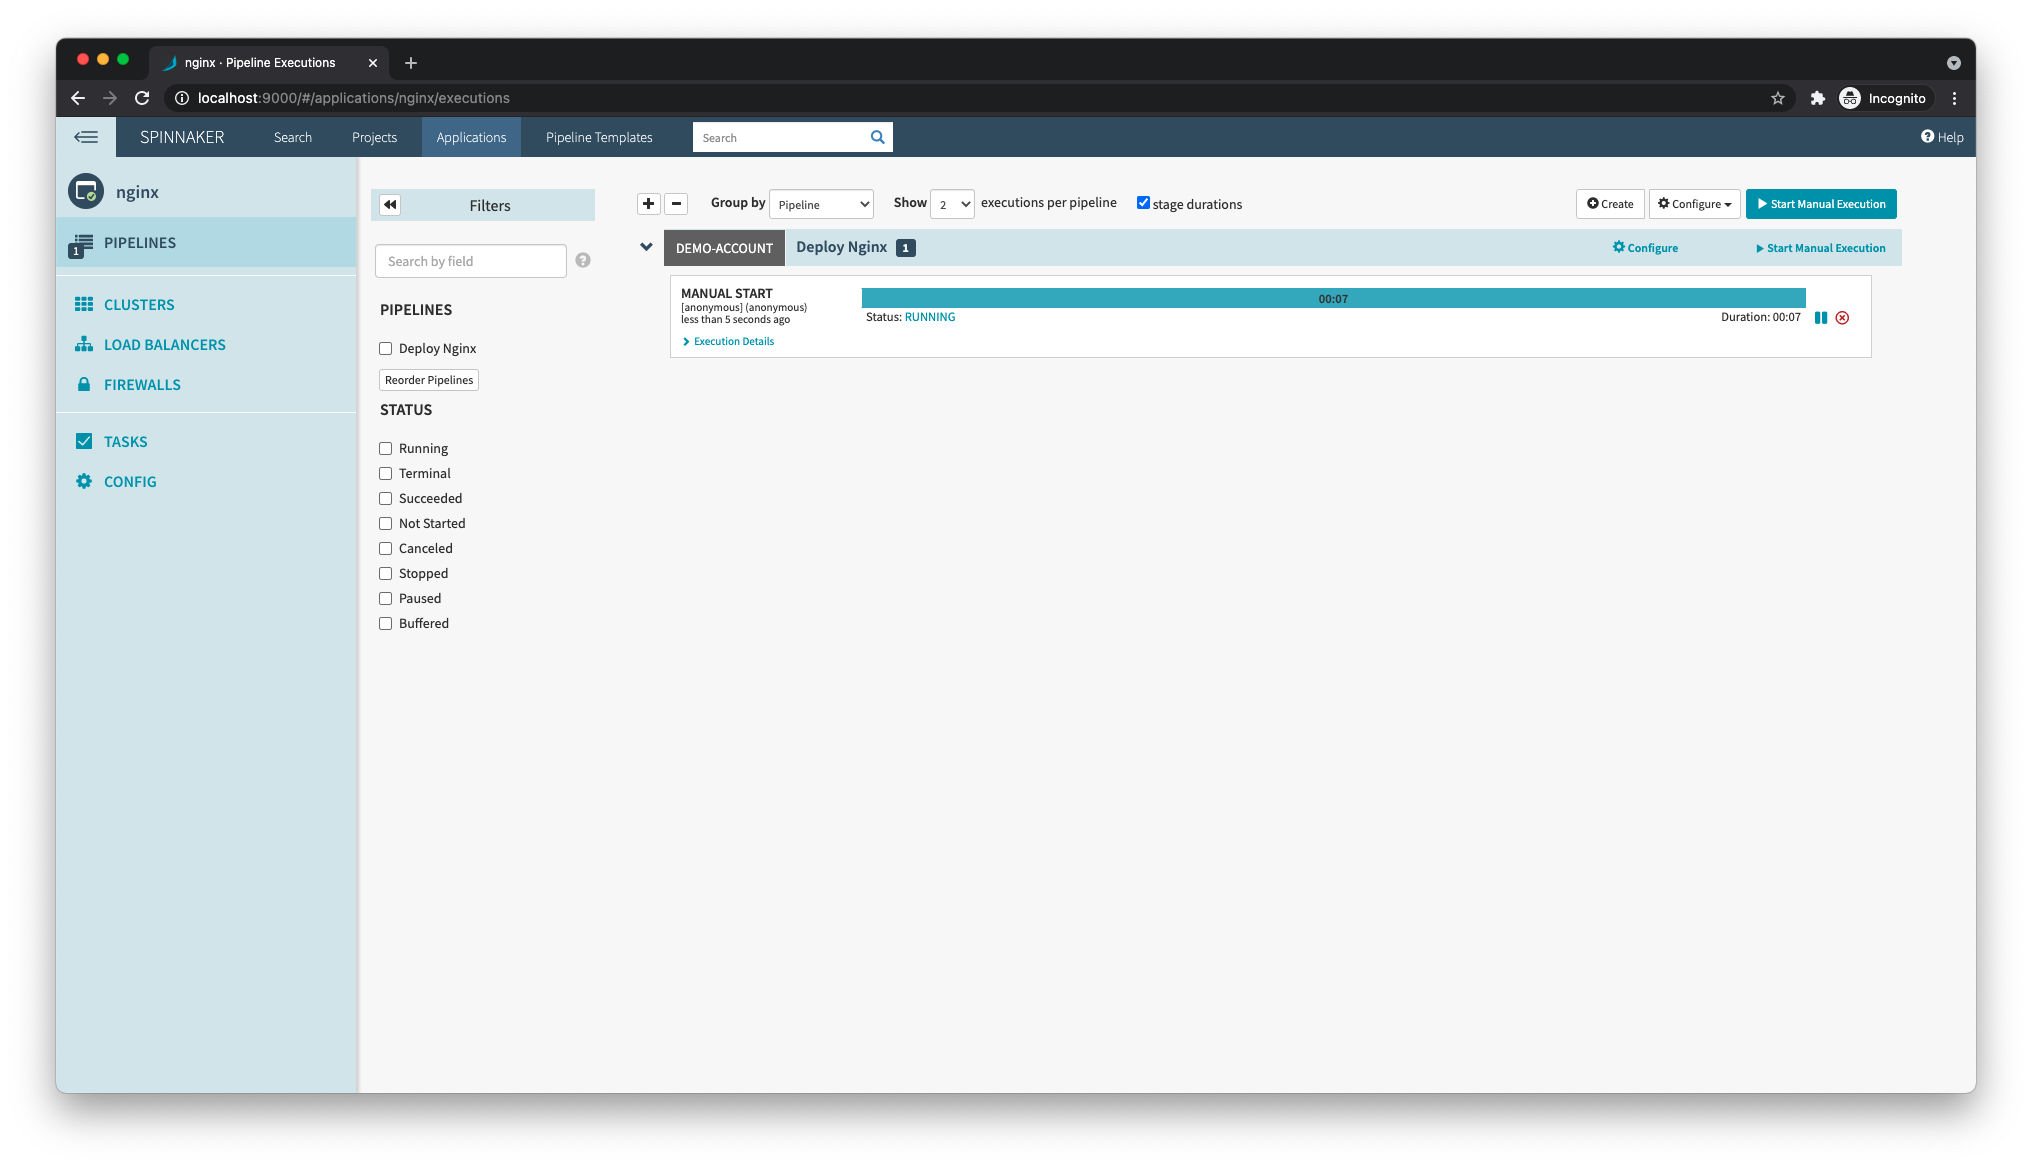
You can now save these changes and go back to the Pipelines page, where you will see the pipeline you just created. On the right side of this pipeline, click Start Manual Execution to manually trigger the pipeline.
After it finishes running, you can confirm with kubectl that a new service and pod were created:
$ kubectl get pod,svc
| NAME | READY | STATUS | RESTARTS | AGE |
|---|---|---|---|---|
| pod/nginx-7bc7d78944-cm7qs | 1/1 | Running | 0 | 90s |
| NAME | TYPE | CLUSTER-IP | EXTERNAL-IP | PORT(S) | AGE |
|---|---|---|---|---|---|
| service/nginx-svc | ClusterIP | 10.104.56.154 | <none> | 80/TCP | 91s |
You can also use kubectl port-forward to access nginx from your browser on port 8080:
And that’s it, your first service deployed to Kubernetes through Spinnaker!
Understanding Spinnaker
Before you move ahead, it’s important to understand a few terms used by Spinnaker, as it doesn’t always map one-to-one with the terminology used in Kubernetes.
There are four main pages that you’ll see for your applications:
- Pipelines: It’s the page you just used to deploy an application. Here, you can create as many pipelines as you want, each one composed of one or more stages. In each of these pipelines, you could have a stage to apply a
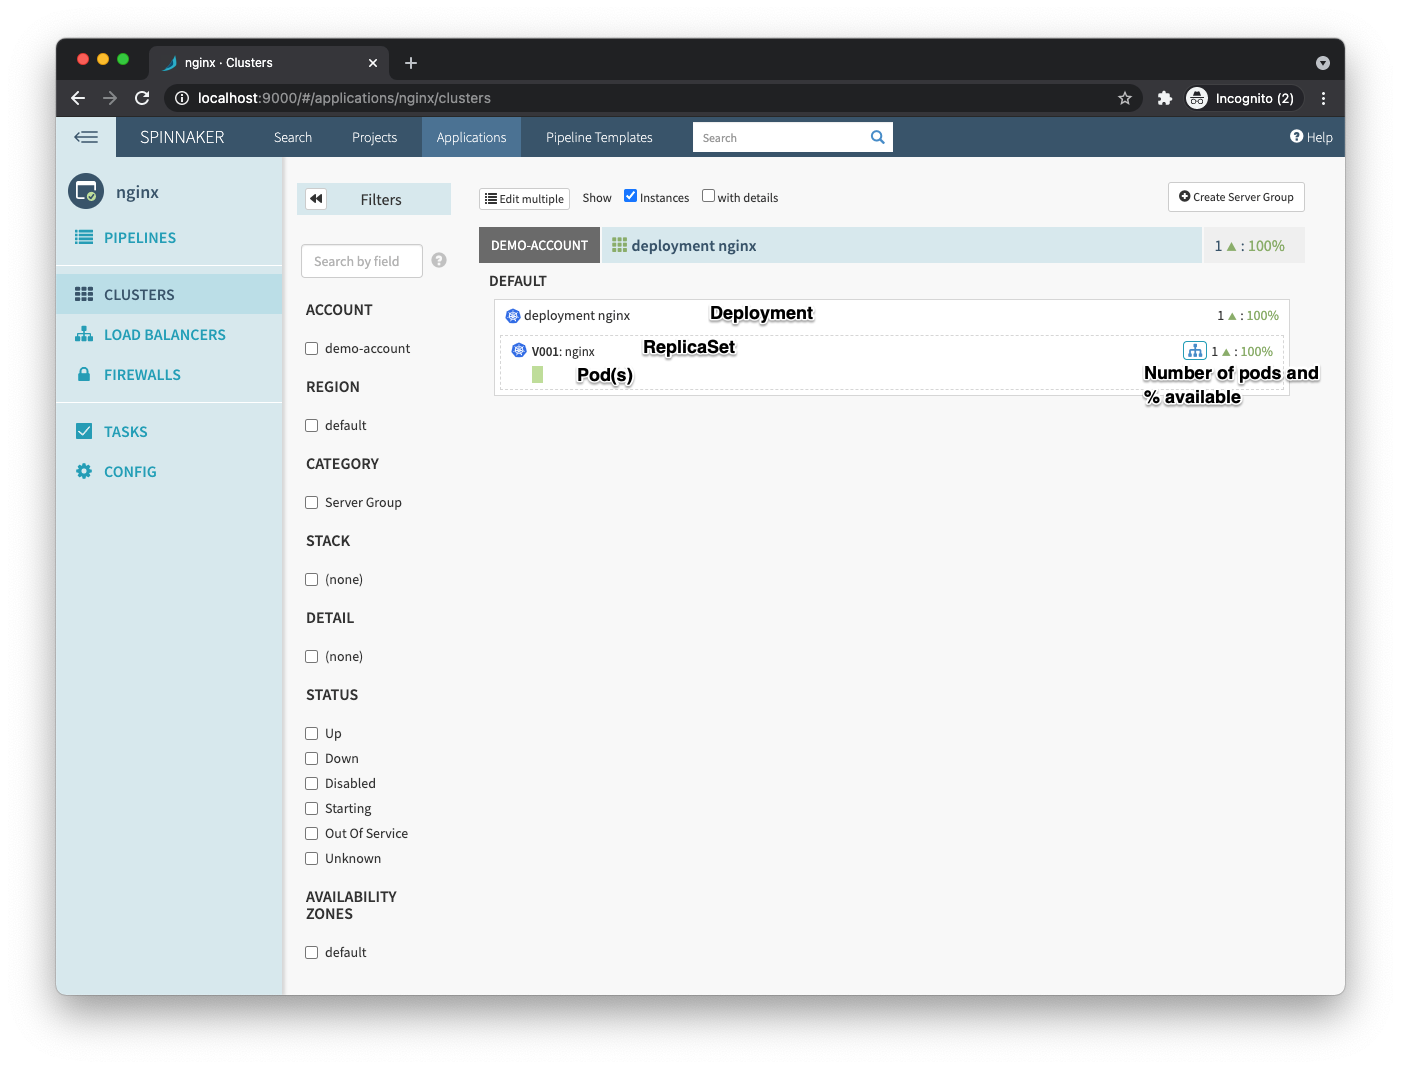
ConfigMapwith your application’s configuration, another stage to run aJobthat executes your database migrations, and a final stage to apply yourDeployment. - Clusters: This is where you will see your workloads. In this example, you will see the
nginx DeploymentwithReplicaSetv001and all thePodsthat are being managed by thisReplicaSet.
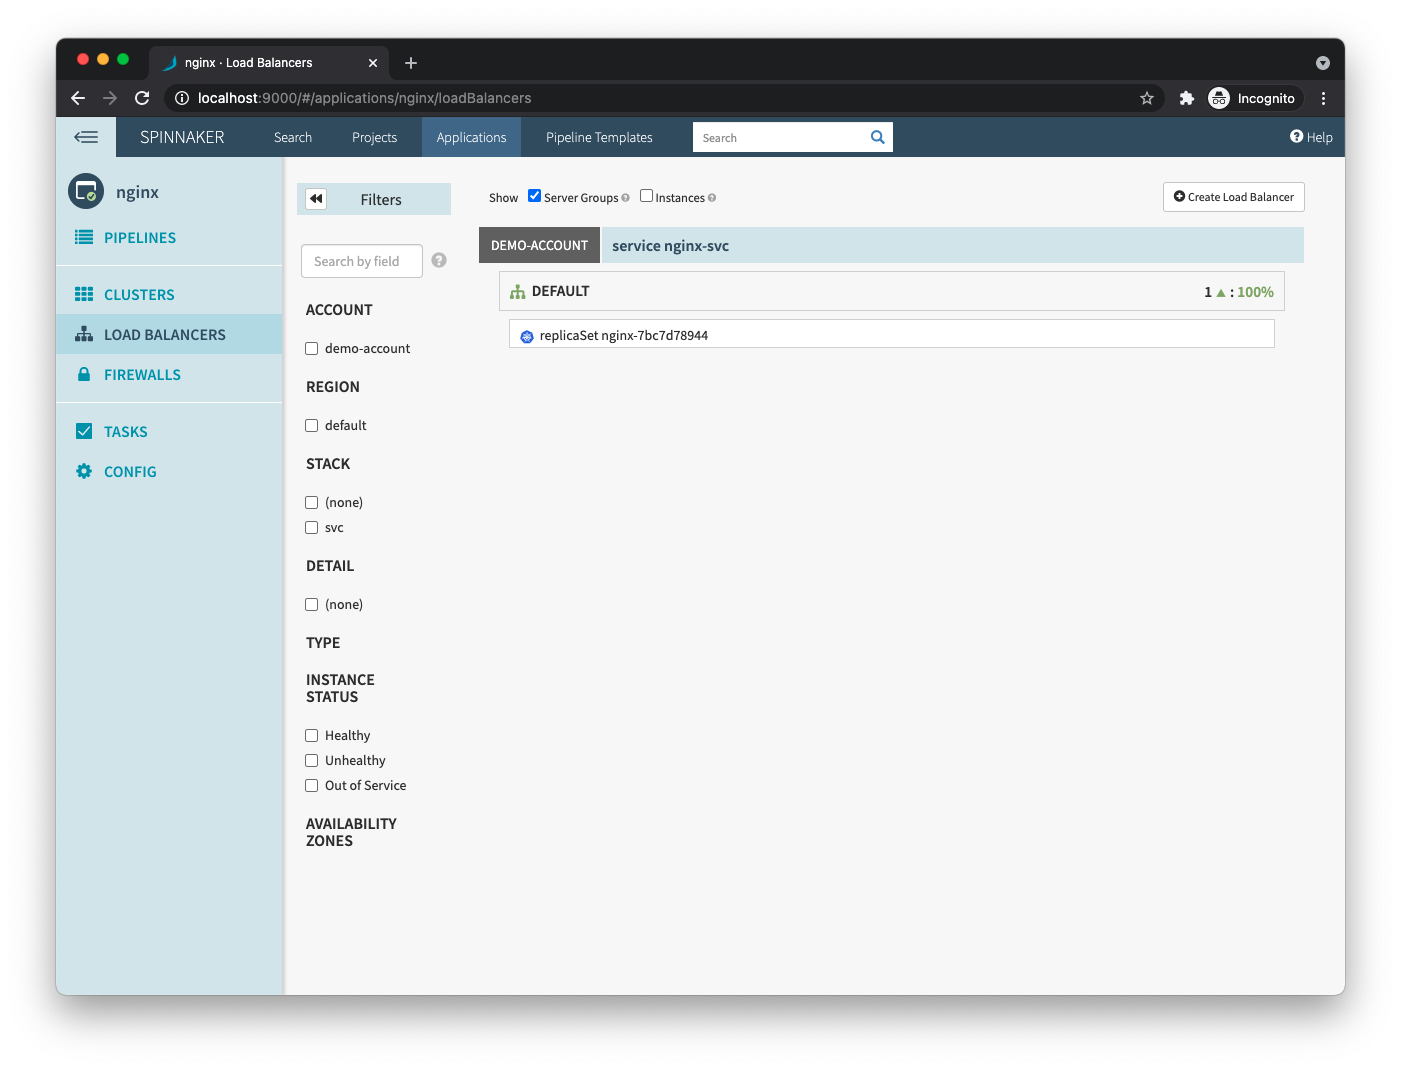
- Load balancers: This is where Spinnaker shows your Kubernetes services and ingresses. You can see you have a single service,
nginx-svc, and all the pods behind it.
- Firewalls: This is where Spinnaker shows your
NetworkPolicies. You haven’t created any policies, so this page should be empty.
It’s important to note these terms could mean very different things for different providers. For example, if you were using AWS, you could use Spinnaker to spin up a new Application Load Balancer (ALB).
Building your own service
Now that you have a better understanding of Spinnaker and how it interacts with Kubernetes, you can create your own service and an entire delivery pipeline end-to-end. The goal is to push a code change to GitHub and see that change deployed to your Kubernetes cluster, following the steps you define.
Creating a simple example service
For this example, I will use a very simple Ruby service that just returns the message Hello, Spinnaker!. Here’s the entire code for it:
And its Dockerfile:
To test that the service is working as expected locally:
There you go, a simple Dockerized service that’s ready to be used for your delivery pipeline!
Now you can push this code to a GitHub repository, like I did here.
Creating a Docker Hub project
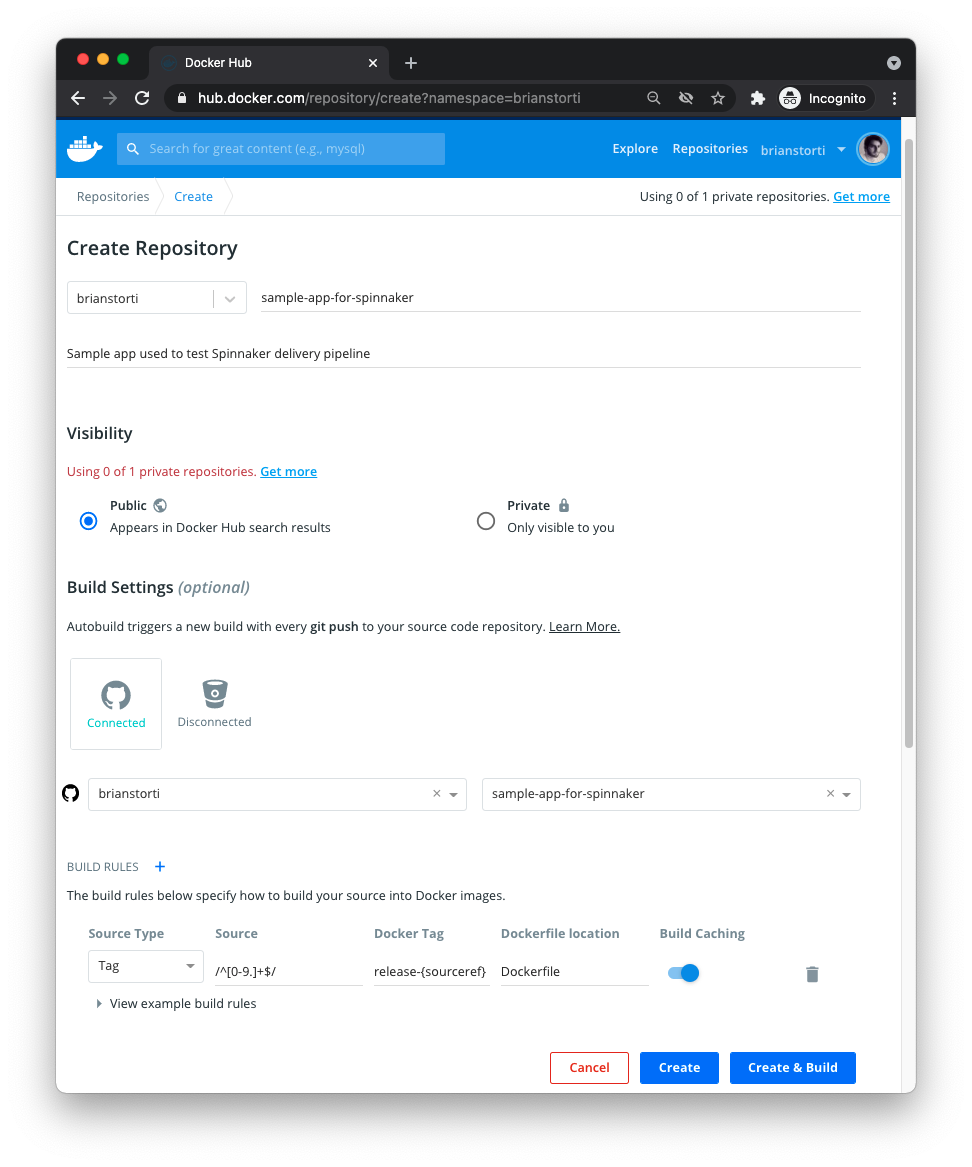
The next step is to create a repository on Docker Hub, which is where your Docker images will live. You will use Docker Hub to build new images when you push a tag to GitHub, and that will later trigger a Spinnaker pipeline to deploy this new image.
In your Docker Hub account, create a new repository linked to the GitHub project that has the code for your sample service. Create a build rule to build a new Docker image every time a tag is pushed:
We are using Docker Hub in this example, but there are various other tools you can use to build and store your Docker images. You could, for example, use Jenkins to build an image after your automated tests pass, and push that image to a private repository on Amazon ECR.
To make sure everything is working as expected, you can push a new Git tag to GitHub and watch Docker Hub building a Docker image:

Creating Kubernetes manifests for your service
Lastly, you will create a Kubernetes service and deployment for this service and push to the same GitHub repository:
Make sure you change the image in the deployment so it uses your account and repository names. Also, note that this deployment is not specifying any specific image tag. That’s because you want to let Spinnaker bind the image tag that’s received when a pipeline is triggered by Docker Hub.
Building a continuous delivery pipeline for your service
Now that you have Spinnaker up and running and a service on GitHub that you can push changes to and have new Docker images created by Docker Hub, you are ready to put all the pieces together. It’s time to create a CD pipeline.
Configuring halyard for GitHub and Docker Hub
The first step is to enable GitHub as an artifact provider, so Spinnaker can fetch the manifest files, and the Docker Hub provider, so it can trigger a pipeline when new images are built.
For GitHub, you’ll need to have a token (with the repo scope if you want to use a private repository).
In your halyard container, enable the Git Hub artifact source:
And then enable the Docker Hub provider, changing the --repositories value to use your own account name and repository name:
Lastly, apply these changes with:
And that’s it. Halyard will restart the Spinnaker services, and then it will be able to interact with GitHub and Docker Hub.
Creating a new Spinnaker pipeline for your service
Now that you have all your necessary integrations configured, you are ready to put in place a fully automated delivery pipeline for this simple service. You’ll start by creating a new application in Spinnaker, as you did for the NGINX example. I’ll call it my-service.
In the application’s Pipeline page, create a new pipeline that will be responsible for deploying this service. You can call it Deploy service.
In this pipeline configuration, you can set up a new automated trigger. These are things that can trigger the pipeline automatically, like a webhook call, a cron schedule or, in this case, a new image being pushed to Docker Hub.
Go ahead and select Docker Registry as the automated trigger type. For the Registry Name, you’ll see the provider you set up previously, my-docker-registry. In the Organization field, you will see your username (or organization), and for the Image, you see the repository you configured:
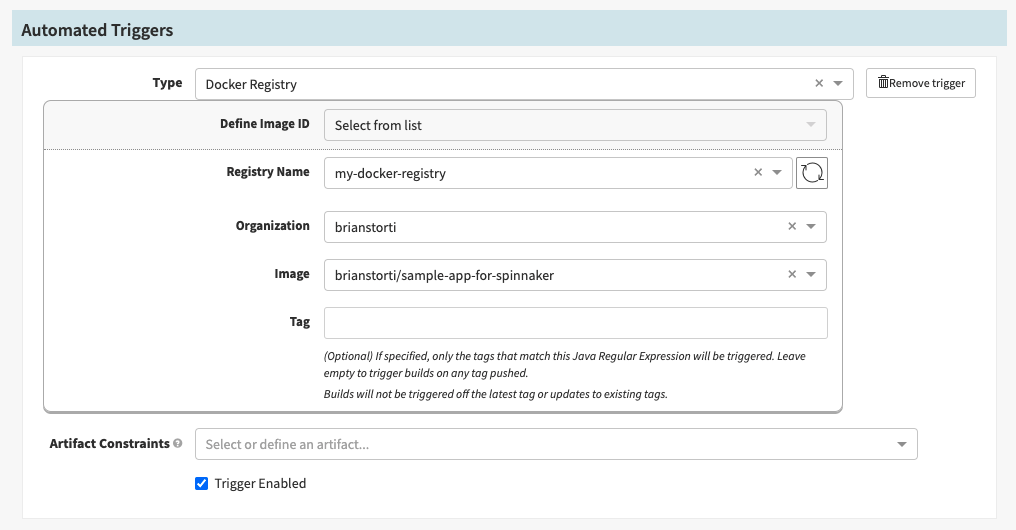
Notice the Tag field was left empty, which means any image tag will trigger this pipeline. You could also define a specific pattern for image tags to be deployed. For example, you could have production-* and staging-* tags triggering different pipelines.
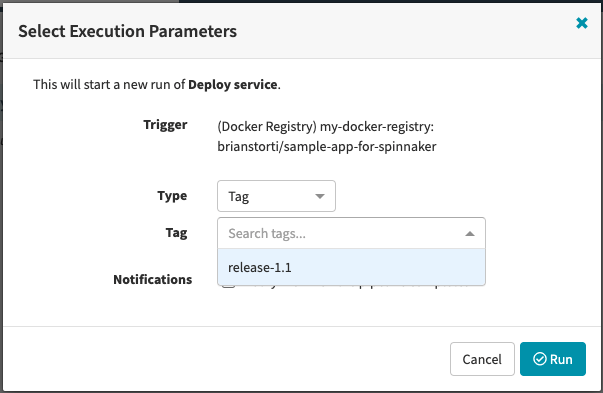
If you save and try to manually run this pipeline, you will be prompted for the image tag you want to trigger the pipeline with.
Fetching manifests from GitHub
You could define your Kubernetes YAML manifests directly in Spinnaker, as you did previously for NGINX. That works fine, but you lose the benefits of having these manifests versioned with your code, and potentially even making changes to these files in GitHub trigger a pipeline execution.
For this sample service, you will make Spinnaker fetch the files directly from the GitHub repository you created previously. This repository has two manifest files: service.yaml and deployment.yaml. You’ll create two stages in this pipeline you just configured, one to apply the `service` and another for the `deployment`.
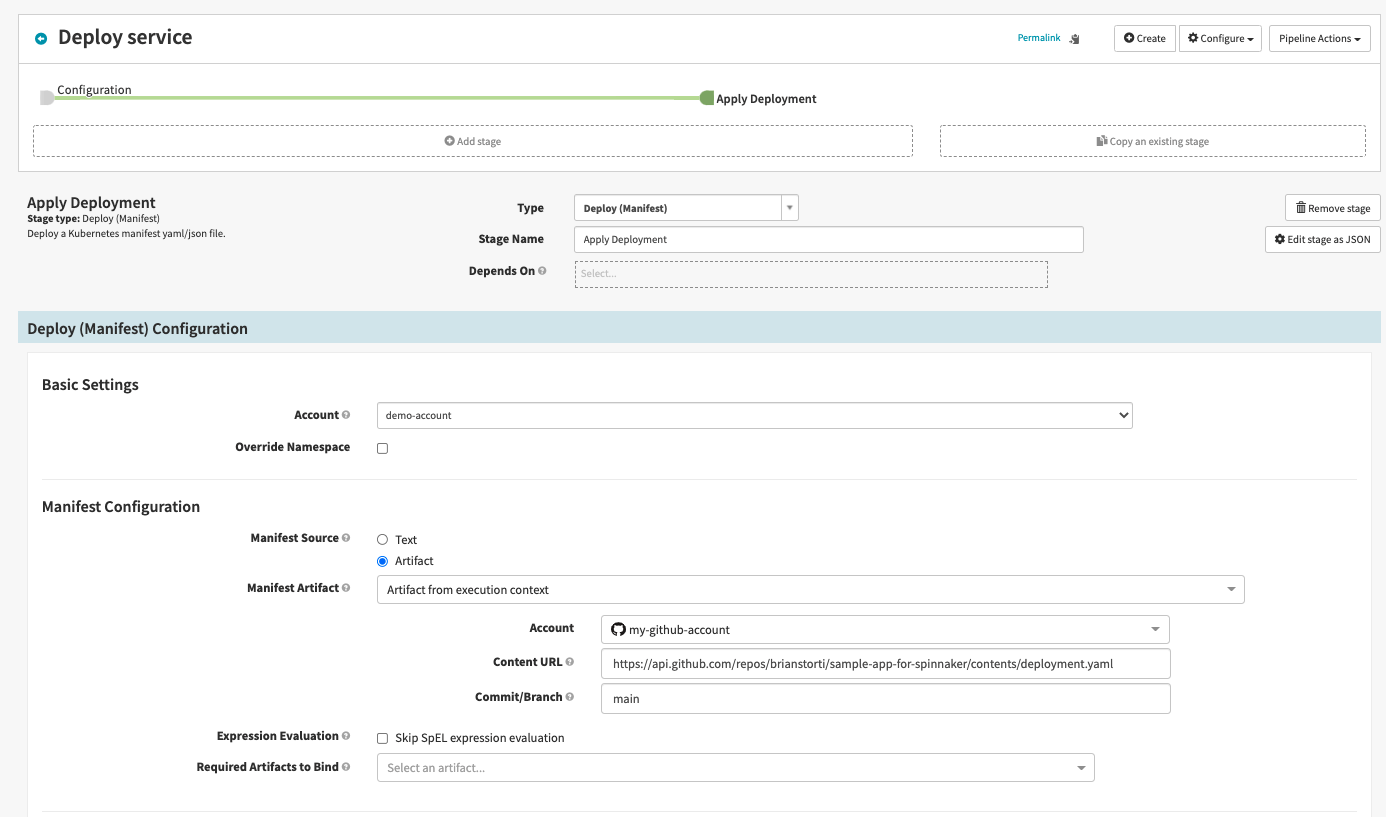
Go ahead and create a new stage in this pipeline with the type Deploy (Manifest) and name it Apply Deployment. Select the demo-account, and in the Manifest Configuration section, select artifact instead of text.
For the Manifest Artifact field, choose Define a new artifact and then select the GitHub account you configured. For the Content URL, you will define the API URL that Spinnaker will use to fetch this file from GitHub, following this pattern:
For example, to get the file from my repository, I’m using this path:
And, finally, the commit or branch to be used, which will be main by default on GitHub.
You can now follow the same process, creating a new stage to deploy your service.yaml manifest from GitHub. The result should be this:

And that’s it! Every time you push a tag to GitHub, a new Docker image will be built. This will automatically trigger your Spinnaker pipeline, which will fetch the manifest files from GitHub, bind the Docker image to this manifest, updating the image to be deployed, and apply these manifests to your Kubernetes cluster.
Seeing it in action
To see this entire process in place, you can push a new tag to your GitHub repository and watch the pipeline run until your change is live.
First, in your service’s repository, change the app.rb file, adding a (v2) to the returned string:
And now commit, tag, and push the changes to GitHub:
Now you can just watch the delivery pipeline in action.
First, Docker Hub will notice this new 2.0 tag in GitHub and start building a new image tagged release-2.0.

Then, after the build is done, Spinnaker will notice the new Docker image present in your registry, which will trigger a pipeline execution:

After Spinnaker finishes running, you can see the newly deployed resources in your cluster:
$ kubectl get deploy,service
| AME | READY | UP-TO-DATE | AVAILABLE |
|---|---|---|---|
| deployment.apps/sample-app | 1/1 | 1 | 1 |
| NAME | TYPE | CLUSTER-IP |
|---|---|---|
| service/sample-app-svc | ClusterIP | 10.106.238.227 |
To see the service running and make sure your changes are there, you can again use port-forward:
Conclusion
In this article, you configured a new Spinnaker cluster, as well as its integration with several other services, like GitHub and Docker Hub, making it ready to deploy changes to your Kubernetes cluster. You have also built a delivery pipeline that continuously releases changes pushed to GitHub, which should give you an idea of one of the many possible ways to build a CI/CD pipeline with Spinnaker and Kubernetes.
Spinnaker is a very mature platform, and there are a lot of features that were not covered here.
If you're looking for a maintenance-free, internal tooling platform that makes it easy monitor your applications and connect to third-parties, then check out Airplane. With Airplane, you can transform scripts, queries, APIs, and more into powerful workflows and UIs. Airplane is code-first: everything you build in Airplane can be version controlled, integrated with your existing codebase, and extended using third parties.
Sign up for a free account or book a demo to try it out and build your first internal tools within minutes.


