We’ve all been there. You think you’ve mastered the Git workflow, and then, suddenly, you hit an error you’ve never seen before. It’s practically inevitable that you’ll run into confusing and sometimes intimidating error messages as you work with Git, so the first thing to remember is that other people have likely had the same issue. In this article, you’ll learn how to resolve one very common Git error and build an understanding of why it happens:
What does fatal: not a git repository (or any of the parent directories): .git mean?
At first glance, especially if you’re new to Git, the references to a repository and .git in the error message may not make sense. A repository, or repo, for short, is a directory where Git keeps all your project’s history, including all the changes you make to your project’s files. When you create a Git repository, Git will set up a .git folder within your project directory that holds this history. When you try to run any Git command, it will first check for this .git folder to access all the information it has about your project. If Git can’t find the information, you’ll receive the error above.
One thing to note is that Git will also check the parent directories of your current directory for the .git folder; hence, the (or any of the parent directories) part of the error message. This design feature allows you to navigate to child directories in a project tracked by Git and still use Git commands.
Basic troubleshooting
In short, the fatal: not a git repository error indicates that your current working directory isn’t tracked by Git. If you find yourself experiencing this error, these are the two most important things you should check:
- Did you mistype the path to the repo?
- Was the repo properly created?
If you’ve already checked and confirmed these, continue onto the “Advanced troubleshooting” section below. Otherwise, read on.
Did you mistype the path to the repo?
The first thing you should check if you hit this common error is whether you’ve navigated to or properly referenced the path to the repo. To check this, navigate to the repo:
Then you’ll need to check if a .git directory exists in it. Something that can be confusing is that the .git repository is hidden by default in file managers, like Explorer or Finder. You can tell if a file is a hidden file if it starts with a period: ..
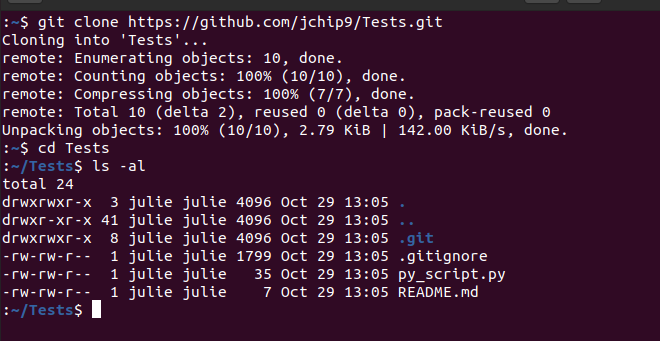
You can use the ls -al command to print a list of files and folders within your current directory, including hidden files and directories, like the .git directory (for Windows, use dir /a).

In the screenshot above, you can see that the git_example directory does contain a .git directory.
If the .git repository doesn’t exist in your working directory, make sure you didn’t initialize it in a different one instead. If not, continue to the next step.
Was the repo properly created?
If you’re sure that you have the correct working directory, but the .git directory doesn’t exist, then something may have gone wrong when you tried to create the repo. You can fix it in one of two ways:
To begin, you can initialize the repo by running the following command:

Alternatively, you can clone an existing repo by following these steps:
- Navigate to the repo you want to clone on GitHub.
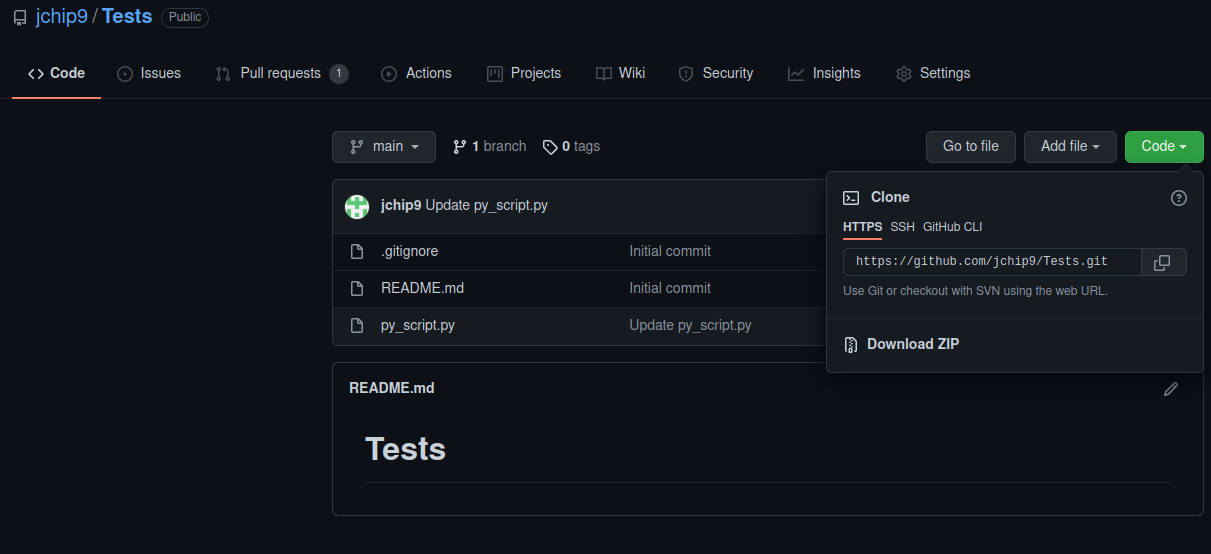
- Click the green Code button, choose the appropriate option, and copy the link.

- Run
git clone <url>. - Navigate to this repository:
cd <repo_name>.

Make sure you don’t skip the last step. When you clone a repo, Git will create a new child directory within your current working directory to hold your project, so you will have to navigate into it.
Advanced troubleshooting
If the troubleshooting steps above didn’t solve your issue, then you may have an issue with the HEAD file. This file contains one line indicating your current branch, acting as a pointer to it.
The term branch may also be unfamiliar to you if you’re new to Git. A branch is a version of your repository that you can use to test changes to your project. Every repository has a main branch that acts as your source of truth and should be the version that gets deployed into your production environment. Whenever you want to make a change to the main branch, you can create a separate version of your project, or branch, where you can test the changes. Once you create a new branch, Git will update the HEAD file to indicate your current working branch.
However, in some cases, the HEAD file can become corrupted, which can also trigger the fatal: not a git repository (or any of the parent directories): .git error. To check the HEAD file, you can use the cat .git/HEAD command to print the contents.

HEAD fileIn the screenshot above, you can see what the contents of a correct HEAD file look like. When you use this command, you should see your current branch name instead of main.
If it doesn’t contain the current branch you’re working on, then you’ll have to update the file. You can use the following command to do so:
Conclusion
Hitting the fatal: not a git repository error doesn’t have to be stressful. If you receive this error, remember that Git is trying to tell you that your current working directory isn’t being tracked, so follow the basic steps outlined in this article, summarized below:
- Make sure you correctly typed the name of the directory.
- Check that you correctly created the repo. If the directory doesn’t contain a
.gitrepo, usegit initto properly initialize the repo or clone an existing repo. - Make sure your
HEADfile contains the correct information on your current branch. If not, update the contents of the file to the following:ref: refs/heads/<branch_name>.
By following the troubleshooting steps summarized above, you’ll be able to resolve the error in just a few minutes for almost every case.
If you're looking for a powerful tool that can help streamline your troubleshooting process and allow you to fix errors quickly and easily, you can use Airplane.
Airplane allows users to build custom internal UIs and workflows within minutes. Airplane's engineering workflows solution is designed for engineering-centric use cases, including incident triage and management. You can also use Airplane Views to build custom internal UIs. Airplane also offers strong defaults, such as job scheduling, permissions setting, audit logs, and more.
To build your first workflow within minutes to streamline your troubleshooting processes, sign up for a free account or book a demo.


